display CADILLAC ESCALADE 2016 4.G Repair Manual
[x] Cancel search | Manufacturer: CADILLAC, Model Year: 2016, Model line: ESCALADE, Model: CADILLAC ESCALADE 2016 4.GPages: 357, PDF Size: 3.49 MB
Page 204 of 357
Cadillac Escalade Owner Manual (GMNA-Localizing-MidEast-9369153) -
2016 - crc - 6/19/15
Driving and Operating 203
the vehicle in Service Only Mode.
The instruments and audio systems
will operate as they do in ON/RUN,
but the vehicle will not be able to be
driven. The engine will not start in
Service Only Mode. Press the
button again to turn the vehicle off.
Starting the Engine
Move the shift lever to P (Park) or
N (Neutral). The engine will not start
in any other position. To restart the
engine when the vehicle is already
moving, use N (Neutral) only.
Caution
Do not try to shift to P (Park) if the
vehicle is moving. If you do, you
could damage the transmission.
Shift to P (Park) only when the
vehicle is stopped.
Caution
If you add electrical parts or
accessories, you could change
the way the engine operates. Any
resulting damage would not be
covered by the vehicle warranty.
SeeAdd-On Electrical Equipment
0 257.
Starting Procedure (Keyless
Access)
1. With the Keyless Access
system, the RKE transmitter
must be in the vehicle. Press
the ENGINE START/STOP
button with the brake pedal
applied. When the engine
begins cranking, let go of the
button.
The idle speed will go down as
the engine gets warm. Do not
race the engine immediately
after starting it.
If the RKE transmitter is not in
the vehicle, if there is
interference, or the RKE
battery is low, the Driver Information Center (DIC) will
display a message. See
Key
and Lock Messages 0148.
Caution
Cranking the engine for long
periods of time, by returning the
ignition to the START position
immediately after cranking has
ended, can overheat and damage
the cranking motor, and drain the
battery. Wait at least 15 seconds
between each try, to let the
cranking motor cool down.
2. If the engine does not start after five to 10 seconds,
especially in very cold weather
(below −18 °C or 0 °F), it could
be flooded with too much
gasoline. Try pushing the
accelerator pedal all the way to
the floor and holding it there as
you press the ENGINE START/
STOP button, for up to a
maximum of 15 seconds. Wait
at least 15 seconds between
each try, to allow the cranking
motor to cool down. When the
Page 208 of 357
Cadillac Escalade Owner Manual (GMNA-Localizing-MidEast-9369153) -
2016 - crc - 6/19/15
Driving and Operating 207
Warning (Continued)
.There are holes or openings
in the vehicle body from
damage or aftermarket
modifications that are not
completely sealed.
If unusual fumes are detected or
if it is suspected that exhaust is
coming into the vehicle: . Drive it only with the
windows completely down.
. Have the vehicle repaired
immediately.
Never park the vehicle with the
engine running in an enclosed
area such as a garage or a
building that has no fresh air
ventilation.
Running the Vehicle
While Parked
It is better not to park with the
engine running. If the vehicle is left with the engine
running, follow the proper steps to
be sure the vehicle will not move.
See
Shifting Into Park 0204 and
Engine Exhaust 0206.
If parking on a hill and pulling a
trailer, see Driving Characteristics
and Towing Tips 0249.
Automatic
Transmission
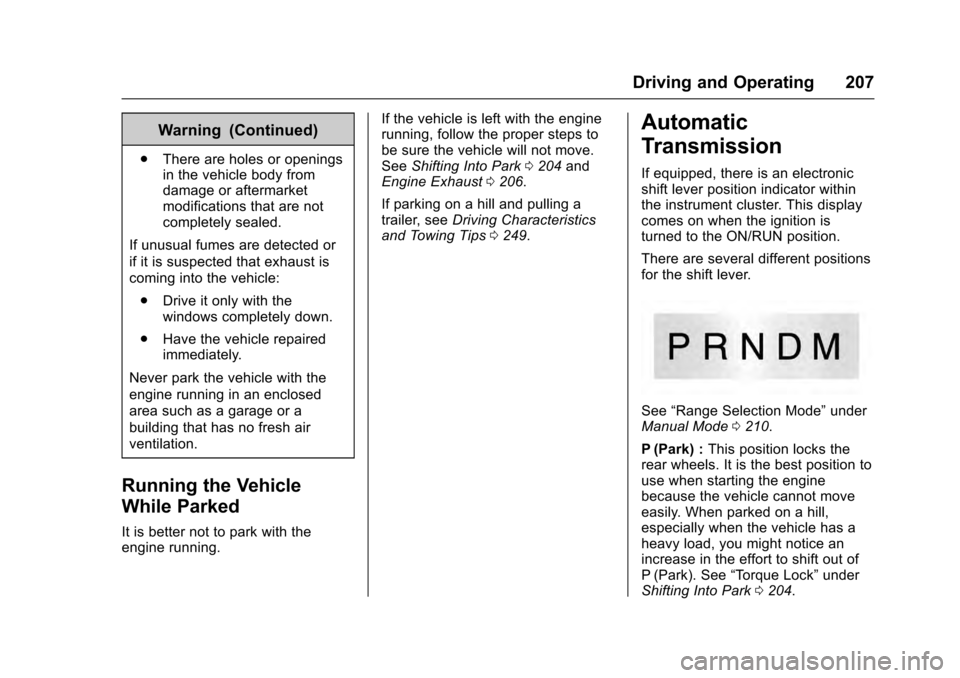
If equipped, there is an electronic
shift lever position indicator within
the instrument cluster. This display
comes on when the ignition is
turned to the ON/RUN position.
There are several different positions
for the shift lever.
See “Range Selection Mode” under
Manual Mode 0210.
P (Park) : This position locks the
rear wheels. It is the best position to
use when starting the engine
because the vehicle cannot move
easily. When parked on a hill,
especially when the vehicle has a
heavy load, you might notice an
increase in the effort to shift out of
P (Park). See “Torque Lock” under
Shifting Into Park 0204.
Page 211 of 357
Cadillac Escalade Owner Manual (GMNA-Localizing-MidEast-9369153) -
2016 - crc - 6/19/15
210 Driving and Operating
Caution (Continued)
may damage the transmission.
The repair will not be covered by
the vehicle warranty. If you are
stuck, do not spin the tires. When
stopping on a hill, use the brakes
to hold the vehicle in place.
Normal Mode Grade Braking
This mode is enabled when the
vehicle is started, but is not enabled
in Range Selection Mode. It assists
in maintaining desired vehicle
speeds when driving on downhill
grades by using the engine and
transmission to slow the vehicle.
The first time the system engages
for each ignition cycle, a DIC
message will be displayed. See
Transmission Messages0154.
To disable or enable Normal Mode
Grade Braking within the current
ignition cycle, press and hold the
Tow/Haul button for five seconds.
When the button is released, the requested mode change is made.
A DIC message displays. See
Transmission Messages
0154.
For other forms of grade braking,
see Tow/Haul Mode 0212 and
Cruise Control 0223.
Kickdown Mode
The accelerator pedal provides an
additional downshift after pressing
through the kickdown feature.
It requires extra pedal pressure near
the end of its travel to engage.
Manual Mode
Range Selection Mode
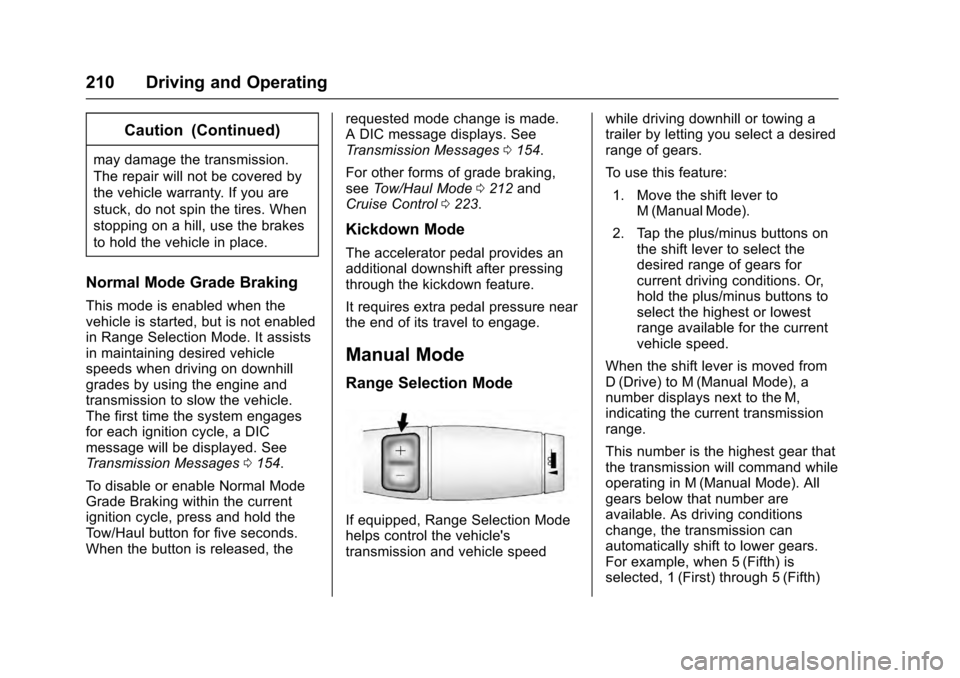
If equipped, Range Selection Mode
helps control the vehicle's
transmission and vehicle speed while driving downhill or towing a
trailer by letting you select a desired
range of gears.
To use this feature:
1. Move the shift lever to M (Manual Mode).
2. Tap the plus/minus buttons on the shift lever to select the
desired range of gears for
current driving conditions. Or,
hold the plus/minus buttons to
select the highest or lowest
range available for the current
vehicle speed.
When the shift lever is moved from
D (Drive) to M (Manual Mode), a
number displays next to the M,
indicating the current transmission
range.
This number is the highest gear that
the transmission will command while
operating in M (Manual Mode). All
gears below that number are
available. As driving conditions
change, the transmission can
automatically shift to lower gears.
For example, when 5 (Fifth) is
selected, 1 (First) through 5 (Fifth)
Page 213 of 357
Cadillac Escalade Owner Manual (GMNA-Localizing-MidEast-9369153) -
2016 - crc - 6/19/15
212 Driving and Operating
Caution (Continued)
stuck, do not spin the tires. When
stopping on a hill, use the brakes
to hold the vehicle in place.
Low Traction Mode
Low Traction Mode assists in
vehicle acceleration when road
conditions are slippery, such as with
ice or snow. While the vehicle is at a
stop, select M2 using Range
Selection Mode. This will limit
torque to the wheels and help to
prevent the tires from spinning.
Tow/Haul Mode
The Tow/Haul Mode adjusts the
transmission shift pattern to reduce
shift cycling. This provides
increased performance, vehicle
control, and enhanced transmission
and engine cooling when driving
down steep hills or mountain
grades, towing, or hauling heavy
loads.
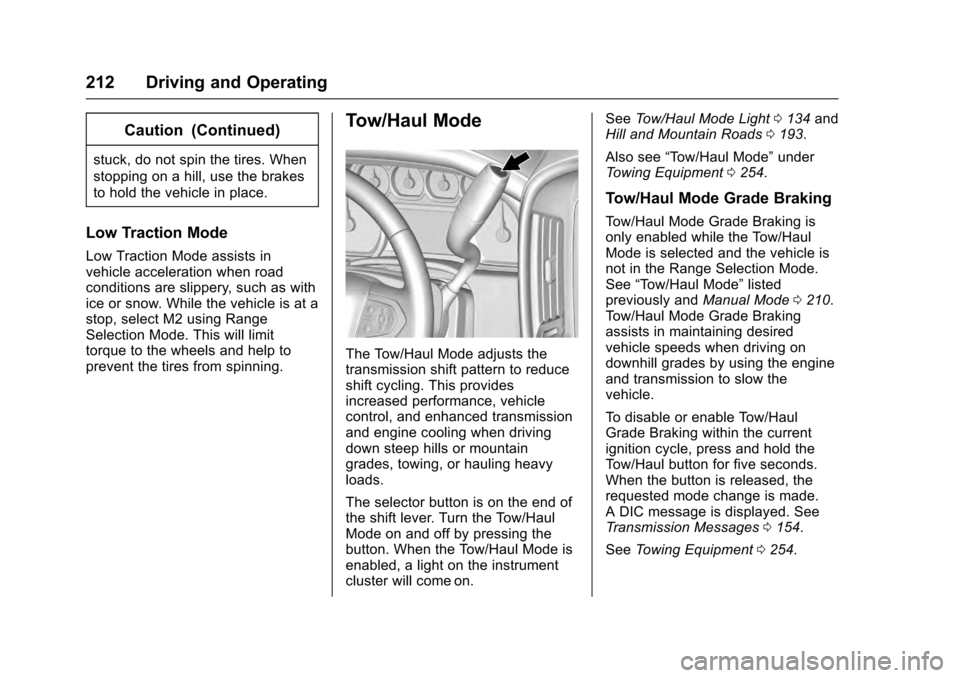
The selector button is on the end of
the shift lever. Turn the Tow/Haul
Mode on and off by pressing the
button. When the Tow/Haul Mode is
enabled, a light on the instrument
cluster will come on.See
Tow/Haul Mode Light 0134 and
Hill and Mountain Roads 0193.
Also see “Tow/Haul Mode” under
Towing Equipment 0254.
Tow/Haul Mode Grade Braking
Tow/Haul Mode Grade Braking is
only enabled while the Tow/Haul
Mode is selected and the vehicle is
not in the Range Selection Mode.
See “Tow/Haul Mode” listed
previously and Manual Mode0210.
Tow/Haul Mode Grade Braking
assists in maintaining desired
vehicle speeds when driving on
downhill grades by using the engine
and transmission to slow the
vehicle.
To disable or enable Tow/Haul
Grade Braking within the current
ignition cycle, press and hold the
Tow/Haul button for five seconds.
When the button is released, the
requested mode change is made.
A DIC message is displayed. See
Transmission Messages 0154.
See Towing Equipment 0254.
Page 215 of 357
Cadillac Escalade Owner Manual (GMNA-Localizing-MidEast-9369153) -
2016 - crc - 6/19/15
214 Driving and Operating
Two Speed Automatic
Transfer Case
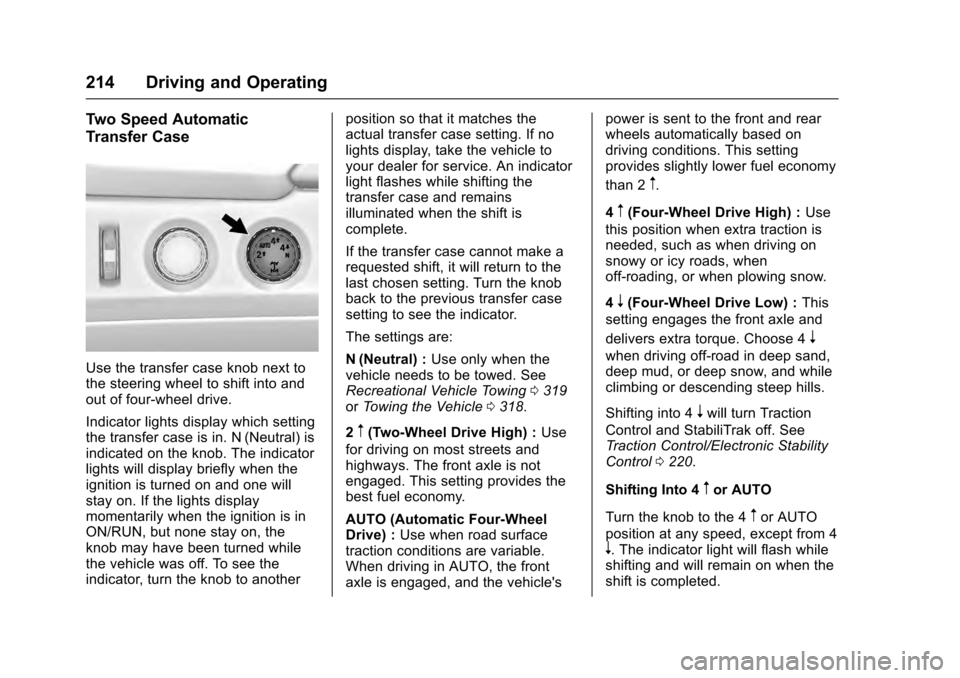
Use the transfer case knob next to
the steering wheel to shift into and
out of four-wheel drive.
Indicator lights display which setting
the transfer case is in. N (Neutral) is
indicated on the knob. The indicator
lights will display briefly when the
ignition is turned on and one will
stay on. If the lights display
momentarily when the ignition is in
ON/RUN, but none stay on, the
knob may have been turned while
the vehicle was off. To see the
indicator, turn the knob to anotherposition so that it matches the
actual transfer case setting. If no
lights display, take the vehicle to
your dealer for service. An indicator
light flashes while shifting the
transfer case and remains
illuminated when the shift is
complete.
If the transfer case cannot make a
requested shift, it will return to the
last chosen setting. Turn the knob
back to the previous transfer case
setting to see the indicator.
The settings are:
N (Neutral) :
Use only when the
vehicle needs to be towed. See
Recreational Vehicle Towing 0319
or Towing the Vehicle 0318.
2
m(Two-Wheel Drive High) : Use
for driving on most streets and
highways. The front axle is not
engaged. This setting provides the
best fuel economy.
AUTO (Automatic Four-Wheel
Drive) : Use when road surface
traction conditions are variable.
When driving in AUTO, the front
axle is engaged, and the vehicle's power is sent to the front and rear
wheels automatically based on
driving conditions. This setting
provides slightly lower fuel economy
than 2
m.
4
m(Four-Wheel Drive High) : Use
this position when extra traction is
needed, such as when driving on
snowy or icy roads, when
off-roading, or when plowing snow.
4
n(Four-Wheel Drive Low) : This
setting engages the front axle and
delivers extra torque. Choose 4
n
when driving off-road in deep sand,
deep mud, or deep snow, and while
climbing or descending steep hills.
Shifting into 4
nwill turn Traction
Control and StabiliTrak off. See
Traction Control/Electronic Stability
Control 0220.
Shifting Into 4
mor AUTO
Turn the knob to the 4
mor AUTO
position at any speed, except from 4
n. The indicator light will flash while
shifting and will remain on when the
shift is completed.
Page 216 of 357
Cadillac Escalade Owner Manual (GMNA-Localizing-MidEast-9369153) -
2016 - crc - 6/19/15
Driving and Operating 215
Shifting Into 2m
Turn the knob to 2mat any speed,
except when shifting from 4
n. The
indicator light will flash while shifting
and will remain on when the shift is
completed.
Shifting Into 4
n
When 4nis engaged, keep vehicle
speed below 72 km/h (45 mph).
To shift into 4
n:
1. The ignition must be in ON/ RUN and the vehicle must be
stopped or moving less than
5 km/h (3 mph) with the
transmission in N (Neutral). It is
best for the vehicle to be
moving 1.6 to 3.2 km/h
(1 to 2 mph).
2. Turn the knob to 4
n. Wait for
the 4
nindicator light to stop
flashing before shifting the
transmission into gear.
Caution
Shifting the transmission into gear
before the requested mode
indicator light has stopped
flashing could damage the
transfer case.
If the transmission is in gear and/or
moving more than 5 km/h (3 mph),
the 4
nindicator light will flash for
30 seconds and not complete the
shift. After 30 seconds the transfer
case will shift to 4
m. Turn the knob
to 4
mto display the indicator. With
the vehicle moving less than 5 km/h
(3 mph), and the transmission in
N (Neutral), attempt the shift again.
Shifting Out of 4
n
To shift:
1. The vehicle must be stopped or moving less than 5 km/h
(3 mph) with the transmission
in N (Neutral) and the ignition in
ON/RUN. It is best for the
vehicle to be moving
1.6 to 3.2 km/h (1 to 2 mph). 2. Turn the knob to 4
m, AUTO,
or 2
m. Wait for the 4m, AUTO,
or 2
mindicator light to stop
flashing before shifting the
transmission into gear.
Caution
Shifting the transmission into gear
before the requested mode
indicator light has stopped
flashing could damage the
transfer case.
If the transmission is in gear and/or
moving more than 5 km/h (3 mph),
the 4
m, AUTO, or 2mindicator light
will flash for 30 seconds but will not
complete the shift. With the vehicle
moving less than 5 km/h (3 mph),
and the transmission in N (Neutral),
attempt the shift again.
Shifting Into N (Neutral)
To shift:
1. Park the vehicle on a level surface.
Page 219 of 357

Cadillac Escalade Owner Manual (GMNA-Localizing-MidEast-9369153) -
2016 - crc - 6/19/15
218 Driving and Operating
message will appear and a chime
will sound warning you that the
parking brake is still on.
If you are towing a trailer and are
parking on a hill, seeDriving
Characteristics and Towing Tips
0 249.
Electric Parking Brake
If equipped with an Electric Parking
Brake (EPB), the switch is to the left
of the steering wheel on the
instrument panel, below the exterior
lamp controls. The EPB can always
be activated, even if the ignition is off. To prevent draining the battery,
avoid repeated cycles of the EPB
when the engine is not running.
The system has a red parking brake
status light and an amber parking
brake warning light. See
Electric
Parking Brake Light 0133 and
Service Electric Parking Brake Light
0 133. There are also parking
brake-related Driver Information
Center (DIC) messages. See Brake
System Messages 0145. In case of
insufficient electrical power, the EPB
cannot be applied or released.
Before leaving the vehicle, check
the red parking brake status light to
ensure that the parking brake is
applied.
EPB Apply
To apply the EPB:
1. Be sure the vehicle is at a complete stop.
2. Lift up the EPB switch momentarily.
The red parking brake status light
will flash and then stay on once the
EPB is fully applied. If the red parking brake status light flashes
continuously, then the EPB is only
partially applied or there is a
problem with the EPB. A DIC
message will display. Release the
EPB and try to apply it again. If the
light does not come on, or keeps
flashing, have the vehicle serviced.
Do not drive the vehicle if the red
parking brake status light is flashing.
See your dealer. See
Electric
Parking Brake Light 0133.
If the amber parking brake warning
light is on, lift up on the EPB switch
and hold it up. Continue to hold the
switch until the red parking brake
status light remains on. If the amber
parking brake warning light is on,
see your dealer.
If the EPB is applied while the
vehicle is moving, the vehicle will
decelerate as long as the switch is
held up. If the switch is held up until
the vehicle comes to a stop, the
EPB will remain applied.
The vehicle may automatically apply
the EPB in some situations when
the vehicle is not moving. This is
Page 222 of 357
Cadillac Escalade Owner Manual (GMNA-Localizing-MidEast-9369153) -
2016 - crc - 6/19/15
Driving and Operating 221
disabled,gcomes on, and the
appropriate message will appear on
the DIC. Both traction control and
StabiliTrak are automatically
disabled in this condition.
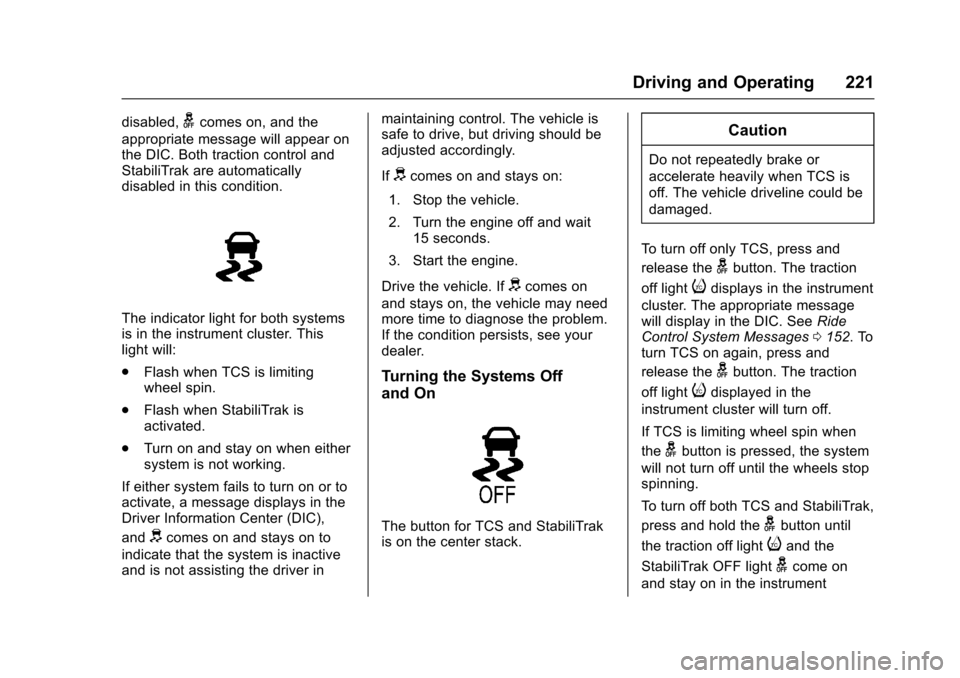
The indicator light for both systems
is in the instrument cluster. This
light will:
. Flash when TCS is limiting
wheel spin.
. Flash when StabiliTrak is
activated.
. Turn on and stay on when either
system is not working.
If either system fails to turn on or to
activate, a message displays in the
Driver Information Center (DIC),
and
dcomes on and stays on to
indicate that the system is inactive
and is not assisting the driver in maintaining control. The vehicle is
safe to drive, but driving should be
adjusted accordingly.
If
dcomes on and stays on:
1. Stop the vehicle.
2. Turn the engine off and wait 15 seconds.
3. Start the engine.
Drive the vehicle. If
dcomes on
and stays on, the vehicle may need
more time to diagnose the problem.
If the condition persists, see your
dealer.
Turning the Systems Off
and On
The button for TCS and StabiliTrak
is on the center stack.
Caution
Do not repeatedly brake or
accelerate heavily when TCS is
off. The vehicle driveline could be
damaged.
To turn off only TCS, press and
release the
gbutton. The traction
off light
idisplays in the instrument
cluster. The appropriate message
will display in the DIC. See Ride
Control System Messages 0152. To
turn TCS on again, press and
release the
gbutton. The traction
off light
idisplayed in the
instrument cluster will turn off.
If TCS is limiting wheel spin when
the
gbutton is pressed, the system
will not turn off until the wheels stop
spinning.
To turn off both TCS and StabiliTrak,
press and hold the
gbutton until
the traction off light
iand the
StabiliTrak OFF light
gcome on
and stay on in the instrument
Page 223 of 357
Cadillac Escalade Owner Manual (GMNA-Localizing-MidEast-9369153) -
2016 - crc - 6/19/15
222 Driving and Operating
cluster, then release. The
appropriate message will display in
the DIC. SeeRide Control System
Messages 0152.
To turn TCS and StabiliTrak on
again, press and release the
g
button. The traction off lightiand
the StabiliTrak OFF light
gin the
instrument cluster turn off.
StabiliTrak will automatically turn on
if the vehicle exceeds 56 km/h
(35 mph). Traction control will
remain off.
The vehicle has a Trailer Sway
Control (TSC) feature and a Hill
Start Assist (HSA) feature. See
Trailer Sway Control (TSC) 0256 or
Hill Start Assist (HSA) 0219.
Adding accessories can affect the
vehicle performance. See
Accessories and Modifications
0 259.
Magnetic Ride Control
The Magnetic Ride Control monitors
the suspension system. Based on road conditions, steering
wheel angle, and vehicle speed, the
system automatically adjusts to
provide the best handling while
providing a smooth ride. The Tour
and Sport Modes will feel similar on
a smooth road.
Tour :
Use for normal city and
highway driving. This setting
provides a smooth, soft ride.
Sport : Use where road conditions
or personal preference demand
more control. This setting provides
more “feel,” or response to road
conditions.
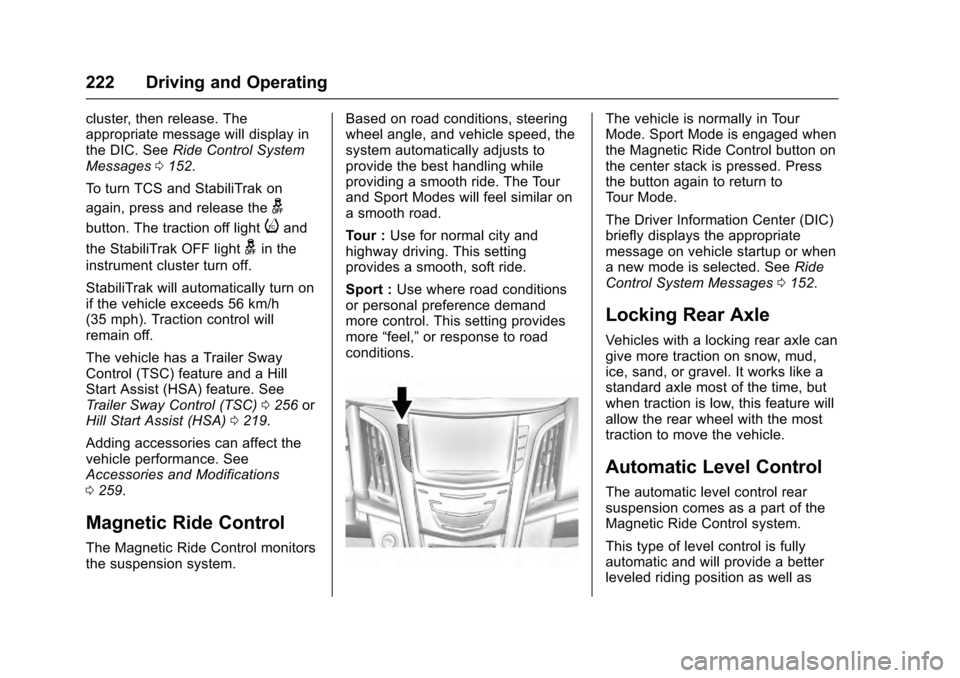
The vehicle is normally in Tour
Mode. Sport Mode is engaged when
the Magnetic Ride Control button on
the center stack is pressed. Press
the button again to return to
Tour Mode.
The Driver Information Center (DIC)
briefly displays the appropriate
message on vehicle startup or when
a new mode is selected. See Ride
Control System Messages 0152.
Locking Rear Axle
Vehicles with a locking rear axle can
give more traction on snow, mud,
ice, sand, or gravel. It works like a
standard axle most of the time, but
when traction is low, this feature will
allow the rear wheel with the most
traction to move the vehicle.
Automatic Level Control
The automatic level control rear
suspension comes as a part of the
Magnetic Ride Control system.
This type of level control is fully
automatic and will provide a better
leveled riding position as well as
Page 225 of 357
Cadillac Escalade Owner Manual (GMNA-Localizing-MidEast-9369153) -
2016 - crc - 6/19/15
224 Driving and Operating
+RES (Resume/Accelerate) :If
there is a set speed in memory,
press the control up briefly to
resume that speed or press and
hold to accelerate. If the cruise
control is already active, use to
increase vehicle speed.
SET− (Set/Coast) : Press the
control down briefly to set the speed
and activate cruise control. If the
cruise control is already active, use
to decrease vehicle speed.
*(Cancel) : Press to disengage
cruise control without erasing the
set speed from memory.
Setting Cruise Control
If
Jis on when not in use, SET− or
+RES could get pressed and go into
cruise when not desired. Keep
J
off when cruise is not being used.
To set cruise control:
1. Press
J.
2. Get up to the desired speed.
3. Press and release SET− .
4. Remove foot from the accelerator. When the cruise control has been
set to the desired speed, a green
cruise control indicator appears on
the instrument cluster and a cruise
set speed message appears on the
Driver Information Center (DIC) and
Head-Up Display (HUD),
if equipped.
Resuming a Set Speed
If the cruise control is set at a
desired speed and then the brakes
are applied or
*is pressed, the
cruise control is disengaged without
erasing the set speed from memory.
Once the vehicle speed reaches
about 40 km/h (25 mph) or more,
press +RES up briefly. The vehicle
returns to the previous set speed.
Increasing Speed While Cruise
Control is at a Set Speed
If the cruise control system is
already activated:
. Press and hold +RES up until
the vehicle accelerates to the
desired speed, then release it. .
To increase vehicle speed in
small increments, press +RES
up briefly. For each press, the
vehicle goes about 1.6 km/h
(1 mph) faster.
The speedometer reading can be
displayed in either English or metric
units. See Instrument Cluster 0124.
The increment value used depends
on the units displayed.
Reducing Speed While Cruise
Control is at a Set Speed
If the cruise control system is
already activated:
. Press and hold SET− down until
the desired lower speed is
reached, then release it.
. To decrease the vehicle speed in
small increments, press SET−
down briefly. For each press, the
vehicle goes about 1.6 km/h
(1 mph) slower.
The speedometer reading can be
displayed in either English or metric
units. See Instrument Cluster 0124.
The increment value used depends
on the units displayed.