park CADILLAC ESCALADE ESV 2005 2.G Workshop Manual
[x] Cancel search | Manufacturer: CADILLAC, Model Year: 2005, Model line: ESCALADE ESV, Model: CADILLAC ESCALADE ESV 2005 2.GPages: 470, PDF Size: 2.86 MB
Page 349 of 470

5. Check that the jumper cables do not have loose or
missing insulation. If they do, you could get a
shock. The vehicles could be damaged too.
Before you connect the cables, here are some
basic things you should know. Positive (+) will go to
positive (+) or to a remote positive terminal (+) if
the vehicle has one. Negative (−) will go to a heavy,
unpainted metal engine part or to a remote
negative (−) terminal, if the vehicle has one.
Do not connect positive (+) to negative (−)oryou
will get a short that would damage the battery
and maybe other parts too.
{CAUTION:
Fans or other moving engine parts can injure
you badly. Keep your hands away from moving
parts once the engine is running.
6. Connect the red positive (+) cable to the positive (+)
terminal of the dead battery. Use a remote
positive (+) terminal if the vehicle has one.7. Do not let the other end touch metal. Connect it
to the positive (+) terminal of the good battery.
Use a remote positive (+) terminal if the vehicle
has one.
8. Now connect the black negative (−) cable to the
negative (−) terminal of the good battery. Use a
remote negative (−) terminal if the vehicle has one.
Do not let the other end touch anything until the
next step. The other end of the negative (−) cable
does not go to the dead battery. It goes to a
heavy, unpainted metal engine part or to a remote
negative (−) terminal on the vehicle with the
dead battery.
9. Connect the other end of the negative (−) cable at
least 18 inches (45 cm) away from the dead battery,
but not near engine parts that move. The electrical
connection is just as good there, and the chance
of sparks getting back to the battery is much less.
Use a remote negative (−) terminal if the vehicle has
one. Your vehicle’s remote negative (−) terminal
is marked GND.
10. Now start the vehicle with the good battery and run
the engine for awhile.
11. Try to start the vehicle that had the dead battery. If
it will not start after a few tries, it probably needs
service.
5-43
Page 358 of 470

Halogen Bulbs
{CAUTION:
Halogen bulbs have pressurized gas inside
and can burst if you drop or scratch the bulb.
You or others could be injured. Be sure to read
and follow the instructions on the bulb
package.
Headlamps
A. Low-Beam
Headlamp
B. Daytime Running
Lamp (DRL)
C. Sidemarker LampD. High-Beam
Headlamp
E. Front Parking/Turn
Signal Lamp
5-52
Page 362 of 470
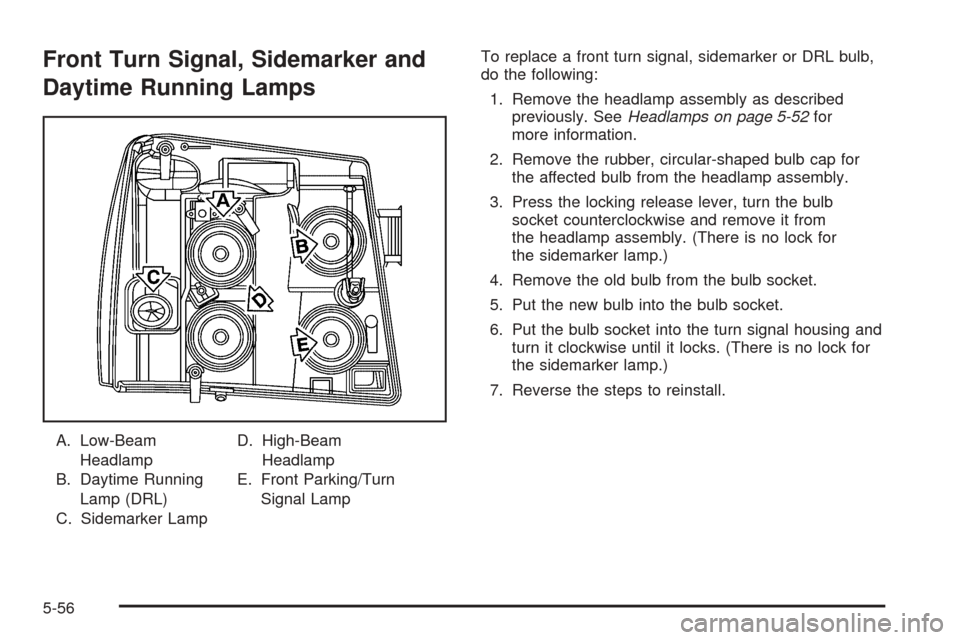
Front Turn Signal, Sidemarker and
Daytime Running Lamps
A. Low-Beam
Headlamp
B. Daytime Running
Lamp (DRL)
C. Sidemarker LampD. High-Beam
Headlamp
E. Front Parking/Turn
Signal LampTo replace a front turn signal, sidemarker or DRL bulb,
do the following:
1. Remove the headlamp assembly as described
previously. SeeHeadlamps on page 5-52for
more information.
2. Remove the rubber, circular-shaped bulb cap for
the affected bulb from the headlamp assembly.
3. Press the locking release lever, turn the bulb
socket counterclockwise and remove it from
the headlamp assembly. (There is no lock for
the sidemarker lamp.)
4. Remove the old bulb from the bulb socket.
5. Put the new bulb into the bulb socket.
6. Put the bulb socket into the turn signal housing and
turn it clockwise until it locks. (There is no lock for
the sidemarker lamp.)
7. Reverse the steps to reinstall.
5-56
Page 364 of 470
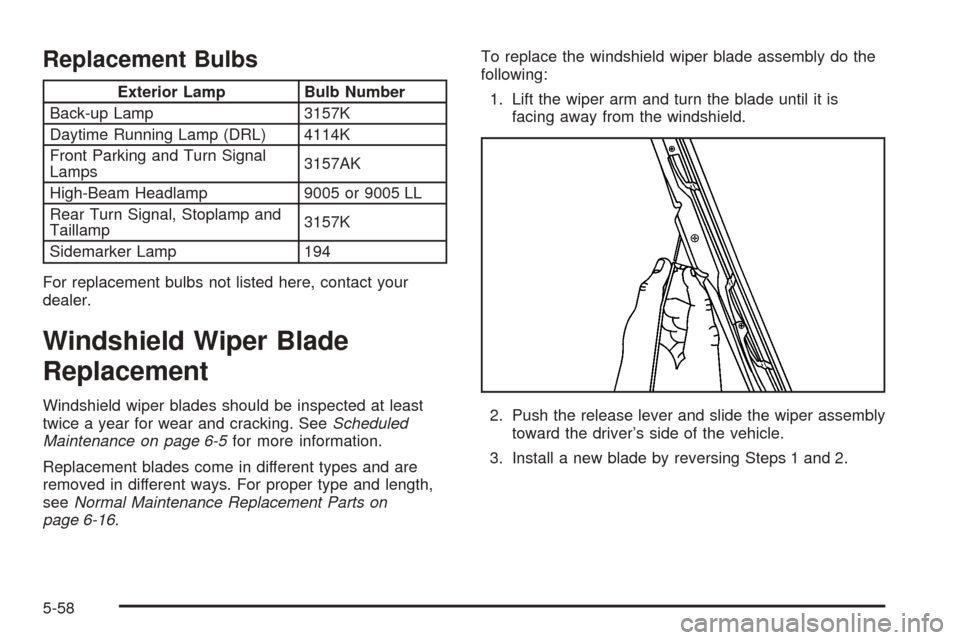
Replacement Bulbs
Exterior Lamp Bulb Number
Back-up Lamp 3157K
Daytime Running Lamp (DRL) 4114K
Front Parking and Turn Signal
Lamps3157AK
High-Beam Headlamp 9005 or 9005 LL
Rear Turn Signal, Stoplamp and
Taillamp3157K
Sidemarker Lamp 194
For replacement bulbs not listed here, contact your
dealer.
Windshield Wiper Blade
Replacement
Windshield wiper blades should be inspected at least
twice a year for wear and cracking. SeeScheduled
Maintenance on page 6-5for more information.
Replacement blades come in different types and are
removed in different ways. For proper type and length,
seeNormal Maintenance Replacement Parts on
page 6-16.To replace the windshield wiper blade assembly do the
following:
1. Lift the wiper arm and turn the blade until it is
facing away from the windshield.
2. Push the release lever and slide the wiper assembly
toward the driver’s side of the vehicle.
3. Install a new blade by reversing Steps 1 and 2.
5-58
Page 374 of 470

TPM Sensor Identication Codes
Each TPM sensor has a unique identication code. Any
time you rotate your vehicle’s tires or replace one or
more of the TPM sensors, the identication codes
will need to be matched to the new tire/wheel position.
Each tire/wheel position is matched to a sensor, by
increasing or decreasing the tire’s air pressure.
The sensors are matched to the tire/wheel positions in
the following order: left front (LF); right front (RF);
right rear (RR) and left rear (LR).
You will have one minute to match the rst tire/wheel
position, and ve minutes overall to match all
four tire/wheel positions. If it takes longer than
one minute, to match the rst tire and wheel, or more
than ve minutes to match all four tire and wheel
positions the matching process stops and you will need
to start over.
The TPM sensor matching process is outlined below:
1. Set the parking brake.
2. Turn the ignition switch to RUN with the engine off.
3. Turn the exterior lamp switch from the off position
to the on position four times within three seconds.
A double horn chirp will sound and the TPM low tire
warning light will begin to ash. The double horn
chirp and ashing TPM warning light indicate
that the TPM matching process has started.The TPM warning light should continue ashing
throughout the matching procedure. The SERVICE
TIRE MONITOR message will be displayed on
the Driver Information Center (DIC).
4. Start with the left (driver’s side) front tire.
5. Remove the valve cap from the valve cap stem.
Activate the TPM sensor by increasing or
decreasing the tire’s air pressure for 10 seconds,
then stop and listen for a single horn chirp.
The single horn chirp should sound within
15 seconds, conrming that the sensor identication
code has been matched to this tire and wheel
position. If you do not hear the conrming single
horn chirp, you will need to start over with step
number one. To let air-pressure out of a tire you can
use the pointy end of the valve cap, a pencil-style
air pressure gage or a key.
6. Proceed to the right (passenger’s side) front tire,
and repeat the procedure in Step 5.
7. Proceed to the right (passenger’s side) rear tire,
and repeat the procedure in Step 5.
8. Proceed to the left (driver’s side) rear tire, and
repeat the procedure in Step 5.
9. After hearing the conrming horn chirp for the left
rear tire, check to see if the TPM warning light is
still ashing. If yes, turn the ignition switch to LOCK.
5-68
Page 384 of 470

{CAUTION:
Changing a tire can be dangerous. The vehicle
can slip off the jack and roll over or fall on you
or other people. You and they could be badly
injured or even killed. Find a level place to
change your tire. To help prevent the vehicle
from moving:
1. Set the parking brake rmly.
2. Put the shift lever in PARK (P).
3. Turn off the engine and do not restart
while the vehicle is raised.
4. Do not allow passengers to remain in the
vehicle.
To be even more certain the vehicle will not
move, you should put blocks at the front and
rear of the tire farthest away from the one
being changed. That would be the tire, on the
other side, at the opposite end of the vehicle.
When your vehicle has a at tire, use the following
example as a guide to assist you in the placement of
wheel blocks.The following information will tell you next how to use
the jack and change a tire.
5-78
Page 419 of 470

Fuses Usage
GLOW PLUG Not Used
CUST FEED Gasoline Accessory Power
HYBRID Hybrid
STUD #1Accessory Power/Trailer
Wiring
MBEC 1Mid Bussed Electrical Center
Power Feed, Front Seats,
Right Doors
BLOWER Front Climate Control Fan
LBEC 2Left Bussed Electrical
Center, Door Modules,
Door Locks, Auxiliary Power
Outlet — Rear Cargo Area
and Instrument Panel
STUD #2Accessory Power/Trailer
Wiring Brake Feed
ABS Anti-Lock Brakes
VSES/ECASElectronically Controlled
Air Suspension
IGN A Ignition Switch
IGN B Ignition SwitchFuses Usage
LBEC 1Left Bussed Electrical Center,
Left Doors, Truck Body
Controller, Flasher Module
TRL PARK Parking Lamps Trailer Wiring
RR PARKRight Rear Parking and
Sidemarker Lamps
LR PARKLeft Rear Parking and
Sidemarker Lamps
PARK LP Parking Lamps Relay
STRTR Starter Relay
INTPARK Roof Marker Lamps
STOP LP Stoplamps
TBC BATTTruck Body Controller
Battery Feed
S/ROOF Sunroof
SEO B2 Off-Road Lamps
4WS Vent Solenoid Canister
RR HVAC Not Used
AUX PWRAuxiliary Power
Outlet — Console
5-113
Page 420 of 470
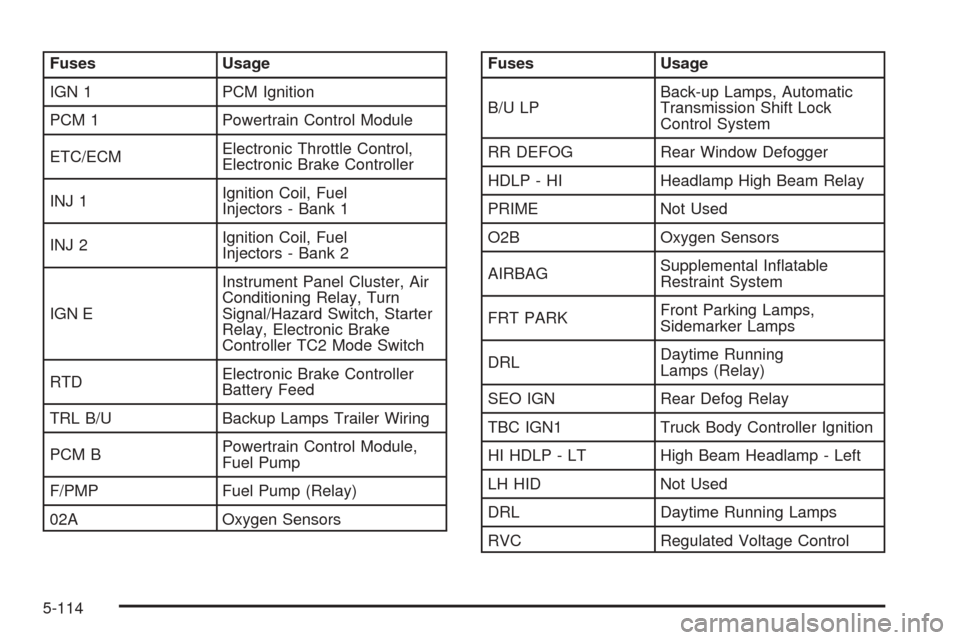
Fuses Usage
IGN 1 PCM Ignition
PCM 1 Powertrain Control Module
ETC/ECMElectronic Throttle Control,
Electronic Brake Controller
INJ 1Ignition Coil, Fuel
Injectors - Bank 1
INJ 2Ignition Coil, Fuel
Injectors - Bank 2
IGN EInstrument Panel Cluster, Air
Conditioning Relay, Turn
Signal/Hazard Switch, Starter
Relay, Electronic Brake
Controller TC2 Mode Switch
RTDElectronic Brake Controller
Battery Feed
TRL B/U Backup Lamps Trailer Wiring
PCM BPowertrain Control Module,
Fuel Pump
F/PMP Fuel Pump (Relay)
02A Oxygen SensorsFuses Usage
B/U LPBack-up Lamps, Automatic
Transmission Shift Lock
Control System
RR DEFOG Rear Window Defogger
HDLP - HI Headlamp High Beam Relay
PRIME Not Used
O2B Oxygen Sensors
AIRBAGSupplemental Inatable
Restraint System
FRT PARKFront Parking Lamps,
Sidemarker Lamps
DRLDaytime Running
Lamps (Relay)
SEO IGN Rear Defog Relay
TBC IGN1 Truck Body Controller Ignition
HI HDLP - LT High Beam Headlamp - Left
LH HID Not Used
DRL Daytime Running Lamps
RVC Regulated Voltage Control
5-114
Page 424 of 470

Capacities and Specications
Engine VIN Code Transmission Spark Plug Gap
VORTEC™ 5300 V8 T Automatic 0.040 inches (1.01 mm)
VORTEC™ 6000 H.O. V8 N Automatic 0.040 inches (1.01 mm)
5-118
Page 432 of 470

Additional Required Services (cont’d)
Service and Miles (Kilometers)25,000
(41 500)50,000
(83 000)75,000
(125 000)100,000
(166 000)125,000
(207 500)150,000
(240 000)
Replace spark plugs and inspect spark
plug wires.An Emission Control
Service.•
Engine cooling system service
(or every ve years, whichever occurs
rst).An Emission Control Service.
See footnote (i).•
Inspect engine accessory drive belt.
An Emission Control Service.•
Maintenance Footnotes
†The U.S. Environmental Protection Agency or the
California Air Resources Board has determined that the
failure to perform this maintenance item will not nullify
the emission warranty or limit recall liability prior to
the completion of the vehicle’s useful life. We, however,
urge that all recommended maintenance services be
performed at the indicated intervals and the
maintenance be recorded.#Lubricate the front suspension, ball joints, steering
linkage, transmission shift linkage, and parking
brake cable guides. Ball joints should not be lubricated
unless their temperature is 10°F (-12°C) or higher,
or they could be damaged.
(a)Visually inspect brake lines and hoses for proper
hook-up, binding, leaks, cracks, chang, etc. Inspect
disc brake pads for wear and rotors for surface
condition. Inspect other brake parts, including calipers,
parking brake, etc.
6-8