turn signal CADILLAC ESCALADE ESV 2014 Owner's Guide
[x] Cancel search | Manufacturer: CADILLAC, Model Year: 2014, Model line: ESCALADE ESV, Model: CADILLAC ESCALADE ESV 2014Pages: 508, PDF Size: 7.64 MB
Page 223 of 508
Black plate (51,1)Cadillac Escalade/Escalade ESV Owner Manual (GMNA-Localizing-U.S./
Canada/Mexico-6081529) - 2014 - CRC 1st Edition - 4/23/13
Infotainment System 7-51
power if the RSE system and RSA
are shut off, or if the headphones
are out of range of the transmitters
for more than three minutes. If you
move too far forward or step out of
the vehicle, the headphones lose
the audio signal.
To adjust the volume on the
headphones, use the volume control
located on the right side.
For optimal audio performance, the
headphones must be worn correctly.
Headphones should be worn with
the headband over the top of the
head for best audio reception. The
symbol L (Left) appears on the
outside bottom edge of the ear cup
and should be positioned on the left
ear. The symbol R (Right) appears
on the outside bottom edge of the
ear cup and should be positioned on
the right ear.
Notice:Do not store the
headphones in heat or direct
sunlight. This could damage the
headphones and repairs will not
be covered by the warranty. Storage in extreme cold can
weaken the batteries. Keep the
headphones stored in a cool, dry
place.
If the foam ear pads attached to the
headphones become worn or
damaged, the pads can be replaced
separately from the headphone set.
To purchase replacement ear pads,
call 1-888-293-3332, then prompt
zero (0), or contact your dealer.
Battery Replacement
To change the batteries on the
headphones:
1. Turn the screw to loosen the
battery door located on the left
side of the headphones. Slide
the battery door open.
2. Replace the two batteries in the compartment. Make sure that
they are installed correctly, using
the diagram on the inside of the
battery compartment.
3. Replace the battery door and tighten the door screw. If the headphones are to be stored
for a long period of time, remove the
batteries and keep them in a cool,
dry place.
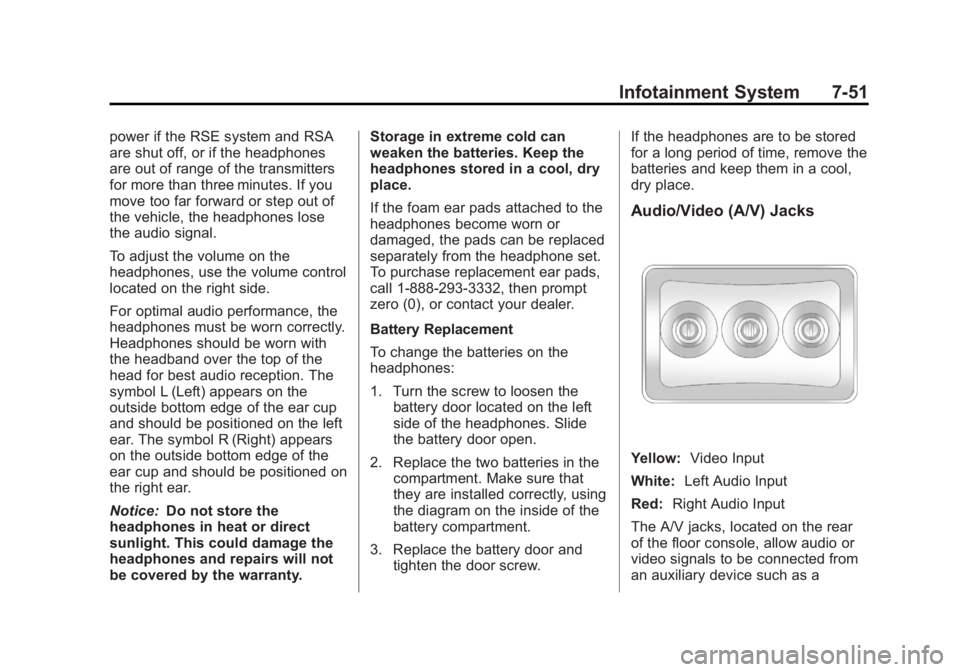
Audio/Video (A/V) Jacks
Yellow:
Video Input
White: Left Audio Input
Red: Right Audio Input
The A/V jacks, located on the rear
of the floor console, allow audio or
video signals to be connected from
an auxiliary device such as a
Page 224 of 508
Black plate (52,1)Cadillac Escalade/Escalade ESV Owner Manual (GMNA-Localizing-U.S./
Canada/Mexico-6081529) - 2014 - CRC 1st Edition - 4/23/13
7-52 Infotainment System
camcorder or a video game unit to
the RSE system. Adapter
connectors or cables (not included)
may be required to connect the
auxiliary device to the A/V jacks.
Refer to the manufacturer’s
instructions for proper usage.
Power for auxiliary devices is not
supplied by the radio system.
To use the auxiliary inputs of the
RSE system, connect an external
auxiliary device to the color-coded
A/V jacks and turn both the auxiliary
device and the video screen power
on. If the video screen is in the DVD
player mode, pressing the AUX
(auxiliary) button on the remote
control switches the video screen
from the DVD player mode to the
auxiliary device. The audio of the
connected source can be listened to
over the speakers by sourcing the
radio to the auxiliary device or by
sourcing the RSA to the Rear Aux
and listening with the wireless
headphones on Channel 2 or with the wired headphones. See
“Using
the Auxiliary Input Jack” under
Auxiliary Devices on page 7-29 for
more information about changing
the source.
How to Change the RSE Video
Screen Settings
The screen display mode (normal,
full, and zoom), screen brightness,
and setup menu language can be
changed from the on screen setup
menu. To change any feature:
1. Press the
z(display menu)
button on the remote control.
2. Use the remote control
n,q,
p,o(navigation) arrows and
the
r(enter) button to use the
setup menu.
3. Press the
zbutton again to
remove the setup menu from the
screen.
Audio Output
Audio from the DVD player or
auxiliary inputs can be heard
through the following possible
sources:
.Wireless headphones
.Vehicle speakers
.Vehicle-wired headphone jacks
on the RSA system, if the
vehicle has this feature.
The RSE system always transmits
the audio signal to the wireless
headphones, if there is audio
available. See “Headphones” earlier
in this section for more information.
The DVD player is capable of
outputting audio to the wired
headphone jacks on the RSA
system, if the vehicle has this
feature. The DVD player can be
selected as an audio source on the
RSA system. See Rear Seat Audio
(RSA) System on page 7-59 for
more information.
Page 225 of 508
Black plate (53,1)Cadillac Escalade/Escalade ESV Owner Manual (GMNA-Localizing-U.S./
Canada/Mexico-6081529) - 2014 - CRC 1st Edition - 4/23/13
Infotainment System 7-53
When a device is connected to the
A/V jacks, or the radio's auxiliary
input jack if the vehicle has this
feature, the rear seat passengers
are able to hear audio from the
auxiliary device through the wireless
or wired headphones. The front seat
passengers are able to listen to
playback from this device through
the vehicle speakers by selecting
AUX as the source on the radio.
Video Screen(s)
The video screen(s) are located in
the overhead console.
To use the video screen(s):
1. Push the release button locatedon the overhead console.
2. Move the screen to the desired position.
When the video screen is not in
use, push it up into its locked
position. If a DVD is playing and the screen
is raised to its locked position, the
screen remains on. This is normal,
and the DVD continues to play
through the previous audio source.
Use the remote control power button
or eject the disc to turn off the
screen.
The overhead console contains the
infrared transmitters for the wireless
headphones and the infrared
receivers for the remote control.
They are located at the rear of the
console.
Notice:
Avoid directly touching
the video screen, as damage may
occur. See “Cleaning the Video
Screens” later in this section for
more information.
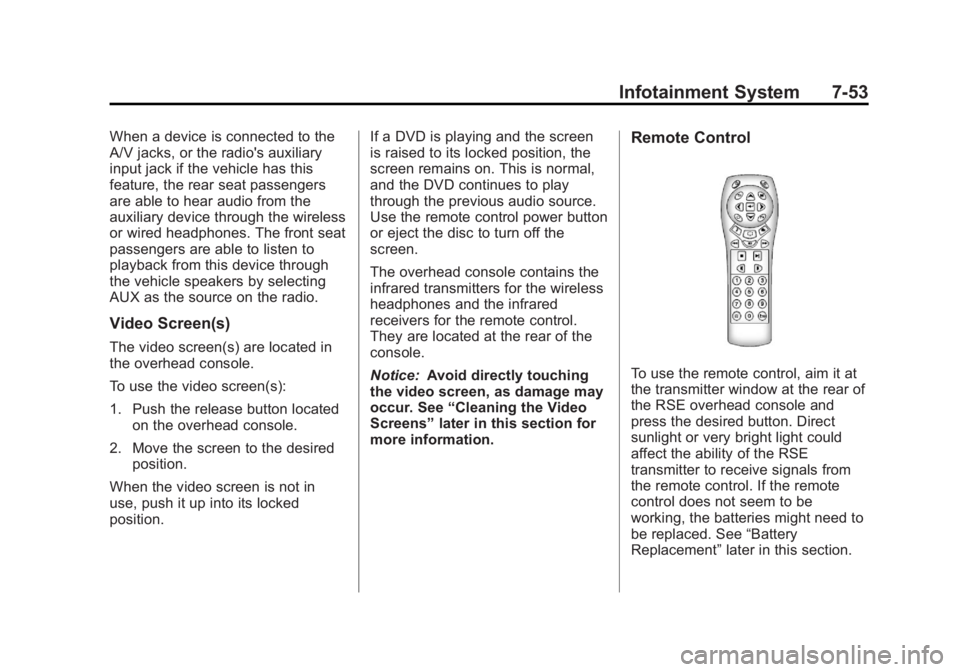
Remote Control
To use the remote control, aim it at
the transmitter window at the rear of
the RSE overhead console and
press the desired button. Direct
sunlight or very bright light could
affect the ability of the RSE
transmitter to receive signals from
the remote control. If the remote
control does not seem to be
working, the batteries might need to
be replaced. See “Battery
Replacement” later in this section.
Page 233 of 508
Black plate (61,1)Cadillac Escalade/Escalade ESV Owner Manual (GMNA-Localizing-U.S./
Canada/Mexico-6081529) - 2014 - CRC 1st Edition - 4/23/13
Infotainment System 7-61
Navigation
Using the Navigation
System
This section presents basic
information needed to operate the
navigation system.
Use the buttons located on the
navigation system along with the
available touch-sensitive screen
buttons on the navigation screen to
operate the system. SeeOverview
on page 7-4 for more information.
Once the vehicle is moving, various
functions are disabled to reduce
driver distractions.
Navigation Control Buttons
The following control buttons are
located on the navigation system:
O/n(Power/Volume):
1. Press to turn the system on and off.
2. Turn to increase or decrease the volume to the audio system. 3. Press and hold for more than
two seconds to turn off the
navigation system, the Rear
Seat Entertainment (RSE), and
Rear Seat Audio (RSA). If the
vehicle has not been tuned off,
the RSE and the RSA can be
turned back on by pressing this
knob and continues play of the
last active source.
Z(Eject): Press to eject the CD/
DVD Disc. See CD/DVD Player on
page 7-18.
w(Tuning Knob): Turn to go to
the next or previous frequency or
disc track or chapter. See CD/DVD
Player on page 7-18 orMP3 on
page 7-26 for more information.
AUDIO: Press to display the audio
screen. Press to switch between
AM, FM, or XM, if equipped, DISC,
or AUX (Auxiliary), or press on the
screen button. See CD/DVD Player
on page 7-18, MP3 on page 7-26,
and Auxiliary Devices on page 7-29
for more information. FAV (Favorite):
Press to access
the preset stations. See “Storing
Radio Station Presets” under,
Overview on page 7-4.
5(Phone): SeeOnStar Overview
on page 14-1 (if equipped) and
Bluetooth on page 7-100 (if
equipped) for more information.
e(Sound): Press to access the
Sound menu to adjust the treble,
midrange, bass, fade, balance, and
Digital Signal Processing (DSP).
y/z(Scan Up/Down): Press to
scan the tracks/chapters up or down
on a disc.
y/©or¨/z(Seek/Scan)
(Previous/Next): Press the up or
down arrows to go to the next or
previous station. Press and hold
either arrow for more than
two seconds. The radio goes to a
station, plays for a few seconds,
then goes to the next station.
NAV (Navigation): Press to view
the vehicle's current position on the
map screen. Each press of this
Page 255 of 508

Black plate (83,1)Cadillac Escalade/Escalade ESV Owner Manual (GMNA-Localizing-U.S./
Canada/Mexico-6081529) - 2014 - CRC 1st Edition - 4/23/13
Infotainment System 7-83
Press CONFIG to adjust several of
the system's features and
preferences. The last selected
CONFIG screen is the screen that
displays: Sound, Radio, Nav
(navigation), Display, or Time.
Sound
Press CONFIG to enter the
configure menu options, then press
CONFIG again, repeatedly until
Sound is selected or press the
Sound screen button to make
speaker and DSP (Digital Signal
Processing) adjustments. See
“Sound Menu”under,AM-FM Radio
on page 7-9 for more information.
Radio
Press CONFIG to enter the
configure menu options, then press
CONFIG again, repeatedly until
Radio is selected or press the Radio
screen button to make changes for
radio information displayed, preset
pages, XM (if equipped) categories, and Bose AudioPilot. See
“Radio
Menu” under,AM-FM Radio on
page 7-9 for more information.
Nav (Navigation)
Press CONFIG to enter the
configure menu options, then press
CONFIG again, repeatedly until Nav
is selected or press the Nav screen
button. Voice Prompt
Press the Voice Prompt screen
button to change the volume of the
voice prompts or to turn voice
guidance on and off.
Volume:
Press + or −to increase
or to decrease the volume of the
voice prompts. The system will
respond with the adjusted voice
level.
Voice Guidance: Press On or Off
to turn voice instructions on and off
while traveling on a planned route.
Route Preference
Press the Route Preference screen
button to change route options
when the system calculates a route.
Allow Major Roads: This feature
allows the system to use major
roads when calculating a planned
route.
Allow Toll Roads: This feature
allows the system to use toll roads
when calculating a planned route.
Page 266 of 508
Black plate (94,1)Cadillac Escalade/Escalade ESV Owner Manual (GMNA-Localizing-U.S./
Canada/Mexico-6081529) - 2014 - CRC 1st Edition - 4/23/13
7-94 Infotainment System
Night:Press to make the map
background darker.
Day: Press to make the map
background brighter.
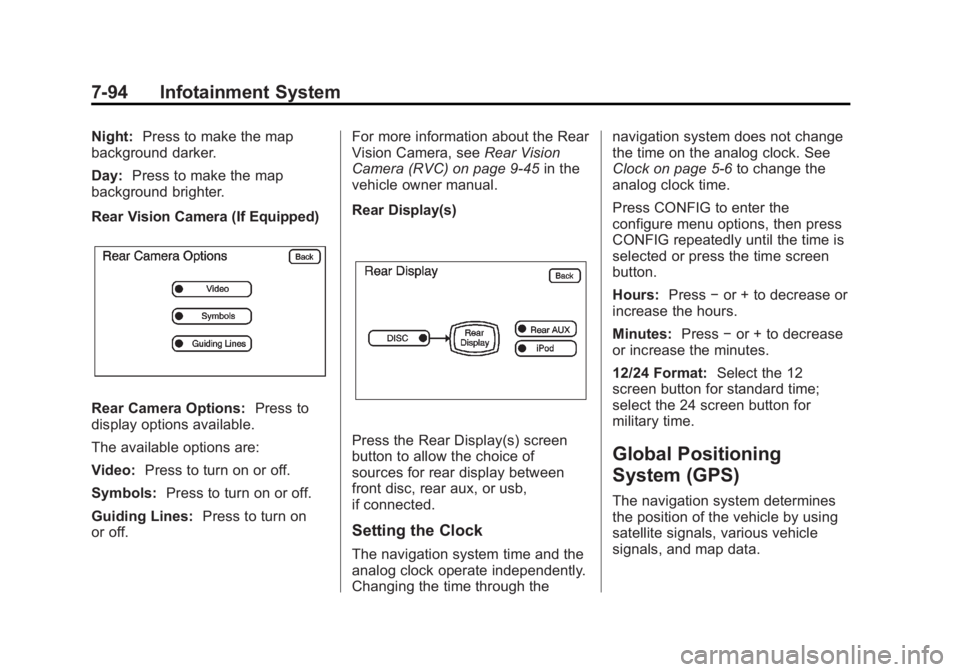
Rear Vision Camera (If Equipped)
Rear Camera Options: Press to
display options available.
The available options are:
Video: Press to turn on or off.
Symbols: Press to turn on or off.
Guiding Lines: Press to turn on
or off. For more information about the Rear
Vision Camera, see
Rear Vision
Camera (RVC) on page 9-45 in the
vehicle owner manual.
Rear Display(s)
Press the Rear Display(s) screen
button to allow the choice of
sources for rear display between
front disc, rear aux, or usb,
if connected.
Setting the Clock
The navigation system time and the
analog clock operate independently.
Changing the time through the navigation system does not change
the time on the analog clock. See
Clock on page 5-6
to change the
analog clock time.
Press CONFIG to enter the
configure menu options, then press
CONFIG repeatedly until the time is
selected or press the time screen
button.
Hours: Press−or + to decrease or
increase the hours.
Minutes: Press−or + to decrease
or increase the minutes.
12/24 Format: Select the 12
screen button for standard time;
select the 24 screen button for
military time.
Global Positioning
System (GPS)
The navigation system determines
the position of the vehicle by using
satellite signals, various vehicle
signals, and map data.
Page 267 of 508
Black plate (95,1)Cadillac Escalade/Escalade ESV Owner Manual (GMNA-Localizing-U.S./
Canada/Mexico-6081529) - 2014 - CRC 1st Edition - 4/23/13
Infotainment System 7-95
At times, other interferences such
as the satellite condition, road
configuration, the condition of the
vehicle and/or other circumstances
can interfere with the navigation
system's ability to determine the
accurate position of the vehicle.
The GPS shows the current position
of the vehicle using signals sent by
the GPS Satellites of the United
States Department of Defense.
When the vehicle is not receiving
signals from the satellites, a symbol
appears on the map screen. Refer
toGlobal Positioning System (GPS)
on page 7-94.
This system may not be available or
interferences may occur if any of the
following are true:
.Signals are obstructed by tall
buildings, trees, large trucks,
or a tunnel.
.Objects are located on the front
dash of the vehicle.
.Satellites are being repaired or
improved.
.After-market glass tinting has
been applied to the vehicle's
windshield.
Notice: Do not apply after-market
glass tinting to the vehicle's
windows. Glass tinting interferes
with the system's ability to
receive GPS signals and causes
the system to malfunction. The
window might have to be
replaced to correct the problem.
This would not be covered by the
warranty.
For more information if the GPS is
not functioning properly, see Vehicle
Positioning on page 7-95 and
Problems with Route Guidance on
page 7-96.
Vehicle Positioning
At times, the position of the vehicle
on the map may be inaccurate due
to one or more of the following
reasons:
.Road system has changed.
.Vehicle is driving on slippery
road surfaces such as in sand,
gravel, and/or snow.
.Vehicle is traveling on winding
roads.
.Vehicle is on a long
straight road.
.Vehicle is approaching a tall
building or a large vehicle.
.Surface streets run parallel to a
freeway.
.Vehicle has just been transferred
by a vehicle carrier or a ferry.
.Current position calibration is set
incorrectly.
.Vehicle is traveling at high
speed.
.Vehicle changes directions more
than once, or when the vehicle is
turning on a turn table in a
parking lot.
.Vehicle is entering and/or exiting
a parking lot or a garage.
.GPS signal is not received.
Page 301 of 508

Black plate (13,1)Cadillac Escalade/Escalade ESV Owner Manual (GMNA-Localizing-U.S./
Canada/Mexico-6081529) - 2014 - CRC 1st Edition - 4/23/13
Driving and Operating 9-13
{Warning
Snow can trap engine exhaust
under the vehicle. This may
cause exhaust gases to get
inside. Engine exhaust contains
carbon monoxide (CO) which
cannot be seen or smelled. It can
cause unconsciousness and even
death.
If the vehicle is stuck in the snow:
.Clear away snow from around
the base of your vehicle,
especially any that is blocking
the exhaust pipe.
.Check again from time to
time to be sure snow does
not collect there.
.Open a window about 5 cm
(2 in) on the side of the
vehicle that is away from the
wind to bring in fresh air.(Continued)
Warning (Continued)
.Fully open the air outlets on
or under the instrument
panel.
.Adjust the climate control
system to a setting that
circulates the air inside the
vehicle and set the fan speed
to the highest setting. See
“Climate Control Systems” in
the Index.
For more information about
carbon monoxide, see Engine
Exhaust on page 9-27.
To save fuel, run the engine for only
short periods as needed to warm
the vehicle and then shut the engine
off and close the window most of
the way to save heat. Repeat this
until help arrives but only when you
feel really uncomfortable from the
cold. Moving about to keep warm
also helps. If it takes some time for help to
arrive, now and then when you run
the engine, push the accelerator
pedal slightly so the engine runs
faster than the idle speed. This
keeps the battery charged to restart
the vehicle and to signal for help
with the headlamps. Do this as little
as possible to save fuel.
If the Vehicle Is Stuck
Slowly and cautiously spin the
wheels to free the vehicle when
stuck in sand, mud, ice, or snow.
See“Rocking Your Vehicle to Get It
Out”
later in this section.
If the vehicle has a traction system,
it can often help to free a stuck
vehicle. Refer to the vehicle's
traction system in the Index. If stuck
too severely for the traction system
to free the vehicle, turn the traction
system off and use the rocking
method.
Page 326 of 508

Black plate (38,1)Cadillac Escalade/Escalade ESV Owner Manual (GMNA-Localizing-U.S./
Canada/Mexico-6081529) - 2014 - CRC 1st Edition - 4/23/13
9-38 Driving and Operating
wheel(s) excessively while these
lights and messages are
displayed.
TCS may activate on dry or rough
roads or under conditions such as
heavy acceleration while turning or
abrupt upshifts/downshifts of the
transmission. When this happens, a
reduction in acceleration may be
noticed, or a noise or vibration may
be heard. This is normal.
If cruise control is being used when
the system activates, the StabiliTrak
light will flash and cruise control will
automatically disengage. Cruise
control may be reengaged when
road conditions allow. SeeCruise
Control on page 9-40.
StabiliTrak may also turn off
automatically if it determines that a
problem exists with the system.
If the problem does not clear itself
after restarting the vehicle, see your
dealer for service. Vehicles with StabiliTrak have a
Trailer Sway Control (TSC) feature.
See
Trailer Sway Control (TSC) on
page 9-65.
Vehicles with StabiliTrak have a Hill
Start Assist (HSA) feature. See Hill
Start Assist (HSA) on page 9-35.
Adding non-dealer accessories can
affect the vehicle's performance.
See Accessories and Modifications
on page 10-3.
Locking Rear Axle
Vehicles with a locking rear axle can
give more traction on snow, mud,
ice, sand, or gravel. It works like a
standard axle most of the time, but
when traction is low, this feature will
allow the rear wheel with the most
traction to move the vehicle.
Road Sensing
Suspension
The Road Sensing
Suspension (RSS) feature provides
superior vehicle ride and handling
under a variety of passenger and
loading conditions.
The system is fully automatic and
uses a computer controller to
continuously monitor vehicle speed,
wheel to body position, lift/dive and
steering position of the vehicle. The
controller then sends signals to
each shock absorber to
independently adjust the damping
level to provide the optimum
vehicle ride.
RSS also interacts with the tow/haul
mode that, when engaged, will
provide additional control of the
shock absorbers. This additional
control results in better ride and
handling characteristics when the
vehicle is loaded or towing a trailer.
See “Tow/Haul Mode” underTowing
Equipment on page 9-60.
Page 327 of 508

Black plate (39,1)Cadillac Escalade/Escalade ESV Owner Manual (GMNA-Localizing-U.S./
Canada/Mexico-6081529) - 2014 - CRC 1st Edition - 4/23/13
Driving and Operating 9-39
Continuous Damping
Control (CDC)
This vehicle may have a continuous
damping control system called
Autoride
®or MagneRide™. With
this feature, improved vehicle ride
and handling is provided under a
variety of passenger and loading
conditions.
Autoride and MagneRide are fully
automatic and use a computer
controller to continuously monitor
vehicle speed, wheel to body
position, lift/dive and steering
position of the vehicle. The
controller then sends signals to
each shock absorber to
independently adjust the damping
level to provide the optimum
vehicle ride. Autoride and MagneRide also
interact with the tow/haul mode that,
when activated, will provide
additional control of the shock
absorbers. This additional control
results in better ride and handling
characteristics when the vehicle is
loaded or towing a trailer. See
“Tow/
Haul Mode” underTrailer Towing on
page 9-56.
Automatic Level Control
The automatic level control rear
suspension is available on light‐duty
vehicles and comes as a part of the
Continuous Damping Control (CDC)
suspension, if equipped. This type of level control is fully
automatic and will provide a better
leveled riding position as well as
better handling under a variety of
passenger and loading conditions.
An air compressor connected to the
rear shocks will raise or lower the
rear of the vehicle to maintain
proper vehicle height. The system is
activated when the ignition key is
turned to ON/RUN and will
automatically adjust vehicle height
thereafter. The system may exhaust
(lower vehicle height) for up to
ten minutes after the ignition key
has been turned off. You may hear
the air compressor operating when
the height is being adjusted.
If a weight‐distributing hitch is being
used, it is recommended to allow
the shocks to inflate, thereby
leveling the vehicle prior to adjusting
the hitch.