display CADILLAC ESCALADE EXT 2003 2.G Repair Manual
[x] Cancel search | Manufacturer: CADILLAC, Model Year: 2003, Model line: ESCALADE EXT, Model: CADILLAC ESCALADE EXT 2003 2.GPages: 473, PDF Size: 3.31 MB
Page 232 of 473

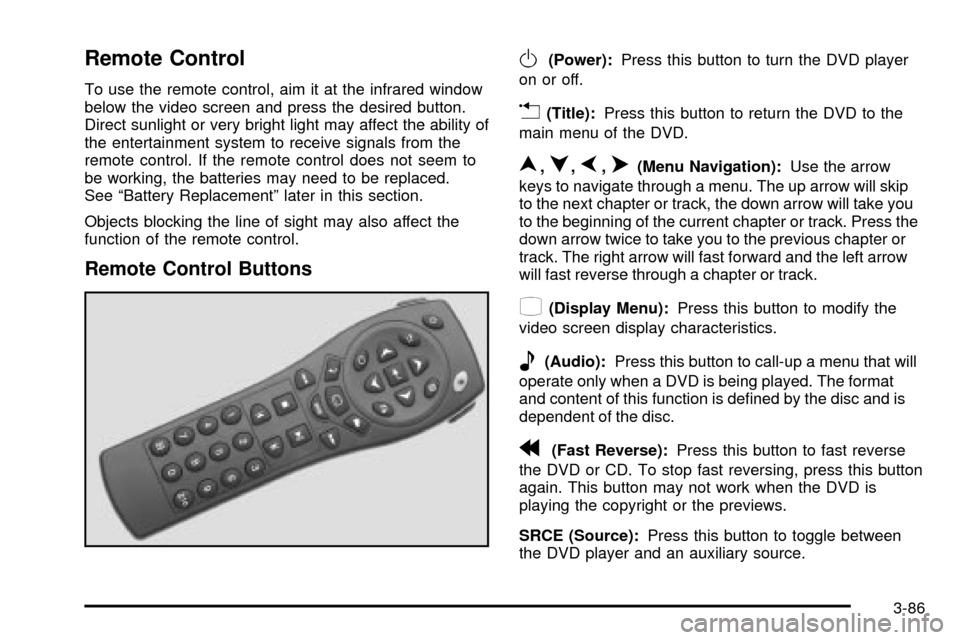
Remote Control
To use the remote control, aim it at the infrared window
below the video screen and press the desired button.
Direct sunlight or very bright light may affect the ability of
the entertainment system to receive signals from the
remote control. If the remote control does not seem to
be working, the batteries may need to be replaced.
See ªBattery Replacementº later in this section.
Objects blocking the line of sight may also affect the
function of the remote control.
Remote Control Buttons
O(Power):Press this button to turn the DVD player
on or off.
v(Title):Press this button to return the DVD to the
main menu of the DVD.
n,q,p,o(Menu Navigation):Use the arrow
keys to navigate through a menu. The up arrow will skip
to the next chapter or track, the down arrow will take you
to the beginning of the current chapter or track. Press the
down arrow twice to take you to the previous chapter or
track. The right arrow will fast forward and the left arrow
will fast reverse through a chapter or track.
z(Display Menu):Press this button to modify the
video screen display characteristics.
e(Audio):Press this button to call-up a menu that will
operate only when a DVD is being played. The format
and content of this function is de®ned by the disc and is
dependent of the disc.
r(Fast Reverse):Press this button to fast reverse
the DVD or CD. To stop fast reversing, press this button
again. This button may not work when the DVD is
playing the copyright or the previews.
SRCE (Source):Press this button to toggle between
the DVD player and an auxiliary source.
3-86
Page 234 of 473

Slow Play:When the DVD is playing, press the pause
button then press the fast forward button. The DVD
will continue playing in a slow play mode. To cancel slow
play mode, press the play/pause button.
u(Next Track/Chapter):Press this button to advance
to the beginning of the next track or chapter. This
button may not work when the DVD is playing the
copyright or the previews.
Battery Replacement
To change the batteries, do the following:
1. Remove the battery compartment door located on
the bottom of the remote control.
2. Replace the two AA batteries in the compartment.
Make sure that they are installed correctly.
3. Close the battery door securely.
Notice:Do not store the remote control in heat or
direct sunlight. This could damage the remote
control and it would not be covered by your vehicles
warranty. Keep the remote control stored in a
cool, dry place.
If the remote control is to be stored for a long period of
time, remove the batteries and keep them in a cool,
dry place.
Headphones
The RSE system includes two sets of wireless infrared
headphones.
Each set of headphones has an ON/OFF control.
An indicator light will illuminate on the headphones when
they are on. If the light does not illuminate, the batteries
may need to be replaced. See ªBattery Replacementº
later in this section for more information. To turn the
headphones OFF activate the ON/OFF control.
Each set of headphones has a volume knob. To adjust
the volume, adjust this knob.
The headphones will automatically turn off if they lose
the infrared signal from the system after approximately
four minutes in order to preserve their battery power.
The signal may be lost if the system is turned off or if the
headphones are out of range of the infrared signal
transmitters that are located below the video display
screen.
3-88
Page 236 of 473

How to Change the Video Format when in
the Auxiliary Mode
The auxiliary input video format is preset to NTSC. In
some countries, the video format may be in PAL system.
To change the video format, perform the following:
1. Press the display menu button.
2. Press the navigation down arrow key to scroll down
to Video Format.
3. Press the enter button to select Video Format.
4. Press the navigation key to select the PAL video
format.
5. Press the enter button to accept the change.
Audio Output
Audio from the DVD player or auxiliary inputs may be
heard through the following possible sources:
·Wireless Headphones
·Vehicle Speakers
·Vehicle wired headphone jacks on the Rear Seat
Audio system (if equipped)The RSE system will always transmit the audio signal
by infrared to the wireless headphones, if there is audio
available. See ªHeadphonesº previously for more
information.
The RSE system is capable of outputting audio to the
vehicle speakers by using the radio. The RSE system
may be selected as an audio source on the radio if the
RSE system power is on. Once the RSE system is
selected as an audio source on the radio you may adjust
the speaker volume on the radio. If the RSE system
power is not on, the RSE system will not be an available
source on the radio. Refer to the radio information for the
radio that your vehicle has for more information.
The RSE system is capable of outputting audio to the
wired headphone jacks on the Rear Seat Audio system
(if equipped). The RSE system may be selected as
an audio source on the Rear Seat Audio system if the
RSE system power is on. Refer to
Rear Seat Audio
(RSA) on page 3-93for more information.
3-90
Page 237 of 473

Problem Recommended Action
No power. The ignition might not be
in on or accessory.
The parental control
button might have been
pressed. (The power
indicator light will ¯ash.)
Disc will not play. The system might be off.
The parental control
button might have been
pressed. (The power
indicator light will ¯ash.)
The system might be in
auxiliary source mode.
Press the SRCE button
to toggle between the
DVD player and the
auxiliary source.
The disc is upside down
or is not compatible.
The picture does not ®ll
the screen. There are
black borders on the
top and bottom or on
both sides or it looks
stretched out.Press the Display button
on the DVD player or
on the remote control.
Change the display mode.Problem Recommended Action
The disc was ejected,
but it was pulled back
into the DVD player.The disc is being stored
in the DVD player. Press
the eject button again to
eject the disc.
In auxiliary mode, the
picture moves or scrolls.Check the signal coming
from the auxiliary device
and make sure that the
connection and the
signal is good.
Change the Video
Format to PAL or NTSC.
See ªStereo RCA Jacksº
previously for how to
change the video format.
The language in the
audio or on the screen
is wrong.Press the Menu button
on the DVD player or on
the remote control and
change the audio or
language selection on
the DVD menu.
3-91
Page 239 of 473

Navigation/Radio System
The display screen is located in the center of the
instrument panel. There are ªhardº buttons and a touch
sensitive screen.
Your vehicle may be equipped with an AM-FM radio
navigation radio system that includes digital sound
processing (DSP), Radio Data System (RDS) with
program ªtypeº selections (PTY) that will seek out the
kind of music you want to listen to and XMŸ Satellite
Radio Service capabilities (United States only).The radio system can also communicate with your
navigation system to broadcast announcements on
traffic, weather and emergency alert communications.
For information on how to use this system, see the
ªNavigation Systemº manual.
Rear Seat Audio (RSA)
This feature allows rear seat passengers to listen to
any of the audio sources: radio, cassette tapes,
CDs, DVDs, XMŸ (USA only, if equipped) depending
on your vehicles options. However, the rear seat
passengers can only control the music sources that the
front seat passengers are not listening to. For example,
rear seat passengers may listen to a cassette tape
through headphones while the driver listens to the radio
through the front speakers. The rear seat passengers
have control of the volume for each set of headphones.
The front seat audio controls always override the
RSA controls. Navigation/Radio Display and Controls
3-93
Page 243 of 473

CD Functions
1 PREV (Previous):Press this pushbutton to go to the
previous track if the current track has been playing
for less than eight seconds. If pressed when the current
track has been playing for more than eight seconds,
it will go to the beginning of the current track. If you hold
or press this pushbutton more than once, the player
will continue moving back through the CD.
2 NEXT:Press this pushbutton to go to the next track.
If you hold this pushbutton or press it more than once,
the player will continue moving forward through the CD.
3 REV (Reverse):Press and hold this pushbutton to
reverse quickly through a track. Release it to resume
playing.
4 FWD (Forward):Press and hold this pushbutton to
advance quickly through a track. Release it to resume
playing.
5
X:Press this pushbutton to select a CD. The CD
number and track number will be displayed.
6 RDM (Random):Press this button to hear the tracks
in random, rather than sequential, order. RDM ALL
will appear on the radio display, which will randomly play
all of the loaded CDs. Press and hold this button until
you hear a beep and the radio will display RDM ONE,which will randomly play the tracks on the current CD.
Press this button again to turn off random play,
RDM OFF will appear on the radio display.
qSEEKr:Press the right or the left SEEK arrow to
go to the next or to the previous track on the CD.
BAND:Press BAND to listen to the radio when a CD
is playing.
TAPE DISC:Press this button if you have a CD loaded
in the changer and the radio is turned on, to play a
CD. Press this button to switch between playing a tape
and the CD changer if all are loaded.
Compact Disc Changer Errors
CHK CD (Check):If this message appears on the
display, it could be for one of the following reasons:
·You are driving on a very rough road. The CD
should play when the road gets smoother.
·A CD is upside down.
·It is dirty, scratched or wet.
·It is very humid. If so, wait about an hour and
try again.
·The CD player is very hot.
If any error occurs repeatedly or if an error cannot be
corrected, contact your dealership.
3-97
Page 244 of 473

Theft-Deterrent Feature
THEFTLOCKžis designed to discourage theft of your
radio. The feature works automatically by learning
a portion of the Vehicle Identi®cation Number (VIN).
If the radio is moved to a different vehicle, it will
not operate and LOCKED will be displayed.
When the radio and vehicle are turned off, the blinking
red light indicates that THEFTLOCK
žis armed.
With THEFTLOCKžactivated, your radio will not operate
if stolen.
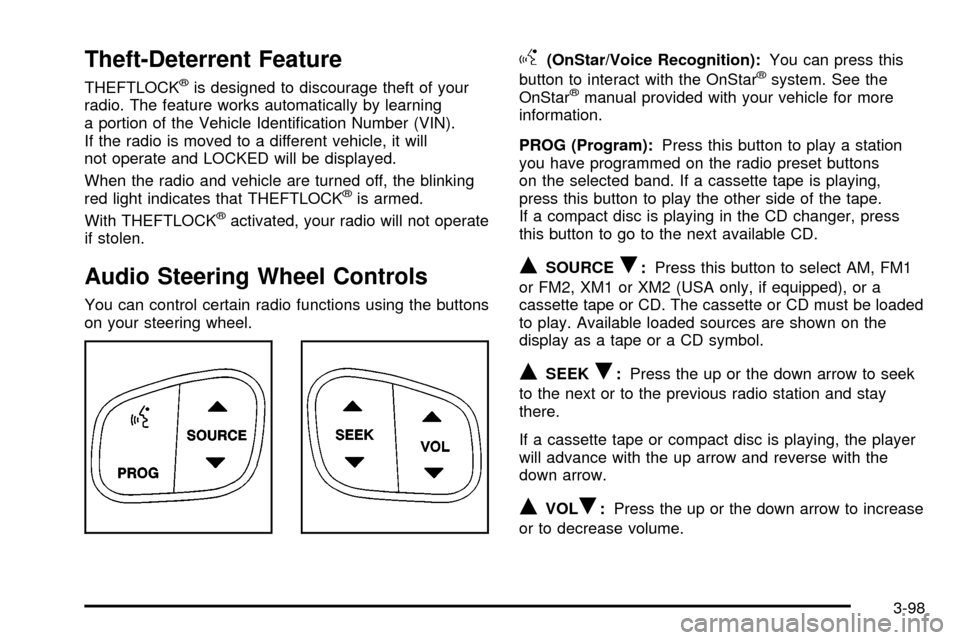
Audio Steering Wheel Controls
You can control certain radio functions using the buttons
on your steering wheel.
g(OnStar/Voice Recognition):You can press this
button to interact with the OnStaržsystem. See the
OnStaržmanual provided with your vehicle for more
information.
PROG (Program):Press this button to play a station
you have programmed on the radio preset buttons
on the selected band. If a cassette tape is playing,
press this button to play the other side of the tape.
If a compact disc is playing in the CD changer, press
this button to go to the next available CD.
QSOURCER:Press this button to select AM, FM1
or FM2, XM1 or XM2 (USA only, if equipped), or a
cassette tape or CD. The cassette or CD must be loaded
to play. Available loaded sources are shown on the
display as a tape or a CD symbol.
QSEEKR:Press the up or the down arrow to seek
to the next or to the previous radio station and stay
there.
If a cassette tape or compact disc is playing, the player
will advance with the up arrow and reverse with the
down arrow.
QVOLR:Press the up or the down arrow to increase
or to decrease volume.
3-98
Page 245 of 473

DVD Distortion
You may experience audio distortion in the
IR headphones when operating cellular phones,
scanners, CB radios, Global Positioning Systems
(GPS)*, two-way radios, mobile fax, or walkie talkies.
It may be necessary to turn off the DVD player
when operating one of these devices in or near the
vehicle.
* Excludes the OnStar
žSystem.
Understanding Radio Reception
AM
The range for most AM stations is greater than for FM,
especially at night. The longer range, however, can
cause stations to interfere with each other. AM can pick
up noise from things like storms and power lines. Try
reducing the treble to reduce this noise if you ever get it.
FM Stereo
FM stereo will give you the best sound, but FM signals
will reach only about 10 to 40 miles (16 to 65 km).
Tall buildings or hills can interfere with FM signals,
causing the sound to come and go.
XMŸ Satellite Radio Service (USA Only)
XMŸ Satellite Radio gives you digital radio reception
from coast to coast. Just as with FM, tall buildings
or hills can interfere with satellite radio signals, causing
the sound to come and go. Your radio may display
NO SIGNAL to indicate interference.
Care of Your Cassette Tape Player
A tape player that is not cleaned regularly can cause
reduced sound quality, ruined cassettes or a damaged
mechanism. Cassette tapes should be stored in their
cases away from contaminants, direct sunlight and
extreme heat. If they aren't, they may not operate
properly or may cause failure of the tape player.
Your tape player should be cleaned regularly after every
50 hours of use. Your radio may display CLEAN to
indicate that you have used your tape player for
50 hours without resetting the tape clean timer. If this
message appears on the display, your cassette
tape player needs to be cleaned. It will still play tapes,
but you should clean it as soon as possible to
prevent damage to your tapes and player. If you notice
a reduction in sound quality, try a known good
cassette to see if the tape or the tape player is at fault.
If this other cassette has no improvement in sound
quality, clean the tape player.
3-99
Page 246 of 473

For best results, use a scrubbing action, non-abrasive
cleaning cassette with pads which scrub the tape
head as the hubs of the cleaner cassette turn.
The recommended cleaning cassette is available
through your dealership.
When cleaning the cassette tape player with the
recommended non-abrasive cleaning cassette, it is
possible that the cassette may eject, because the cut
tape detection feature on your radio may recognize it
as a broken tape, in error. To prevent the cleaning
cassette from being ejected, use the following steps:
1. Turn the ignition on.
2. Turn the radio off.
3. Press and hold the TAPE DISC button for ®ve
seconds. READY will appear on the display and
the cassette symbol will ¯ash for ®ve seconds.
4. Insert the scrubbing action cleaning cassette.
5. Eject the cleaning cassette after the manufacturer's
recommended cleaning time.When the cleaning cassette has been ejected, the cut
tape detection feature is active again.
You may also choose a non-scrubbing action, wet-type
cleaner which uses a cassette with a fabric belt to
clean the tape head. This type of cleaning cassette will
not eject on its own. A non-scrubbing action cleaner
may not clean as thoroughly as the scrubbing type
cleaner. The use of a non-scrubbing action, dry-type
cleaning cassette is not recommended.
After you clean the player, press and hold the eject
button for ®ve seconds to reset the CLEAN indicator.
The radio will display --- or CLEANED to show the
indicator was reset.
Cassettes are subject to wear and the sound quality
may degrade over time. Always make sure the cassette
tape is in good condition before you have your tape
player serviced.
3-100
Page 259 of 473

StabilitrakžSystem
Your vehicle is equipped with Stabilitrakž, which
combines antilock brake, traction and stability control
systems and helps the driver maintain directional control
of the vehicle in most driving conditions.
When you ®rst start your vehicle and begin to drive
away, the system performs several diagnostic checks
to insure there are no problems. You may hear or
feel the system working. This is normal and does not
mean there is a problem with your vehicle. The system
should initialize before the vehicle reaches 20 mph
(32 km/h). In some cases, it may take approximately two
miles of driving before the system initializes.
If the system fails to turn on or activate, the STABILITY
SYS DISABLED or SERVICE STABILITY message
will be displayed. If the vehicle has gone through heavy
acceleration or braking or multiple turns during the
®rst two miles of driving after starting your vehicle, the
STABILITY SYS DISABLED message may appear.
If this is the case, your vehicle does not need servicing.You will need to turn the vehicle off and then restart it to
initialize Stabilitrak
ž. If either message appears on
the Driver Information Center (DIC), and your vehicle
hasn't gone through hard acceleration, braking or
multiple turns in the ®rst two miles of driving, your
vehicle should be taken in for service.
The STABILITY SYS ACTIVE message will appear on
the Driver Information Center (DIC) only when the
system is both on and activated. You may also feel or
hear the system working; this is normal. For more
information on the stability messages, see
Driver
Information Center (DIC) on page 3-47.
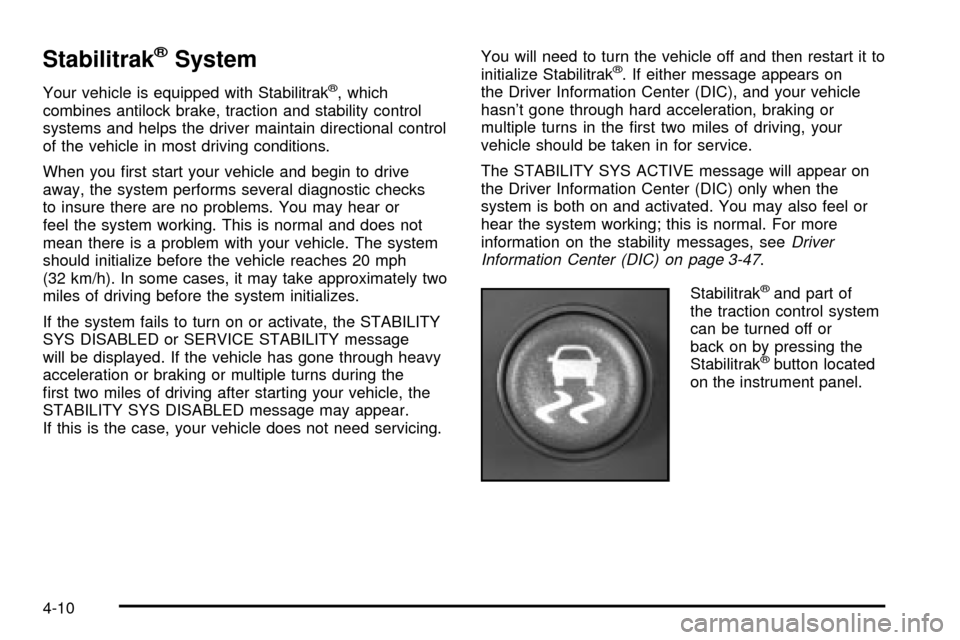
Stabilitrak
žand part of
the traction control system
can be turned off or
back on by pressing the
Stabilitrak
žbutton located
on the instrument panel.
4-10