automatic transmission CADILLAC ESCALADE EXT 2010 3.G Owner's Manual
[x] Cancel search | Manufacturer: CADILLAC, Model Year: 2010, Model line: ESCALADE EXT, Model: CADILLAC ESCALADE EXT 2010 3.GPages: 580, PDF Size: 6.23 MB
Page 436 of 580

Automatic Transmission Fluid
When to Check and Change Automatic
Transmission Fluid
It is usually not necessary to check the transmission
fluid level. The only reason for fluid loss is a
transmission leak or overheating the transmission.
If you suspect a small leak, then use the following
checking procedures to check the fluid level. However,
if there is a large leak, then it may be necessary to have
the vehicle towed to a dealer/retailer service department
and have it repaired before driving the vehicle further.
Notice:Use of the incorrect automatic transmission
fluid may damage the vehicle, and the damages may
not be covered by the vehicle's warranty. Always
use the automatic transmission fluid listed in
Recommended Fluids and Lubricants on page 8‑10.
Change the fluid and filter at the intervals listed in the
Maintenance Schedule. See Scheduled Maintenance
on page 8‑3. Be sure to use the transmission fluid
listed in Recommended Fluids and Lubricantson
page 8‑10.
How to Check Automatic Transmission
Fluid
Notice: Too much or too little fluid can damage your
transmission. Too much can mean that some of the
fluid could come out and fall on hot engine parts or
exhaust system parts, starting a fire. Too little fluid
could cause the transmission to overheat. Be sure
to get an accurate reading if you check your
transmission fluid.
Before checking the fluid level, prepare the vehicle as
follows:
1. Start the engine and park the vehicle on a level surface. Keep the engine running.
2. Apply the parking brake and place the shift lever in P (Park).
3. With your foot on the brake pedal, move the shift lever through each gear range, pausing for about
three seconds in each range. Then, move the shift
lever back to P (Park).
7-22
Page 456 of 580

Jump Starting
If the vehicle's battery (or batteries) has run down, you
may want to use another vehicle and some jumper
cables to start your vehicle. Be sure to use the following
steps to do it safely.
{WARNING:
Batteries can hurt you. They can be dangerous
because:
.They contain acid that can burn you.
.They contain gas that can explode or ignite.
.They contain enough electricity to burn you.
If you do not follow these steps exactly, some or
all of these things can hurt you. Notice:
Ignoring these steps could result in costly
damage to the vehicle that would not be covered by
the warranty.
Trying to start the vehicle by pushing or pulling it
will not work, and it could damage the vehicle.
1. Check the other vehicle. It must have a 12-volt battery with a negative ground system.
Notice: If the other vehicle's system is not a 12-volt
system with a negative ground, both vehicles can
be damaged. Only use vehicles with 12-volt systems
with negative grounds to jump start your vehicle.
2. Get the vehicles close enough so the jumper cables can reach, but be sure the vehicles are not
touching each other. If they are, it could cause a
ground connection you do not want. You would
not be able to start your vehicle, and the bad
grounding could damage the electrical systems.
To avoid the possibility of the vehicles rolling, set
the parking brake firmly on both vehicles involved
in the jump start procedure. Put the automatic
transmission in P (Park) or a manual transmission
in Neutral before setting the parking brake. If you
have a four-wheel-drive vehicle, be sure the
transfer case is in a drive gear, not in Neutral.
7-42
Page 475 of 580

Tire Terminology and Definitions
Air Pressure:The amount of air inside the tire
pressing outward on each square inch of the tire.
Air pressure is expressed in pounds per square
inch (psi) or kilopascal (kPa).
Accessory Weight
:This means the combined
weight of optional accessories. Some examples of
optional accessories are, automatic transmission,
power steering, power brakes, power windows,
power seats, and air conditioning.
Aspect Ratio
:The relationship of a tire's height
to its width.
Belt
:A rubber coated layer of cords that is
located between the plies and the tread. Cords
may be made from steel or other reinforcing
materials.
Bead
:The tire bead contains steel wires wrapped
by steel cords that hold the tire onto the rim.
Bias Ply Tire
:A pneumatic tire in which the plies
are laid at alternate angles less than 90 degrees
to the centerline of the tread. Cold Tire Pressure
:The amount of air pressure
in a tire, measured in pounds per square inch (psi)
or kilopascals (kPa) before a tire has built up heat
from driving. See Inflation - Tire Pressure
on
page 7‑64
.
Curb Weight
:The weight of a motor vehicle with
standard and optional equipment including the
maximum capacity of fuel, oil, and coolant, but
without passengers and cargo.
DOT Markings
:A code molded into the sidewall
of a tire signifying that the tire is in compliance
with the U.S. Department of Transportation (DOT)
motor vehicle safety standards. The DOT code
includes the Tire Identification Number (TIN), an
alphanumeric designator which can also identify
the tire manufacturer, production plant, brand, and
date of production.
GVWR
:Gross Vehicle Weight Rating.
See Loading the Vehicle
on page 6‑32.
GAWR FRT
:Gross Axle Weight Rating for the
front axle. See Loading the Vehicle
on page 6‑32.
7-61
Page 523 of 580

FusesUsage
1 Right Trailer Stop/Turn Lamp
2Electronic Stability Suspension
Control, Automatic Level Control
Exhaust
3 Left Trailer Stop/Turn Lamp
4 Engine Controls
Fuses Usage
5Engine Control Module, Throttle
Control
6 Trailer Brake Controller
7 Front Washer
8 Oxygen Sensors
9 Antilock Brakes System 2
10 Trailer Back-up Lamps 11 Driver Side Low-Beam Headlamp
12 Engine Control Module (Battery)
13 Fuel Injectors, Ignition Coils
(Right Side)
14 Transmission Control Module
(Battery)
15 Vehicle Back-up Lamps
16 Passenger Side Low-Beam Headlamp
17 Air Conditioning Compressor
18 Oxygen Sensors
19 Transmission Controls (Ignition)
20 Fuel Pump
21 Fuel System Control Module
22 Headlamp Washers
23 Rear Windshield Washer
7-109
Page 527 of 580

ApplicationCapacities
English Metric
Transmission Fluid (Pan Removal and Filter Replacement) 6.0 qt5.7 L
Transfer Case Fluid 1.5 qt1.4 L
Wheel Nut Torque 140 lb ft190Y
All capacities are approximate. When adding, be sure to fill to the approximate level, as recommended in this manual.
Recheck fluid after filling.
†Oil filter should be changed at every oil change.
Engine Specifications
Engine VIN CodeTransmission Spark Plug Gap
6.2L V8 FAutomatic 0.040 in (1.02 mm)
7-113
Page 532 of 580

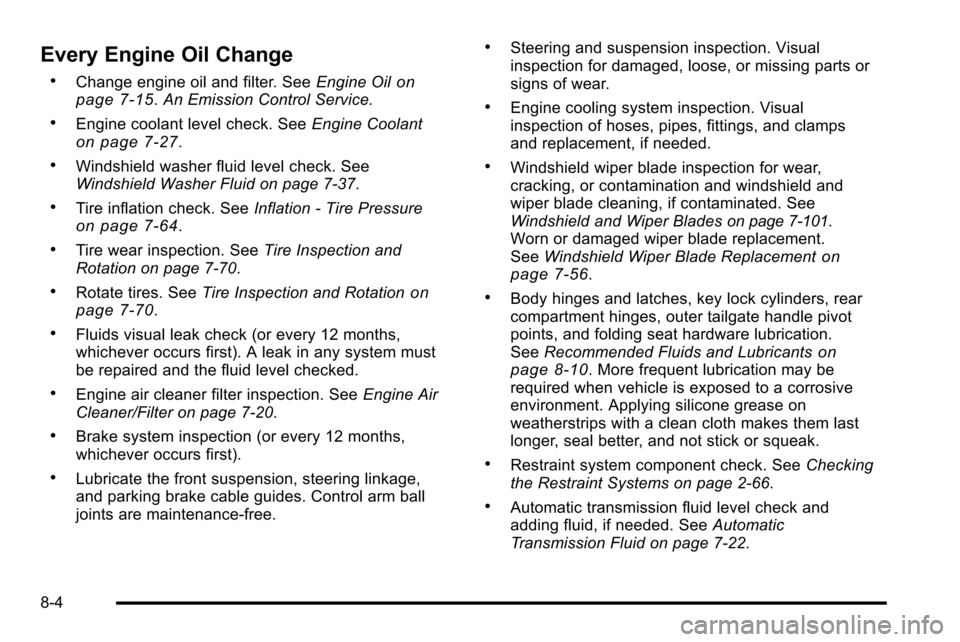
Every Engine Oil Change
.Change engine oil and filter. SeeEngine Oilon
page 7‑15. An Emission Control Service.
.Engine coolant level check. See Engine Coolanton page 7‑27.
.Windshield washer fluid level check. See
Windshield Washer Fluid on page 7‑37.
.Tire inflation check. SeeInflation - Tire Pressureon page 7‑64.
.Tire wear inspection. See Tire Inspection and
Rotation on page 7‑70.
.Rotate tires. See Tire Inspection and Rotationon
page 7‑70.
.Fluids visual leak check (or every 12 months,
whichever occurs first). A leak in any system must
be repaired and the fluid level checked.
.Engine air cleaner filter inspection. See Engine Air
Cleaner/Filter on page 7‑20.
.Brake system inspection (or every 12 months,
whichever occurs first).
.Lubricate the front suspension, steering linkage,
and parking brake cable guides. Control arm ball
joints are maintenance‐free.
.Steering and suspension inspection. Visual
inspection for damaged, loose, or missing parts or
signs of wear.
.Engine cooling system inspection. Visual
inspection of hoses, pipes, fittings, and clamps
and replacement, if needed.
.Windshield wiper blade inspection for wear,
cracking, or contamination and windshield and
wiper blade cleaning, if contaminated. See
Windshield and Wiper Blades
on page 7‑101.
Worn or damaged wiper blade replacement.
See Windshield Wiper Blade Replacement
on
page 7‑56.
.Body hinges and latches, key lock cylinders, rear
compartment hinges, outer tailgate handle pivot
points, and folding seat hardware lubrication.
See Recommended Fluids and Lubricants
on
page 8‑10. More frequent lubrication may be
required when vehicle is exposed to a corrosive
environment. Applying silicone grease on
weatherstrips with a clean cloth makes them last
longer, seal better, and not stick or squeak.
.Restraint system component check. See Checking
the Restraint Systems on page 2‑66.
.Automatic transmission fluid level check and
adding fluid, if needed. See Automatic
Transmission Fluid on page 7‑22.
8-4
Page 533 of 580

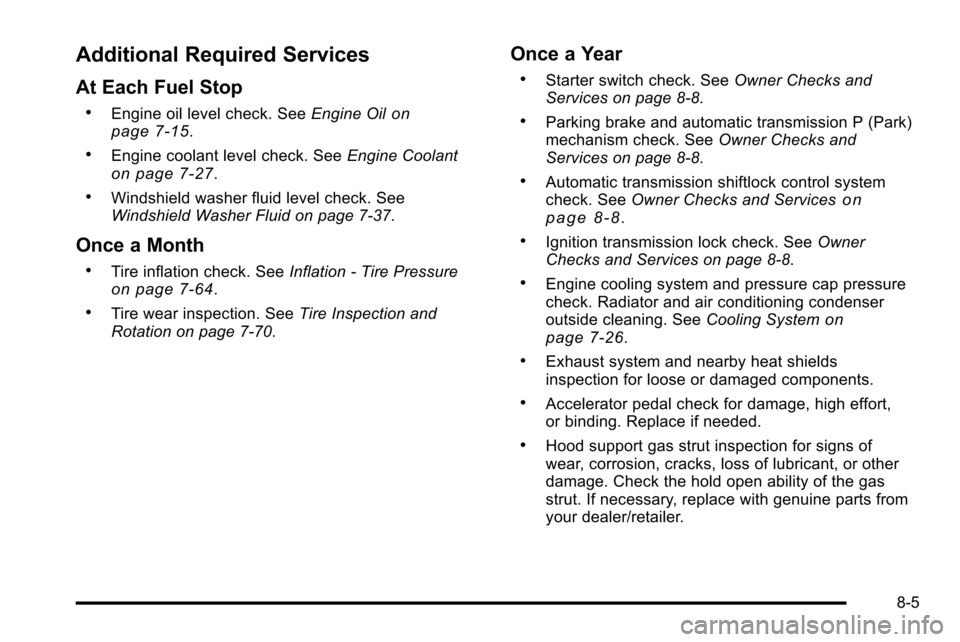
Additional Required Services
At Each Fuel Stop
.Engine oil level check. SeeEngine Oilon
page 7‑15.
.Engine coolant level check. See Engine Coolanton page 7‑27.
.Windshield washer fluid level check. See
Windshield Washer Fluid on page 7‑37.
Once a Month
.Tire inflation check. SeeInflation - Tire Pressureon page 7‑64.
.Tire wear inspection. See Tire Inspection and
Rotation on page 7‑70.
Once a Year
.Starter switch check. See Owner Checks and
Services on page 8‑8.
.Parking brake and automatic transmission P (Park)
mechanism check. See Owner Checks and
Services on page 8‑8.
.Automatic transmission shiftlock control system
check. See Owner Checks and Serviceson
page 8‑8.
.Ignition transmission lock check. See Owner
Checks and Services on page 8‑8.
.Engine cooling system and pressure cap pressure
check. Radiator and air conditioning condenser
outside cleaning. See Cooling System
on
page 7‑26.
.Exhaust system and nearby heat shields
inspection for loose or damaged components.
.Accelerator pedal check for damage, high effort,
or binding. Replace if needed.
.Hood support gas strut inspection for signs of
wear, corrosion, cracks, loss of lubricant, or other
damage. Check the hold open ability of the gas
strut. If necessary, replace with genuine parts from
your dealer/retailer.
8-5
Page 534 of 580

First Engine Oil Change After Every
40 000 km/25,000 Miles
.Fuel system inspection for damage or leaks.
First Engine Oil Change After Every
80 000 km/50,000 Miles
.Engine air cleaner filter replacement. SeeEngine
Air Cleaner/Filter on page 7‑20.
.Automatic transmission fluid and filter change
(severe service) for vehicles mainly driven in heavy
city traffic in hot weather, in hilly or mountainous
terrain, when frequently towing a trailer, or used for
taxi, police, or delivery service. See Automatic
Transmission Fluid on page 7‑22.
.Four‐wheel drive only: Transfer case fluid change
(severe service) for vehicles mainly driven when
frequently towing a trailer, or used for taxi, police,
or delivery service. Check vent hose at transfer
case for kinks and proper installation. Check to be
sure vent hose is unobstructed, clear, and free of debris. During any maintenance, if a power washer
is used to clean mud and dirt from the underbody,
care should be taken to not directly spray the
transfer case output seals. High pressure water
can overcome the seals and contaminate the
transfer case fluid. Contaminated fluid will
decrease the life of the transfer case and should
be replaced.
.Evaporative control system inspection. Check all
fuel and vapor lines and hoses for proper hook‐up,
routing, and condition. Check that the purge valve,
if the vehicle has one, works properly. Replace as
needed.
An Emission Control Service. The U.S.
Environmental Protection Agency or the California
Air Resources Board has determined that the
failure to perform this maintenance item will not
nullify the emission warranty or limit recall liability
prior to the completion of the vehicle's useful life.
We, however, urge that all recommended
maintenance services be performed at the
indicated intervals and the maintenance be
recorded.
8-6
Page 535 of 580

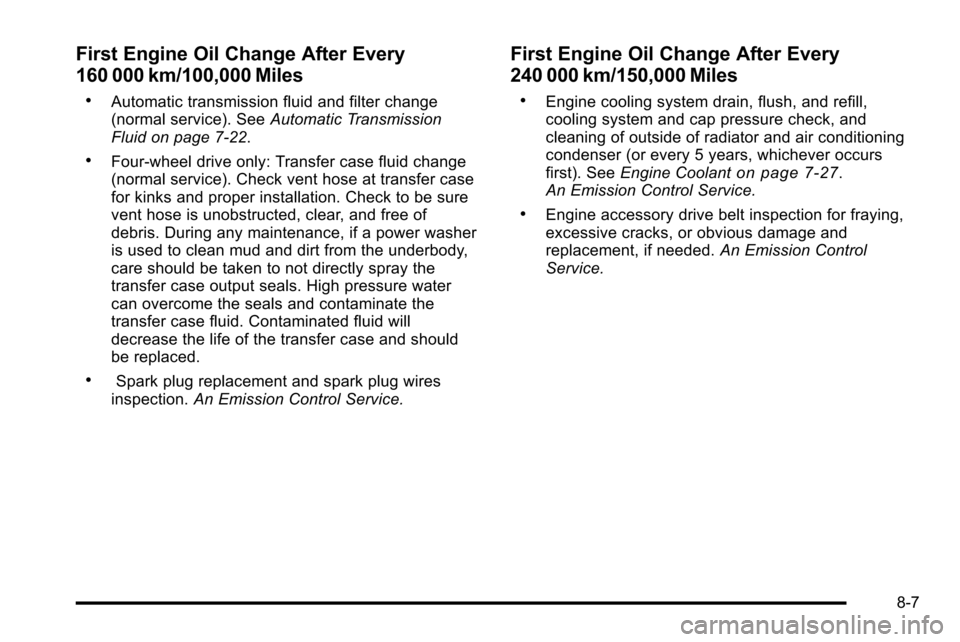
First Engine Oil Change After Every
160 000 km/100,000 Miles
.Automatic transmission fluid and filter change
(normal service). SeeAutomatic Transmission
Fluid on page 7‑22.
.Four‐wheel drive only: Transfer case fluid change
(normal service). Check vent hose at transfer case
for kinks and proper installation. Check to be sure
vent hose is unobstructed, clear, and free of
debris. During any maintenance, if a power washer
is used to clean mud and dirt from the underbody,
care should be taken to not directly spray the
transfer case output seals. High pressure water
can overcome the seals and contaminate the
transfer case fluid. Contaminated fluid will
decrease the life of the transfer case and should
be replaced.
.Spark plug replacement and spark plug wires
inspection. An Emission Control Service.
First Engine Oil Change After Every
240 000 km/150,000 Miles
.Engine cooling system drain, flush, and refill,
cooling system and cap pressure check, and
cleaning of outside of radiator and air conditioning
condenser (or every 5 years, whichever occurs
first). SeeEngine Coolant
on page 7‑27.
An Emission Control Service.
.Engine accessory drive belt inspection for fraying,
excessive cracks, or obvious damage and
replacement, if needed. An Emission Control
Service.
8-7
Page 536 of 580

Owner Checks and Services
Starter Switch Check
{WARNING:
When you are doing this inspection, the vehicle
could move suddenly. If the vehicle moves, you or
others could be injured.
1. Before starting this check, be sure there is enough room around the vehicle.
2. Firmly apply both the parking brake and the regular brake. See Parking Brake on page 3‑40.
Do not use the accelerator pedal, and be ready to
turn off the engine immediately if it starts.
3. Try to start the engine in each gear. The vehicle should start only in P (Park) or N (Neutral). If the
vehicle starts in any other position, contact your
dealer/retailer for service.
Automatic Transmission Shift Lock
Control System Check
{WARNING:
When you are doing this inspection, the vehicle
could move suddenly. If the vehicle moves, you or
others could be injured.
1. Before starting this check, be sure there is enough room around the vehicle. It should be parked on a
level surface.
2. Firmly apply the parking brake. See Parking Brake
on page 3‑40.
Be ready to apply the regular brake immediately if
the vehicle begins to move.
3. With the engine off, turn the ignition to ON/RUN, but do not start the engine. Without applying the
regular brake, try to move the shift lever out of
P (Park) with normal effort. If the shift lever moves
out of P (Park), contact your dealer/retailer for
service.
8-8