display CADILLAC ESCALADE EXT 2010 3.G Owners Manual
[x] Cancel search | Manufacturer: CADILLAC, Model Year: 2010, Model line: ESCALADE EXT, Model: CADILLAC ESCALADE EXT 2010 3.GPages: 580, PDF Size: 6.23 MB
Page 22 of 580
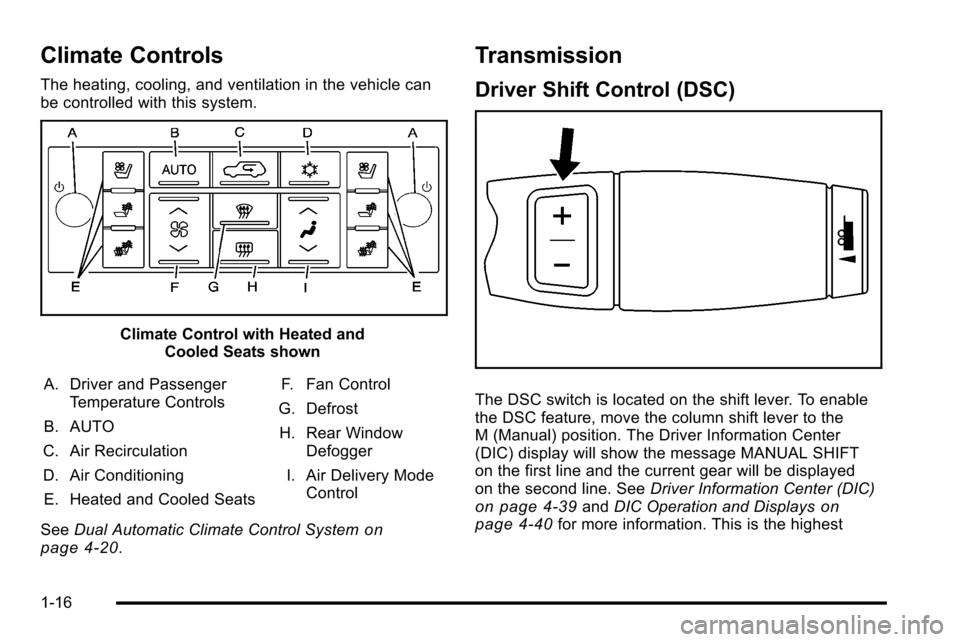
Climate Controls
The heating, cooling, and ventilation in the vehicle can
be controlled with this system.
Climate Control with Heated andCooled Seats shown
A. Driver and Passenger Temperature Controls
B. AUTO
C. Air Recirculation
D. Air Conditioning E. Heated and Cooled Seats F. Fan Control
G. Defrost H. Rear Window Defogger
I. Air Delivery Mode Control
See Dual Automatic Climate Control System
on
page 4‑20.
Transmission
Driver Shift Control (DSC)
The DSC switch is located on the shift lever. To enable
the DSC feature, move the column shift lever to the
M (Manual) position. The Driver Information Center
(DIC) display will show the message MANUAL SHIFT
on the first line and the current gear will be displayed
on the second line. See Driver Information Center (DIC)
on page 4‑39andDIC Operation and Displayson
page 4‑40for more information. This is the highest
1-16
Page 25 of 580
Bluetooth®
For vehicles with an in-vehicle Bluetooth system, it
allows users with a Bluetooth enabled cell phone to
make and receive hands-free calls using the vehicle’s
audio system and controls.
The Bluetooth enabled cell phone must be paired with
the in-vehicle Bluetooth system before it can be used in
the vehicle. Not all phones will support all functions.
For more information visit www.gm.com/bluetooth.
For more information, seeBluetooth
®on page 4‑66.
Navigation System
The vehicle's navigation system provides detailed maps
of most major freeways and roads throughout the
United States and Canada. After a destination has been
set, the system provides turn-by-turn instructions for
reaching the destination. In addition, the system can
help locate a variety of points of interest (POI), such as
banks, airports, restaurants, and more.
See Navigation System in the owner's manual for more
information.
Driver Information Center (DIC)
The DIC display is located at the bottom of the
instrument panel cluster. It shows the status of
many vehicle systems and enables access to the
personalization menu.
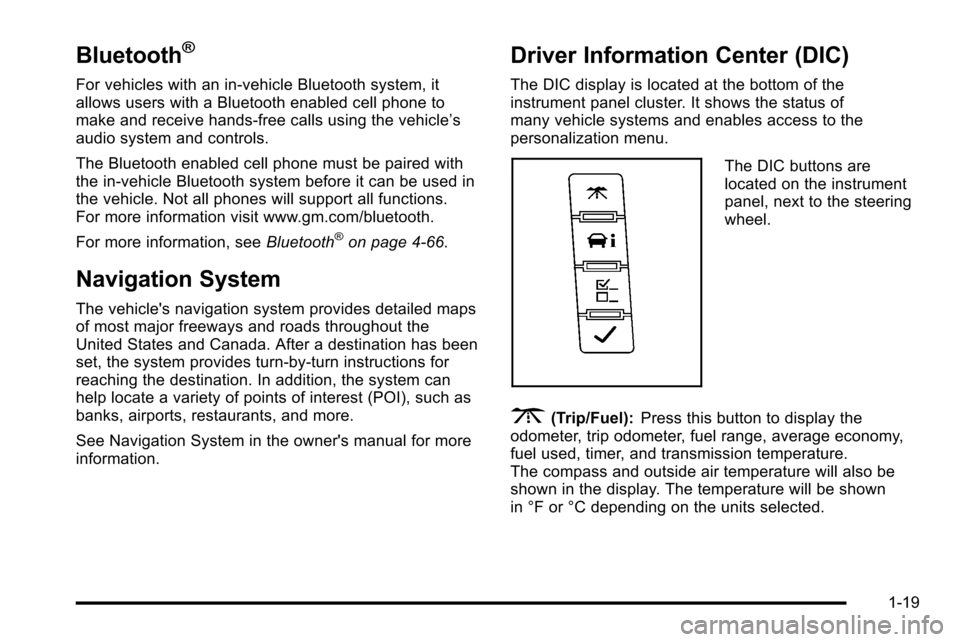
The DIC buttons are
located on the instrument
panel, next to the steering
wheel.
3(Trip/Fuel):Press this button to display the
odometer, trip odometer, fuel range, average economy,
fuel used, timer, and transmission temperature.
The compass and outside air temperature will also be
shown in the display. The temperature will be shown
in °F or °C depending on the units selected.
1-19
Page 26 of 580
T(Vehicle Information):Press this button to display
the oil life, units, tire pressure readings for vehicles with
the Tire Pressure Monitor System (TPMS), Remote
Keyless Entry (RKE) transmitter programming, compass
zone setting, and compass recalibration.
U(Customization): Press this button to customize the
feature settings on your vehicle. See DIC Vehicle
Customization
on page 4‑56for more information.
V(Set/Reset) : Press this button to set or reset certain
functions and to turn off or acknowledge messages on
the DIC.
For more information, see Driver Information Center
(DIC) on page 4‑39.
Vehicle Customization
Some vehicle features can be programmed by using the
DIC buttons next to the steering wheel. These features
include:
.Language
.Door Lock and Unlock Settings
.RKE Lock and Unlock Feedback
.Lighting
.Chime Volume
.Memory Features
.Remote Start
.Digital Speedometer Display
See DIC Vehicle Customization on page 4‑56.
1-20
Page 27 of 580
Cruise Control
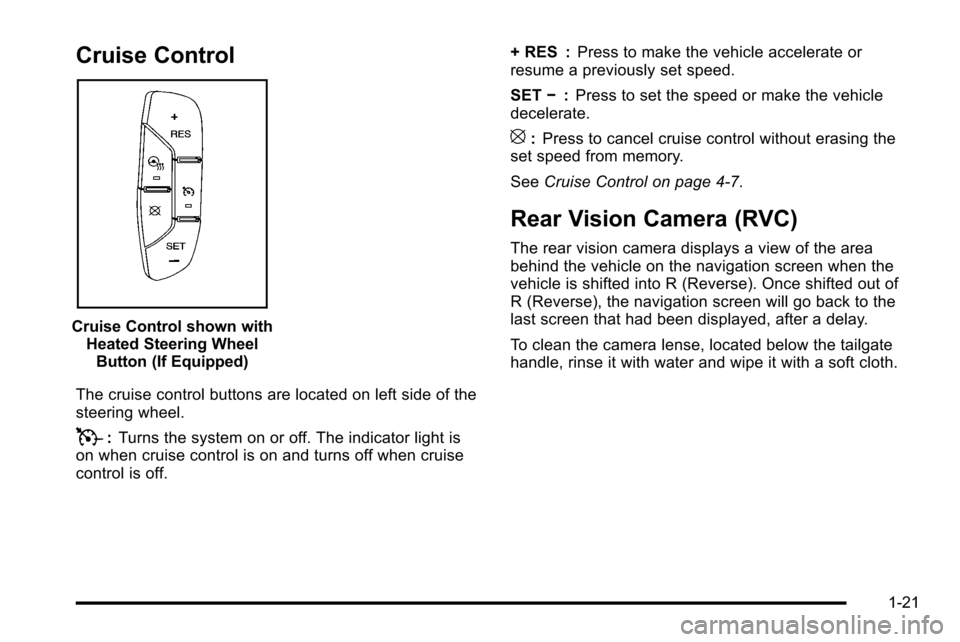
Cruise Control shown withHeated Steering WheelButton (If Equipped)
The cruise control buttons are located on left side of the
steering wheel.
T: Turns the system on or off. The indicator light is
on when cruise control is on and turns off when cruise
control is off. + RES :
Press to make the vehicle accelerate or
resume a previously set speed.
SET −:Press to set the speed or make the vehicle
decelerate.
[: Press to cancel cruise control without erasing the
set speed from memory.
See Cruise Control on page 4‑7.
Rear Vision Camera (RVC)
The rear vision camera displays a view of the area
behind the vehicle on the navigation screen when the
vehicle is shifted into R (Reverse). Once shifted out of
R (Reverse), the navigation screen will go back to the
last screen that had been displayed, after a delay.
To clean the camera lense, located below the tailgate
handle, rinse it with water and wipe it with a soft cloth.
1-21
Page 29 of 580
Performance and Maintenance
StabiliTrak®
The vehicle may have a traction control system that
limits wheel spin and the StabiliTrak system that assists
with directional control of the vehicle in difficult driving
conditions. Both systems turn on automatically every
time the vehicle is started.
.To turn off traction control, press and release5on
the instrument panel.
Filluminates and the
appropriate DIC message displays. See DIC
Warnings and Messages on page 4‑48.
.To turn off both traction control and Electronic
Stability Control, press and hold
5untilF
illuminates and the appropriate DIC message
displays. See DIC Warnings and Messageson
page 4‑48.
.Press and release the button again to turn on both
systems.
For more information, see StabiliTrak
®Systemon
page 6‑6.
Tire Pressure Monitor
This vehicle may have a Tire Pressure Monitor
System (TPMS).
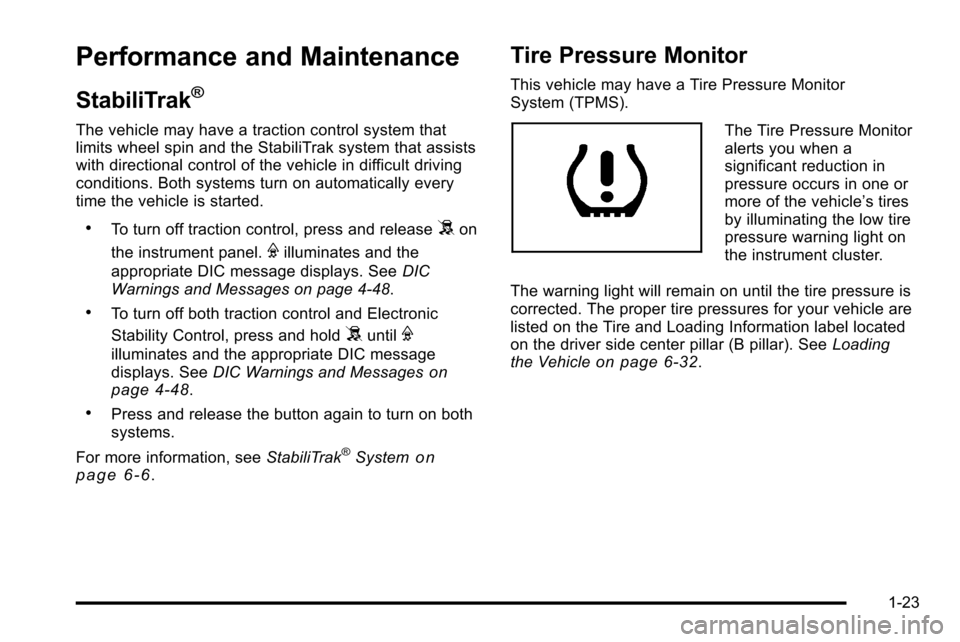
The Tire Pressure Monitor
alerts you when a
significant reduction in
pressure occurs in one or
more of the vehicle’s tires
by illuminating the low tire
pressure warning light on
the instrument cluster.
The warning light will remain on until the tire pressure is
corrected. The proper tire pressures for your vehicle are
listed on the Tire and Loading Information label located
on the driver side center pillar (B pillar). See Loading
the Vehicle
on page 6‑32.
1-23
Page 30 of 580
You may notice during cooler conditions that the low tire
pressure warning light will appear when the vehicle is
first started and then turn off as you drive. This may be
an early indicator that your tire pressures are getting
low and the tires need to be inflated to the proper
pressure.
Note:The Tire Pressure Monitor can alert you about
low tire pressure, but it does not replace normal monthly
tire maintenance. It is the driver ’s responsibility to
maintain correct tire pressures.
See Tire Pressure Monitor System
on page 7‑66and
Tire Pressure Monitor Operation on page 7‑67.
Engine Oil Life System
The engine oil life system calculates engine oil life
based on vehicle use and displays a DIC message
when it is necessary to change the engine oil and filter.
The oil life system should be reset to 100% only
following an oil change.
Resetting the Oil Life System
1. Display the OIL LIFE REMAINING on the DIC.
2. Press and hold the SET/RESET button on the DIC for more than five seconds. The oil life will change
to 100%.
See Engine Oil Life System on page 7‑18.
Fuel E85 (85% Ethanol)
This vehicle has a yellow fuel cap and can use either
unleaded gasoline or ethanol fuel containing up to 85%
ethanol (E85). See Gasoline Octane
on page 7‑7and
Fuel E85 (85% Ethanol) on page 7‑8.
Driving for Better Fuel Economy
Driving habits can affect fuel mileage. Here are some
driving tips to get the best fuel economy possible.
.Avoid fast starts and accelerate smoothly.
.Brake gradually and avoid abrupt stops.
.Avoid idling the engine for long periods of time.
.When road and weather conditions are
appropriate, use cruise control, if equipped.
.Always follow posted speed limits or drive more
slowly when conditions require.
.Keep vehicle tires properly inflated.
.Combine several trips into a single trip.
.Replace the vehicle's tires with the same TPC
Spec number molded into the tire's sidewall near
the size.
.Follow recommended scheduled maintenance.
1-24
Page 39 of 580
Release the control when the lower seatback reaches
the desired level of lumbar support.
Your vehicle may have a memory function which allows
seat settings to be saved and recalled. SeeMemory
Features
on page 2‑6for more information.
Keep in mind that as your seating position changes, as
it may during long trips, so should the position of your
lumbar support. Adjust the seat as needed.
Heated and Cooled Seats
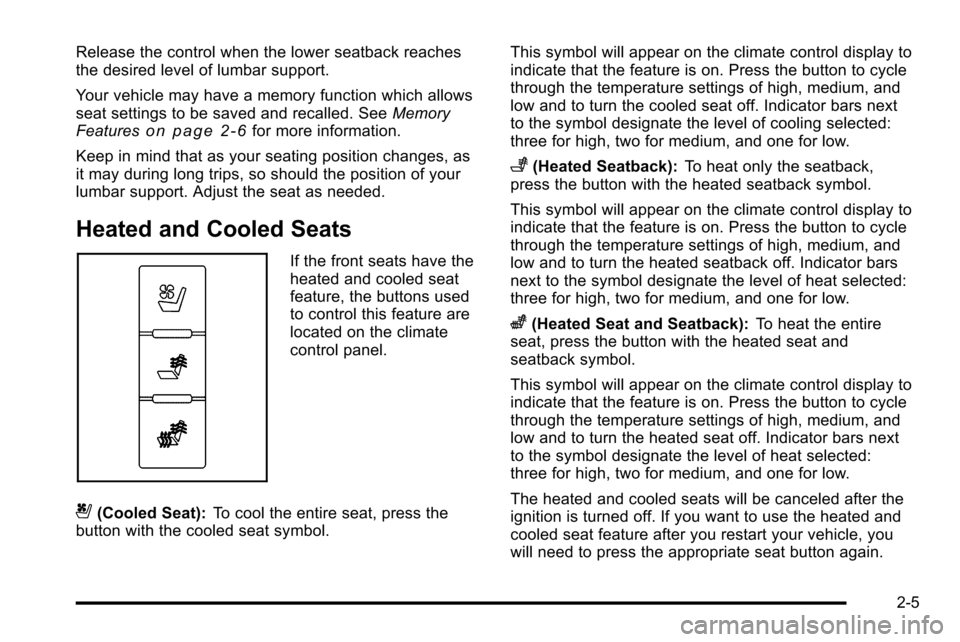
If the front seats have the
heated and cooled seat
feature, the buttons used
to control this feature are
located on the climate
control panel.
{(Cooled Seat): To cool the entire seat, press the
button with the cooled seat symbol. This symbol will appear on the climate control display to
indicate that the feature is on. Press the button to cycle
through the temperature settings of high, medium, and
low and to turn the cooled seat off. Indicator bars next
to the symbol designate the level of cooling selected:
three for high, two for medium, and one for low.
+(Heated Seatback):
To heat only the seatback,
press the button with the heated seatback symbol.
This symbol will appear on the climate control display to
indicate that the feature is on. Press the button to cycle
through the temperature settings of high, medium, and
low and to turn the heated seatback off. Indicator bars
next to the symbol designate the level of heat selected:
three for high, two for medium, and one for low.
z(Heated Seat and Seatback): To heat the entire
seat, press the button with the heated seat and
seatback symbol.
This symbol will appear on the climate control display to
indicate that the feature is on. Press the button to cycle
through the temperature settings of high, medium, and
low and to turn the heated seat off. Indicator bars next
to the symbol designate the level of heat selected:
three for high, two for medium, and one for low.
The heated and cooled seats will be canceled after the
ignition is turned off. If you want to use the heated and
cooled seat feature after you restart your vehicle, you
will need to press the appropriate seat button again.
2-5
Page 108 of 580

Programming Transmitters to the
Vehicle
Only RKE transmitters programmed to this vehicle will
work. If a transmitter is lost or stolen, a replacement
can be purchased and programmed through your
dealer/retailer. When the replacement transmitter is
programmed to this vehicle, all remaining transmitters
must also be reprogrammed. Any lost or stolen
transmitters will no longer work once the new
transmitter is programmed. Each vehicle can have
up to eight transmitters programmed to it. See“Relearn
Remote Key” underDIC Operation and Displays
on
page 4‑40for instructions on how to match RKE
transmitters to your vehicle.
Battery Replacement
Replace the battery if the REPLACE BATTERY
IN REMOTE KEY message displays in the DIC.
See “REPLACE BATTERY IN REMOTE KEY” under
DIC Warnings and Messages
on page 4‑48for
additional information.
Notice: When replacing the battery, do not touch
any of the circuitry on the transmitter. Static from
your body could damage the transmitter.
To replace the battery:
1. Separate the transmitter with a flat, thin object inserted into the notch, located above the
metal base.
2. Remove the old battery. Do not use a metal object.
3. Insert the new battery, positive side facing up. Replace with a CR2032 or equivalent battery.
4. Snap the transmitter back together.
3-6
Page 133 of 580

Ignition Positions
The ignition switch has
four different positions.
To shift out of P (Park), the ignition must be in ON/RUN
or ACC/ACCESSORY and the regular brake pedal must
be applied.
A (LOCK/OFF) : This position locks the ignition.
It may also lock the steering wheel and automatic
transmission. The key can be removed in LOCK/OFF.
On vehicles with an automatic transmission, the shift
lever must be in P (Park) to turn the ignition switch to
LOCK/OFF. The steering may bind with the wheels turned off center.
If this happens, move the steering wheel from right to
left while turning the key to ACC/ACCESSORY. If this
doesn't work, then the vehicle needs service.
Notice:
Using a tool to force the key to turn in the
ignition could cause damage to the switch or break
the key. Use the correct key, make sure it is all the
way in, and turn it only with your hand. If the key
cannot be turned by hand, see your dealer/retailer.
B (ACC/ACCESSORY) : This position lets things like
the radio and the windshield wipers operate while the
engine is off. Use this position if the vehicle must be
pushed or towed.
C (ON/RUN) : This position can be used to operate the
electrical accessories and to display some instrument
panel cluster warning and indicator lights. The switch
stays in this position when the engine is running. The
transmission is also unlocked in this position on
automatic transmission vehicles.
If you leave the key in the ACC/ACCESSORY or
ON/RUN position with the engine off, the battery could
be drained. You may not be able to start the vehicle if
the battery is allowed to drain for an extended period
of time.
3-31
Page 137 of 580

WARNING: (Continued)
You could be seriously injured. Plug the cord into
a properly grounded three-prong 110-volt AC
outlet. If the cord will not reach, use a heavy-duty
three-prong extension cord rated for at least
15 amps.
4. Before starting the engine, be sure to unplug and store the cord as it was before to keep it away from
moving engine parts. If you do not, it could be
damaged.
The length of time the heater should remain plugged in
depends on several factors. Ask a dealer/retailer in the
area where you will be parking the vehicle for the best
advice on this.
Active Fuel Management™
Vehicles with V8 engines may have Active Fuel
Management™. This system allows the engine to
operate on either all or half of its cylinders, depending
on the driving conditions.
When less power is required, such as cruising at a
constant vehicle speed, the system will operate in the
half cylinder mode, allowing the vehicle to achieve
better fuel economy. When greater power demands are required, such as accelerating from a stop, passing,
or merging onto a freeway, the system will maintain
full-cylinder operation.
If the vehicle has an Active Fuel Management™
indicator, see
DIC Operation and Displays
on
page 4‑40for more information on using this display .
Automatic Transmission Operation
The vehicle has a Hydra-Matic®6L80 automatic
transmission, and has an electronic shift position
indicator within the instrument panel cluster. The
electronic shift position indicator displays when the
shift lever is moved out of P (Park).
There are several different positions for the shift lever.
P (Park) : This position locks the rear wheels. It is the
best position to use when you start the engine because
the vehicle cannot move easily.
3-35