glove box CADILLAC SEVILLE 2003 5.G Owners Manual
[x] Cancel search | Manufacturer: CADILLAC, Model Year: 2003, Model line: SEVILLE, Model: CADILLAC SEVILLE 2003 5.GPages: 408, PDF Size: 2.72 MB
Page 62 of 408

OnStaržSystem.............................................2-42
HomeLinkžTransmitter...................................2-44
Programming the HomeLinkžTransmitter.........2-45
Storage Areas................................................2-48
Glove Box...................................................2-48
Cellular Telephone........................................2-48
Center Console Storage Area.........................2-49
Map Pocket.................................................2-49Assist Handles.............................................2-49
Garment Hooks............................................2-49
Umbrella Holder...........................................2-49
Floor Mats...................................................2-49
Convenience Net..........................................2-49
Sunroof.........................................................2-50
Vehicle Personalization...................................2-51
Memory Seat, Mirrors and Steering Wheel.......2-51
Section 2 Features and Controls
2-2
Page 64 of 408

There is a master key that works all of the lock cylinders
(driver's door, trunk, ignition and glove box).
There is also a VALET key which only operates the
driver's door and the ignition.Your vehicle has the PASS-Key
žIII vehicle theft
system. Both the master and VALET key have a
transponder in the key head that matches a decoder in
the vehicle's steering column. If a replacement key
or any additional key is needed, you must purchase this
key from your dealer. The key will have PK3 stamped
on it. Keep the bar code tag that came with the original
keys. Give this tag to your dealer if you need a new
key made.
Any new PASS-Key
žIII key must be programmed before
it will start your vehicle. SeePASS-KeyžIII on page 2-21for more information on programming your new key.
Notice:Your vehicle has a number of features that
can help prevent theft. You can have a lot of trouble
getting into your vehicle if you ever lock your keys
inside. You may even have to damage your vehicle to
get in. So be sure you have spare keys.
In an emergency, contact Cadillac Roadside Assistance.
See
Roadside Service on page 7-6.
If your vehicle is equipped with the OnStar
žsystem with
an active subscription and you lock your keys inside
the vehicle, OnStar
žmay be able to send a command to
unlock your vehicle. SeeOnStaržSystem on page 2-42for more information. Master Key
Valet Key
2-4
Page 80 of 408

Testing the Alarm
1. From inside the vehicle, roll down the window, then
get out of the vehicle, keeping the door open.
2. From outside of the vehicle, with the door open,
lock the vehicle using the power door lock or the
remote keyless entry transmitter and close the
door. Wait 30 seconds until the SECURITY lamp
goes off.
3. Reach in and unlock the door using the manual
lock and open the door. The horn will sound and
the hazard lights will ¯ash.
You can turn off the alarm by unlocking the driver's door
with your key, using the unlock button on the remote
keyless entry transmitter or by starting the car with
a valid key.
If the alarm does not sound when it should, check to
see if the horn works. The horn fuse may be blown. To
replace the fuse, see
Fuses and Circuit Breakers on
page 5-93. If the fuse does not need to be replaced, you
may need to have your vehicle serviced.
To reduce the possibility of theft, always arm the
theft-deterrent system when leaving your vehicle.
Valet Lockout Switch
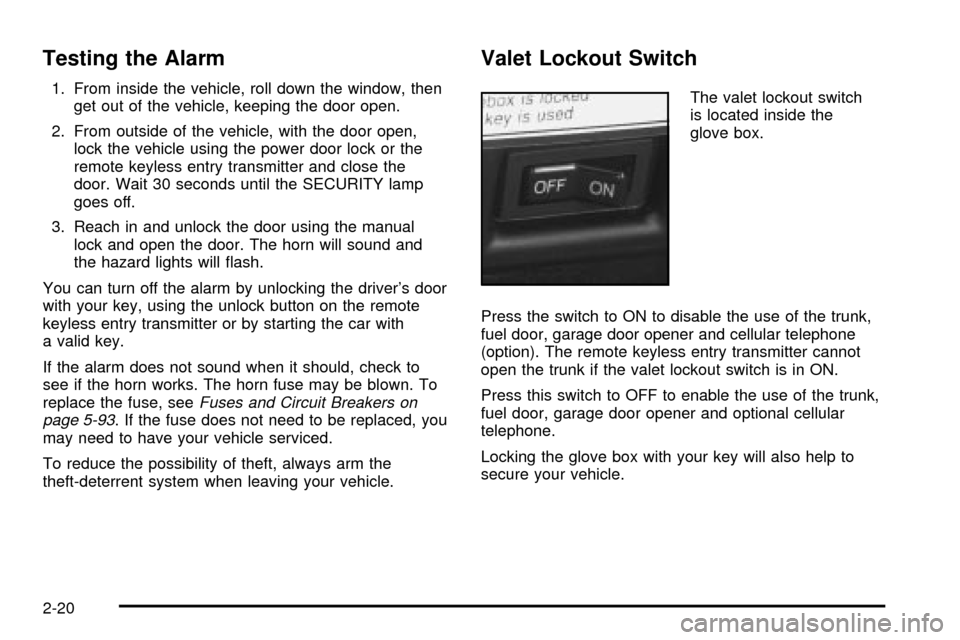
The valet lockout switch
is located inside the
glove box.
Press the switch to ON to disable the use of the trunk,
fuel door, garage door opener and cellular telephone
(option). The remote keyless entry transmitter cannot
open the trunk if the valet lockout switch is in ON.
Press this switch to OFF to enable the use of the trunk,
fuel door, garage door opener and optional cellular
telephone.
Locking the glove box with your key will also help to
secure your vehicle.
2-20
Page 102 of 408

OnStaržSystem
OnStaržuses global positioning system (GPS) satellite
technology, wireless communications, and call centers
to provide you with a wide range of safety, security,
information and convenience services.
A complete OnStar
žuser's guide and the terms and
conditions of the OnStaržSubscription Service
Agreement are included in your vehicle's glove box
literature. For more information, visit www.onstar.com,
contact OnStar
žat 1-888-4-ONSTAR (1-888-466-7827),
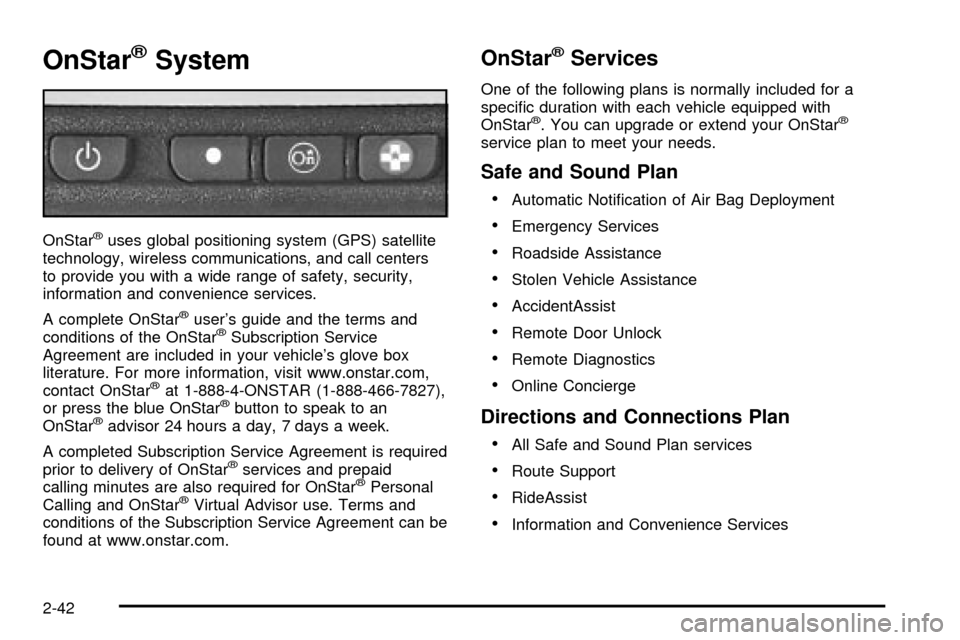
or press the blue OnStaržbutton to speak to an
OnStaržadvisor 24 hours a day, 7 days a week.
A completed Subscription Service Agreement is required
prior to delivery of OnStar
žservices and prepaid
calling minutes are also required for OnStaržPersonal
Calling and OnStaržVirtual Advisor use. Terms and
conditions of the Subscription Service Agreement can be
found at www.onstar.com.
OnStaržServices
One of the following plans is normally included for a
speci®c duration with each vehicle equipped with
OnStar
ž. You can upgrade or extend your OnStarž
service plan to meet your needs.
Safe and Sound Plan
·
Automatic Noti®cation of Air Bag Deployment
·Emergency Services
·Roadside Assistance
·Stolen Vehicle Assistance
·AccidentAssist
·Remote Door Unlock
·Remote Diagnostics
·Online Concierge
Directions and Connections Plan
·
All Safe and Sound Plan services
·Route Support
·RideAssist
·Information and Convenience Services
2-42
Page 103 of 408

Luxury and Leisure Plan
·
All Directions and Connections Plan services
·Personal Concierge
OnStaržPersonal Calling
With OnStaržPersonal Calling, you have a safer way to
stay connected while driving. It's a hands-free wireless
phone that's integrated into your vehicle. You can place
calls nationwide using voice-activated dialing with no
contracts and no additional roaming charges. To ®nd out
more about OnStar
žPersonal Calling, refer to the
OnStaržuser's guide in your vehicle's glove box, or call
OnStaržat 1-888-4-ONSTAR (1-888-466-7827).
OnStaržVirtual Advisor
With OnStaržVirtual Advisor you can listen to the news,
entertainment and informative topics, such as traffic
and weather reports. You are able to listen and reply to
your e-mail through your vehicle's speakers.
OnStaržSteering Wheel Controls
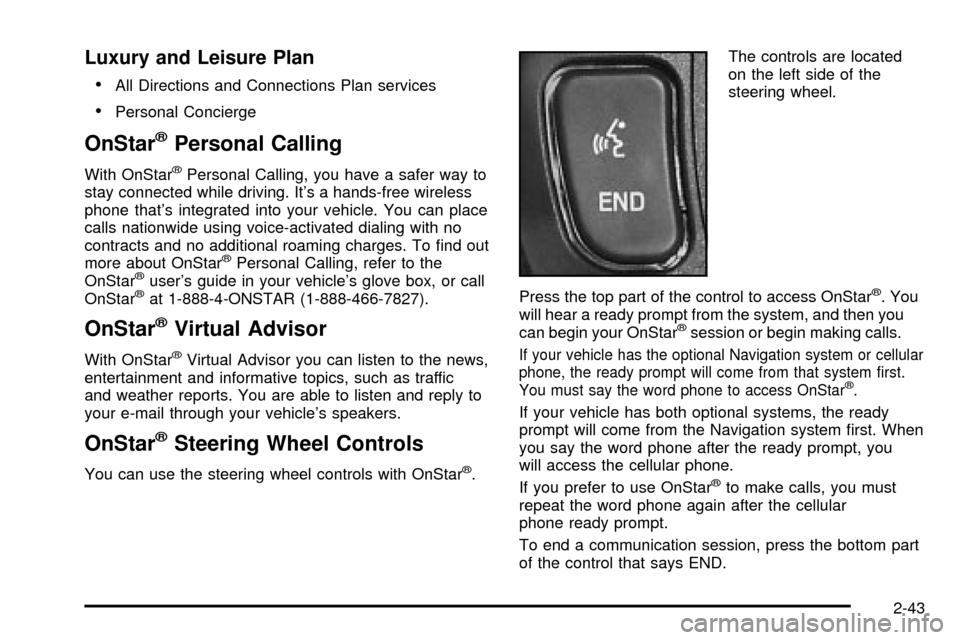
You can use the steering wheel controls with OnStarž.The controls are located
on the left side of the
steering wheel.
Press the top part of the control to access OnStar
ž. You
will hear a ready prompt from the system, and then you
can begin your OnStar
žsession or begin making calls.
If your vehicle has the optional Navigation system or cellular
phone, the ready prompt will come from that system ®rst.
You must say the word phone to access OnStar
ž.
If your vehicle has both optional systems, the ready
prompt will come from the Navigation system ®rst. When
you say the word phone after the ready prompt, you
will access the cellular phone.
If you prefer to use OnStar
žto make calls, you must
repeat the word phone again after the cellular
phone ready prompt.
To end a communication session, press the bottom part
of the control that says END.
2-43
Page 108 of 408

Reprogramming a Single HomeLinkž
Button
To program a device to HomeLinkžusing a HomeLinkž
button previously trained, follow these steps:
1. Press and hold the desired HomeLink
žbutton. Do
not release the button.
2. The indicator light will begin to ¯ash after
20 seconds. While still holding the HomeLink
ž
button, proceed with Step 2 under ªProgramming
HomeLinkž.º
Resetting Defaults
To reset HomeLinkžto default settings do the following:
1. Hold down the two outside buttons for about
20 seconds until the indicator light begins to ¯ash.
2. Continue to hold both buttons until the HomeLink
ž
indicator light turns off.
3. Release both buttons.
For questions or comments, contact HomeLink
žat
1-800-355-3515, or on the internet at
www.homelink.com.
Storage Areas
Glove Box
The glove box is located in front of the passenger's seat
on the instrument panel. To lock the glove box door,
insert the master key into the lock cylinder and
turn it clockwise. Turn the key counterclockwise to
unlock the door.
Cellular Telephone
Your vehicle may have been prewired for dealer
installation of a portable cellular telephone system. The
system has steering wheel telephone controls and
information output through the Driver Information
Center (DIC). Voice activation with remote record and
hands-free operation are standard features. For
more information, contact your dealer. A user's guide is
provided with the telephone.
2-48
Page 117 of 408

The main components of the instrument panel are the following:
A. Air Outlets. See
Outlet Adjustment on page 3-33.
B. Driver Information Center (DIC) Buttons. See
DIC Controls and Displays on page 3-53.
C. Turn Signal/Multifunction Lever. See
Turn
Signal/Multifunction Lever on page 3-9.
D. Climate Controls and OnStaržSteering Wheel
Controls (or Cellular Telephone Controls, If
Equipped).
See
Steering Wheel Climate Controls on page 3-35andOnStaržSystem on page 2-42.
E. Instrument Panel Cluster. See
Instrument Panel
Cluster on page 3-38.
F. Windshield Wiper/Washer Lever. See ªWindshield
Wipersº under
Turn Signal/Multifunction Lever
on page 3-9.
G. Audio Steering Wheel Controls. See
Audio Steering
Wheel Controls on page 3-103.
H. Ignition Switch. See
Ignition Positions on page 2-24.
I. Air Outlet Thumbwheel. See
Outlet Adjustment
on page 3-33.
J. Hazard Warning Flasher Button. See
Hazard
Warning Flashers on page 3-6.K. Audio System. See
Audio System(s) on page 3-78.
L. Exterior Lamp Controls. See
Exterior Lamps on
page 3-16.
M. Hood Release. See
Hood Release on page 5-11.
N. Fuel Door Release. See
Filling Your Tank on
page 5-6.
O. Trunk Release Button. See
Trunk on page 2-12.
P. Cruise Control. See ªCruise Controlº under
Turn Signal/Multifunction Lever on page 3-9.
Q. Horn. See
Horn on page 3-7.
R. Heated Seat Controls. See
Heated Seats on
page 1-3.
S. Traction Control System (TCS) Button. See
Traction
Control System (TCS) on page 4-9.
T. Console Shift Lever. See
Automatic Transaxle
Operation on page 2-28.
U. Optional Ashtray. See
Ashtrays and Cigarette
Lighter on page 3-27.
V. Climate Controls. See
Dual Climate Control System
on page 3-28.
W. Glove Box. See
Glove Box on page 2-48.
3-5
Page 135 of 408

Battery Load Management
The battery load management feature is designed to
monitor the vehicle's electrical load and determine when
the battery is in a heavy discharge condition. During
times of high electrical loading, the engine may idle at a
higher revolutions per minute (rpm) setting than
normal to make sure the battery charges. High electrical
loads may occur when several of the following are
on: headlamps, high beams, fog lamps, rear window
defogger, the climate control fan at high speeds, heated
seats and engine cooling fans.
If the battery continues to discharge, even with the
engine idling at a higher rpm setting, some electrical
loads will automatically be reduced. When this occurs,
the rear window defogger may take slightly longer
to clear the glass, the heated seats may not get as warm
as they usually do and the fan may cut back to a
lower speed. For more battery saving information, see
ªBattery Saver Active Messageº under
DIC Warnings
and Messages on page 3-56.
Inadvertent Power Battery Saver
This feature is designed to protect your vehicle's battery
against drainage from the interior lamps, trunk lamp,
glove box lamp, cigarette lighters or the garage
door opener. When the ignition is turned off, the power
to these features will automatically turn off after
10 minutes (three minutes if a new car has 15 miles
(24 km) or less). Power will be restored for an additional
10 minutes if any door is opened, the trunk is opened
or the courtesy lamp switch is turned on.
3-23
Page 372 of 408

At Least Twice a Year
Restraint System Check
Make sure the safety belt reminder light and all your
belts, buckles, latch plates, retractors and anchorages
are working properly. Look for any other loose or
damaged safety belt system parts. If you see anything
that might keep a safety belt system from doing its
job, have it repaired. Have any torn or frayed safety belts
replaced.
Also look for any opened or broken air bag coverings,
and have them repaired or replaced. (The air bag
system does not need regular maintenance.)
Wiper Blade Check
Inspect wiper blades for wear or cracking. Replace
blade inserts that appear worn or damaged or that
streak or miss areas of the windshield. Also see
ªWindshield Wiper and Wiper Bladesº under
Cleaning
the Outside of Your Vehicle on page 5-86.
Weatherstrip Lubrication
Silicone grease on weatherstrips will make them last
longer, seal better, and not stick or squeak. Apply
silicone grease with a clean cloth. During very cold,
damp weather more frequent application may be
required. See
Part D: Recommended Fluids and
Lubricants on page 6-15.
Automatic Transaxle Check
Check the transaxle ¯uid level; add if needed. SeeAutomatic Transaxle Fluid on page 5-21. A ¯uid loss
may indicate a problem. Check the system and repair if
needed.
At Least Once a Year
Key Lock Cylinders Service
Lubricate the key lock cylinders with the lubricant
speci®ed in Part D.
Body Lubrication Service
Lubricate all hinges and latches, including those for the
hood, rear compartment, interior glove box and
console doors. Part D tells you what to use. More
frequent lubrication may be required when exposed to a
corrosive environment.
6-10
Page 398 of 408

F
Filter.............................................................5-19
Engine Air Cleaner......................................5-19
Finding a PTY Station (RDS and XMŸ).............3-92
Finding a PTY Station (XMŸ Only)...................3-81
Finding a Station....................................3-80, 3-89
Finish Care....................................................5-87
Finish Damage...............................................5-89
Flat Tire, Changing.........................................5-74
Flat Tire........................................................5-73
Floor Mats.....................................................2-49
Fluid.............................................................5-21
Automatic Transaxle.....................................5-21
Power Steering...........................................5-38
Windshield Washer......................................5-39
FM Stereo....................................................3-103
Fog Lamp Light..............................................3-51
Fog Lamps....................................................3-18
Following Distance..........................................4-39
Footnotes........................................................ 6-5
Front Ashtray.................................................3-27
Fuel............................................................... 5-4
Additives...................................................... 5-6
California Fuel.............................................. 5-5
Filling a Portable Fuel Container....................5-10
Filling Your Tank........................................... 5-6
Fuels in Foreign Countries.............................. 5-6
Gage.........................................................3-52
Gasoline Octane........................................... 5-4Fuel (cont.)
Gasoline Speci®cations.................................. 5-5
System Inspection.......................................6-13
Fuses...........................................................5-93
Fuses and Circuit Breakers...........................5-93
Windshield Wiper.........................................5-92
G
Gage............................................................3-46
Engine Coolant Temperature.........................3-46
Fuel..........................................................3-52
Speedometer..............................................3-39
Tachometer.................................................3-41
Garage Door Opener.......................................2-44
Garment Hooks..............................................2-49
Gasoline......................................................... 5-4
Octane........................................................ 5-4
Speci®cations............................................... 5-5
Gate Operator and Canadian Programming........2-47
Glove Box.....................................................2-48
GM Mobility Program for Persons with
Disabilities.................................................... 7-5
H
Hazard Warning Flashers................................... 3-6
Head Restraints............................................... 1-5
Headlamp High/Low-Beam Changer...................3-10
6