center console CADILLAC SEVILLE 2004 5.G Owners Manual
[x] Cancel search | Manufacturer: CADILLAC, Model Year: 2004, Model line: SEVILLE, Model: CADILLAC SEVILLE 2004 5.GPages: 410, PDF Size: 2.64 MB
Page 9 of 410
Heated Seats
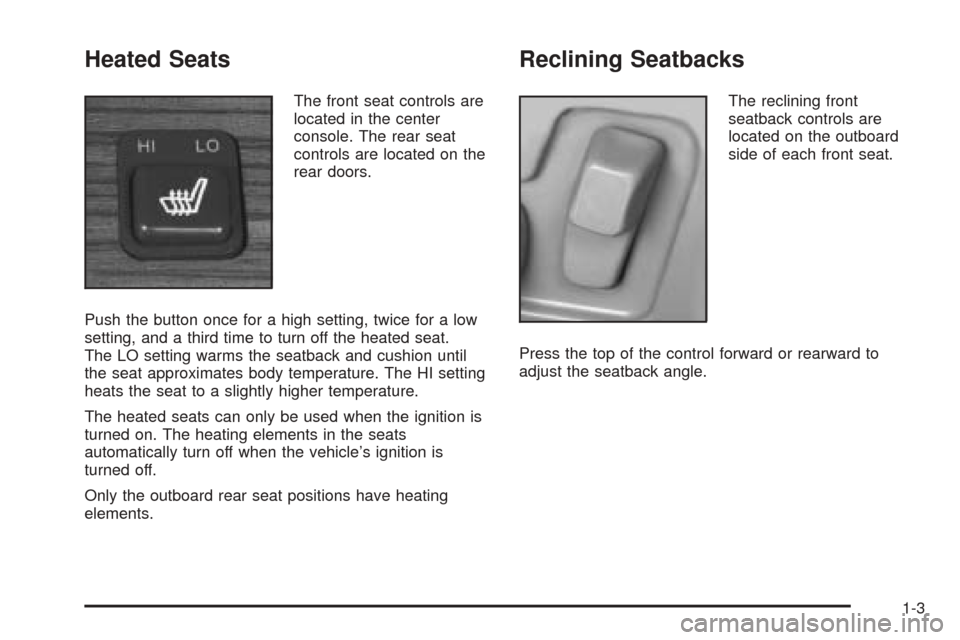
The front seat controls are
located in the center
console. The rear seat
controls are located on the
rear doors.
Push the button once for a high setting, twice for a low
setting, and a third time to turn off the heated seat.
The LO setting warms the seatback and cushion until
the seat approximates body temperature. The HI setting
heats the seat to a slightly higher temperature.
The heated seats can only be used when the ignition is
turned on. The heating elements in the seats
automatically turn off when the vehicle’s ignition is
turned off.
Only the outboard rear seat positions have heating
elements.
Reclining Seatbacks
The reclining front
seatback controls are
located on the outboard
side of each front seat.
Press the top of the control forward or rearward to
adjust the seatback angle.
1-3
Page 60 of 410
Storage Areas................................................2-49
Glove Box...................................................2-49
Cellular Telephone........................................2-49
Center Console Storage Area.........................2-49
Map Pocket.................................................2-49
Assist Handles.............................................2-49
Garment Hooks............................................2-49Umbrella Holder...........................................2-50
Floor Mats...................................................2-50
Convenience Net..........................................2-50
Sunroof.........................................................2-50
Vehicle Personalization...................................2-52
Memory Seat, Mirrors and Steering Wheel.......2-52
Section 2 Features and Controls
2-2
Page 107 of 410
Storage Areas
Glove Box
The glove box is located in front of the passenger’s seat
on the instrument panel. To lock the glove box door,
insert the master key into the lock cylinder and
turn it clockwise. Turn the key counterclockwise to
unlock the door.
Cellular Telephone
Your vehicle may have been prewired for dealer
installation of a portable cellular telephone system.
The system has steering wheel telephone controls and
information output through the Driver Information
Center (DIC). Voice activation with remote record and
hands-free operation are standard features. For
more information, contact your dealer. A user’s guide is
provided with the telephone.
Center Console Storage Area
The center console comes with a storage tray, a
storage compartment for CDs or tapes, a dual cupholder
that unfolds, a coinholder, an optional phone and an
armrest. The cupholder can be opened by pressing on
the surface panel located in front of the armrest and
unfolding it. Close the lid to secure it.
Map Pocket
The map/storage pockets are located on each front door
as well as on the passenger’s and driver’s seatbacks.
Assist Handles
A handle above each door can be used when getting
out of your vehicle.
Garment Hooks
For your convenience, a garment hook is attached to
each rear assist handle.
2-49
Page 117 of 410
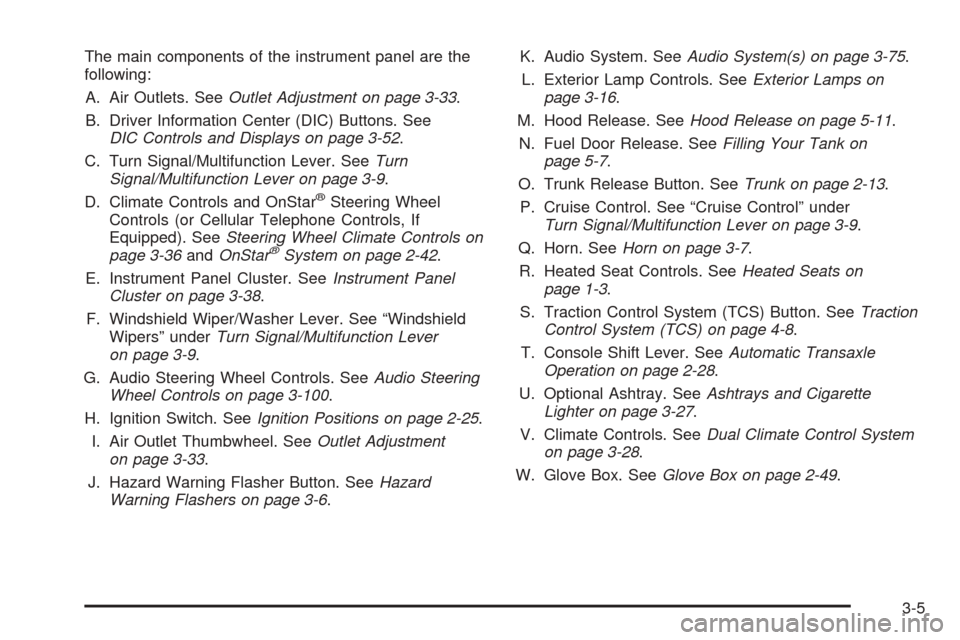
The main components of the instrument panel are the
following:
A. Air Outlets. SeeOutlet Adjustment on page 3-33.
B. Driver Information Center (DIC) Buttons. See
DIC Controls and Displays on page 3-52.
C. Turn Signal/Multifunction Lever. SeeTurn
Signal/Multifunction Lever on page 3-9.
D. Climate Controls and OnStar
®Steering Wheel
Controls (or Cellular Telephone Controls, If
Equipped). SeeSteering Wheel Climate Controls on
page 3-36andOnStar
®System on page 2-42.
E. Instrument Panel Cluster. SeeInstrument Panel
Cluster on page 3-38.
F. Windshield Wiper/Washer Lever. See “Windshield
Wipers” underTurn Signal/Multifunction Lever
on page 3-9.
G. Audio Steering Wheel Controls. SeeAudio Steering
Wheel Controls on page 3-100.
H. Ignition Switch. SeeIgnition Positions on page 2-25.
I. Air Outlet Thumbwheel. SeeOutlet Adjustment
on page 3-33.
J. Hazard Warning Flasher Button. SeeHazard
Warning Flashers on page 3-6.K. Audio System. SeeAudio System(s) on page 3-75.
L. Exterior Lamp Controls. SeeExterior Lamps on
page 3-16.
M. Hood Release. SeeHood Release on page 5-11.
N. Fuel Door Release. SeeFilling Your Tank on
page 5-7.
O. Trunk Release Button. SeeTrunk on page 2-13.
P. Cruise Control. See “Cruise Control” under
Turn Signal/Multifunction Lever on page 3-9.
Q. Horn. SeeHorn on page 3-7.
R. Heated Seat Controls. SeeHeated Seats on
page 1-3.
S. Traction Control System (TCS) Button. SeeTraction
Control System (TCS) on page 4-8.
T. Console Shift Lever. SeeAutomatic Transaxle
Operation on page 2-28.
U. Optional Ashtray. SeeAshtrays and Cigarette
Lighter on page 3-27.
V. Climate Controls. SeeDual Climate Control System
on page 3-28.
W. Glove Box. SeeGlove Box on page 2-49.
3-5
Page 138 of 410
If the URPA system is not functioning properly, the
display will flash red, indicating that there is a problem.
The light will also flash red while driving if a trailer is
attached to your vehicle, or a bicycle or object is on the
back of, or hanging out of your trunk. The light will
continue to flash until the trailer or the object is
removed and your vehicle is driven forward at least
15 mph (25 km/h).
It may also flash red if the ultrasonic sensors are not
kept clean. So be sure to keep your rear bumper free of
mud, dirt, snow, ice and slush or materials such as
paint or the system may not work properly. If after
cleaning the rear bumper and driving forward at least
15 mph (25 km/h), the display continues to flash red, see
your dealer. For cleaning instructions, seeCleaning
the Outside of Your Vehicle on page 5-90.
It may also flash red if your vehicle is moving in
REVERSE (R) at a speed greater than 3 mph (5 km/h).
Other conditions that may affect system performance
include things like the vibrations from a jackhammer or
the compression of air brakes on a very large truck.
As always, drivers should use care when backing up a
vehicle. Always look behind you, being sure to check
for other vehicles, obstructions and blind spots.Accessory Power Outlets
Your vehicle is equipped with accessory power outlets.
The outlets can be used to plug in electrical equipment
such as a cellular telephone, CB radio, etc.
The accessory power outlets are located at the rear of
the center console and on the lower inboard carpeted
panel on the passenger’s side of the vehicle.
Your vehicle may have a small cap that must be
removed to access the accessory power outlet. If it
does, when not using the outlet be sure to cover it with
the protective cap.
The accessory power outlet will only operate when the
ignition is in ACC or ON and for 10 minutes after
turning the ignition OFF. If you would like the accessory
power outlet to operate regardless of ignition position,
and for extended periods of time, see your dealer
for more information.
Notice:Leaving electrical equipment on for
extended periods will drain the battery. Always turn
off electrical equipment when not in use and do
not plug in equipment that exceeds the maximum
amperage rating.
Certain accessory power plugs may not be compatible
to the accessory power outlet and could result in
blown vehicle or adapter fuses. If you experience a
problem see your dealer for additional information on the
accessory power plugs.
3-26
Page 139 of 410
Notice:Adding any electrical equipment to your
vehicle may damage it or keep other components
from working as they should. The repairs would not
be covered by your warranty. Check with your
dealer before adding electrical equipment.
Follow the proper installation instructions that are
included with any electrical equipment you install.
Notice:Improper use of the power outlet can cause
damage not covered by your warranty. Do not
hang any type of accessory or accessory bracket
from the plug because the power outlets are
designed for accessory power plugs only.
Ashtrays and Cigarette Lighter
The ashtrays and cigarette lighters may be ordered
through your dealer.
Notice:If you put papers or other flammable items
in the ashtray, hot cigarettes or other smoking
materials could ignite them and possibly damage
your vehicle. Never put flammable items in the
ashtray.
Front Ashtray
The front ashtray is located below the climate control
system on the instrument panel.
Press on the lower edge of the cover to access the
ashtray. To clean the ashtray, lift it out by pulling on the
snuffer.
Rear Ashtray
The ashtrays are located on the door armrests. To use
an ashtray, lift the lid.
Cigarette Lighter
Notice:Holding a cigarette lighter in while it is
heating will not allow the lighter to back away from
the heating element when it is hot. Damage from
overheating may occur to the lighter or heating
element, or a fuse could be blown. Do not hold a
cigarette lighter in while it is heating.
The front cigarette lighter is located on the center
console in the passenger’s side footwell. Open the flip
out door to access the cigarette lighter. Your vehicle
may also have a lighter on the back of the center
console near the rear seat air outlet.
Press the lighter all the way in and release it. It will pop
back out by itself once the element has heated for use.
Cigarette lighters can be used to provide electrical
power to accessories. SeeAccessory Power Outlets on
page 3-26for more information.
3-27
Page 146 of 410
Rear Climate Control System
Your vehicle has a rear climate-control system that
allows the rear-seat passengers to adjust the direction
of the airflow and the fan speed for the rear seating
area. This system also works with the main
climate-control system in your vehicle.
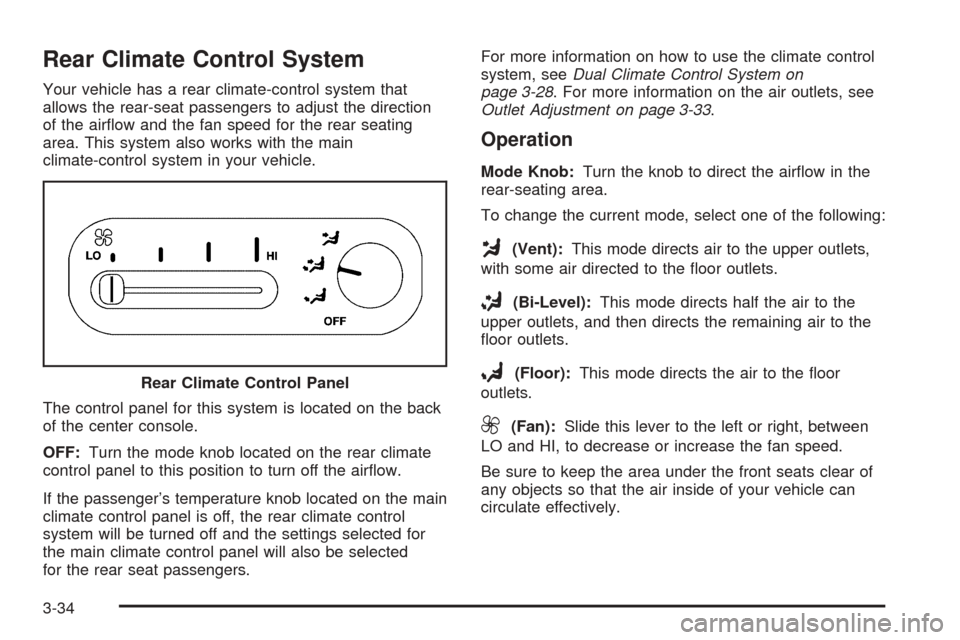
The control panel for this system is located on the back
of the center console.
OFF:Turn the mode knob located on the rear climate
control panel to this position to turn off the airflow.
If the passenger’s temperature knob located on the main
climate control panel is off, the rear climate control
system will be turned off and the settings selected for
the main climate control panel will also be selected
for the rear seat passengers.For more information on how to use the climate control
system, seeDual Climate Control System on
page 3-28. For more information on the air outlets, see
Outlet Adjustment on page 3-33.
Operation
Mode Knob:Turn the knob to direct the airflow in the
rear-seating area.
To change the current mode, select one of the following:
G(Vent):This mode directs air to the upper outlets,
with some air directed to the floor outlets.
+(Bi-Level):This mode directs half the air to the
upper outlets, and then directs the remaining air to the
floor outlets.
8(Floor):This mode directs the air to the floor
outlets.
9(Fan):Slide this lever to the left or right, between
LO and HI, to decrease or increase the fan speed.
Be sure to keep the area under the front seats clear of
any objects so that the air inside of your vehicle can
circulate effectively. Rear Climate Control Panel
3-34
Page 173 of 410
When the STABILITY SYS ENGAGED message is on,
you should continue to steer in the direction you
want to go. The system is designed to help you in bad
weather or other difficult driving situations by making
the most of whatever road conditions will permit. If the
STABILITY SYS ENGAGED message comes on,
you will know that something has caused your vehicle to
start to spin, so you should consider slowing down. A
single chime will also sound when this message is
displayed.
STARTING DISABLED REMOVE KEY – 33:This
message will appear when the PASS-Key
®III system
detects that an improper ignition key is being used to try
to start the vehicle. Check the ignition key for damage.
If it is damaged, it may need to be replaced. If it is
not damaged, remove the key and try to start the vehicle
again. If it still does not start, try another ignition key
or see your dealer for service.
THEFT ATTEMPTED – 40:This message is displayed
if the theft system has detected a break-in attempt
while you were away from your vehicle.TOP SPEED FUEL CUT-OFF – 111:This message will
appear when the Powertrain Control Module (PCM)
detects that the maximum speed for your vehicle has
been reached. The speed of your vehicle will surge
as the fuel supply is cut off. Your vehicle’s top speed is
based on the top speed rating of the tires. This
ensures that your vehicle stays in a safe operating
range for the tires.
TRACTION ENGAGED – 91:When your traction
control system is limiting wheel spin, the TRACTION
ENGAGED message will be displayed. Slippery
road conditions may exist if this message is displayed,
so adjust your driving accordingly. This message
will stay on for a few seconds after the traction control
system stops limited wheel spin.
TRACTION OFF – 89:This message will be displayed
after the traction control system has been turned off
using the TRAC ON/OFF button on the center console.
TRACTION READY – 90:This message informs
the driver that the traction control system is available.
Pressing the TRAC ON/OFF button on the center
console once turns the traction control system off;
pressing the button again turns the system back on. This
message will automatically disappear from the display
after five seconds.
3-61
Page 225 of 410
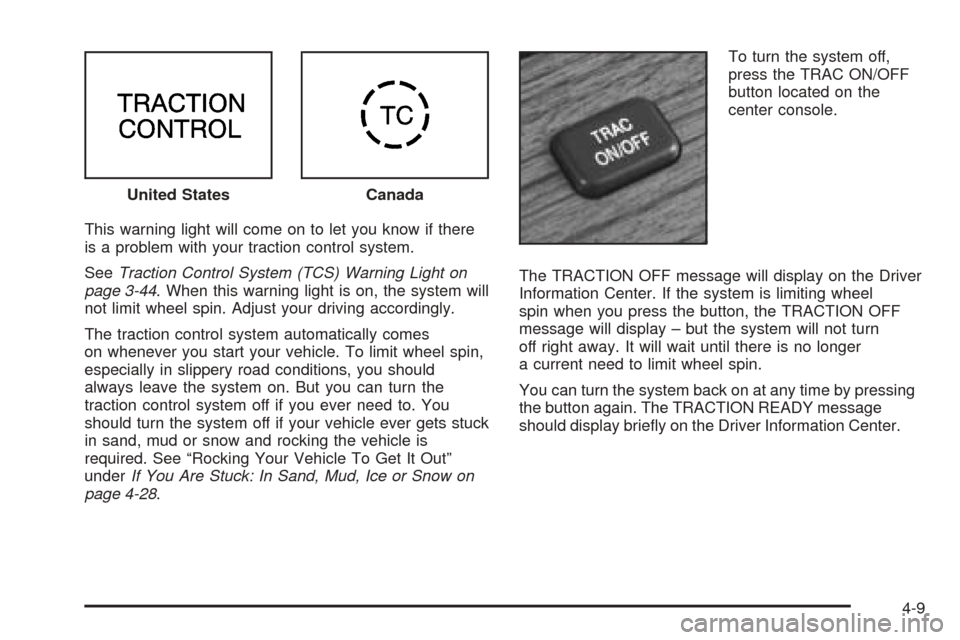
This warning light will come on to let you know if there
is a problem with your traction control system.
SeeTraction Control System (TCS) Warning Light on
page 3-44. When this warning light is on, the system will
not limit wheel spin. Adjust your driving accordingly.
The traction control system automatically comes
on whenever you start your vehicle. To limit wheel spin,
especially in slippery road conditions, you should
always leave the system on. But you can turn the
traction control system off if you ever need to. You
should turn the system off if your vehicle ever gets stuck
in sand, mud or snow and rocking the vehicle is
required. See “Rocking Your Vehicle To Get It Out”
underIf You Are Stuck: In Sand, Mud, Ice or Snow on
page 4-28.To turn the system off,
press the TRAC ON/OFF
button located on the
center console.
The TRACTION OFF message will display on the Driver
Information Center. If the system is limiting wheel
spin when you press the button, the TRACTION OFF
message will display – but the system will not turn
off right away. It will wait until there is no longer
a current need to limit wheel spin.
You can turn the system back on at any time by pressing
the button again. The TRACTION READY message
should display briefly on the Driver Information Center. United States
Canada
4-9
Page 396 of 410
B
Backing Up....................................................4-42
Battery..........................................................5-41
Battery Load Management...............................3-23
Battery Replacement......................................... 2-8
Before Leaving on a Long Trip.........................4-21
Brake
Parking......................................................2-31
System Warning and Parking Brake
Indicator Light..........................................3-43
Brake Adjustment............................................5-40
Brake Fluid....................................................5-38
Brake Pedal Travel.........................................5-40
Brake Wear...................................................5-40
Brakes..........................................................5-38
Braking........................................................... 4-6
Braking in Emergencies..................................... 4-8
Break-In, New Vehicle.....................................2-24
Bulb Replacement...........................................5-53
Center High-Mounted Stoplamp (CHMSL)........5-58
Front Turn Signal Lamps..............................5-57
Halogen Bulbs............................................5-54
Headlamp Aiming........................................5-49
Headlamps.................................................5-54
High Intensity Discharge (HID) Lighting...........5-53
Replacement Bulbs......................................5-59
Taillamps and Turn Signal Lamps..................5-58
Buying New Tires...........................................5-73
C
Cadillac Owner Privileges™............................... 7-6
California Fuel.................................................. 5-5
Canada – Customer Assistance.......................... 7-4
Canadian Owners................................................ ii
Capacities and Specifications..........................5-104
Carbon Monoxide...................4-24, 4-37, 2-13, 2-35
Care of
Safety Belts................................................5-90
Your Cassette Tape Player..........................3-101
Your CD Player.........................................3-102
Your CDs .................................................3-102
Cassette Tape Messages.................................3-92
Cassette Tape Player Service............................. 6-9
CD Changer, Console-Mounted.........................3-95
CD Messages................................3-82, 3-94, 3-98
Cellular Phone Usage....................................3-101
Cellular Telephone, Storage Area......................2-49
Center Console Storage Area...........................2-49
Center High-Mounted Stoplamp (CHMSL)...........5-58
Chains, Tires..................................................5-77
Charging System Light....................................3-42
Check
Engine Light...............................................3-46
Checking Coolant............................................5-25
Checking Engine Oil........................................5-13
Checking Things Under the Hood......................5-10
Checking Your Restraint Systems......................1-50
2