garage door opener CADILLAC SEVILLE 2004 5.G Owners Manual
[x] Cancel search | Manufacturer: CADILLAC, Model Year: 2004, Model line: SEVILLE, Model: CADILLAC SEVILLE 2004 5.GPages: 410, PDF Size: 2.64 MB
Page 79 of 410
Testing the Alarm
1. From inside the vehicle, roll down the window, then
get out of the vehicle, keeping the door open.
2. From outside of the vehicle, with the door open, lock
the vehicle using the power door lock or the remote
keyless entry transmitter and close the door. Wait 30
seconds until the SECURITY lamp goes off.
3. Reach in and unlock the door using the manual
lock and open the door. The horn will sound and
the hazard lights will flash.
You can turn off the alarm by unlocking the driver’s door
with your key, using the unlock button on the remote
keyless entry transmitter or by starting the car with
a valid key.
If the alarm does not sound when it should, check to
see if the horn works. The horn fuse may be blown. To
replace the fuse, seeFuses and Circuit Breakers on
page 5-97. If the fuse does not need to be replaced, you
may need to have your vehicle serviced.
To reduce the possibility of theft, always arm the
theft-deterrent system when leaving your vehicle.
Valet Lockout Switch
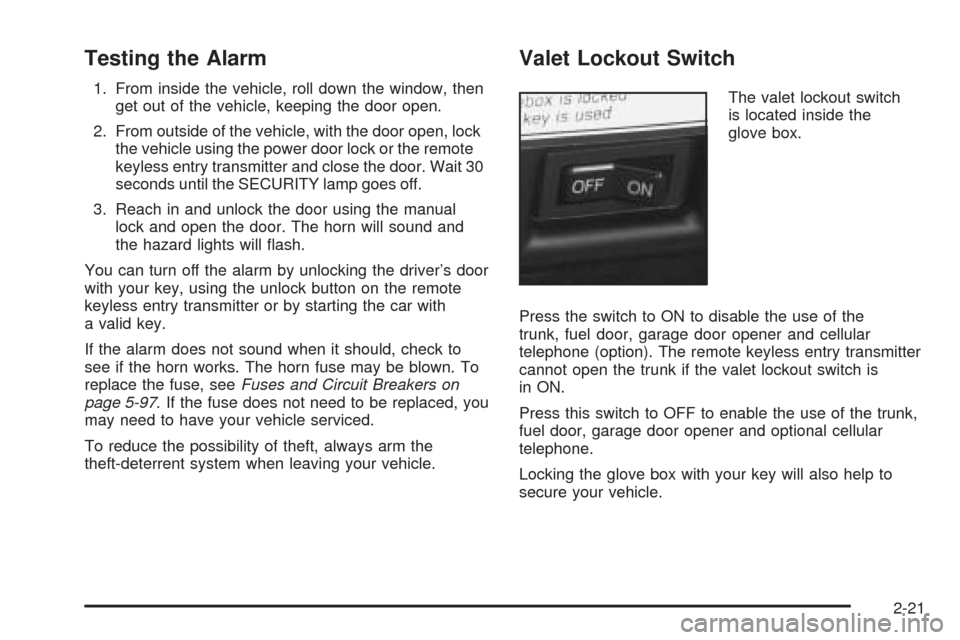
The valet lockout switch
is located inside the
glove box.
Press the switch to ON to disable the use of the
trunk, fuel door, garage door opener and cellular
telephone (option). The remote keyless entry transmitter
cannot open the trunk if the valet lockout switch is
in ON.
Press this switch to OFF to enable the use of the trunk,
fuel door, garage door opener and optional cellular
telephone.
Locking the glove box with your key will also help to
secure your vehicle.
2-21
Page 102 of 410
If your vehicle has the optional Navigation system or
cellular phone, the ready prompt will come from
that system first. You must say the word phone to
access OnStar
®.
If your vehicle has both optional systems, the ready
prompt will come from the Navigation system first. When
you say the word phone after the ready prompt, you
will access the cellular phone.
If you prefer to use OnStar
®to make calls, you must
repeat the word phone again after the cellular
phone ready prompt.
To end a communication session, press the bottom part
of the control that says END.
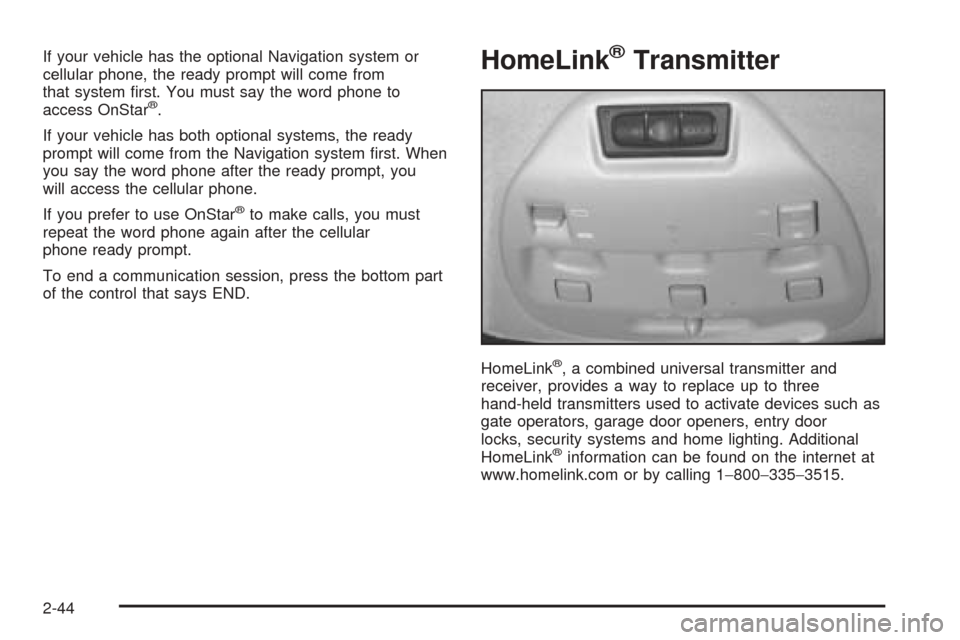
HomeLink®Transmitter
HomeLink®, a combined universal transmitter and
receiver, provides a way to replace up to three
hand-held transmitters used to activate devices such as
gate operators, garage door openers, entry door
locks, security systems and home lighting. Additional
HomeLink
®information can be found on the internet at
www.homelink.com or by calling 1−800−335−3515.
2-44
Page 103 of 410
If your vehicle is equipped with the HomeLink®
Transmitter, it complies with Part 15 of the FCC Rules.
Operation is subject to the following two conditions:
(1) this device may not cause harmful interference, and
(2) this device must accept any interference received,
including interference that may cause undesired
operation.
This device complies with RSS-210 of Industry Canada.
Operation is subject to the following two conditions:
(1) this device may not cause interference, and (2) this
device must accept any interference, including
interference that may cause undesired operation of the
device.
Changes and modifications to this system by other than
an authorized service facility could void authorization
to use this equipment.Programming the HomeLink®
Transmitter
Do not use the HomeLink®Transmitter with any garage
door opener that does not have the “stop and reverse”
feature. This includes any garage door opener model
manufactured before April 1, 1982. If you have a newer
garage door opener with rolling codes, please be
sure to follow steps 6 through 8 to complete the
programming of your HomeLink
®Transmitter.
Read the instructions completely before attempting to
program the HomeLink
®Transmitter. Because of
the steps involved, it may be helpful to have another
person available to assist you in programming the
transmitter.
Keep the original transmitter for use in other vehicles as
well as for future HomeLink
®programming. It is also
recommended that upon the sale of the vehicle,
the programmed HomeLink
®buttons should be erased
for security purposes. Refer to “Erasing HomeLink®
Buttons” or, for assistance, contact HomeLink®on the
internet at: www.homelink.com or by calling
1-800-355-3515.
2-45
Page 104 of 410
Be sure that people and objects are clear of the garage
door or gate operator you are programming. When
programming a garage door, it is advised to park outside
of the garage.
It is recommended that a new battery be installed in
your hand-held transmitter for quicker and more
accurate transmission of the radio frequency.
Your vehicle’s engine should be turned off while
programming the transmitter. Follow these steps to
program up to three channels:
1. Press and hold down the two outside buttons,
releasing only when the indicator light begins to
flash, after 20 seconds. Do not hold down the
buttons for longer than 30 seconds and do not
repeat this step to program a second and/or third
transmitter to the remaining two HomeLink
®buttons.
2. Position the end of your hand-held transmitter about
1 to 3 inches (3 to 8 cm) away from the HomeLink
®
buttons while keeping the indicator light in view.
3. Simultaneously press and hold both the desired
button on HomeLink
®and the hand-held transmitter
button. Do not release the buttons until Step 4
has been completed.
Some entry gates and garage door openers may
require you to substitute Step 3 with the procedure
noted in “Gate Operator and Canadian
Programming” later in this section.4. The indicator light will flash slowly at first and then
rapidly after HomeLink
®successfully receives the
frequency signal from the hand-held transmitter.
Release both buttons.
5. Press and hold the newly-trained HomeLink
®button
and observe the indicator light.
If the indicator light stays on constantly,
programming is complete and your device should
activate when the HomeLink
®button is pressed and
released.
To program the remaining two HomeLink
®buttons,
begin with Step 2 under “Programming HomeLink®.”
Do not repeat Step 1 as this will erase all of the
programmed channels.
If the indicator light blinks rapidly for two seconds
and then turns to a constant light, continue with
Steps 6 through 8 following to complete the
programming of a rolling-code equipped device
(most commonly, a garage door opener).
6. Locate in the garage, the garage door opener
receiver (motor-head unit). Locate the “Learn”
or “Smart” button. This can usually be found where
the hanging antenna wire is attached to the
motor-head unit.
2-46
Page 105 of 410
7. Firmly press and release the “Learn” or “Smart”
button. The name and color of the button may
vary by manufacturer.
You will have 30 seconds to start Step 8.
8. Return to the vehicle. Firmly press and hold the
programmed HomeLink
®button for two seconds,
then release. Repeat the press/hold/release
sequence a second time, and depending on the
brand of the garage door opener (or other rolling
code device), repeat this sequence a third time
to complete the programming.
HomeLink
®should now activate your rolling-code
equipped device.
To program the remaining two HomeLink
®buttons,
begin with Step 2 of “Programming HomeLink®.” Do not
repeat Step 1.
Gate Operator and Canadian
Programming
Canadian radio-frequency laws require transmitter
signals to “time out” or quit after several seconds of
transmission. This may not be long enough for
HomeLink
®to pick up the signal during programming.
Similarly, some U.S. gate operators are manufactured to
“time out” in the same manner.
If you live in Canada, or you are having difficulty
programming a gate operator by using the
“Programming HomeLink
®” procedures (regardless of
where you live), replace Step 3 under “Programming
HomeLink
®” with the following:
Continue to press and hold the HomeLink
®button while
you press and release every two seconds (cycle)
your hand-held transmitter until the frequency signal has
been successfully accepted by HomeLink
®. The
indicator light will flash slowly at first and then rapidly.
Proceed with Step 4 under “Programming HomeLink
®”
to complete.
2-47
Page 136 of 410
If the battery continues to discharge, even with the
engine idling at a higher rpm setting, some electrical
loads will automatically be reduced. When this occurs,
the rear window defogger may take slightly longer
to clear the glass, the heated seats may not get as warm
as they usually do and the fan may cut back to a
lower speed. For more battery saving information, see
“Battery Saver Active Message” underDIC Warnings
and Messages on page 3-55.
Inadvertent Power Battery Saver
This feature is designed to protect your vehicle’s battery
against drainage from the interior lamps, trunk lamp,
glove box lamp, cigarette lighters or the garage
door opener. When the ignition is turned off, the power
to these features will automatically turn off after
10 minutes (three minutes if a new car has 15 miles
(24 km) or less). Power will be restored for an additional
10 minutes if any door is opened, the trunk is opened
or the courtesy lamp switch is turned on.
Ultrasonic Rear Parking Assist
(URPA)
Your vehicle may be equipped with Ultrasonic Rear
Parking Assist (URPA). URPA is designed to help you
park while in REVERSE (R) and operates only at speeds
less than 3 mph (5 km/h). URPA can help you avoid
colliding with objects such as parked vehicles. The
system can detect objects 5 feet (1.5 m) behind your
vehicle and tell you how close those objects are to your
rear bumper.
{CAUTION:
Even with the Ultrasonic Rear Park Assist
system, the driver must check carefully before
backing up. The system does not operate
above typical backing speeds of 3 mph
(5 km/h) while parking. And, the system does
not detect objects that are more than 5 feet
(1.5 meters) behind the vehicle.
CAUTION: (Continued)
3-24
Page 400 of 410
F
Filter
Engine Air Cleaner......................................5-18
Finding a Program Type (PTY) Station
(XM™ Only).......................................3-78, 3-86
Finding a Station....................................3-76, 3-84
Finish Care....................................................5-91
Finish Damage...............................................5-92
Flat Tire........................................................5-77
Flat Tire, Changing.........................................5-78
Floor Mats.....................................................2-50
Fluid
Automatic Transaxle.....................................5-20
Power Steering...........................................5-36
Windshield Washer......................................5-37
FM Stereo....................................................3-100
Fog Lamp Light..............................................3-50
Fog Lamps....................................................3-19
Following Distance..........................................4-41
Front Ashtray.................................................3-27
Fuel............................................................... 5-4
Additives...................................................... 5-6
California Fuel.............................................. 5-5
Filling a Portable Fuel Container....................5-10
Filling Your Tank........................................... 5-7Fuel (cont.)
Fuels in Foreign Countries.............................. 5-6
Gage.........................................................3-51
Gasoline Octane........................................... 5-4
Gasoline Specifications.................................. 5-5
Fuses
Fuses and Circuit Breakers...........................5-97
Windshield Wiper.........................................5-96
G
Gage
Engine Coolant Temperature.........................3-45
Fuel..........................................................3-51
Speedometer..............................................3-39
Tachometer.................................................3-40
Garage Door Opener.......................................2-44
Garment Hooks..............................................2-49
Gasoline
Octane........................................................ 5-4
Specifications............................................... 5-5
Gate Operator and Canadian Programming........2-47
Glove Box.....................................................2-49
GM Mobility Program for Persons
with Disabilities............................................. 7-5
6