liftgate CADILLAC SRX 2004 1.G Owners Manual
[x] Cancel search | Manufacturer: CADILLAC, Model Year: 2004, Model line: SRX, Model: CADILLAC SRX 2004 1.GPages: 468, PDF Size: 2.92 MB
Page 14 of 468
Stowable Seat
If your vehicle has a third row seat, it is a power
folding seat.
The head rests need to be removed before folding the
third row seat. SeeHead Restraints on page 1-6for
instructions for removing the third row seat head rests.
The seatback will not fold all of the way down if the
head rests are not removed.The buttons that are used to operate the power folding
third row seat are located inside of the liftgate and
behind the second row seat on the passenger’s side of
the vehicle.
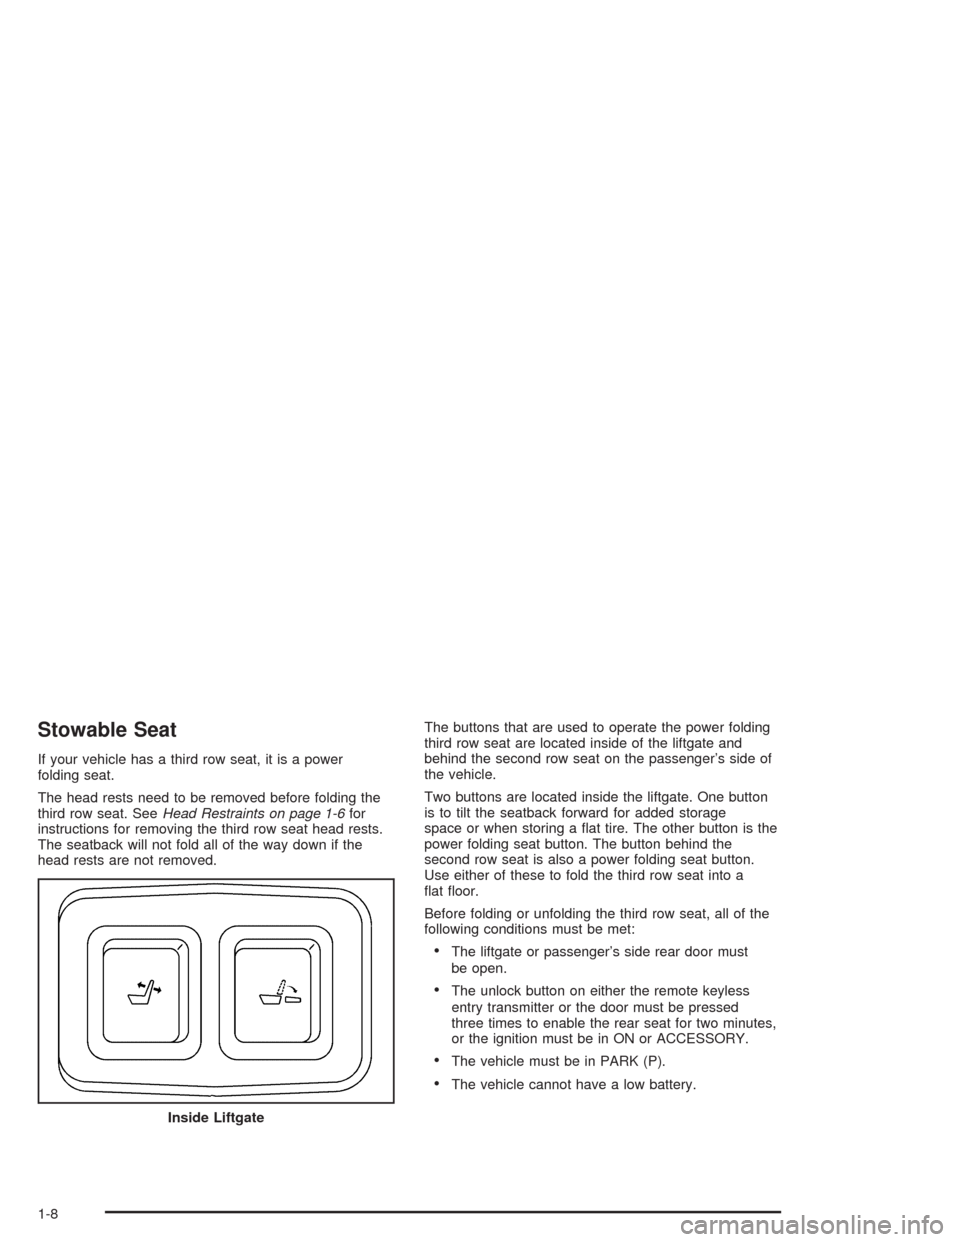
Two buttons are located inside the liftgate. One button
is to tilt the seatback forward for added storage
space or when storing a at tire. The other button is the
power folding seat button. The button behind the
second row seat is also a power folding seat button.
Use either of these to fold the third row seat into a
at oor.
Before folding or unfolding the third row seat, all of the
following conditions must be met:
The liftgate or passenger’s side rear door must
be open.
The unlock button on either the remote keyless
entry transmitter or the door must be pressed
three times to enable the rear seat for two minutes,
or the ignition must be in ON or ACCESSORY.
The vehicle must be in PARK (P).
The vehicle cannot have a low battery.
Inside Liftgate
1-8
Page 69 of 468
Keys...............................................................2-3
Remote Keyless Entry System.........................2-5
Remote Keyless Entry System Operation...........2-6
Doors and Locks.............................................2-8
Door Locks....................................................2-8
Central Door Unlocking System........................2-9
Power Door Locks..........................................2-9
Delayed Locking.............................................2-9
Programmable Automatic Door Locks..............2-10
Rear Door Security Locks..............................2-10
Lockout Protection........................................2-11
Leaving Your Vehicle....................................2-11
Liftgate........................................................2-12
Windows........................................................2-13
Power Windows............................................2-14
Sun Visors...................................................2-16
Theft-Deterrent Systems..................................2-17
Theft-Deterrent System..................................2-17
Immobilizer..................................................2-18
Immobilizer Operation....................................2-19
Starting and Operating Your Vehicle................2-20
New Vehicle Break-In....................................2-20
Ignition Positions..........................................2-21Starting Your Engine.....................................2-23
Adjustable Throttle and Brake Pedal................2-23
Engine Coolant Heater..................................2-24
Automatic Transmission Operation...................2-25
All-Wheel Drive............................................2-28
Parking Brake..............................................2-29
Shifting Into Park (P).....................................2-30
Shifting Out of Park (P).................................2-32
Parking Over Things That Burn.......................2-32
Engine Exhaust............................................2-33
Running Your Engine While You Are Parked.......2-34
Mirrors...........................................................2-35
Automatic Dimming Rearview Mirror
with OnStar
®............................................2-35
Automatic Dimming Rearview Mirror
with OnStar
®and Compass........................2-35
Outside Power Heated Mirrors........................2-38
Outside Automatic Dimming Mirror..................2-38
Outside Curb View Assist Mirror.....................2-39
Outside Convex Mirror...................................2-39
OnStar
®System.............................................2-40
HomeLink®Transmitter...................................2-41
Programming the HomeLink®Transmitter...........2-42
Section 2 Features and Controls
2-1
Page 74 of 468
Remote Keyless Entry System
Operation
With this feature, you can lock and unlock the doors or
the liftgate and turn on your vehicle’s interior lamps
from about 10 feet (3 m) away using the remote keyless
entry transmitter supplied with your vehicle.
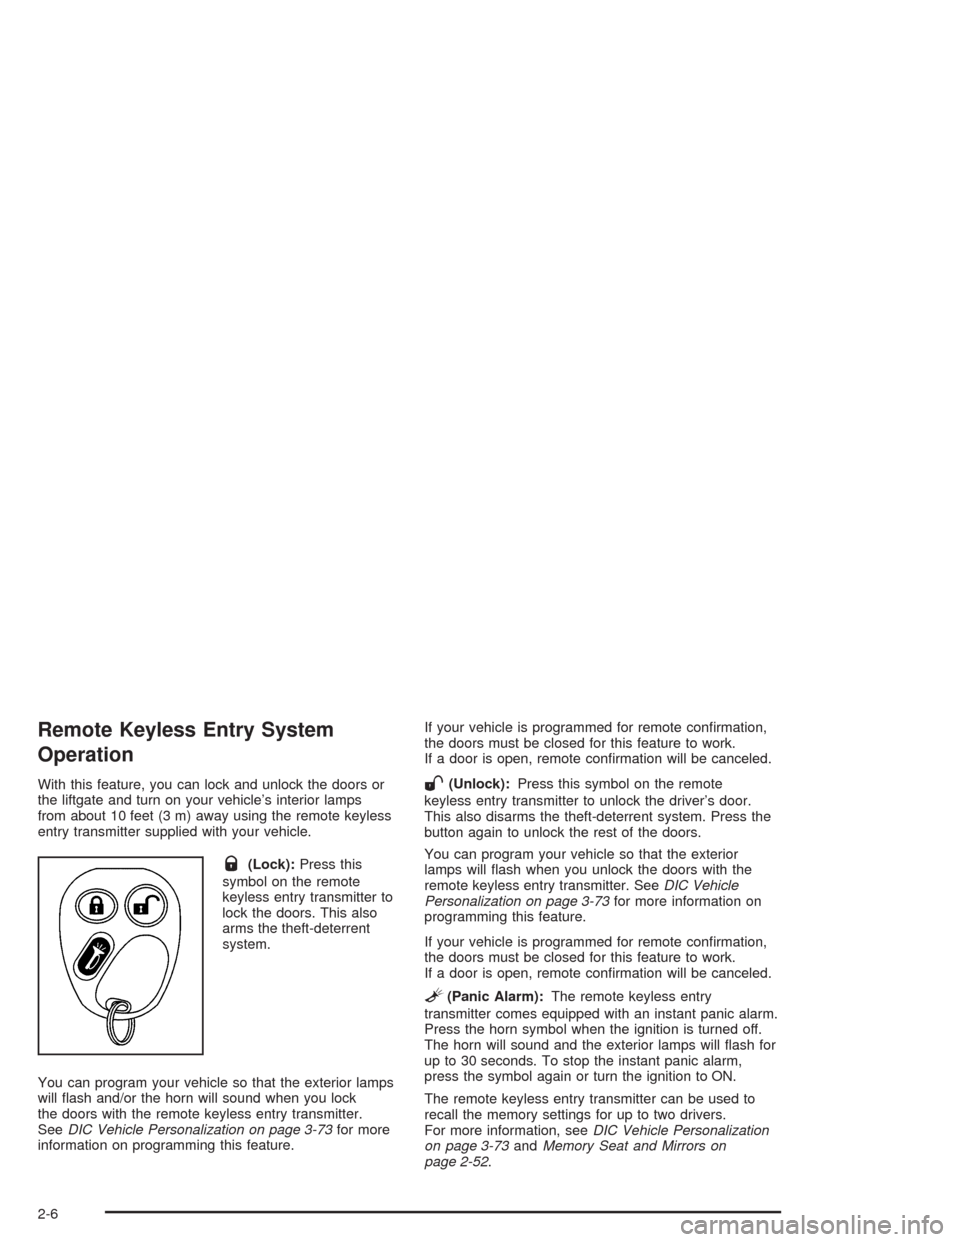
Q(Lock):Press this
symbol on the remote
keyless entry transmitter to
lock the doors. This also
arms the theft-deterrent
system.
You can program your vehicle so that the exterior lamps
will ash and/or the horn will sound when you lock
the doors with the remote keyless entry transmitter.
SeeDIC Vehicle Personalization on page 3-73for more
information on programming this feature.If your vehicle is programmed for remote conrmation,
the doors must be closed for this feature to work.
If a door is open, remote conrmation will be canceled.
W(Unlock):Press this symbol on the remote
keyless entry transmitter to unlock the driver’s door.
This also disarms the theft-deterrent system. Press the
button again to unlock the rest of the doors.
You can program your vehicle so that the exterior
lamps will ash when you unlock the doors with the
remote keyless entry transmitter. SeeDIC Vehicle
Personalization on page 3-73for more information on
programming this feature.
If your vehicle is programmed for remote conrmation,
the doors must be closed for this feature to work.
If a door is open, remote conrmation will be canceled.
L(Panic Alarm):The remote keyless entry
transmitter comes equipped with an instant panic alarm.
Press the horn symbol when the ignition is turned off.
The horn will sound and the exterior lamps will ash for
up to 30 seconds. To stop the instant panic alarm,
press the symbol again or turn the ignition to ON.
The remote keyless entry transmitter can be used to
recall the memory settings for up to two drivers.
For more information, seeDIC Vehicle Personalization
on page 3-73andMemory Seat and Mirrors on
page 2-52.
2-6
Page 80 of 468
Liftgate
To unlock the liftgate from the outside, turn the key in
the driver’s door cylinder counterclockwise or use the
remote keyless entry transmitter. To lock the liftgate
using the key, turn the key clockwise in the driver’s door.
Open the liftgate using the handle located below the
license plate. Once slightly opened, the liftgate will rise
by itself.
{CAUTION:
It can be dangerous to drive with the liftgate
open because carbon monoxide (CO) gas can
come into your vehicle. You can not see or
smell CO. It can cause unconsciousness and
even death. If you must drive with the liftgate
CAUTION: (Continued)
CAUTION: (Continued)
open or if electrical wiring or other cable
connections must pass through the seal
between the body and the liftgate:
Make sure all other windows are shut.
Turn the fan on your heating or cooling
system to its highest speed and select the
control setting that will force outside air
into your vehicle. SeeDual Climate Control
System on page 3-26.
If you have air outlets on or under the
instrument panel, open them all the way.
SeeEngine Exhaust on page 2-33.
To close the liftgate, pull down on the handle, then
rmly shut the liftgate. Don’t drive with the liftgate open,
even slightly. SeeEngine Exhaust on page 2-33.
2-12
Page 85 of 468
Theft-Deterrent Systems
Vehicle theft is big business, especially in some cities.
Although your vehicle has a number of theft-deterrent
features, we know that nothing we put on it can make it
impossible to steal.
Theft-Deterrent System
The security light is
located on the instrument
panel cluster.
If the ignition is off and a door is open, the security light
will ash, reminding you to arm the theft-deterrent system.
To arm the system, do the following:
1. Open the door.
2. Lock the door using the remote keyless entry
transmitter or the power door lock switch. The
security light should come on and stay on.
3. Close all the doors. The security light should go off
within approximately 30 seconds.If a door or a liftgate is opened without a key or a
remote keyless entry transmitter, the horn will sound
and the lamps will ash for up to 30 seconds.
The theft-deterrent system won’t arm if you lock the
doors with a key or use the manual door lock.
It activates only if you use the remote keyless entry
transmitter or the power door lock.
To avoid activating the alarm by accident do the
following:The vehicle should be locked with the door key or
the manual door lock after the doors are closed if
you don’t want to arm the theft-deterrent system.
Always unlock a door with a key or use the remote
keyless entry transmitter. Pressing the unlock button
on the remote keyless entry transmitter disarms the
theft-deterrent system. Unlocking a door any other
way while the system is armed will activate the alarm
when a door or the liftgate is opened.
If you activate the alarm by accident, unlock the driver’s
door with your key. You can also turn off the alarm by
using the unlock button on the remote keyless entry
transmitter, or by starting the vehicle with a valid key.
2-17
Page 114 of 468
Center Console Storage Area
Your vehicle has a center console storage area located
between the front seats. It includes storage areas,
and accessory power outlet(s) on the rear of the
console.
Map Pocket
There are map pockets located near the bottom of the
front doors.
Assist Handles
Your vehicle has assist handles located above the
doors.
Garment Hooks
Your vehicle has garment hooks located between the
rear doors and the liftgate.
Luggage Carrier
{CAUTION:
If you try to carry something on top of your
vehicle that is longer or wider than the luggage
carrier — like paneling, plywood, a mattress
and so forth — the wind can catch it as you
drive along. This can cause you to lose
control. What you are carrying could be
violently torn off, and this could cause you or
other drivers to have a collision, and of course
damage your vehicle. You may be able to carry
something like this inside. But, never carry
something longer or wider than the luggage
carrier on top of your vehicle.
2-46
Page 144 of 468
Ultrasonic Rear Parking Assist
(URPA)
The Ultrasonic Rear Parking Assist (URPA) system is
designed to help you park, while the vehicle is in
REVERSE (R). It operates only at very low speeds, less
than 3 mph (5 km/h). URPA can help make parking
easier and to help you avoid colliding with objects such as
parked vehicles. The URPA system can detect objects up
to 5 feet (1.5 m) behind the vehicle, and tell you how
close these objects are from your rear bumper.
{CAUTION:
Even with the Ultrasonic Rear Park Assist
system, the driver must check carefully before
backing up. The system does not operate above
typical backing speeds of 3 mph (5 km/h) while
parking. And, the system does not detect
objects that are more than 5 feet (1.5 meters)
behind the vehicle.
CAUTION: (Continued)
CAUTION: (Continued)
So, unless you check carefully behind you
before and when you back up, you could strike
children, pedestrians, bicyclists or pets behind
you, and they could be injured or killed.
Whether or not you are using rear park assist,
always check carefully behind your vehicle
before you back up and then watch closely as
you do.
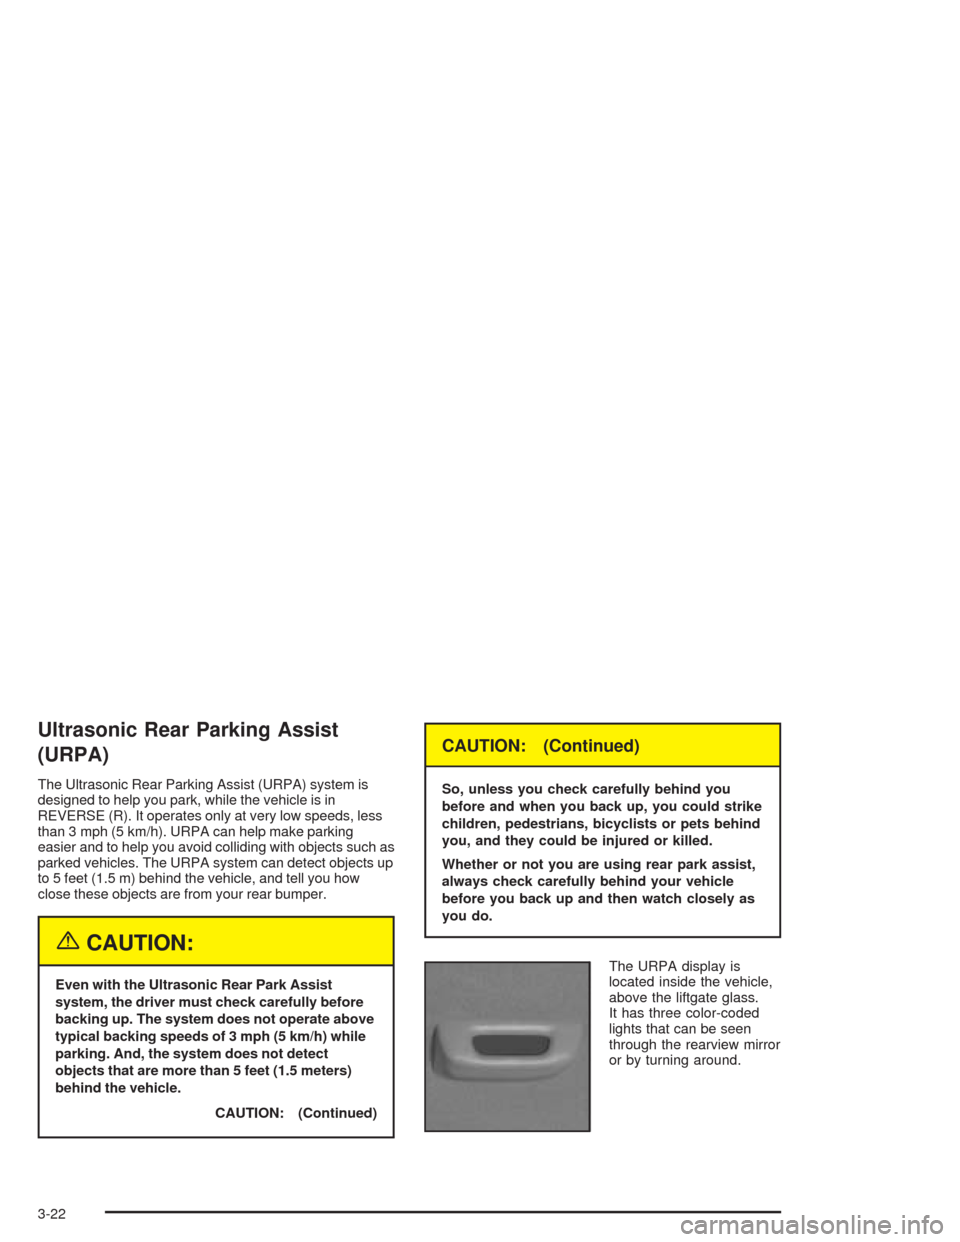
The URPA display is
located inside the vehicle,
above the liftgate glass.
It has three color-coded
lights that can be seen
through the rearview mirror
or by turning around.
3-22
Page 145 of 468
How the System Works
URPA comes on automatically when the shift lever is
moved into REVERSE (R) and the vehicle speed is less
than 3 mph (5 km/h). When the system turns on, the
three lights on the display will illuminate for one and
a half seconds to let you know that the system is
working. If your vehicle is moving in REVERSE (R) at
a speed greater than 3 mph (5 km/h), the red light
will ash to remind you that the system does not work
at speed greater than 3 mph (5 km/h).
If an object is detected at a REVERSE (R) speed of
less than 3 mph (5 km/h), one of the following will occur:
Description English Metric
amber light 5 ft. 1.5 m
amber/amber lights 40 in. 1.0 m
amber/amber/red lights &
continuous chime20 in. 0.5 m
amber/amber/red lights
ashing & continuous
chime1 ft. 0.3 m
A chime will sound the rst time an object is detected
between 20 inches (0.5 m) and 5 feet (1.5 m) away.
URPA cannot detect objects that are above liftgate level.
In order for the rear sensors to recognize an object,
it must be within detection range behind the vehicle.
When the System Does Not Seem to
Work Properly
The light may ash red when the vehicle is in
REVERSE (R) if the ultrasonic sensors are not kept
clean. So be sure to keep your rear bumper free of mud,
dirt, snow, ice and slush. Other conditions that may
affect system performance include things like the
vibrations from a jackhammer or the compression of
air brakes on a very large truck. If after cleaning the
rear bumper and then driving forward at least 15 mph
(25 km/h), the display continues to ash red, see your
dealer.
If a trailer was attached to your vehicle, or a bicycle or
an object was on the back of, or hanging out of your
liftgate during your last drive cycle, the light may
also ash red. The light will continue to ash whenever
in REVERSE (R) until your vehicle is driven forward
at least 15 mph (25 km/h) without any obstructions
behind the vehicle.
For cleaning instructions, seeCleaning the Outside of
Your Vehicle on page 5-97.
3-23
Page 190 of 468
Fuel Level Low
When this message appears on the display, it means
that your vehicle is low on fuel. You should rell the tank
as soon as possible. A single chime will sound when
this message is displayed.
Headlamps Suggested
This message will appear when the amount of available
light outside the vehicle is low and the exterior lamp
control is off. This message informs the driver that
turning on the exterior lamps is recommended even
though the DRL are still illuminated and it has become
dark enough outside to require the headlamps and/or
other exterior lamps.
This message will also appear when the windshield
wipers have been on for more than six seconds and the
exterior lamp control is off or in the parking lamp position.
Ice Possible
This message appears when the outside temperature is
cold enough to create icy road conditions.
Left Rear Door Ajar
When this message appears on the display, it means
that the driver’s side rear door was not closed
completely. You should make sure that the door is
closed completely.
Lift Gate Ajar
When this message appears on the display, it means that
the liftgate was not closed completely. You should make
sure that the liftgate is closed completely.
Oil Pressure Low – Stop Engine
A multiple chime will sound when this message is
displayed.
Notice:If you drive your vehicle while the engine
oil pressure is low, severe engine damage may
occur. If a low oil pressure warning appears on the
instrument panel cluster and/or DIC, stop the
vehicle as soon as possible. Do not drive the vehicle
until the cause of the low oil pressure is corrected.
SeeEngine Oil on page 5-15for more information.
3-68
Page 365 of 468
7. Turn the bulb socket one-quarter turn
counterclockwise to remove it from the assembly.
8. Replace the bulb. SeeReplacement Bulbs on
page 5-58for the proper bulb number.
9. Reverse Steps 1 through 7 to reinstall the bulb
socket and access cap.
Sidemarker Lamps
This procedure is for replacing the sidemarker bulb only.
If you need to replace the parking lamp bulb or
halogen headlamp as well, seeHeadlamps, Sidemarker,
and Parking Lamps on page 5-55.
1. Use a tool to remove the fasteners that attach the
front fascia extension panel in the wheelhouse.
2. Reach forward past the wheelhouse to the front
sidemarker socket in the outboard side of the
headlamp assembly.
3. Rotate the front sidemarker socket one-eighth turn
counterclockwise to remove it.
4. Replace the bulb. SeeReplacement Bulbs on
page 5-58for the proper bulb number.
5. Reinstall the socket to the headlamp assembly.
6. Replace the fasteners that attach the front fascia
extension panel in the wheelhouse.
Center High-Mounted Stoplamp
(CHMSL)
It is recommended that this component be replaced as
a unit. See your dealer.
Taillamps, Turn Signal, Stoplamps
and Sidemarker Lamps
It is recommended that this component be replaced as
a unit. See your dealer.
Back-Up and License Plate Lamps
To replace the back-up and/or license plate lamps, use
the following procedure:
1. Open the liftgate.
2. Remove the liftgate trim panel on the interior of the
liftgate by pulling the trim panel snap-in fasteners
out of the retainers and also by using a tool to
remove the screw on the bottom right side of the
trim panel.
3. Disconnect the courtesy lamp electrical connector
on the trim panel.
4. Use a tool to remove the ve nuts on the back of
the license plate applique assembly.
5-57