ECO mode CADILLAC SRX 2007 1.G User Guide
[x] Cancel search | Manufacturer: CADILLAC, Model Year: 2007, Model line: SRX, Model: CADILLAC SRX 2007 1.GPages: 522, PDF Size: 2.71 MB
Page 263 of 522
To change from playback by artist to playback by
album, press the pushbutton located below the Sort
By label. From the sort screen, push one of the
buttons below the album button. Press the
pushbutton below the Back label to return to the
main music navigator screen. Now the album name
displays on the second line between the arrows and
songs from the current album begins to play. Once
all songs from that album have played, the player
moves to the next album in alphabetical order on
the CD-R and begins playing MP3 �les from that
album.
To exit music navigator mode, press the button
below the Back label to return to normal MP3
playback.BAND:Press this button to listen to the radio
when a CD is playing. The CD remains inside the
radio for future listening.
CD/AUX (CD/Auxiliary):Press this button to play
a CD when listening to the radio. The CD icon
and a message showing disc and/or track number
displays when a CD is in the player. Press this
button again and the system automatically
searches for an auxiliary input device such as a
portable audio player. If a portable audio player is
not connected, No Aux Input Device displays.
263
Page 269 of 522

Audio Steering Wheel Controls
Some audio controls can be adjusted at the
steering wheel. They include the following:
0(Mute):Press this button to mute the system.
Press this button again, or any other radio
button, to turn the sound on.
SRCE (Source):Press this button to switch
between AM, FM, XM™ (if equipped), CD, and
auxiliary jack.
g(Voice Recognition):If your vehicle has the
navigation system, press and hold this button
for longer than one second to initiate voice
recognition. See “Voice Recognition” in the
Navigation System manual for more information.
If your vehicle has OnStar
®, press and hold
this button for longer than one second to interact
with the OnStar
®system. If your vehicle also
has the navigation system, press and hold this
button for longer than one second to initiate voice
recognition and say “OnStar” to enter OnStar
®
mode. See theOnStar®System on page 139in
this manual for more information.
1-6 (Preset Stations):Press this button to play
stations that are programmed on the radio
preset pushbuttons. The radio seeks preset
stations only with a strong signal that are in the
selected band.
While a CD is playing, press this button to go to
the next track.
269
Page 333 of 522
Tow/Haul Mode
Tow/haul is designed to assist while your vehicle
is pulling a large or heavy load or trailer.
Tow/haul is most useful while pulling such a load
in rolling terrain, in stop-and-go traffic, or when
you need improved low-speed control, such
as when parking. The purpose of the tow/haul
mode is to do the following:
Reduce the frequency and improve the
predictability of transmission shifts when
pulling a heavy trailer or a large or heavy load.
Provide the same solid shift feel when pulling a
heavy trailer or a large or heavy load as when
the vehicle is unloaded.
Improve control of vehicle speed while
requiring less throttle pedal activity when
pulling a heavy trailer or a large or heavy load.
Tow/haul is designed to be most effective
when the vehicle and trailer combined weight is at
least 75 percent of the vehicle’s Gross
Combination Weight Rating (GCWR). See “Weight
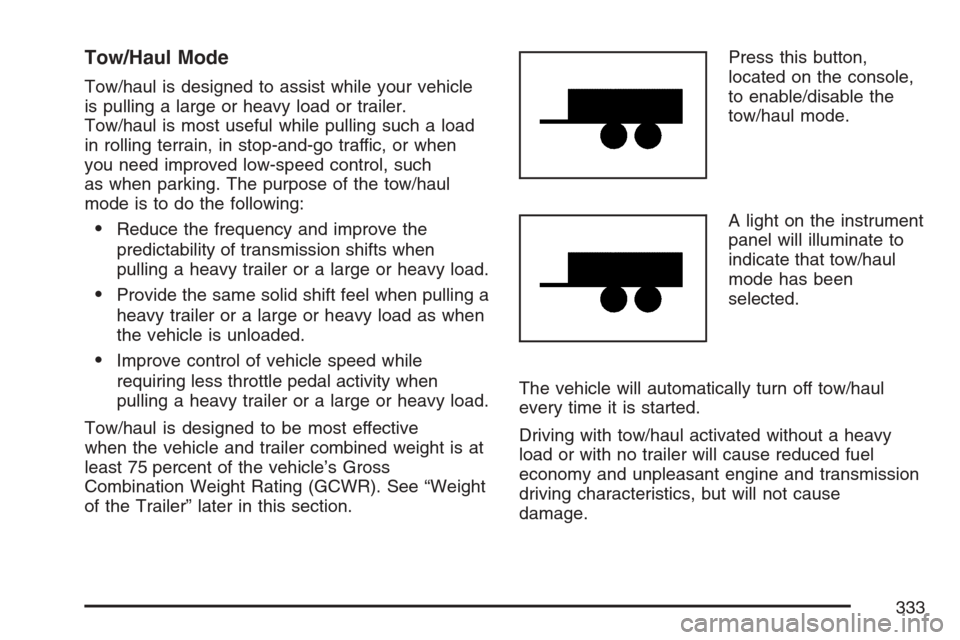
of the Trailer” later in this section.Press this button,
located on the console,
to enable/disable the
tow/haul mode.
A light on the instrument
panel will illuminate to
indicate that tow/haul
mode has been
selected.
The vehicle will automatically turn off tow/haul
every time it is started.
Driving with tow/haul activated without a heavy
load or with no trailer will cause reduced fuel
economy and unpleasant engine and transmission
driving characteristics, but will not cause
damage.
333
Page 406 of 522
Maximum Loaded Vehicle Weight:The sum of
curb weight, accessory weight, vehicle capacity
weight, and production options weight.
Normal Occupant Weight:The number of
occupants a vehicle is designed to seat multiplied
by 150 lbs (68 kg). SeeLoading Your Vehicle
on page 322.
Occupant Distribution:Designated seating
positions.
Outward Facing Sidewall:The side of an
asymmetrical tire that has a particular side that
faces outward when mounted on a vehicle.
The side of the tire that contains a whitewall, bears
white lettering, or bears manufacturer, brand,
and/or model name molding that is higher
or deeper than the same moldings on the other
sidewall of the tire.
Passenger (P-Metric) Tire:A tire used on
passenger cars and some light duty trucks and
multipurpose vehicles.Recommended In�ation Pressure:Vehicle
manufacturer’s recommended tire in�ation
pressure as shown on the tire placard. See
In�ation - Tire Pressure on page 407andLoading
Your Vehicle on page 322.
Radial Ply Tire:A pneumatic tire in which the ply
cords that extend to the beads are laid at 90
degrees to the centerline of the tread.
Rim:A metal support for a tire and upon which
the tire beads are seated.
Sidewall:The portion of a tire between the tread
and the bead.
Speed Rating:An alphanumeric code assigned
to a tire indicating the maximum speed at
which a tire can operate.
Traction:The friction between the tire and the
road surface. The amount of grip provided.
Tread:The portion of a tire that comes into
contact with the road.
406
Page 413 of 522
The TPM matching process is outlined below:
1. Set the parking brake.
2. Turn the ignition switch to ON with the
engine off.
3. Using the DIC, press the vehicle information
button until the PRESS
VTO RELEARN
TIRE POSITIONS message displays.
4. Press the Set/Reset button. The horn sounds
twice to indicate the TPMS receiver is ready,
and the TIRE LEARNING ACTIVE message
displays. The TPMS low tire warning light
�ashes throughout the matching procedure.
5. Start with the driver’s side front tire.
6. Remove the valve cap from the valve stem.
Activate the TPM sensor by increasing or
decreasing the tire’s air pressure for
10 seconds, or until a horn chirp sounds. The
horn chirp, which may take up to 30 seconds to
sound, con�rms that the sensor identi�cation
code has been matched to this tire position. To
decrease the tire’s air-pressure use the pointed
end of the valve cap, a pencil-style air pressure
gage, or a key.7. Proceed to the passenger’s side front tire, and
repeat the procedure in Step 6.
8. Proceed to the passenger’s side rear tire, and
repeat the procedure in Step 6.
9. Proceed to the driver’s side rear tire, and
repeat the procedure in Step 6.
10. After hearing the con�rming horn chirp, for
the driver’s side rear tire, the horn sounds
two more times to signal the tire learning
model is no longer active. Turn the ignition
switch to OFF.
11. Set all four tires to the recommended air
pressure level as indicated on the tire and
loading information label.
12. Put the valve caps back on the valve stems.
The spare tire does not have a TPMS sensor.
If you replace one of the road tires with the spare,
the SERVICE TIRE MONITOR SYSTEM
message displays on the DIC screen. This
message should go off once you re-install the
road tire containing the TPMS sensor.
413
Page 498 of 522
Courtesy Transportation is available only at
participating dealers and all program options, such
as shuttle service, may not be available at
every dealer. Please contact your dealer for
speci�c information about availability. All Courtesy
Transportation arrangements will be administered
by appropriate dealer personnel.
Canadian Vehicles:For warranty repairs during
the Complete Vehicle Coverage period of the
General Motors of Canada New Vehicle Limited
Warranty, alternative transportation may be
available under the Courtesy Transportation
Program. Please consult your dealer for details.
General Motors reserves the right to unilaterally
modify, change or discontinue Courtesy
Transportation at any time and to resolve all
questions of claim eligibility pursuant to the terms
and conditions described herein at its sole
discretion.Vehicle Data Collection and Event
Data Recorders
Your vehicle, like other modern motor vehicles, has
a number of sophisticated computer systems that
monitor and control several aspects of the vehicle’s
performance. Your vehicle uses on-board vehicle
computers to monitor emission control components
to optimize fuel economy, to monitor conditions for
airbag deployment and, if so equipped, to provide
anti-lock braking and to help the driver control the
vehicle in difficult driving situations. Some
information may be stored during regular operations
to facilitate repair of detected malfunctions; other
information is stored only in a crash event by
computer systems, such as those commonly called
Event Data Recorders (EDR).
In a crash event, computer systems, such as the
airbag Sensing and Diagnostic Module (SDM)
in your vehicle may record information about the
condition of the vehicle and how it was operated,
such as data related to engine speed, brake
application, throttle position, vehicle speed, safety
belt usage, airbag readiness, airbag performance,
and the severity of a collision.
498
Page 512 of 522
Engine
Air Cleaner/Filter...................................... 365
Battery..................................................... 385
Check and Service Engine Soon Light..... 208
Coolant.................................................... 368
Coolant Heater......................................... 121
Coolant Temperature Gage...................... 207
Coolant Temperature Warning Light.......... 206
Drive Belt Routing.................................... 483
Engine Compartment Overview................ 356
Exhaust................................................... 132
Oil ........................................................... 360
Oil Life System........................................ 363
Overheated Protection Operating Mode.... 374
Overheating............................................. 372
Speed Limiter.......................................... 199
Starting.................................................... 119
Entry Lighting.............................................. 182
Event Data Recorders (EDR)...................... 498
Extender, Safety Belt..................................... 42
Exterior Lighting Battery Saver.................... 181F
Filter
Engine Air Cleaner................................... 365
Finish Damage............................................ 451
Flashers, Hazard Warning........................... 166
Flash-to-Pass.............................................. 169
Flat Tire...................................................... 423
Flat Tire, Changing...................................... 424
Flat Tire, Storing......................................... 439
Fluid
Automatic Transmission............................ 367
Power Steering........................................ 379
Windshield Washer.................................. 380
Fog Lamp Light........................................... 212
Fog Lamps.................................................. 181
Front Axle................................................... 395
Fuel............................................................ 349
Additives.................................................. 350
California Fuel.......................................... 350
Filling a Portable Fuel Container.............. 354
Filling Your Tank...................................... 352
Fuels in Foreign Countries....................... 351
512
Page 515 of 522
Light (cont.)
Safety Belt Reminder............................... 200
Security................................................... 212
TCS Warning Light.................................. 206
Tire Pressure........................................... 207
Tow/Haul Mode........................................ 213
Traction Control System (TCS)
Warning................................................ 206
Lighting
Entry........................................................ 182
Parade Dimming...................................... 182
Limited-Slip Rear Axle................................. 283
Loading Your Vehicle................................... 322
Lockout Protection....................................... 104
Locks
Central Door Unlocking System................ 101
Delayed Locking...................................... 102
Door........................................................ 100
Lockout Protection................................... 104
Power Door............................................. 101
Programmable Automatic Door Locks....... 102
Rear Door Security Locks........................ 103
Loss of Control........................................... 289
Luggage Carrier.......................................... 154
Lumbar
Power Controls.......................................... 10M
Magnetic Ride Control................................. 283
Maintenance Schedule
Additional Required Services.................... 473
At Each Fuel Fill...................................... 476
At Least Once a Month............................ 477
At Least Once a Year .............................. 477
Introduction.............................................. 468
Maintenance Footnotes............................ 474
Maintenance Record................................ 484
Maintenance Requirements...................... 468
Normal Maintenance Replacement
Parts.................................................... 482
Owner Checks and Services.................... 476
Recommended Fluids and Lubricants....... 480
Scheduled Maintenance........................... 471
Using....................................................... 469
Your Vehicle and the Environment............ 468
Malfunction Indicator Light........................... 208
Manual Seats.................................................. 9
Memory Seat and Mirrors.............................. 12
Message
DIC Warnings and Messages................... 220
515
Page 516 of 522

Mirrors
Automatic Dimming Rearview
with OnStar
®........................................ 134
Automatic Dimming Rearview
with OnStar
®and Compass.................. 134
Outside Automatic Dimming Mirror........... 138
Outside Convex Mirror............................. 139
Outside Curb View Assist Mirror............... 138
Outside Power Heated Mirrors................. 137
MP3 ............................................................ 257
MyGMLink.com............................................ 490
N
Navigation/Radio System,
see Navigation Manual............................. 266
New Vehicle Break-In.................................. 116
Normal Maintenance Replacement Parts..... 482
O
Odometer.................................................... 199
Off-Road Driving.......................................... 291
Off-Road Recovery...................................... 287Oil
Engine..................................................... 360
Pressure Light.......................................... 211
Oil, Engine Oil Life System ......................... 363
Older Children, Restraints............................. 43
Online Owner Center................................... 490
OnStar
®System, see OnStar®Manual........ 139
Operation, Universal Home Remote
System............................................144, 150
Other Warning Devices................................ 166
Outlet Adjustment........................................ 194
Outlet(s), Accessory Power.......................... 186
Outside
Automatic Dimming Mirror........................ 138
Convex Mirror.......................................... 139
Curb View Assist Mirror........................... 138
Power Heated Mirrors.............................. 137
Overheated Engine Protection
Operating Mode....................................... 374
Owner Checks and Services....................... 476
Owners, Canadian.......................................... 3
516
Page 521 of 522
Tires (cont.)
Tire Terminology and De�nitions............... 404
Uniform Tire Quality Grading.................... 419
Wheel Alignment and Tire Balance........... 420
Wheel Replacement................................. 421
When It Is Time for New Tires................. 416
Winter Tires............................................. 400
Tow/Haul Mode........................................... 126
Tow/Haul Mode Light................................... 213
Towing
Recreational Vehicle................................. 328
Towing a Trailer....................................... 331
Your Vehicle............................................. 328
Traction
Control System (TCS).............................. 281
Control System Warning Light.................. 206
Limited-Slip Rear Axle.............................. 283
Magnetic Ride Control.............................. 283
StabiliTrak
®System................................. 283
Transmission
Fluid, Automatic....................................... 367
Transmission Operation, Automatic.............. 122
Turn and Lane-Change Signals................... 168
Turn Signal/Multifunction Lever.................... 167
U
Ultrasonic Rear Parking Assist (URPA)........ 184
Understanding Radio Reception................... 270
Uniform Tire Quality Grading....................... 419
Universal Home Remote System................. 143
Operation........................................144, 150
V
Vehicle
Control..................................................... 278
Damage Warnings....................................... 5
Loading.................................................... 322
Symbols...................................................... 5
Vehicle Customization, DIC......................... 231
Vehicle Data Collection and Event
Data Recorders........................................ 498
Vehicle Identi�cation
Number (VIN).......................................... 453
Service Parts Identi�cation Label.............. 453
Ventilation Adjustment.................................. 194
Visors.......................................................... 112
521