brake sensor CADILLAC SRX 2011 2.G Owners Manual
[x] Cancel search | Manufacturer: CADILLAC, Model Year: 2011, Model line: SRX, Model: CADILLAC SRX 2011 2.GPages: 498, PDF Size: 7.62 MB
Page 316 of 498
Black plate (40,1)Cadillac SRX Owner Manual - 2011
9-40 Driving and Operating
Ending Cruise Control
There are three ways to end cruise
control:
.Step lightly on the brake pedal.
.Press the[button on the
steering wheel.
.Press theTbutton on the
steering wheel.
Erasing Speed Memory
The cruise control set speed is
erased from memory by pressing
the
Tbutton or if the ignition is
turned off.
Object Detection
Systems
Ultrasonic Parking Assist
For vehicles with the Ultrasonic
Front and Rear Parking Assist
(UFRPA) system, it assists the
driver with parking and avoiding
objects. UFRPA operates at speeds
less than 8 km/h (5 mph), and the
sensors on the front and rear
bumper detect objects up to 1.2 m
(4 ft) in front of the vehicle and 2.5 m
(8 ft) behind the vehicle, and at least
25.4 cm (10 in) off the ground.
{WARNING
The Ultrasonic Front and Rear
Park Assist (UFRPA) system
does not replace driver vision.
It cannot detect:
.objects that are below the
bumper, underneath the
vehicle, or if they are too
close or far from the vehicle
.children, pedestrians,
bicyclists, or pets.
If you do not use proper care
before moving forward and while
backing; vehicle damage, injury,
or death could occur. Even with
UFRPA, always check in front of
the vehicle before moving forward
and behind the vehicle before
backing up. While moving forward
and backing, be sure to look for
objects and check the vehicle's
mirrors.
Page 318 of 498
Black plate (42,1)Cadillac SRX Owner Manual - 2011
9-42 Driving and Operating
The following describes how the UFRPA front display lights appear as the
vehicle gets closer to a detected object:Description Metric English
one amber bar 1.2 m 4 ft
two amber bars 1.0 m 40 in
three amber bars 0.6 m 23 in
three amber bars and one red bar 0.3 m 1 ft
Turning the System On and Off
The UFRPA system can be turned
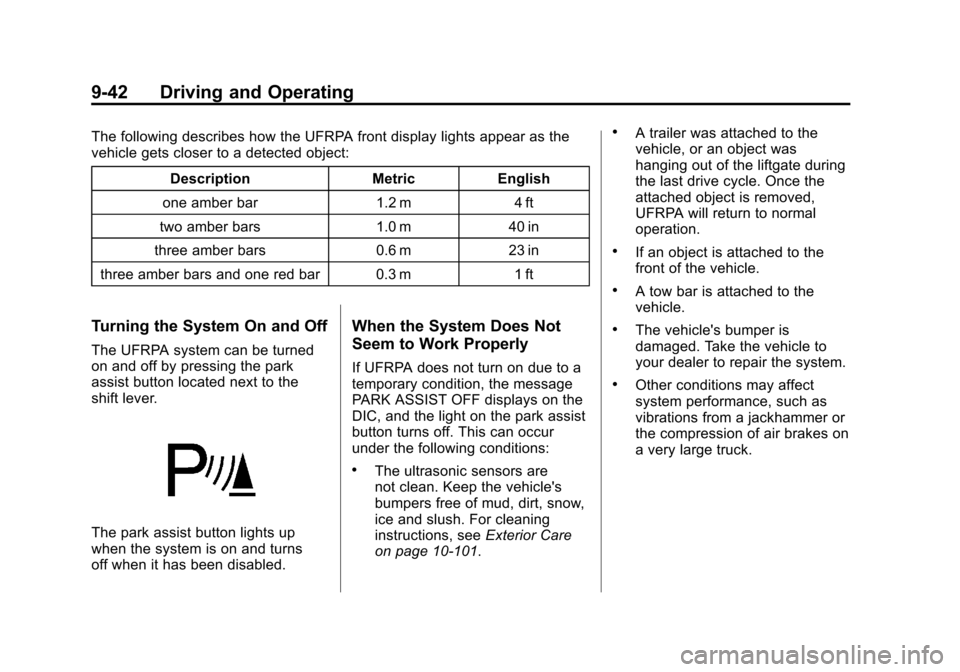
on and off by pressing the park
assist button located next to the
shift lever.
The park assist button lights up
when the system is on and turns
off when it has been disabled.
When the System Does Not
Seem to Work Properly
If UFRPA does not turn on due to a
temporary condition, the message
PARK ASSIST OFF displays on the
DIC, and the light on the park assist
button turns off. This can occur
under the following conditions:
.The ultrasonic sensors are
not clean. Keep the vehicle's
bumpers free of mud, dirt, snow,
ice and slush. For cleaning
instructions, see Exterior Care
on page 10‑101.
.A trailer was attached to the
vehicle, or an object was
hanging out of the liftgate during
the last drive cycle. Once the
attached object is removed,
UFRPA will return to normal
operation.
.If an object is attached to the
front of the vehicle.
.A tow bar is attached to the
vehicle.
.The vehicle's bumper is
damaged. Take the vehicle to
your dealer to repair the system.
.Other conditions may affect
system performance, such as
vibrations from a jackhammer or
the compression of air brakes on
a very large truck.
Page 385 of 498
Black plate (47,1)Cadillac SRX Owner Manual - 2011
Vehicle Care 10-47
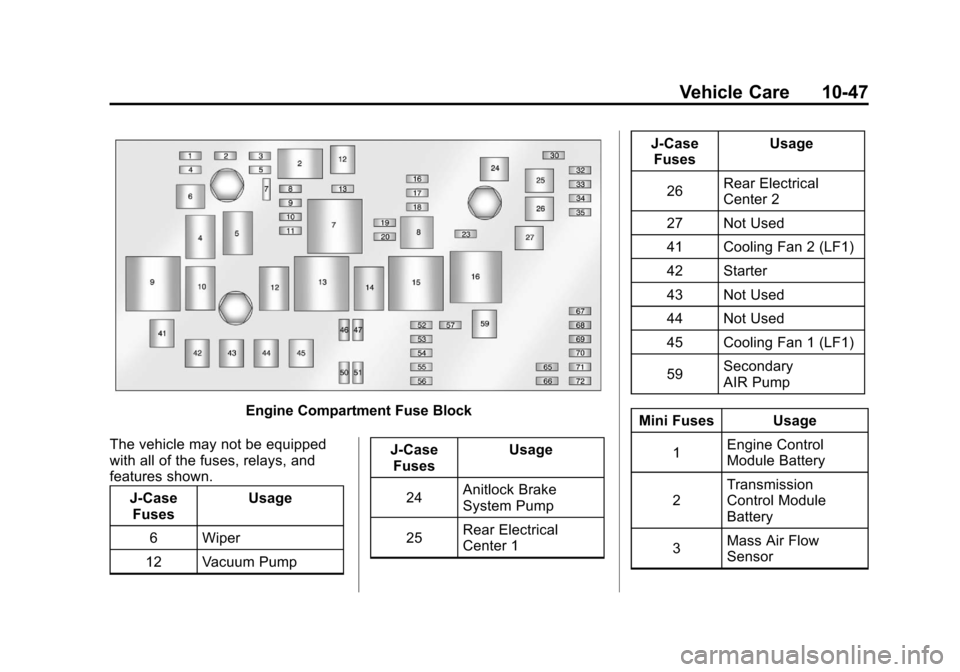
Engine Compartment Fuse Block
The vehicle may not be equipped
with all of the fuses, relays, and
features shown. J-CaseFuses Usage
6 Wiper
12 Vacuum Pump J-Case
Fuses Usage
24 Anitlock Brake
System Pump
25 Rear Electrical
Center 1 J-Case
Fuses Usage
26 Rear Electrical
Center 2
27 Not Used
41 Cooling Fan 2 (LF1)
42 Starter
43 Not Used
44 Not Used
45 Cooling Fan 1 (LF1)
59 Secondary
AIR Pump
Mini Fuses Usage 1 Engine Control
Module Battery
2 Transmission
Control Module
Battery
3 Mass Air Flow
Sensor
Page 386 of 498
Black plate (48,1)Cadillac SRX Owner Manual - 2011
10-48 Vehicle Care
Mini Fuses Usage4 Not Used
5 Engine Control
Module Run Crank
7 Post–Catalytic
Converter O2
Sensor
8 Pre–Catalytic
Converter O2
Sensor
9 Engine Control
Module Powertrain
10 Fuel Injectors–Even 11 Fuel Injectors–Odd
13 Washer
16 Instrument Panel
Cluster/Malfunction
Indicator Lamp/
Ignition
17 Air Quality Sensor
18 Headlamp Washer Mini Fuses Usage
19 Transmission
Control Module Run
Crank
20 Rear Electrical
Center Run Crank
23 Heater Motor
30 Switch Back Light
32 Battery Sense
(Regulated Voltage
Control)
33 Adaptive Forward
Lighting/Adaptive
Headlamp Leveling
Module
34 Body Control
Module 7
35 Electronic Brake
Control Module
46 Low Beam
Headlamp‐Right
47 Low Beam
Headlamp‐Left Mini Fuses Usage
50 Front Fog Lamps
51 Horn
52 Fuel System Control
Module
53 Headlamp Level
54 Sensing Diagnostic
Module Ignition
55 High Beam
Headlamp–Right
56 High Beam
Headlamp–Left
57 Ignition Steering
Column Lock
65 Trailer Right
Stop Lamp
66 Trailer Left
Stop Lamp
67 Spare
68 Spare
69 Spare
Page 405 of 498
Black plate (67,1)Cadillac SRX Owner Manual - 2011
Vehicle Care 10-67
To decrease air-pressure out of a
tire you can use the pointed end of
the valve cap, a pencil-style air
pressure gauge, or a key.
You have two minutes to match
the first tire/wheel position, and
five minutes overall to match all
four tire/wheel positions. If it takes
longer than two minutes, to match
the first tire and wheel, or more than
five minutes to match all four tire
and wheel positions the matching
process stops and you need to
start over.
The TPMS sensor matching process
is outlined below:
1. Set the parking brake.
2. Place the vehicle power mode inON/RUN/START. See Ignition
Positions on page 9‑18.
3. Select the vehicle information menu using the menu button.
4. Select the tire pressure screen using the up/down thumbwheel. 5. Press and hold SET to begin the
sensor matching process.
6. Press SET to confirm selection. The horn sounds twice to signal
the receiver is in relearn mode
and TIRE LEARNING ACTIVE
message displays on the DIC
screen.
7. Start with the driver side front tire.
8. Remove the valve cap from the valve cap stem. Activate the
TPMS sensor by increasing
or decreasing the tire's air
pressure for five seconds,
or until a horn chirp sounds.
The horn chirp, which may
take up to 30 seconds to
sound, confirms that the sensor
identification code has been
matched to this tire and wheel
position.
9. Proceed to the passenger side front tire, and repeat the
procedure in Step 5. 10. Proceed to the passenger
side rear tire, and repeat the
procedure in Step 5.
11. Proceed to the driver side rear tire, and repeat the procedure
in Step 5. The horn sounds
two times to indicate the
sensor identification code has
been matched to the driver
side rear tire, and the TPMS
sensor matching process
is no longer active. The TIRE
LEARNING ACTIVE message
on the DIC display screen
goes off.
12. Press STOP to turn the ignition off.
13. Set all four tires to the recommended air pressure
level as indicated on the Tire
and Loading Information label.
14. Put the valve caps back on the valve stems.
Page 413 of 498
Black plate (75,1)Cadillac SRX Owner Manual - 2011
Vehicle Care 10-75
Warning: The temperature grade
for this tire is established for a
tire that is properly inflated and
not overloaded. Excessive
speed, underinflation,
or excessive loading, either
separately or in combination,
can cause heat buildup and
possible tire failure.
Wheel Alignment and Tire
Balance
The tires and wheels on the vehicle
were aligned and balanced carefully
at the factory to give the longest tire
life and best overall performance.
Adjustments to wheel alignment and
tire balancing will not be necessary
on a regular basis. However, if there
is unusual tire wear or the vehicle
pulls to one side or the other, the
alignment should be checked. If the
vehicle vibrates when driving on a
smooth road, the tires and wheels
might need to be rebalanced. See
your dealer for proper diagnosis.
Wheel Replacement
Replace any wheel that is bent,
cracked, or badly rusted or
corroded. If wheel nuts keep coming
loose, the wheel, wheel bolts, and
wheel nuts should be replaced.
If the wheel leaks air, replace it,
except some aluminum wheels,
which can sometimes be repaired.
See your dealer if any of these
conditions exist.
Your dealer will know the kind of
wheel you need.
Each new wheel should have
the same load-carrying capacity,
diameter, width, offset, and be
mounted the same way as the
one it replaces.
If you need to replace any of the
wheels, wheel bolts, wheel nuts,
or Tire Pressure Monitor System
(TPMS) sensors, replace them only
with new GM original equipment
parts. This way, you will be sure to
have the right wheel, wheel bolts,
wheel nuts, and TPMS sensors for
the vehicle.{WARNING
Using the wrong replacement
wheels, wheel bolts, or wheel
nuts on your vehicle can be
dangerous. It could affect the
braking and handling of your
vehicle, make your tires lose
air and make you lose control.
You could have a collision in
which you or others could be
injured. Always use the correct
wheel, wheel bolts, and wheel
nuts for replacement.
Notice: The wrong wheel can
also cause problems with
bearing life, brake cooling,
speedometer or odometer
calibration, headlamp aim,
bumper height, vehicle ground
clearance, and tire or tire chain
clearance to the body and
chassis.
See If a Tire Goes Flat on
page 10‑77 for more information.