check engine CADILLAC SRX 2012 2.G Owner's Guide
[x] Cancel search | Manufacturer: CADILLAC, Model Year: 2012, Model line: SRX, Model: CADILLAC SRX 2012 2.GPages: 502, PDF Size: 6.23 MB
Page 350 of 502
Black plate (18,1)Cadillac SRX Owner Manual (Include Mex) - 2012
10-18 Vehicle Care
2. Then keep turning the pressurecap slowly and remove it.
3. Fill the coolant surge tank with the proper DEX-COOL coolant
mixture to the indicated
level mark.
4. With the coolant surge tank pressure cap off, start the
engine and let it run until you
can feel the upper radiator hose
getting hot. Watch out for the
engine cooling fan.
By this time, the coolant level
inside the coolant surge tank
may be lower. If the level is
lower, add more of the proper
DEX-COOL
®coolant mixture to
the coolant surge tank until the
level reaches the indicated
level mark.
5. Then replace the pressure cap. Be sure the pressure cap is
hand-tight. Check the level in the coolant surge
tank when the cooling system has
cooled down. If the coolant is not at
the proper level, repeat Steps 1
through 3 and reinstall the pressure
cap. If the coolant still is not at the
proper level when the system cools
down again, see your dealer.
Engine Overheating
The vehicle has an indicator to warn
of engine overheating.
There is an engine coolant
temperature warning light on the
vehicle's instrument panel.
See
Engine Coolant Temperature
Gauge on page 5‑14.
If the decision is made not to lift the
hood when this warning appears,
but instead get service help right
away. See Roadside Service
(U.S. and Canada) on page 13‑7 or
Roadside Service (Mexico) on
page 13‑9. If the decision is made to lift the
hood, make sure the vehicle is
parked on a level surface.
Then check to see if the engine
cooling fans are running. If the
engine is overheating, both fans
should be running. If they are not,
do not continue to run the engine
and have the vehicle serviced.
Notice:
Engine damage from
running the engine without
coolant is not covered by the
warranty.
Notice: If the engine catches fire
because of being driven with no
coolant, the vehicle can be badly
damaged. The costly repairs
would not be covered by the
vehicle warranty.
Page 352 of 502
Black plate (20,1)Cadillac SRX Owner Manual (Include Mex) - 2012
10-20 Vehicle Care
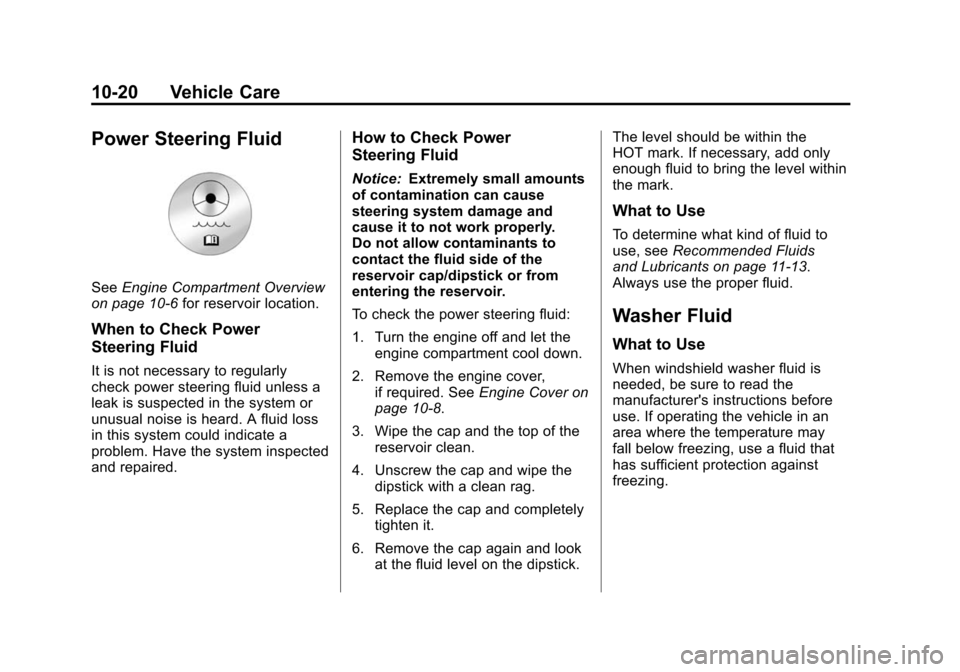
Power Steering Fluid
SeeEngine Compartment Overview
on page 10‑6 for reservoir location.
When to Check Power
Steering Fluid
It is not necessary to regularly
check power steering fluid unless a
leak is suspected in the system or
unusual noise is heard. A fluid loss
in this system could indicate a
problem. Have the system inspected
and repaired.
How to Check Power
Steering Fluid
Notice:Extremely small amounts
of contamination can cause
steering system damage and
cause it to not work properly.
Do not allow contaminants to
contact the fluid side of the
reservoir cap/dipstick or from
entering the reservoir.
To check the power steering fluid:
1. Turn the engine off and let the engine compartment cool down.
2. Remove the engine cover, if required. See Engine Cover on
page 10‑8.
3. Wipe the cap and the top of the reservoir clean.
4. Unscrew the cap and wipe the dipstick with a clean rag.
5. Replace the cap and completely tighten it.
6. Remove the cap again and look at the fluid level on the dipstick. The level should be within the
HOT mark. If necessary, add only
enough fluid to bring the level within
the mark.
What to Use
To determine what kind of fluid to
use, see
Recommended Fluids
and Lubricants on page 11‑13.
Always use the proper fluid.
Washer Fluid
What to Use
When windshield washer fluid is
needed, be sure to read the
manufacturer's instructions before
use. If operating the vehicle in an
area where the temperature may
fall below freezing, use a fluid that
has sufficient protection against
freezing.
Page 356 of 502
Black plate (24,1)Cadillac SRX Owner Manual (Include Mex) - 2012
10-24 Vehicle Care
Battery
Refer to the replacement number
shown on the original battery label
when a new battery is needed.
SeeEngine Compartment Overview
on page 10‑6 for battery location.
{WARNING
Battery posts, terminals, and
related accessories contain lead
and lead compounds, chemicals
known to the State of California to
cause cancer and reproductive
harm. Wash hands after handling.
Vehicle Storage
{WARNING
Batteries have acid that can burn
you and gas that can explode.
You can be badly hurt if you are
not careful. See Jump Starting on
page 10‑88 for tips on working
around a battery without
getting hurt.
Infrequent Usage: Remove the
black, negative (−) cable from the
battery to keep the battery from
running down.
Extended Storage: Remove the
black, negative (−) cable from the
battery or use a battery trickle
charger.
All-Wheel Drive
Transfer Case
When to Check and Change
Lubricant
The transfer case is filled with oil
during manufacture, which then
does not require changing. It is not
necessary to regularly check the
transfer case fluid unless there is a
leak suspected or an unusual noise
is heard. A fluid loss could indicate
a problem. It is recommended to
have the transfer case serviced at
your dealer.
Page 357 of 502
Black plate (25,1)Cadillac SRX Owner Manual (Include Mex) - 2012
Vehicle Care 10-25
Starter Switch Check
{WARNING
When you are doing this
inspection, the vehicle could
move suddenly. If the vehicle
moves, you or others could be
injured.
1. Before starting this check, be sure there is enough room
around the vehicle.
2. Firmly apply both the parking brake and the regular brake.
See Parking Brake on
page 9‑31.
Do not use the accelerator
pedal, and be ready to turn off
the engine immediately if it
starts. 3. Try to start the engine in each
gear. The vehicle should start
only in P (Park) or N (Neutral).
If the vehicle starts in any other
position, contact your dealer for
service.
Automatic Transmission
Shift Lock Control
Function Check
{WARNING
When you are doing this
inspection, the vehicle could
move suddenly. If the vehicle
moves, you or others could be
injured.
1. Before starting this check, be sure there is enough room
around the vehicle. It should be
parked on a level surface. 2. Firmly apply the parking brake.
See Parking Brake on
page 9‑31.
Be ready to apply the regular
brake immediately if the vehicle
begins to move.
3. With the engine off, turn the ignition on, but do not start the
engine. Without applying the
regular brake, try to move the
shift lever out of P (Park) with
normal effort. If the shift lever
moves out of P (Park), contact
your dealer for service.
Page 358 of 502
Black plate (26,1)Cadillac SRX Owner Manual (Include Mex) - 2012
10-26 Vehicle Care
Park Brake and P (Park)
Mechanism Check
{WARNING
When you are doing this check,
the vehicle could begin to move.
You or others could be injured
and property could be damaged.
Make sure there is room in front
of the vehicle in case it begins to
roll. Be ready to apply the regular
brake at once should the vehicle
begin to move.Park on a fairly steep hill, with the
vehicle facing downhill. Keeping
your foot on the regular brake,
set the parking brake.
.To check the parking brake's
holding ability: With the engine
running and the transmission in
N (Neutral), slowly remove foot
pressure from the regular brake
pedal. Do this until the vehicle is
held by the parking brake only.
.To check the P (Park)
mechanism's holding ability:
With the engine running, shift to
P (Park). Then release the
parking brake followed by the
regular brake.
Contact your dealer if service is
required.
Wiper Blade Replacement
Windshield wiper blades should be
inspected for wear or cracking.
See Maintenance Schedule on
page 11‑4 for more information.
It is a good idea to clean or replace
the wiper blade assembly on a
regular basis or when worn.
For proper windshield wiper blade
length and type, see Maintenance
Replacement Parts on page 11‑15.
Notice: Allowing the wiper blade
arm to touch the windshield
when no wiper blade is installed
could damage the windshield.
Any damage that occurs would
not be covered by your warranty.
Do not allow the wiper blade arm
to touch the windshield.
Page 373 of 502
Black plate (41,1)Cadillac SRX Owner Manual (Include Mex) - 2012
Vehicle Care 10-41
Electrical System
Electrical System
Overload
The vehicle has fuses and circuit
breakers to protect against an
electrical system overload.
When the current electrical load is
too heavy, the circuit breaker opens
and closes, protecting the circuit
until the current load returns to
normal or the problem is fixed.
This greatly reduces the chance of
circuit overload and fire caused by
electrical problems.
Fuses and circuit breakers protect
power devices in the vehicle.
Replace a bad fuse with a new one
of the identical size and rating.
If there is a problem on the road and
a fuse needs to be replaced, the
same amperage fuse can be
borrowed. Choose some feature of
the vehicle that is not needed to use
and replace it as soon as possible.
Headlamp Wiring
An electrical overload may cause
the lamps to go on and off, or in
some cases to remain off. Have the
headlamp wiring checked right away
if the lamps go on and off or
remain off.
Windshield Wipers
If the wiper motor overheats due to
heavy snow or ice, the windshield
wipers will stop until the motor cools
and will then restart.
Although the circuit is protected
from electrical overload, overload
due to heavy snow or ice may
cause wiper linkage damage.
Always clear ice and heavy snow
from the windshield before using the
windshield wipers.
If the overload is caused by an
electrical problem and not snow or
ice, be sure to get it fixed.
Fuses and Circuit
Breakers
The wiring circuits in the vehicle are
protected from short circuits by a
combination of fuses and circuit
breakers. This greatly reduces the
chance of damage caused by
electrical problems.
To check a fuse, look at the
silver-colored band inside the fuse.
If the band is broken or melted,
replace the fuse. Be sure to replace
a bad fuse with a new one of the
identical size and rating.
Fuses of the same amperage can
be temporarily borrowed from
another fuse location, if a fuse goes
out. Replace the fuse as soon as
you can.
To identify and check fuses, circuit
breakers, and relays, seeEngine
Compartment Fuse Block on
page 10‑42 andRear Compartment
Fuse Block on page 10‑46.
Page 422 of 502
Black plate (90,1)Cadillac SRX Owner Manual (Include Mex) - 2012
10-90 Vehicle Care
{WARNING
Fans or other moving engine
parts can injure you badly. Keep
your hands away from moving
parts once the engine is running.
5. Check that the jumper cables do not have loose or missing
insulation. If they do, you could
get a shock. The vehicles could
also be damaged.
Before you connect the cables,
here are some basic things you
should know. Positive (+) will go
to positive (+) or to a remote
positive (+) terminal if the vehicle
has one. Negative (−) will go to a
heavy, unpainted metal engine
part or to a remote negative (−)
terminal if the vehicle has one. Do not connect positive (+) to
negative (−) or you will get a
short that would damage the
battery and maybe other parts.
Do not connect the negative (−)
cable to the negative (−) terminal
on the dead battery because this
can cause sparks.
6. Connect the red positive (+) cable to the positive (+)
terminal on the vehicle with the
dead battery. Use a remote
positive (+) terminal if the vehicle
has one.
7. Do not let the other end touch metal. Connect it to the
positive (+) terminal of the
good battery. Use a remote
positive (+) terminal if the
vehicle has one. 8. Now connect the black
negative (−) cable to the
negative (−) terminal of the
good battery. Use a remote
negative (−) terminal if the
vehicle has one.
Do not let the other end touch
anything until the next step.
The other end of the negative (−)
cable does not go to the dead
battery. It goes to a heavy,
unpainted metal engine part or
to a remote negative (−) terminal
on the vehicle with the dead
battery.
9. Connect the other end of the negative (−) cable away from
the dead battery, but not
near engine parts that move.
The electrical connection is just
as good there, and the chance
of sparks getting back to the
battery is much less.
Your vehicle has a remote (−)
terminal for this purpose.
Page 440 of 502
Black plate (4,1)Cadillac SRX Owner Manual (Include Mex) - 2012
11-4 Service and Maintenance
Maintenance
Schedule
Owner Checks and Services
At Each Fuel Stop
.Check the engine oil level.
SeeEngine Oil on page 10‑8.
Once a Month
.Check the tire inflation
pressures. See Tire Pressure on
page 10‑56.
.Inspect the tires for wear.
See Tire Inspection on
page 10‑63.
.Check the windshield washer
fluid level. See Washer Fluid on
page 10‑20.
Engine Oil Change
When the CHANGE ENGINE OIL
SOON message displays, have the
engine oil and filter changed within
the next 1 000 km/600 mi. If driven
under the best conditions, the
engine oil life system might not
indicate the need for vehicle service
for more than a year. The engine oil
and filter must be changed at least
once a year and the oil life system
must be reset. Your trained dealer
technician can perform this work.
If the engine oil life system is reset
accidentally, service the vehicle
within 5 000 km/3,000 mi since the
last service. Reset the oil life
system when the oil is changed.
See Engine Oil Life System on
page 10‑10.
Tire Rotation and
Required Services Every
12 000 km/7,500 mi
Rotate the tires, if recommended
for the vehicle, and perform the
following services. See Tire
Rotation on page 10‑63.
.Check engine oil level and oil
life percentage. If needed,
change engine oil and filter, and
reset oil life system. See Engine
Oil on page 10‑8 andEngine Oil
Life System on page 10‑10.
.Check engine coolant level.
See Engine Coolant on
page 10‑15.
.Check windshield washer fluid
level. See Washer Fluid on
page 10‑20.
Page 441 of 502

Black plate (5,1)Cadillac SRX Owner Manual (Include Mex) - 2012
Service and Maintenance 11-5
.Visually inspect windshield
wiper blades for wear, cracking,
or contamination. SeeExterior
Care on page 10‑96. Replace
worn or damaged wiper blades.
See Wiper Blade Replacement
on page 10‑26.
.Check tire inflation pressures.
See Tire Pressure on
page 10‑56.
.Inspect tire wear. See Tire
Inspection on page 10‑63.
.Visually check for fluid leaks.
.Inspect engine air cleaner filter.
See Engine Air Cleaner/Filter on
page 10‑12.
.Inspect brake system.
.Visually inspect steering,
suspension, and chassis
components for damaged,
loose, or missing parts or signs
of wear. See Exterior Care on
page 10‑96.
.Check restraint system
components. See Safety
System Check on page 3‑21.
.Visually inspect fuel system for
damage or leaks.
.Visually inspect exhaust system
and nearby heat shields for
loose or damaged parts.
.Lubricate body components.
See Exterior Care on
page 10‑96.
.Check starter switch.
See Starter Switch Check on
page 10‑25.
.Check automatic transmission
shift lock control function.
See Automatic Transmission
Shift Lock Control Function
Check on page 10‑25.
.Check parking brake and
automatic transmission park
mechanism. See Park Brake and
P (Park) Mechanism Check on
page 10‑26.
.Check accelerator pedal for
damage, high effort, or binding.
Replace if needed.
.Visually inspect gas strut for
signs of wear, cracks, or other
damage. Check the hold open
ability of the strut. See your
dealer if service is required.
.Check tire sealant expiration
date, if equipped. See Tire
Sealant and Compressor Kit on
page 10‑73.
.Inspect sunroof track and seal,
if equipped. See Sunroof on
page 2‑27.
Page 447 of 502
Black plate (11,1)Cadillac SRX Owner Manual (Include Mex) - 2012
Service and Maintenance 11-11
Fluids
Proper fluid levels and approved
fluids protect the vehicle’s
systems and components.
SeeRecommended Fluids and
Lubricants on page 11‑13 for
GM approved fluids.
.Engine oil and windshield
washer fluid levels should be
checked at every fuel fill.
.Instrument cluster lights may
come on to indicate that fluids
may be low and need to be
filled.
Hoses
Hoses transport fluids and should
be regularly inspected to ensure
that there are no cracks or leaks.
With a multi‐point inspection, your
dealer can inspect the hoses and
advise if replacement is needed. Lamps
Properly working headlamps,
taillamps, and brake lamps are
important to see and be seen on
the road.
.Signs that the headlamps need
attention include dimming, failure
to light, cracking, or damage.
The brake lamps need to be
checked periodically to ensure
that they light when braking.
.With a multi‐point inspection,
your dealer can check the lamps
and note any concerns.
Shocks and Struts
Shocks and struts help aid in
control for a smoother ride.
.Signs of wear may include
steering wheel vibration,
bounce/sway while braking,
longer stopping distance,
or uneven tire wear.
.As part of the multi‐point
inspection, trained dealer
technicians can visually inspect
the shocks and struts for signs
of leaking, blown seals,
or damage, and can advise
when service is needed.