engine CADILLAC SRX 2014 User Guide
[x] Cancel search | Manufacturer: CADILLAC, Model Year: 2014, Model line: SRX, Model: CADILLAC SRX 2014Pages: 416, PDF Size: 4.56 MB
Page 35 of 416
Black plate (7,1)Cadillac SRX Owner Manual (GMNA-Localizing-U.S./Canada/Mexico-
6081464) - 2014 - CRC - 10/4/13
Keys, Doors, and Windows 2-7
3. Repeat Step 2 two additionaltimes. After the third time all
previously known transmitters
will no longer work with the
vehicle. Remaining transmitters
can be relearned during the next
steps.
The DIC display should
now show READY FOR
REMOTE # 1.
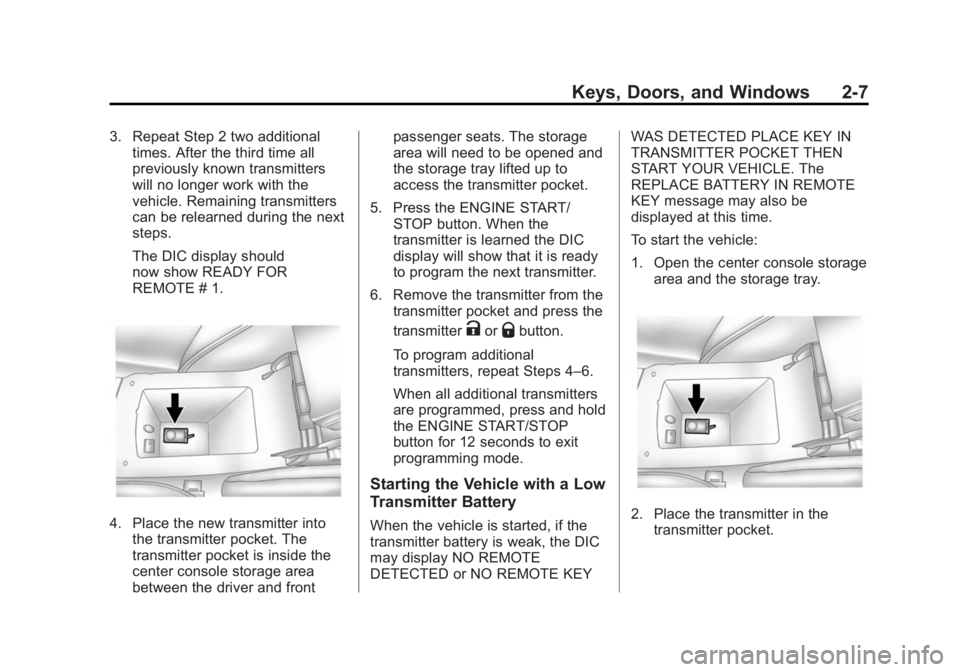
4. Place the new transmitter intothe transmitter pocket. The
transmitter pocket is inside the
center console storage area
between the driver and front passenger seats. The storage
area will need to be opened and
the storage tray lifted up to
access the transmitter pocket.
5. Press the ENGINE START/ STOP button. When the
transmitter is learned the DIC
display will show that it is ready
to program the next transmitter.
6. Remove the transmitter from the transmitter pocket and press the
transmitter
KorQbutton.
To program additional
transmitters, repeat Steps 4–6.
When all additional transmitters
are programmed, press and hold
the ENGINE START/STOP
button for 12 seconds to exit
programming mode.
Starting the Vehicle with a Low
Transmitter Battery
When the vehicle is started, if the
transmitter battery is weak, the DIC
may display NO REMOTE
DETECTED or NO REMOTE KEY WAS DETECTED PLACE KEY IN
TRANSMITTER POCKET THEN
START YOUR VEHICLE. The
REPLACE BATTERY IN REMOTE
KEY message may also be
displayed at this time.
To start the vehicle:
1. Open the center console storage
area and the storage tray.2. Place the transmitter in the
transmitter pocket.
Page 36 of 416
Black plate (8,1)Cadillac SRX Owner Manual (GMNA-Localizing-U.S./Canada/Mexico-
6081464) - 2014 - CRC - 10/4/13
2-8 Keys, Doors, and Windows
3. With the vehicle in P (Park) orN (Neutral), press the brake
pedal and the ENGINE START/
STOP button.
Replace the transmitter battery
as soon as possible.
Battery Replacement
{Caution
When replacing the battery, do
not touch any of the circuitry on
the transmitter. Static from your
body could damage the
transmitter.
Replace the battery if the REPLACE
BATTERY IN REMOTE KEY
message displays in the DIC.
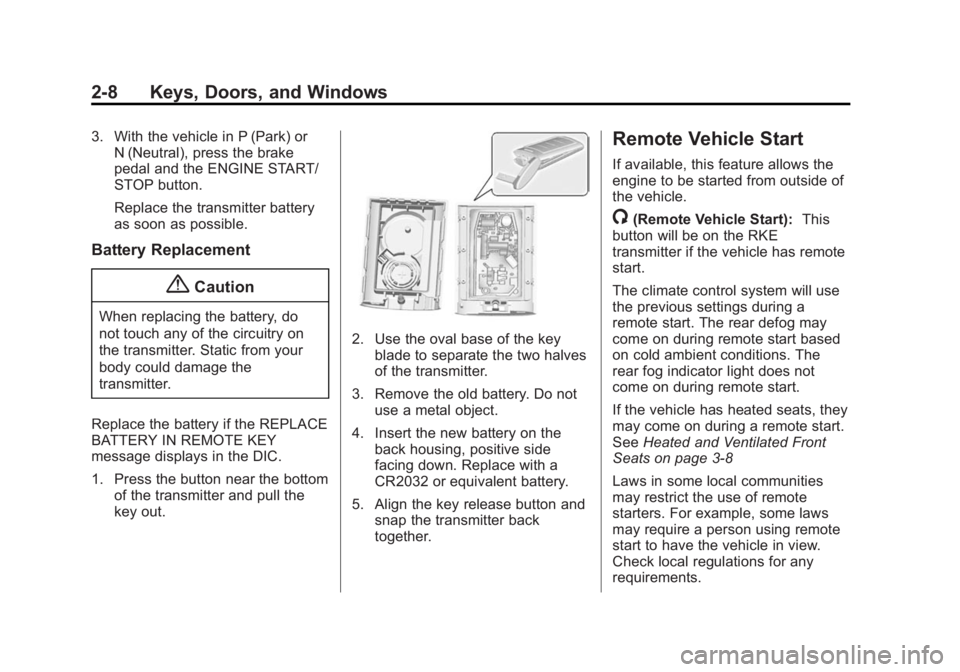
1. Press the button near the bottom of the transmitter and pull the
key out.
2. Use the oval base of the keyblade to separate the two halves
of the transmitter.
3. Remove the old battery. Do not use a metal object.
4. Insert the new battery on the back housing, positive side
facing down. Replace with a
CR2032 or equivalent battery.
5. Align the key release button and snap the transmitter back
together.
Remote Vehicle Start
If available, this feature allows the
engine to be started from outside of
the vehicle.
/(Remote Vehicle Start): This
button will be on the RKE
transmitter if the vehicle has remote
start.
The climate control system will use
the previous settings during a
remote start. The rear defog may
come on during remote start based
on cold ambient conditions. The
rear fog indicator light does not
come on during remote start.
If the vehicle has heated seats, they
may come on during a remote start.
See Heated and Ventilated Front
Seats on page 3-8
Laws in some local communities
may restrict the use of remote
starters. For example, some laws
may require a person using remote
start to have the vehicle in view.
Check local regulations for any
requirements.
Page 37 of 416
Black plate (9,1)Cadillac SRX Owner Manual (GMNA-Localizing-U.S./Canada/Mexico-
6081464) - 2014 - CRC - 10/4/13
Keys, Doors, and Windows 2-9
Other conditions can affect the
performance of the transmitter. See
Remote Keyless Entry (RKE)
System on page 2-2for additional
information.
Starting the Engine Using Remote
Start
1. Press and release
Qon the
RKE transmitter.
2. Immediately press and hold
/
for at least four seconds or until
the turn signal lamps flash. The
turn signal lamps flashing
confirms the request to remote
start the vehicle has been
received.
During the remote start the
doors will be locked and the
parking lamps will remain on as
long as the engine is running.
The engine will shut off after
10 minutes unless a time
extension is done or the ignition
is put in ON/RUN/START. 3. Press the brake pedal and select
the ON/RUN/START ignition
mode to drive the vehicle.
Extending Engine Run Time
The engine run time can also be
extended by another 10-minutes,
if during the first 10 minutes
Steps 1–2 are repeated while the
engine is still running. This provides
a total of 20 minutes.
The remote start can only be
extended once.
When the remote start is extended,
the second 10-minute period is
added on to the first 10 minutes for
a total of 20 minutes.
A maximum of two remote starts,
or a remote start with an extension,
are allowed between ignition cycles.
The vehicle's ignition must be
changed to ON/RUN/START and
then back to OFF before the remote
start procedure can be used again. Shutting the Engine Off After a
Remote Start
To cancel a remote start, do any of
the following:
.Press and hold/until the
parking lamps turn off.
.Turn on the hazard warning
flashers.
.Turn the vehicle on and then off.
Conditions in Which Remote Start
Will Not Work
The remote start will not operate if
any of the following occur:
.The transmitter is in the vehicle.
.The hood is not closed.
.The hazard warning flashers
are on.
.There is an emission control
system malfunction.
.The engine coolant temperature
is too high.
.The oil pressure is low.
Page 41 of 416
Black plate (13,1)Cadillac SRX Owner Manual (GMNA-Localizing-U.S./Canada/Mexico-
6081464) - 2014 - CRC - 10/4/13
Keys, Doors, and Windows 2-13
Doors
Liftgate
{Warning
Exhaust gases can enter the
vehicle if it is driven with the
liftgate or trunk/hatch open,
or with any objects that pass
through the seal between the
body and the trunk/hatch or
liftgate. Engine exhaust contains
carbon monoxide (CO) which
cannot be seen or smelled. It can
cause unconsciousness and even
death.
If the vehicle must be driven with
the liftgate or trunk/hatch open:
.Close all of the windows.
.Fully open the air outlets on
or under the instrument
panel.(Continued)
Warning (Continued)
.Adjust the climate control
system to a setting that
brings in only outside air and
set the fan speed to the
highest setting. See “Climate
Control Systems” in the
Index.
.If the vehicle is equipped with
a power liftgate, disable the
power liftgate function.
See Engine Exhaust on
page 9-21.
{Caution
To avoid damage to the liftgate or
liftgate glass, make sure the area
above and behind the liftgate is
clear before opening it.
Manual Liftgate
For vehicles without Keyless
Access, unlock the vehicle before
opening the liftgate.
Press the touch pad in the handle of
the liftgate, above the license plate,
and lift up to open.
Do not press the touch pad while
closing the liftgate. This will cause
the liftgate to be unlatched.
Always close the liftgate before
driving.
Page 46 of 416
Black plate (18,1)Cadillac SRX Owner Manual (GMNA-Localizing-U.S./Canada/Mexico-
6081464) - 2014 - CRC - 10/4/13
2-18 Keys, Doors, and Windows
Disarming the Alarm System
To disarm the alarm system or turn
off the alarm if it has been activated:
.PressKon the RKE transmitter.
.Unlock the vehicle using the
Keyless Access system.
.Start the vehicle.
To avoid setting off the alarm by
accident:
.Lock the vehicle after all
occupants have left the vehicle
and all doors are closed.
.Always unlock a door with the
RKE transmitter or use the
Keyless Access system.
Unlocking the driver door with the
key will not disarm the system or
turn off the alarm.
How to Detect a Tamper
Condition
IfKis pressed and the horn chirps
three times, the alarm was activated
while the alarm system was armed. If the alarm system has been
activated, a message will appear on
the DIC. See
Security Messages on
page 5-38.
Immobilizer
See Radio Frequency Statement on
page 13-15.
Immobilizer Operation
This vehicle has a passive
theft-deterrent system.
The system does not have to be
manually armed or disarmed.
The vehicle is automatically
immobilized when the vehicle is
turned off.
The immobilization system is
disarmed when the pushbutton start
is activated to enter the ACC/
ACCESSORY mode or the ON/
RUN/START mode and a valid
transmitter is present in the vehicle.
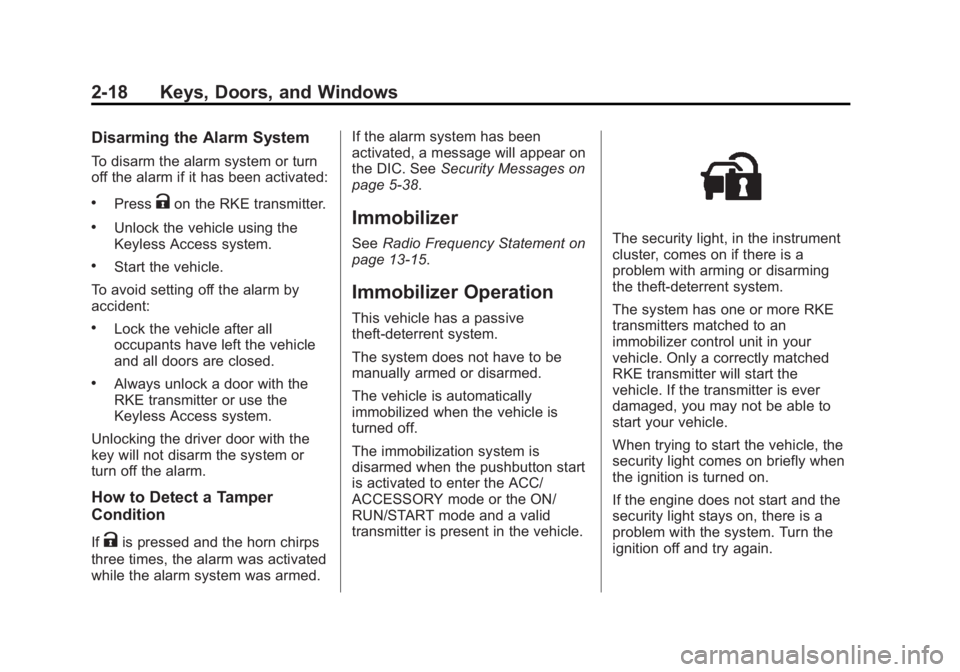
The security light, in the instrument
cluster, comes on if there is a
problem with arming or disarming
the theft-deterrent system.
The system has one or more RKE
transmitters matched to an
immobilizer control unit in your
vehicle. Only a correctly matched
RKE transmitter will start the
vehicle. If the transmitter is ever
damaged, you may not be able to
start your vehicle.
When trying to start the vehicle, the
security light comes on briefly when
the ignition is turned on.
If the engine does not start and the
security light stays on, there is a
problem with the system. Turn the
ignition off and try again.
Page 79 of 416

Black plate (25,1)Cadillac SRX Owner Manual (GMNA-Localizing-U.S./Canada/Mexico-
6081464) - 2014 - CRC - 10/4/13
Seats and Restraints 3-25
What Will You See after
an Airbag Inflates?
After the frontal airbags and
seat-mounted side impact airbags
inflate, they quickly deflate, so
quickly that some people may not
even realize an airbag inflated.
Roof-rail airbags may still be at least
partially inflated for some time after
they inflate. Some components of
the airbag module may be hot for
several minutes. For location of the
airbags, seeWhere Are the
Airbags? on page 3-21.
The parts of the airbag that come
into contact with you may be warm,
but not too hot to touch. There may
be some smoke and dust coming
from the vents in the deflated
airbags. Airbag inflation does not
prevent the driver from seeing out of
the windshield or being able to steer
the vehicle, nor does it prevent
people from leaving the vehicle.
{Warning
When an airbag inflates, there
may be dust in the air. This dust
could cause breathing problems
for people with a history of
asthma or other breathing trouble.
To avoid this, everyone in the
vehicle should get out as soon as
it is safe to do so. If you have
breathing problems but cannot
get out of the vehicle after an
airbag inflates, then get fresh air
by opening a window or a door.
If you experience breathing
problems following an airbag
deployment, you should seek
medical attention.
The vehicle has a feature that may
automatically unlock the doors, turn
on the interior lamps, turn on the
hazard warning flashers, and shut off the fuel system after the airbags
inflate. You can lock the doors, turn
off the interior lamps, and turn off
the hazard warning flashers by
using the controls for those
features.
{Warning
A crash severe enough to inflate
the airbags may have also
damaged important functions in
the vehicle, such as the fuel
system, brake and steering
systems, etc. Even if the vehicle
appears to be drivable after a
moderate crash, there may be
concealed damage that could
make it difficult to safely operate
the vehicle.
Use caution if you should attempt
to restart the engine after a crash
has occurred.
Page 121 of 416
Black plate (1,1)Cadillac SRX Owner Manual (GMNA-Localizing-U.S./Canada/Mexico-
6081464) - 2014 - CRC - 10/4/13
Instruments and Controls 5-1
Instruments and
Controls
Controls
Steering Wheel Adjustment . . . 5-2
Steering Wheel Controls . . . . . . 5-2
Heated Steering Wheel . . . . . . . 5-3
Horn . . . . . . . . . . . . . . . . . . . . . . . . . . 5-3
Windshield Wiper/Washer . . . . . 5-3
Rear Window Wiper/Washer . . . . . . . . . . . . . . . . . . . . . . 5-5
Headlamp Washer . . . . . . . . . . . . 5-6
Compass . . . . . . . . . . . . . . . . . . . . . 5-6
Clock . . . . . . . . . . . . . . . . . . . . . . . . . 5-6
Power Outlets . . . . . . . . . . . . . . . . . 5-7
Cigarette Lighter . . . . . . . . . . . . . . 5-8
Ashtrays . . . . . . . . . . . . . . . . . . . . . . 5-8
Warning Lights, Gauges, and
Indicators
Warning Lights, Gauges, and Indicators . . . . . . . . . . . . . . . . . . . . 5-9
Instrument Cluster . . . . . . . . . . . 5-10
Speedometer . . . . . . . . . . . . . . . . 5-11
Odometer . . . . . . . . . . . . . . . . . . . . 5-11
Trip Odometer . . . . . . . . . . . . . . . 5-12
Tachometer . . . . . . . . . . . . . . . . . . 5-12 Fuel Gauge . . . . . . . . . . . . . . . . . . 5-12
Engine Coolant Temperature
Gauge . . . . . . . . . . . . . . . . . . . . . . 5-13
Safety Belt Reminders . . . . . . . 5-13
Airbag Readiness Light . . . . . . 5-14
Passenger Airbag Status Indicator . . . . . . . . . . . . . . . . . . . . 5-15
Charging System Light . . . . . . 5-16
Malfunction Indicator Lamp . . . . . . . . . . . . . 5-16
Brake System Warning Light . . . . . . . . . . . . . . . . . . . . . . . 5-19
Electric Parking Brake Light . . . . . . . . . . . . . . . . . . . . . . . 5-19
Service Electric Parking Brake Light . . . . . . . . . . . . . . . . . . . . . . . 5-20
Antilock Brake System (ABS) Warning Light . . . . . . . . . . . . . . 5-20
Lane Departure Warning (LDW) Light . . . . . . . . . . . . . . . . 5-21
Vehicle Ahead Indicator . . . . . . 5-21
Traction Off Light . . . . . . . . . . . . 5-21
StabiliTrak®OFF Light . . . . . . . 5-22
Traction Control System (TCS)/StabiliTrak
®Light . . . . 5-22
Engine Coolant Temperature Warning Light . . . . . . . . . . . . . . 5-22
Tire Pressure Light . . . . . . . . . . 5-23
Engine Oil Pressure Light . . . . 5-23 Fuel Economy Light . . . . . . . . . 5-24
Low Fuel Warning Light . . . . . . 5-24
Security Light . . . . . . . . . . . . . . . . 5-24
High-Beam On Light . . . . . . . . . 5-25
Adaptive Forward Lighting
(AFL) Light . . . . . . . . . . . . . . . . . 5-25
Front Fog Lamp Light . . . . . . . . 5-25
Lamps On Reminder . . . . . . . . . 5-25
Cruise Control Light . . . . . . . . . 5-26
Information Displays
Driver Information Center (DIC) . . . . . . . . . . . . . . . 5-26
Vehicle Messages
Vehicle Messages . . . . . . . . . . . 5-29
Battery Voltage and ChargingMessages . . . . . . . . . . . . . . . . . . 5-29
Brake System Messages . . . . 5-29
Compass Messages . . . . . . . . . 5-30
Cruise Control Messages . . . . 5-30
Door Ajar Messages . . . . . . . . . 5-31
Engine Cooling System Messages . . . . . . . . . . . . . . . . . . 5-31
Engine Oil Messages . . . . . . . . 5-32
Engine Power Messages . . . . 5-32
Fuel System Messages . . . . . . 5-33
Key and Lock Messages . . . . . 5-33
Lamp Messages . . . . . . . . . . . . . 5-33
Page 124 of 416
Black plate (4,1)Cadillac SRX Owner Manual (GMNA-Localizing-U.S./Canada/Mexico-
6081464) - 2014 - CRC - 10/4/13
5-4 Instruments and Controls
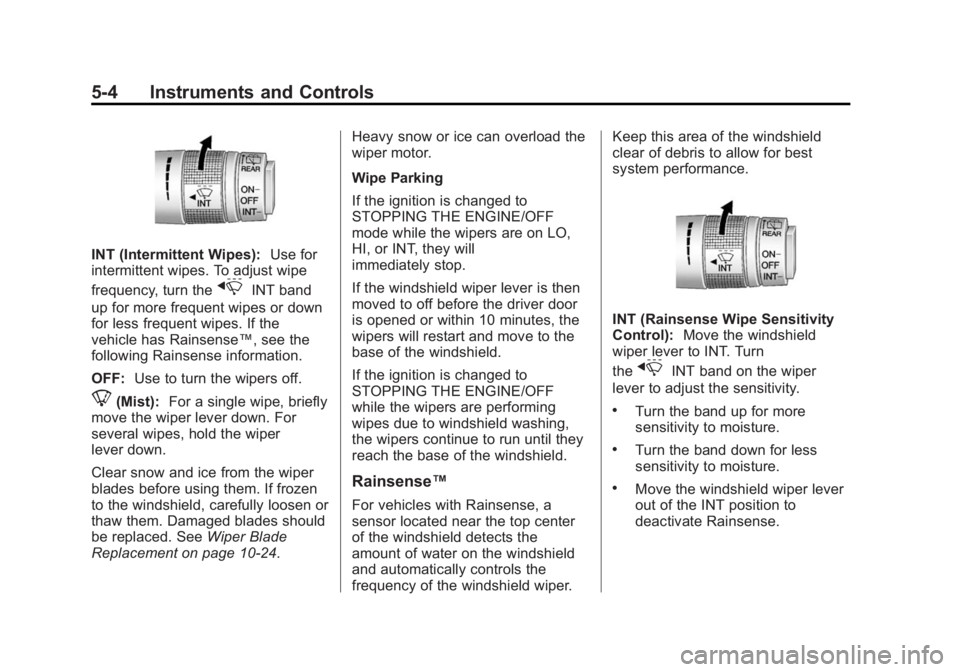
INT (Intermittent Wipes):Use for
intermittent wipes. To adjust wipe
frequency, turn the
xINT band
up for more frequent wipes or down
for less frequent wipes. If the
vehicle has Rainsense™, see the
following Rainsense information.
OFF: Use to turn the wipers off.
8(Mist): For a single wipe, briefly
move the wiper lever down. For
several wipes, hold the wiper
lever down.
Clear snow and ice from the wiper
blades before using them. If frozen
to the windshield, carefully loosen or
thaw them. Damaged blades should
be replaced. See Wiper Blade
Replacement on page 10-24. Heavy snow or ice can overload the
wiper motor.
Wipe Parking
If the ignition is changed to
STOPPING THE ENGINE/OFF
mode while the wipers are on LO,
HI, or INT, they will
immediately stop.
If the windshield wiper lever is then
moved to off before the driver door
is opened or within 10 minutes, the
wipers will restart and move to the
base of the windshield.
If the ignition is changed to
STOPPING THE ENGINE/OFF
while the wipers are performing
wipes due to windshield washing,
the wipers continue to run until they
reach the base of the windshield.
Rainsense™
For vehicles with Rainsense, a
sensor located near the top center
of the windshield detects the
amount of water on the windshield
and automatically controls the
frequency of the windshield wiper.Keep this area of the windshield
clear of debris to allow for best
system performance.
INT (Rainsense Wipe Sensitivity
Control):
Move the windshield
wiper lever to INT. Turn
the
xINT band on the wiper
lever to adjust the sensitivity.
.Turn the band up for more
sensitivity to moisture.
.Turn the band down for less
sensitivity to moisture.
.Move the windshield wiper lever
out of the INT position to
deactivate Rainsense.
Page 129 of 416
Black plate (9,1)Cadillac SRX Owner Manual (GMNA-Localizing-U.S./Canada/Mexico-
6081464) - 2014 - CRC - 10/4/13
Instruments and Controls 5-9
Warning Lights,
Gauges, and
Indicators
Warning lights and gauges can
signal that something is wrong
before it becomes serious enough
to cause an expensive repair or
replacement. Paying attention to the
warning lights and gauges could
prevent injury.Warning lights come on when there
could be a problem with a vehicle
function. Some warning lights come
on briefly when the engine is started
to indicate they are working.
Gauges can indicate when there
could be a problem with a vehicle
function. Often gauges and warning
lights work together to indicate a
problem with the vehicle.
When one of the warning lights
comes on and stays on while
driving, or when one of the gauges
shows there may be a problem,
check the section that explains what
to do. Follow this manual's advice.
Waiting to do repairs can be costly
and even dangerous.
Page 132 of 416
Black plate (12,1)Cadillac SRX Owner Manual (GMNA-Localizing-U.S./Canada/Mexico-
6081464) - 2014 - CRC - 10/4/13
5-12 Instruments and Controls
possible, it is set at zero and a label
is put on the driver door to show the
old mileage reading.
Trip Odometer
The trip odometer can show how far
the vehicle has been driven since
the trip odometer was last reset.
The trip odometer is accessed and
reset through the Driver Information
Center (DIC). SeeDriver
Information Center (DIC) on
page 5-26.
Tachometer
The tachometer displays the engine
speed in revolutions per
minute (rpm).
{Caution
If the engine is operated with the
tachometer in the shaded warning
area, the vehicle could be
damaged, and the damages
(Continued)
Caution (Continued)
would not be covered by the
vehicle warranty. Do not operate
the engine with the tachometer in
the shaded warning area.
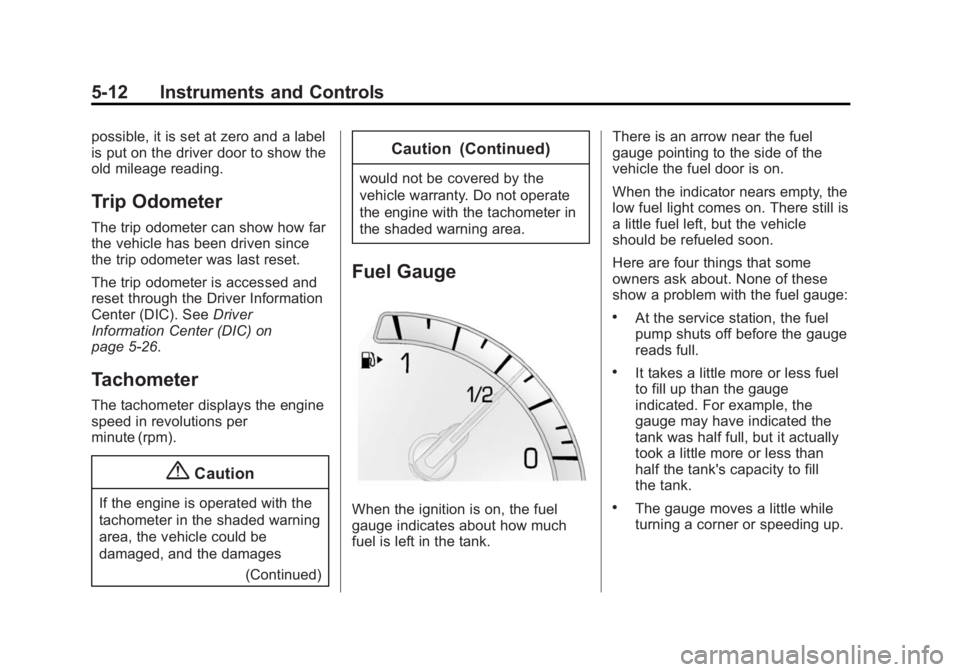
Fuel Gauge
When the ignition is on, the fuel
gauge indicates about how much
fuel is left in the tank. There is an arrow near the fuel
gauge pointing to the side of the
vehicle the fuel door is on.
When the indicator nears empty, the
low fuel light comes on. There still is
a little fuel left, but the vehicle
should be refueled soon.
Here are four things that some
owners ask about. None of these
show a problem with the fuel gauge:
.At the service station, the fuel
pump shuts off before the gauge
reads full.
.It takes a little more or less fuel
to fill up than the gauge
indicated. For example, the
gauge may have indicated the
tank was half full, but it actually
took a little more or less than
half the tank's capacity to fill
the tank.
.The gauge moves a little while
turning a corner or speeding up.