center console CADILLAC SRX 2016 2.G Owners Manual
[x] Cancel search | Manufacturer: CADILLAC, Model Year: 2016, Model line: SRX, Model: CADILLAC SRX 2016 2.GPages: 319, PDF Size: 3.29 MB
Page 22 of 319
Cadillac SRX Owner Manual (GMNA-Localizing-MidEast-9369636) - 2016 -
crc - 6/1/15
In Brief 21
backing crashes when the vehicle is
shifted into R (Reverse). If the
system detects the vehicle is
backing too fast to avoid a crash
with a detected object behind your
vehicle in your path, it may
automatically brake hard to a stop.
SeeAssistance Systems for Parking
or Backing 0198.
Power Outlets
The accessory power outlets can be
used to plug in electrical equipment,
such as a cell phone or MP3 player.
The vehicle may have up to five
accessory power outlets.
The accessory power outlets are:
.
Below the climate control system
inside the front storage bin.
. Inside the center floor console. .
On the rear of the center floor
console. For vehicles with a rear
climate control system, there will
be two accessory power outlets
on the rear of the center floor
console.
. In the rear cargo area.
These are powered while the
vehicle is in ON/RUN/START or
ACC/ACCESSORY mode, or until
the driver door is opened within
10 minutes of turning off the vehicle.
The power outlet located in the rear
cargo area is powered at all times.
See Power Outlets 0106.
Performance and
Maintenance
Traction Control/
Electronic Stability
Control
The Traction Control System (TCS)
limits wheel spin. The system turns
on automatically when the vehicle is
started.
The StabiliTrak system assists with
directional control of the vehicle in
difficult driving conditions. The
system turns on automatically when
the vehicle is started.
.
To turn off traction control, press
and release
gon the center
stack.
iilluminates in the
instrument cluster. The
appropriate message is
displayed in the DIC. See Ride
Control System Messages
0 133.
. Press and release
gagain to
turn traction control back on.
i
goes out in the instrument
Page 29 of 319
Cadillac SRX Owner Manual (GMNA-Localizing-MidEast-9369636) - 2016 -
crc - 6/1/15
28 Keys, Doors, and Windows
transmitter inside the vehicle. Do
not leave the RKE transmitter in an
unattended vehicle.
Temporary Disable of Passive
Locking Feature
Temporarily disable the passive
locking by pressing and holding
K
on the interior door switch with a
door open for at least four seconds,
or until three chimes are heard.
Passive locking will then remain
disabled until
Qon the interior door
is pressed, or until the vehicle is
turned on.
To customize the doors to
automatically lock when exiting the
vehicle, see Vehicle Personalization
0 136.
Keyless Liftgate Opening
Press the touch pad on the liftgate
handle to open the liftgate if the
RKE transmitter is within 1 m (3 ft).
Programming Transmitters to
the Vehicle
Only RKE transmitters programmed
to the vehicle will work. If a
transmitter is lost or stolen, a
replacement can be purchased and
programmed through your dealer.
When the replacement transmitter is
programmed to this vehicle, all
remaining transmitters must also be
reprogrammed. Any lost or stolen
transmitters will no longer work
once the new transmitter is
programmed. Each vehicle can
have up to eight transmitters
programmed to it. See your dealer
to program transmitters to this
vehicle.
Starting the Vehicle with a Low
Transmitter Battery
When the vehicle is started, if the
transmitter battery is weak or there
is interference with the signal, the
DIC may display NO REMOTE
DETECTED or NO REMOTE KEY
WAS DETECTED. PLACE KEY IN
TRANSMITTER POCKET. THEN
START YOUR VEHICLE.. The REPLACE BATTERY IN REMOTE
KEY message may also be
displayed at this time.
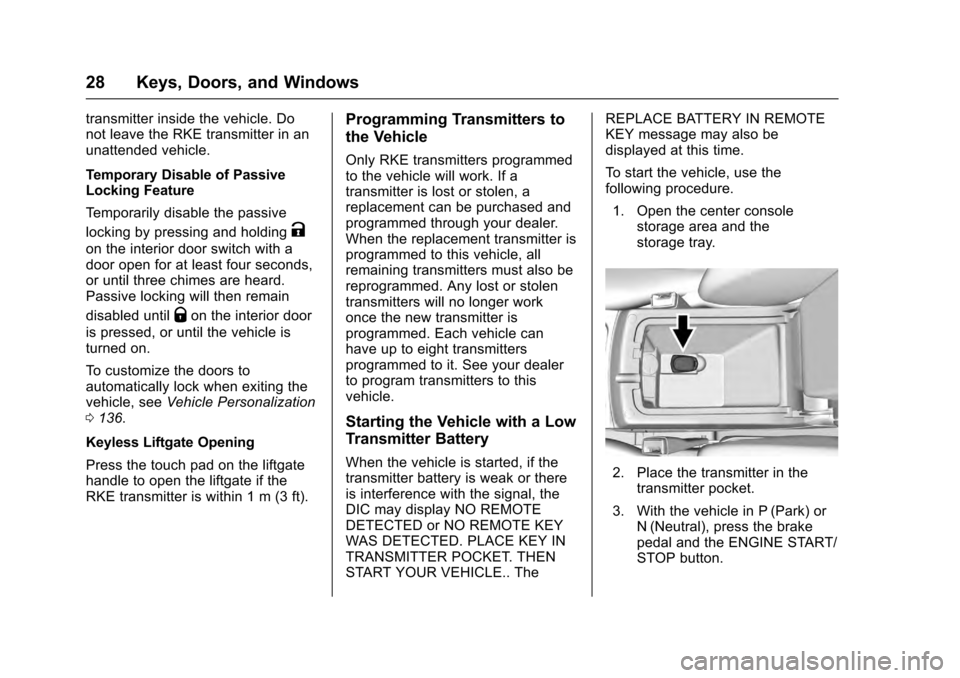
To start the vehicle, use the
following procedure.
1. Open the center console storage area and the
storage tray.2. Place the transmitter in thetransmitter pocket.
3. With the vehicle in P (Park) or N (Neutral), press the brake
pedal and the ENGINE START/
STOP button.
Page 40 of 319
Cadillac SRX Owner Manual (GMNA-Localizing-MidEast-9369636) - 2016 -
crc - 6/1/15
Keys, Doors, and Windows 39
Immobilizer Operation
This vehicle has a passive
theft-deterrent system.
The system does not have to be
manually armed or disarmed.
The vehicle is automatically
immobilized when the vehicle is
turned off.
The immobilization system is
disarmed when the pushbutton start
is activated to enter the ACC/
ACCESSORY mode or the ON/
RUN/START mode and a valid
transmitter is present in the vehicle.
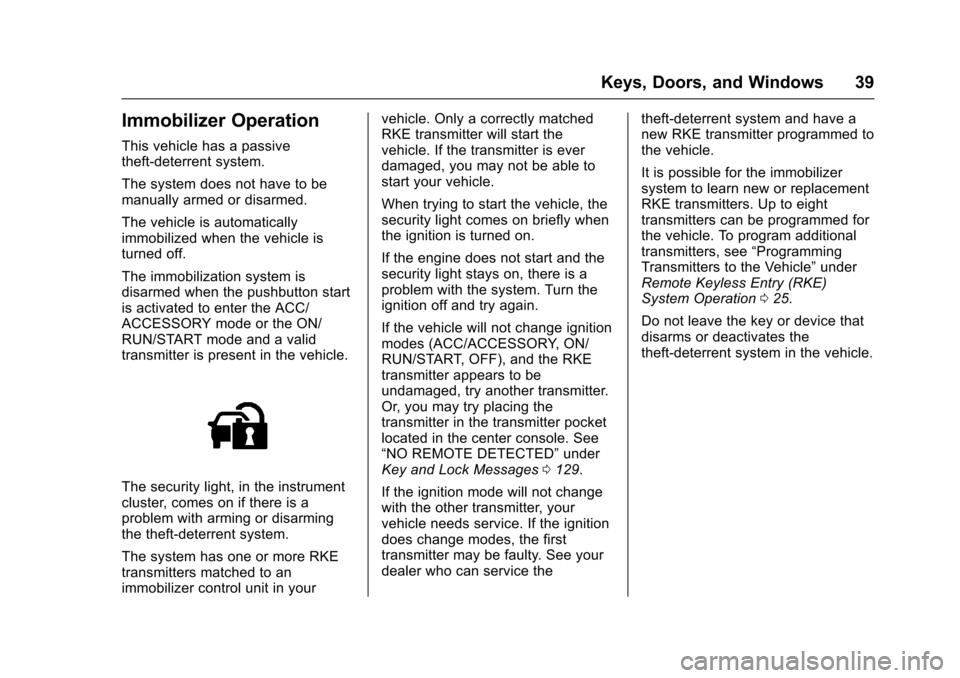
The security light, in the instrument
cluster, comes on if there is a
problem with arming or disarming
the theft-deterrent system.
The system has one or more RKE
transmitters matched to an
immobilizer control unit in yourvehicle. Only a correctly matched
RKE transmitter will start the
vehicle. If the transmitter is ever
damaged, you may not be able to
start your vehicle.
When trying to start the vehicle, the
security light comes on briefly when
the ignition is turned on.
If the engine does not start and the
security light stays on, there is a
problem with the system. Turn the
ignition off and try again.
If the vehicle will not change ignition
modes (ACC/ACCESSORY, ON/
RUN/START, OFF), and the RKE
transmitter appears to be
undamaged, try another transmitter.
Or, you may try placing the
transmitter in the transmitter pocket
located in the center console. See
“NO REMOTE DETECTED”
under
Key and Lock Messages 0129.
If the ignition mode will not change
with the other transmitter, your
vehicle needs service. If the ignition
does change modes, the first
transmitter may be faulty. See your
dealer who can service the theft-deterrent system and have a
new RKE transmitter programmed to
the vehicle.
It is possible for the immobilizer
system to learn new or replacement
RKE transmitters. Up to eight
transmitters can be programmed for
the vehicle. To program additional
transmitters, see
“Programming
Transmitters to the Vehicle” under
Remote Keyless Entry (RKE)
System Operation 025.
Do not leave the key or device that
disarms or deactivates the
theft-deterrent system in the vehicle.
Page 57 of 319
Cadillac SRX Owner Manual (GMNA-Localizing-MidEast-9369636) - 2016 -
crc - 6/1/15
56 Seats and Restraints
To raise the seatback:1. Lift the lever on top of the seatback. Raise the seatback
and release the lever. A tab
near the seatback lever raises
when the seatback is unlocked.
2. Push the seatback rearward until it locks in the upright
position. A tab near the
seatback lever retracts when
the seatback is locked in place.
3. Make sure the rear safety belts are not twisted or caught
between the seat cushion and
the seatback.
Reclining the Seatbacks
To recline the seatback:
1. Lift and hold the lever on top of the seatback. A tab near the
seatback lever raises when the
seatback is unlocked.
2. Tilt the seatback rearward, and then release the lever when the
seatback is in the desired
position. A tab near the
seatback lever retracts when
the seatback is locked in place.
Heated Rear Seats
{Warning
If you cannot feel temperature
change or pain to the skin, the
seat heater may cause burns.
See the Warning under Heated
and Ventilated Front Seats 053.
If available, the buttons are on the
rear climate control panel on the
rear of the center console.
With the ignition in ON/RUN/START,
press
MorLto heat the left or right
outboard seat cushion and seatback. An indicator on the
climate control display appears
when this feature is on.
Press the button once for the
highest setting. With each press of
the button, the heated seat changes
to the next lower setting, and then
the off setting. Three lights indicate
the highest setting, and one light
indicates the lowest.
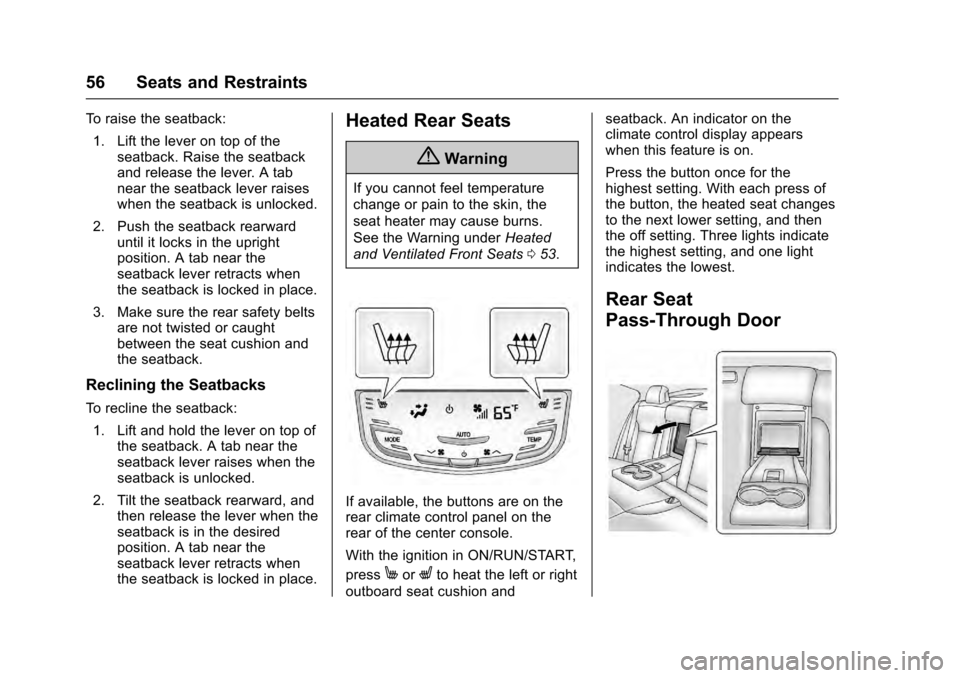
Rear Seat
Pass-Through Door
Page 91 of 319

Cadillac SRX Owner Manual (GMNA-Localizing-MidEast-9369636) - 2016 -
crc - 6/1/15
90 Storage
Storage
Storage Compartments
Storage Compartments . . . . . . . . 90
Glove Box . . . . . . . . . . . . . . . . . . . . . 90
Cupholders . . . . . . . . . . . . . . . . . . . . 91
Front Storage . . . . . . . . . . . . . . . . . . 91
Armrest Storage . . . . . . . . . . . . . . . 91
Center Console Storage . . . . . . . 92
Additional Storage Features
Cargo Cover . . . . . . . . . . . . . . . . . . . 92
Cargo Tie-Downs . . . . . . . . . . . . . . 94
Cargo Management System . . . 94
Cargo Net . . . . . . . . . . . . . . . . . . . . . 97
Convenience Net . . . . . . . . . . . . . . 99
Roof Rack System
Roof Rack System . . . . . . . . . . . . . 99
Storage
Compartments
{Warning
Do not store heavy or sharp
objects in storage compartments.
In a crash, these objects may
cause the cover to open and
could result in injury.
Glove Box
Lift the glove box handle up to open
it. Use the key to lock and unlock
the glove box.
The glove box is air conditioned and
can be used to store items at a
lower temperature. The vehicle air
conditioning must be turned on for
the maximum cool air to enter the
glove box. Move the slide control to
allow cool air into the glove box.
After opening the air flow, close the
glove box door to keep the cold air
from entering the vehicle.
Page 93 of 319
Cadillac SRX Owner Manual (GMNA-Localizing-MidEast-9369636) - 2016 -
crc - 6/1/15
92 Storage
Center Console Storage
The center console has an armrest,
upper storage tray, and lower
storage area.
The armrest can be adjusted. Slide
the top of the armrest to adjust to
the desired position.
Press the driver side button to
access the upper storage tray.
Press the passenger side button to
access the lower storage area.
There are two USB ports and an
accessory power outlet inside the
center console. There may be an
auxiliary jack. SeePower Outlets
0 106 and the infotainment manual.
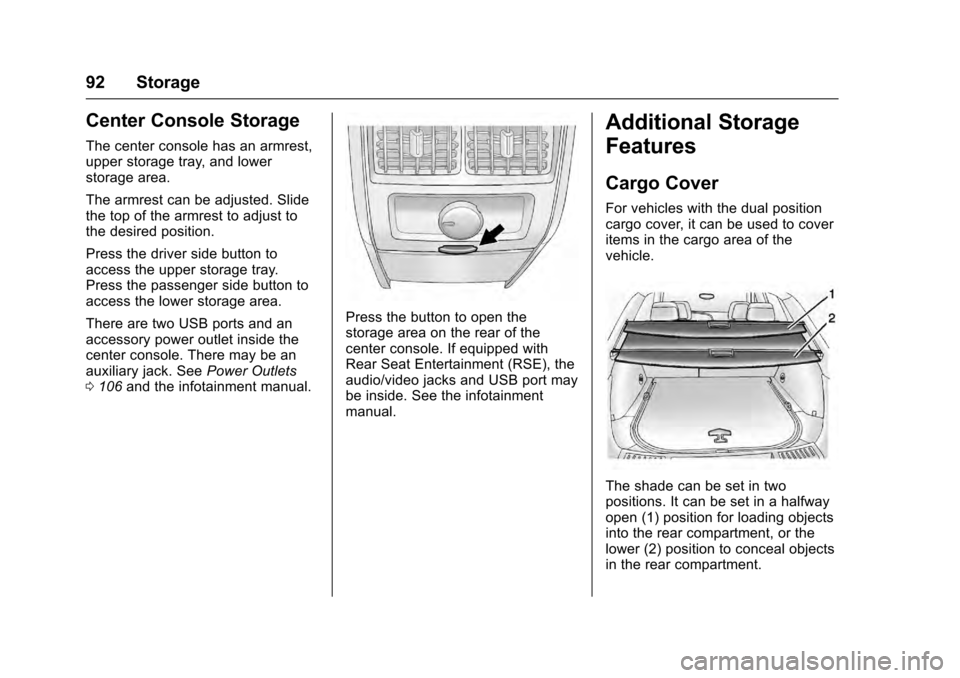
Press the button to open the
storage area on the rear of the
center console. If equipped with
Rear Seat Entertainment (RSE), the
audio/video jacks and USB port may
be inside. See the infotainment
manual.
Additional Storage
Features
Cargo Cover
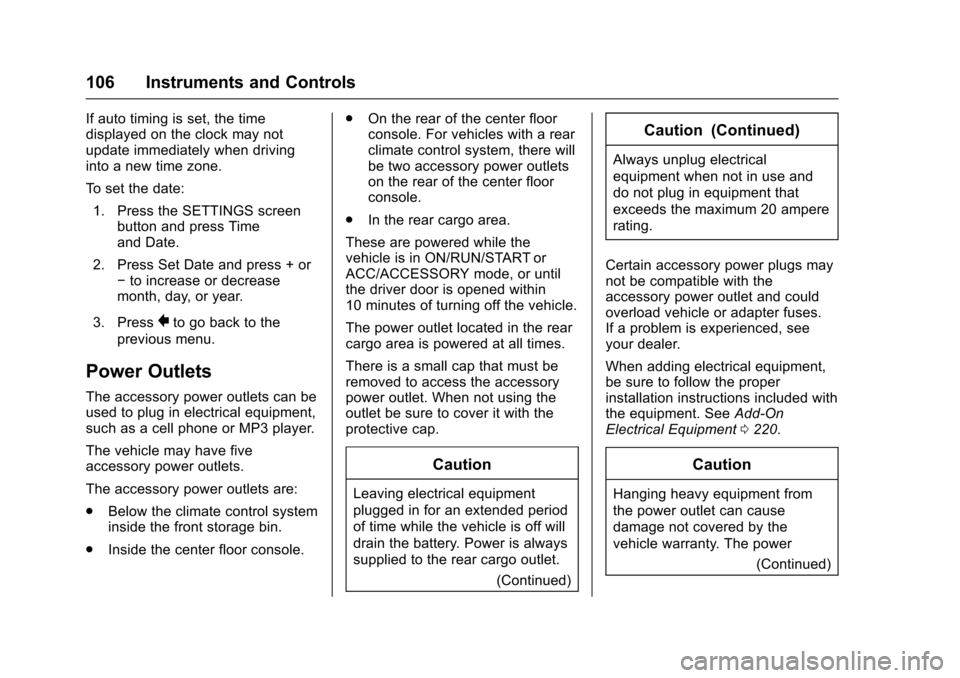
For vehicles with the dual position
cargo cover, it can be used to cover
items in the cargo area of the
vehicle.
The shade can be set in two
positions. It can be set in a halfway
open (1) position for loading objects
into the rear compartment, or the
lower (2) position to conceal objects
in the rear compartment.
Page 107 of 319
Cadillac SRX Owner Manual (GMNA-Localizing-MidEast-9369636) - 2016 -
crc - 6/1/15
106 Instruments and Controls
If auto timing is set, the time
displayed on the clock may not
update immediately when driving
into a new time zone.
To set the date:1. Press the SETTINGS screen button and press Time
and Date.
2. Press Set Date and press + or −to increase or decrease
month, day, or year.
3. Press
}to go back to the
previous menu.
Power Outlets
The accessory power outlets can be
used to plug in electrical equipment,
such as a cell phone or MP3 player.
The vehicle may have five
accessory power outlets.
The accessory power outlets are:
. Below the climate control system
inside the front storage bin.
. Inside the center floor console. .
On the rear of the center floor
console. For vehicles with a rear
climate control system, there will
be two accessory power outlets
on the rear of the center floor
console.
. In the rear cargo area.
These are powered while the
vehicle is in ON/RUN/START or
ACC/ACCESSORY mode, or until
the driver door is opened within
10 minutes of turning off the vehicle.
The power outlet located in the rear
cargo area is powered at all times.
There is a small cap that must be
removed to access the accessory
power outlet. When not using the
outlet be sure to cover it with the
protective cap.
Caution
Leaving electrical equipment
plugged in for an extended period
of time while the vehicle is off will
drain the battery. Power is always
supplied to the rear cargo outlet. (Continued)
Caution (Continued)
Always unplug electrical
equipment when not in use and
do not plug in equipment that
exceeds the maximum 20 ampere
rating.
Certain accessory power plugs may
not be compatible with the
accessory power outlet and could
overload vehicle or adapter fuses.
If a problem is experienced, see
your dealer.
When adding electrical equipment,
be sure to follow the proper
installation instructions included with
the equipment. See Add-On
Electrical Equipment 0220.
Caution
Hanging heavy equipment from
the power outlet can cause
damage not covered by the
vehicle warranty. The power
(Continued)
Page 108 of 319
Cadillac SRX Owner Manual (GMNA-Localizing-MidEast-9369636) - 2016 -
crc - 6/1/15
Instruments and Controls 107
Caution (Continued)
outlets are designed for
accessory power plugs only, such
as cell phone charge cords.
Cigarette Lighter
If equipped, the cigarette lighter is
under the climate control system,
inside the front storage bin.
To activate the cigarette lighter,
push it into the heating element and
let go. The lighter pops out when it
is ready to be used.
Caution
Holding a cigarette lighter in while
it is heating does not let the
lighter back away from the
heating element when it is hot.
Damage from overheating can
occur to the lighter or heating
element, or a fuse could be
blown. Do not hold a cigarette
lighter in while it is heating.
Ashtrays
The ashtray is under the climate
control system on the center stack.
Press the door to release the
ashtray.
To empty the ashtray, remove it from
the instrument panel by holding the
edges and pulling straight out. To
reinstall, push the tray back into
place.
There may also be ashtrays on the
center floor console behind the shift
lever and in the rear doors.
Caution
If papers, pins, or other
flammable items are put in the
ashtray, hot cigarettes or other
smoking materials could ignite
them and possibly damage the
vehicle. Never put flammable
items in the ashtray.
Warning Lights,
Gauges, and
Indicators
Warning lights and gauges can
signal that something is wrong
before it becomes serious enough
to cause an expensive repair or
replacement. Paying attention to the
warning lights and gauges could
prevent injury.
Some warning lights come on briefly
when the engine is started to
indicate they are working. When
one of the warning lights comes on
and stays on while driving, or when
one of the gauges shows there may
be a problem, check the section that
explains what to do. Waiting to do
repairs can be costly and even
dangerous.
Page 114 of 319
Cadillac SRX Owner Manual (GMNA-Localizing-MidEast-9369636) - 2016 -
crc - 6/1/15
Instruments and Controls 113
The airbag readiness light comes on
for several seconds when the
vehicle is started. If the light does
not come on then, have it fixed
immediately.
{Warning
If the airbag readiness light stays
on after the vehicle is started or
comes on while driving, it means
the airbag system might not be
working properly. The airbags in
the vehicle might not inflate in a
crash, or they could even inflate
without a crash. To help avoid
injury, have the vehicle serviced
right away.
If there is a problem with the airbag
system, a Driver Information Center
(DIC) message may also come on.
See Airbag System Messages
0 134.
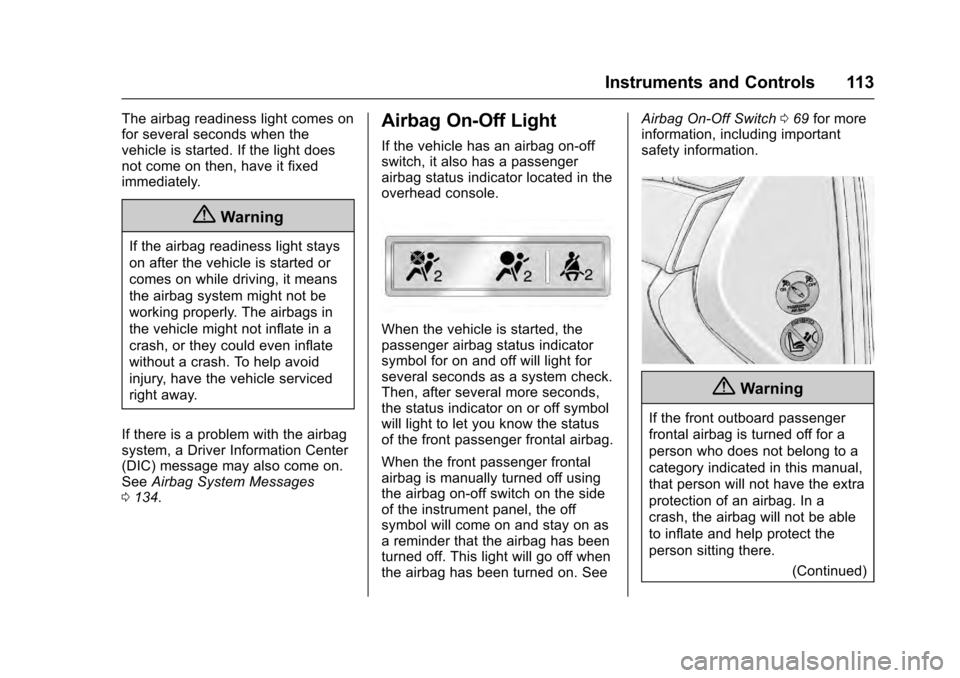
Airbag On-Off Light
If the vehicle has an airbag on-off
switch, it also has a passenger
airbag status indicator located in the
overhead console.
When the vehicle is started, the
passenger airbag status indicator
symbol for on and off will light for
several seconds as a system check.
Then, after several more seconds,
the status indicator on or off symbol
will light to let you know the status
of the front passenger frontal airbag.
When the front passenger frontal
airbag is manually turned off using
the airbag on-off switch on the side
of the instrument panel, the off
symbol will come on and stay on as
a reminder that the airbag has been
turned off. This light will go off when
the airbag has been turned on. See Airbag On-Off Switch
069 for more
information, including important
safety information.
{Warning
If the front outboard passenger
frontal airbag is turned off for a
person who does not belong to a
category indicated in this manual,
that person will not have the extra
protection of an airbag. In a
crash, the airbag will not be able
to inflate and help protect the
person sitting there.
(Continued)
Page 184 of 319
Cadillac SRX Owner Manual (GMNA-Localizing-MidEast-9369636) - 2016 -
crc - 6/1/15
Driving and Operating 183
avoid a sudden obstacle, a
computer senses the wheels are
slowing down. If one of the wheels
is about to stop rolling, the computer
will separately work the brakes at
each wheel.
ABS can change the brake pressure
to each wheel, as required, faster
than any driver could. This can help
you steer around the obstacle while
braking hard.
As the brakes are applied, the
computer keeps receiving updates
on wheel speed and controls
braking pressure accordingly.
Remember: ABS does not change
the time needed to get a foot up to
the brake pedal or always decrease
stopping distance. If you get too
close to the vehicle in front of you,
there will not be enough time to
apply the brakes if that vehicle
suddenly slows or stops. Always
leave enough room up ahead to
stop, even with ABS.Using ABS
Do not pump the brakes. Just hold
the brake pedal down firmly and let
ABS work. You may hear the ABS
pump or motor operating and feel
the brake pedal pulsate. This is
normal.
Braking in Emergencies
ABS allows you to steer and brake
at the same time. In many
emergencies, steering can help
more than even the very best
braking.
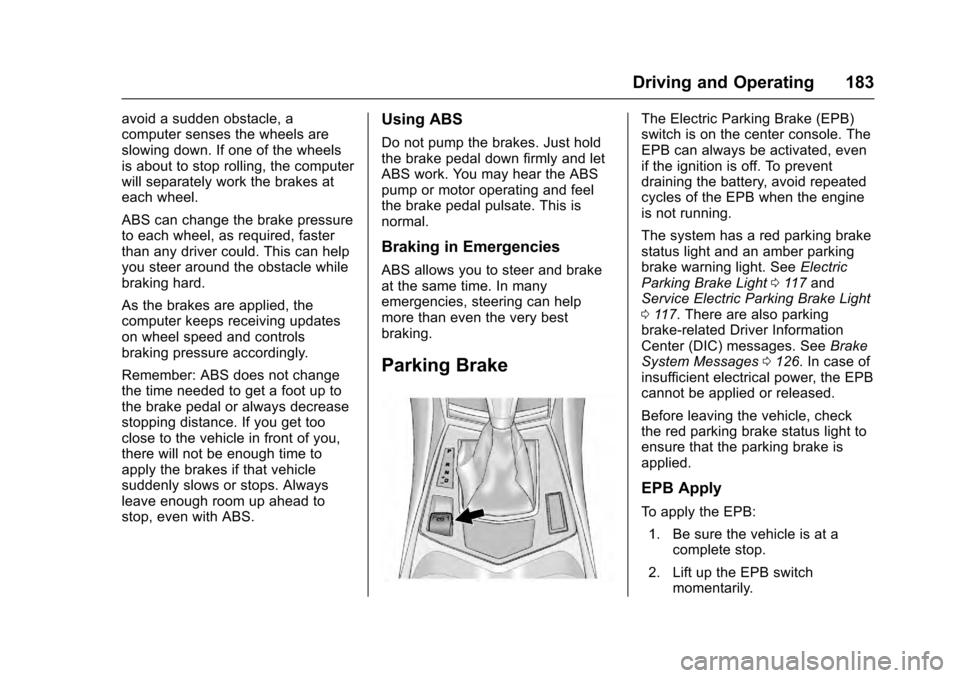
Parking Brake
The Electric Parking Brake (EPB)
switch is on the center console. The
EPB can always be activated, even
if the ignition is off. To prevent
draining the battery, avoid repeated
cycles of the EPB when the engine
is not running.
The system has a red parking brake
status light and an amber parking
brake warning light. SeeElectric
Parking Brake Light 0117 and
Service Electric Parking Brake Light
0 117. There are also parking
brake-related Driver Information
Center (DIC) messages. See Brake
System Messages 0126. In case of
insufficient electrical power, the EPB
cannot be applied or released.
Before leaving the vehicle, check
the red parking brake status light to
ensure that the parking brake is
applied.
EPB Apply
To apply the EPB:
1. Be sure the vehicle is at a complete stop.
2. Lift up the EPB switch momentarily.