air condition CADILLAC STS 2005 1.G Owners Manual
[x] Cancel search | Manufacturer: CADILLAC, Model Year: 2005, Model line: STS, Model: CADILLAC STS 2005 1.GPages: 446, PDF Size: 2.58 MB
Page 103 of 446
If further mirror adjustment is needed press the arrows
located on the outside mirror control pad. If the
outside mirror selector switch is in the middle position,
neither outside mirror will move.
When the vehicle is shifted out of REVERSE (R), and a
�ve-second delay has occurred, the mirror will return to
its original position. The delay prevents movement of
the mirror if multiple gear transitions REVERSE (R) to
AUTOMATIC OVERDRIVE (D) to REVERSE (R) occur
during a parallel parking maneuver.
OnStar®System
OnStar®uses global positioning system (GPS) satellite
technology, wireless communications, and call centers
to provide you with a wide range of safety, security,
information, and convenience services.
A complete OnStar
®user’s guide and the terms and
conditions of the OnStar®Subscription Service
Agreement are included in the vehicle’s glove box
literature. For more information, visit www.onstar.com or
www.onstarcanada.com. Contact OnStar
®at
1-888-4-ONSTAR (1-888-466-7827), or press the
OnStar
®button to speak to an OnStar®advisor
24 hours a day, 7 days a week.
Terms and conditions of the Subscription Service
Agreement can be found at www.onstar.com or
www.onstarcanada.com.
OnStar®Services
The Directions and Connections Plan is included on
new vehicles for one year from the date of purchase.
The OnStar
®subscription can be extended for time
beyond the �rst year to meet your needs. For more
information, press the OnStar
®button to speak with
an advisor.
Directions and Connections Plan
Advanced Automatic Collision Noti�cation
Automatic Noti�cation of Airbag Deployment
Emergency Services
Roadside Assistance
Stolen Vehicle Tracking
AccidentAssist
Remote Door Unlock/Vehicle Alert
Remote Diagnostics
Online Concierge
Driving Directions
RideAssist
Information and Convenience Services
2-39
Page 170 of 446

The other vehicle’s lamp(s) cannot be detected due
to dense exhaust, smoke, fog, snow, road spray,
mist or other airborne obstructions.
Your vehicle’s windshield is dirty, cracked or
obstructed by something that blocks the view of the
Intellibeam™ light sensor.
Your vehicle’s windshield is covered with ice, dirt,
haze or other obstructions.
Your vehicle is loaded such that the front end of the
vehicle points upward, causing the Intellibeam™
sensor to aim high and not detect headlamps
and taillamps.
You are driving on winding or hilly roads.
You may need to manually disable or cancel the
high-beam headlamps by turning the low-beam
headlamps on, if any of the above conditions exist.
Disabling and Resetting Intellibeam™
at the Rearview Mirror
Intellibeam™ can be disabled and reset to the original
factory setting by using the controls on the inside
rearview mirror.
O(On/Off):To disable the system, press and hold
this button on the inside rearview mirror for three
seconds and release it after the indicator on the inside
rearview mirror �ashes two times. This lets you
know that Intellibeam™ has been turned off and will not
come back on until the system has been reset.
To reset the system, quickly press and release this
button on the inside rearview mirror. The indicator on the
inside rearview mirror will �ash one time to indicate
that Intellibeam™ has been reset.
A different sensitivity setting is available for dealer
diagnostics. This is done by pushing and holding this
button for 20 seconds until the light �ashes three times.
If you accidentally activate this, the vehicle’s setting
will automatically be reset each time the ignition
is turned off and then on again; otherwise, refer to the
text above for resetting the system.
3-36
Page 182 of 446

The URPA display is
located inside the vehicle,
above the rear window.
It has three color-coded
lights that can be seen
through the rearview mirror
or by turning around.
How the System Works
URPA comes on automatically when the shift lever is
moved into REVERSE (R) and the vehicle speed is less
than 3 mph (5 km/h). When the system turns on, the
three lights on the display will illuminate for one and
a half seconds to let you know that the system is
working. If your vehicle is moving in REVERSE (R) at
a speed greater than 3 mph (5 km/h), the red light
will �ash to remind you that the system does not work
at a speed greater than 3 mph (5 km/h).If an object is detected at a REVERSE (R) speed of
less than 3 mph (5 km/h), one of the following will occur:
Description English Metric
Amber light 5 ft 1.5 m
Amber/amber lights 40 in 1.0 m
Amber/amber/red lights &
continuous chime20 in 0.5 m
Amber/amber/red lights
�ashing & continuous
chime1 ft 0.3 m
A chime will sound the �rst time an object is detected
between 20 inches (0.5 m) and 5 feet (1.5 m) away.
URPA cannot detect objects that are above trunk level.
In order for the rear sensors to recognize an object,
it must be within detection range behind the vehicle.
When the System Does Not Seem to Work
Properly
The light may �ash red when the vehicle is in
REVERSE (R), if the ultrasonic sensors are not kept
clean. So be sure to keep your rear bumper free of mud,
dirt, snow, ice and slush. Other conditions that may affect
system performance include things like the vibrations
from a jackhammer or the compression of air brakes on a
very large truck. If after cleaning the rear bumper and
then driving forward at least 15 mph (25 km/h), the
display continues to �ash red, see your dealer.
3-48
Page 184 of 446
Ashtray
The ashtray is located under the climate control panel
on the center console. Press on the door to release the
ashtray.
To empty the ashtray, remove it from the center
console by gripping the edges and pulling straight out.
To reinstall, push the tray back into place.
There may also be ashtrays in the rear doors.
Cigarette Lighter
Notice:Holding a cigarette lighter in while it is
heating will not allow the lighter to back away from
the heating element when it is hot. Damage from
overheating may occur to the lighter or heating
element, or a fuse could be blown. Do not hold a
cigarette lighter in while it is heating.
The cigarette lighter is located next to the ashtray.
The vehicle does not have any cigarette lighters for
the rear seat passengers.
Press the lighter all the way in and release it. It will
pop back out by itself once the element has heated
for use.
Climate Controls
Dual Climate Control System
With this system you can control the heating, cooling
and ventilation for your vehicle.
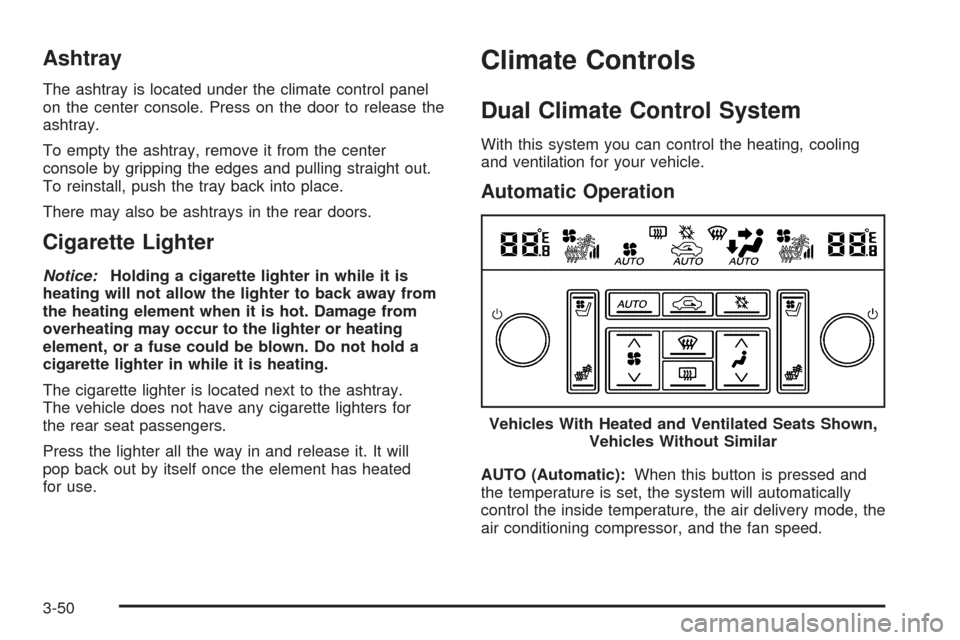
Automatic Operation
AUTO (Automatic):When this button is pressed and
the temperature is set, the system will automatically
control the inside temperature, the air delivery mode, the
air conditioning compressor, and the fan speed.Vehicles With Heated and Ventilated Seats Shown,
Vehicles Without Similar
3-50
Page 185 of 446

AUTO will appear on the display next to the fan, mode
indicators, and recirculation indicator if your vehicle
is equipped with the optional air quality sensor.
1. Press the AUTO button.
2. Adjust the temperature to a comfortable setting,
generally, between 70°F (21°C) and 80°F (27°C).
Choosing the coldest or warmest temperature
setting will not cause the system to heat or cool any
faster. If you set the system at the warmest
temperature setting, the system will try to
continuously heat the vehicle and will not adjust the
system down as the vehicle warms up.
In cold weather, the system may start at reduced
fan speeds to avoid blowing cold air into your
vehicle until warmer air is available. The system will
start out blowing air at the �oor but may change
modes, automatically, as the vehicle warms
up to maintain the chosen temperature setting. The
length of time needed for warm up will depend
on the outside temperature and the length of time
that has elapsed since your vehicle was last driven.
3. Wait for the system to regulate. This may take from
10 to 30 minutes. Then adjust the temperature, if
necessary.
You can switch from English to metric units through the
Driver Information Center (DIC). SeeDIC Controls
and Displays on page 3-74.The air-conditioning system removes moisture from the
air, so you may notice water dripping underneath
your vehicle while idling or after turning off the engine.
This is normal.
Manual Operation
yNz(Mode):Pressing the mode switch and
changing the mode cancels automatic operation and
allows the operator to manually select the air delivery
location. Press AUTO to return to automatic operation.
The outboard air outlets will always receive air�ow
regardless of the mode selected. SeeOutlet Adjustment
on page 3-56to change this air�ow from the outboard
outlets.
To change the current mode, select one of the following:
Y(Vent):This mode directs air to the instrument
panel outlets.
\(Bi-Level):This mode directs approximately half of
the air to the instrument panel outlets, and then
directs most of the remaining air to the �oor outlets. In
automatic operation, cooler air is directed to the
upper outlets and warmer air to the �oor outlets.
[(Floor):This mode directs most of the air to the
�oor outlets with some air directed to the outboard
outlets, and a little air directed to the windshield and
side windows.
3-51
Page 186 of 446
The mode switch can also be used to select the defog
mode. Information on defogging and defrosting can
be found later in this section.
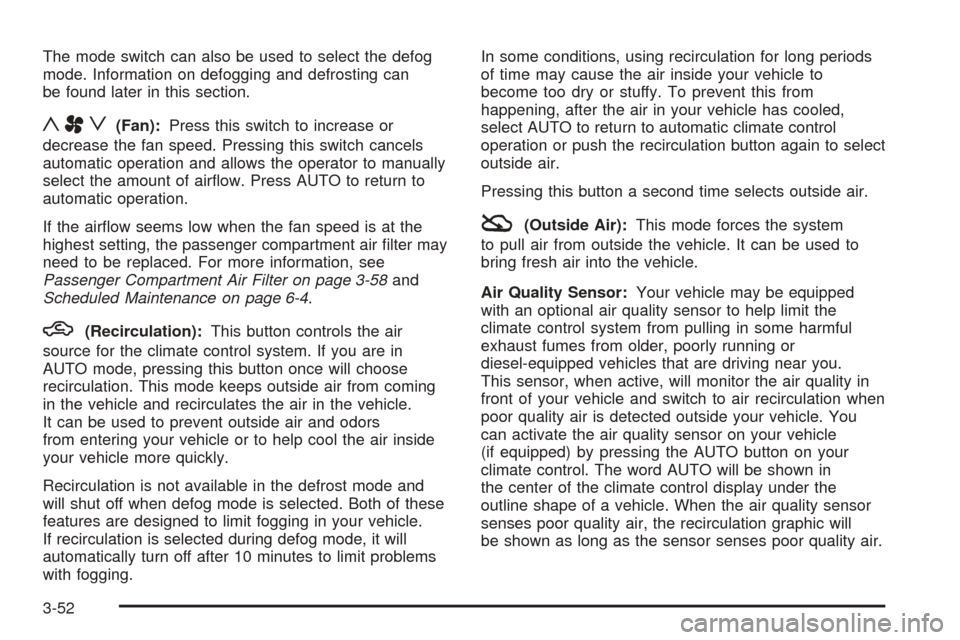
yAz(Fan):Press this switch to increase or
decrease the fan speed. Pressing this switch cancels
automatic operation and allows the operator to manually
select the amount of air�ow. Press AUTO to return to
automatic operation.
If the air�ow seems low when the fan speed is at the
highest setting, the passenger compartment air �lter may
need to be replaced. For more information, see
Passenger Compartment Air Filter on page 3-58and
Scheduled Maintenance on page 6-4.
h(Recirculation):This button controls the air
source for the climate control system. If you are in
AUTO mode, pressing this button once will choose
recirculation. This mode keeps outside air from coming
in the vehicle and recirculates the air in the vehicle.
It can be used to prevent outside air and odors
from entering your vehicle or to help cool the air inside
your vehicle more quickly.
Recirculation is not available in the defrost mode and
will shut off when defog mode is selected. Both of these
features are designed to limit fogging in your vehicle.
If recirculation is selected during defog mode, it will
automatically turn off after 10 minutes to limit problems
with fogging.In some conditions, using recirculation for long periods
of time may cause the air inside your vehicle to
become too dry or stuffy. To prevent this from
happening, after the air in your vehicle has cooled,
select AUTO to return to automatic climate control
operation or push the recirculation button again to select
outside air.
Pressing this button a second time selects outside air.
:(Outside Air):This mode forces the system
to pull air from outside the vehicle. It can be used to
bring fresh air into the vehicle.
Air Quality Sensor:Your vehicle may be equipped
with an optional air quality sensor to help limit the
climate control system from pulling in some harmful
exhaust fumes from older, poorly running or
diesel-equipped vehicles that are driving near you.
This sensor, when active, will monitor the air quality in
front of your vehicle and switch to air recirculation when
poor quality air is detected outside your vehicle. You
can activate the air quality sensor on your vehicle
(if equipped) by pressing the AUTO button on your
climate control. The word AUTO will be shown in
the center of the climate control display under the
outline shape of a vehicle. When the air quality sensor
senses poor quality air, the recirculation graphic will
be shown as long as the sensor senses poor quality air.
3-52
Page 187 of 446
Under some conditions, the air quality sensor system
will not operate. In cold weather, the system may not be
active (even if the AUTO indication is displayed)
because of concerns of fogging your windows, which
may occur by activating recirculation mode. Also, the air
quality sensor system will not remain in recirculation
mode for extended periods of time that could cause
stuffy or very dry conditions in the vehicle. Following a
poorly running vehicle for an extended period of
time may not keep recirculation active inde�nitely.
The air quality sensor will not activate due to organic
odors, like skunk, and may not activate on many
chemical-related odors. If you wish to limit these types
of odors, you may choose to manually select
recirculation. Your vehicle may also be equipped with
a charcoal �lter that can limit many odors from
being pulled into your vehicle. This �lter, like your
engines air cleaner �lter, will need to be changed
periodically. SeeScheduled Maintenance on page 6-4.
The air quality sensor system does not protect
against carbon monoxide (CO), which you cannot see
or smell. SeeEngine Exhaust on page 2-33.
O(Power Driver’s Temperature):Press the power
button located on the driver’s side of the climate control
panel to turn the entire climate control system on or
off. Turn the knob to increase or decrease the
temperature inside your vehicle.
O(Power Passenger’s Temperature):Press the
power button located on the passenger’s side of
the climate control panel to turn the passenger’s climate
control system on if they wish to have a different
setting than the driver. Turn the knob to increase or
decrease the temperature for the front passenger.
Turning the passenger’s side power button off will not
shut off the climate control system for the passenger.
The system will be set to the same setting as the driver.
{(Ventilated Seat):Press this button (if equipped)
to turn on the ventilated seat for the driver’s or
passenger’s side. SeeHeated and Ventilated Seats
on page 1-4.
J(Heated Seat):Press this button (if equipped) to
turn on the heated seat and seatback for the driver’s or
passenger’s side. SeeHeated and Ventilated Seats
on page 1-4.
^(Air Conditioning):Press this button to manually
turn off the air conditioning compressor. Press AUTO
to return to automatic operation or press the A/C
OFF button again. To limit fogging on the windshield,
the air conditioning compressor cannot be in off in
defrost mode.
3-53
Page 189 of 446
Defogging and Defrosting
Fog on the inside of windows is a result of high humidity
(moisture) condensing on the cool window glass. This
can be minimized if the climate control system is
used properly. There are two modes to clear fog from
your windshield. Use the defog mode to clear the
windows of fog or moisture and warm the passengers.
Use the defrost mode to remove fog or frost from
the windshield more quickly.
yNz(Mode):Press this button until defog appears
on the display.
-(Defog):This mode directs the air between the
windshield and �oor outlets with some air supplied to the
outboard panel outlets and side window defogging
outlets. When you select this mode, the system turns off
recirculation and runs the air-conditioning compressor
unless the outside temperature is at or below freezing.
The recirculation mode is cancelled when you enter
defog mode. If you select recirculation while in defog
mode, it will be cancelled after 10 minutes.
If you have fogging on the side windows, remain in
defog or defrost mode until they clear.
0(Defrost):Pressing the defrost button directs most
of the air to the windshield, with some air directed to
the side windows and outboard panel outlets. In
this mode, the system will automatically turn off
recirculation and run the air-conditioning compressor,
unless the outside temperature is at or below freezing.
Recirculation cannot be selected while in the
defrost mode.
This mode may also cause the fan speed and air
temperature to increase.
Rear Window Defogger
The rear window defogger uses a warming grid to
remove fog or frost from the rear window.
The rear window defogger will only work when the
ignition is in ON or during remote start, if programmed.
See “Personal Settings Menu” underVehicle
Personalization on page 2-47for additional information.
=(Rear Window Defogger):Press this button to
turn the rear window defogger on or off. Be sure to clear
as much snow from the rear window as possible.
3-55
Page 191 of 446
Rear Climate Control System
Your vehicle has a rear climate control system. The
base model includes air outlets in the rear of the center
console for cooling and under-seat air outlets for
heating. The temperature, quantity, and air delivery
location is controlled automatically by the front climate
control system.
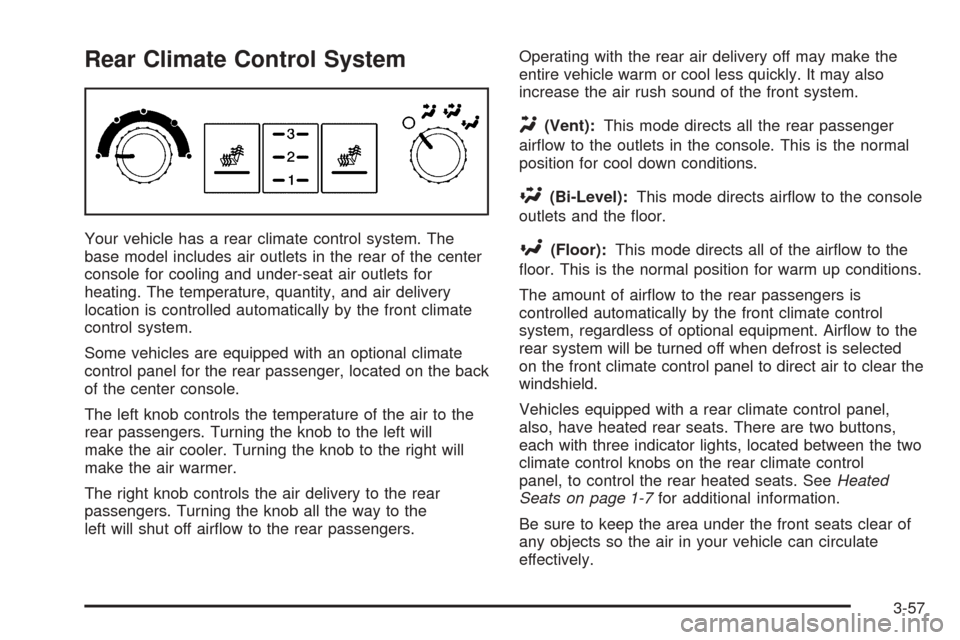
Some vehicles are equipped with an optional climate
control panel for the rear passenger, located on the back
of the center console.
The left knob controls the temperature of the air to the
rear passengers. Turning the knob to the left will
make the air cooler. Turning the knob to the right will
make the air warmer.
The right knob controls the air delivery to the rear
passengers. Turning the knob all the way to the
left will shut off air�ow to the rear passengers.Operating with the rear air delivery off may make the
entire vehicle warm or cool less quickly. It may also
increase the air rush sound of the front system.
Y(Vent):This mode directs all the rear passenger
air�ow to the outlets in the console. This is the normal
position for cool down conditions.
\(Bi-Level):This mode directs air�ow to the console
outlets and the �oor.
[(Floor):This mode directs all of the air�ow to the
�oor. This is the normal position for warm up conditions.
The amount of air�ow to the rear passengers is
controlled automatically by the front climate control
system, regardless of optional equipment. Air�ow to the
rear system will be turned off when defrost is selected
on the front climate control panel to direct air to clear the
windshield.
Vehicles equipped with a rear climate control panel,
also, have heated rear seats. There are two buttons,
each with three indicator lights, located between the two
climate control knobs on the rear climate control
panel, to control the rear heated seats. SeeHeated
Seats on page 1-7for additional information.
Be sure to keep the area under the front seats clear of
any objects so the air in your vehicle can circulate
effectively.
3-57
Page 202 of 446
Malfunction Indicator Lamp
Check Engine Light
Your vehicle is equipped
with a computer which
monitors operation of the
fuel, ignition, and emission
control systems.
This system is called OBD II (On-Board
Diagnostics-Second Generation) and is intended to
assure that emissions are at acceptable levels for the
life of the vehicle, helping to produce a cleaner
environment. The Check Engine light comes on to
indicate that there is a problem and service is required.
Malfunctions often will be indicated by the system
before any problem is apparent. This may prevent more
serious damage to your vehicle. This system is also
designed to assist your service technician in correctly
diagnosing any malfunction.Notice:If you keep driving your vehicle with this
light on, after awhile, your emission controls may not
work as well, your fuel economy may not be as good,
and your engine may not run as smoothly. This could
lead to costly repairs that may not be covered by
your warranty.
Notice:Modi�cations made to the engine,
transmission, exhaust, intake, or fuel system of your
vehicle or the replacement of the original tires with
other than those of the same Tire Performance
Criteria (TPC) can affect your vehicle’s emission
controls and may cause this light to come on.
Modi�cations to these systems could lead to costly
repairs not covered by your warranty. This may also
result in a failure to pass a required Emission
Inspection/Maintenance test.
This light should come on brie�y, as a check to show
you it is working, as you start the engine. If the light
does not come on, have it repaired. This light will also
come on during a malfunction in one of two ways:
Light Flashing— A mis�re condition has been
detected. A mis�re increases vehicle emissions and
may damage the emission control system on your
vehicle. Diagnosis and service may be required.
Light On Steady— An emission control system
malfunction has been detected on your vehicle.
Diagnosis and service may be required.
3-68