clock CADILLAC STS 2005 1.G Owners Manual
[x] Cancel search | Manufacturer: CADILLAC, Model Year: 2005, Model line: STS, Model: CADILLAC STS 2005 1.GPages: 446, PDF Size: 2.58 MB
Page 79 of 446

Squeeze the trunk release button located on the
rear of the trunk lid above the license plate, as
long as you have your keyless access transmitter
with you. Entry occurs when the button is being
pressed and the vehicle recognizes the transmitter.
The vehicle must be in PARK (P) and the valet
mode turned off.
If your vehicle has lost battery power, you can still
access the trunk by unlocking and lowering the rear seat
pass-through door and pulling the emergency trunk
release handle.
Rear Seat Pass-Through Door
This feature allows you to access the trunk without
opening the trunk lid.
To open the door, do the following:
1. Pull down the rear seat armrest.
2. If it is locked, insert and turn the key
counterclockwise in the lock on the door.
3. Press the button above the lock.
4. Lower the door.
To open the trunk lid, pull down the emergency trunk
release handle located in the trunk. See “Emergency
Trunk Release Handle” following.
Emergency Trunk Release Handle
Notice:Using the emergency trunk release handle
as a tie-down or anchor point when securing
items in the trunk may damage it. Use the
emergency trunk release handle only to help you
open the trunk lid.
There is a glow-in-the-dark trunk release handle located
inside the trunk near the back of the rear seats. This
handle will glow following exposure to light. Pull
down the release handle to open the trunk from the
inside of the vehicle.
2-15
Page 175 of 446

SeeVehicle Personalization on page 2-47to select the
delay time that you want. You can also select no
delay time.
If you turn off the ignition with the exterior lamp switch
in the parking lamp or headlamp position, the Twilight
Sentinel
®delay will not occur. The lamps will turn off as
soon as the switch is turned off.
As with any vehicle, you should turn on the regular
headlamp system when you need it.
Exterior Lighting Battery Saver
If the parking lamps or headlamps have been left on,
the exterior lamps will turn off about 10 minutes after the
ignition is turned off. This protects against draining
the battery in case you have accidentally left the
headlamps or parking lamps on. The battery saver does
not work if the headlamps are turned on after the
ignition is turned off.
If you need to leave the lamps on for more than
10 minutes, use the exterior lamp control to turn the
lamps back on.
Instrument Panel Brightness
This feature controls
the brightness of the
instrument panel lights.
Press in the center knob on the DIC control panel until
the knob pops out. Then turn the knob clockwise to
brighten the lights or counterclockwise to dim them.
If you turn the knob completely clockwise, the interior
lamps will turn on.Base Level Shown,
Uplevel Similar
3-41
Page 179 of 446
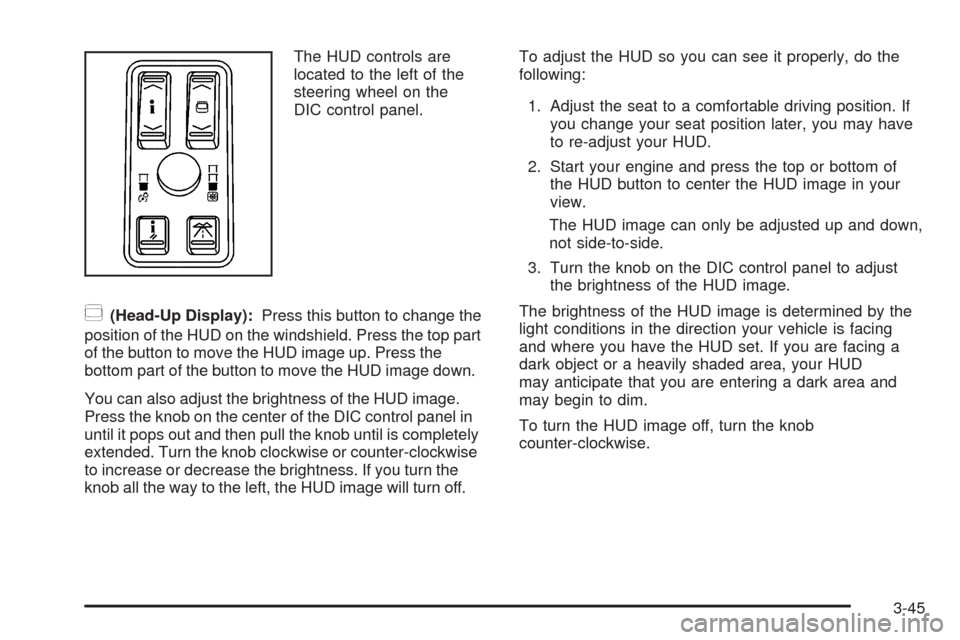
The HUD controls are
located to the left of the
steering wheel on the
DIC control panel.
~(Head-Up Display):Press this button to change the
position of the HUD on the windshield. Press the top part
of the button to move the HUD image up. Press the
bottom part of the button to move the HUD image down.
You can also adjust the brightness of the HUD image.
Press the knob on the center of the DIC control panel in
until it pops out and then pull the knob until is completely
extended. Turn the knob clockwise or counter-clockwise
to increase or decrease the brightness. If you turn the
knob all the way to the left, the HUD image will turn off.To adjust the HUD so you can see it properly, do the
following:
1. Adjust the seat to a comfortable driving position. If
you change your seat position later, you may have
to re-adjust your HUD.
2. Start your engine and press the top or bottom of
the HUD button to center the HUD image in your
view.
The HUD image can only be adjusted up and down,
not side-to-side.
3. Turn the knob on the DIC control panel to adjust
the brightness of the HUD image.
The brightness of the HUD image is determined by the
light conditions in the direction your vehicle is facing
and where you have the HUD set. If you are facing a
dark object or a heavily shaded area, your HUD
may anticipate that you are entering a dark area and
may begin to dim.
To turn the HUD image off, turn the knob
counter-clockwise.
3-45
Page 209 of 446
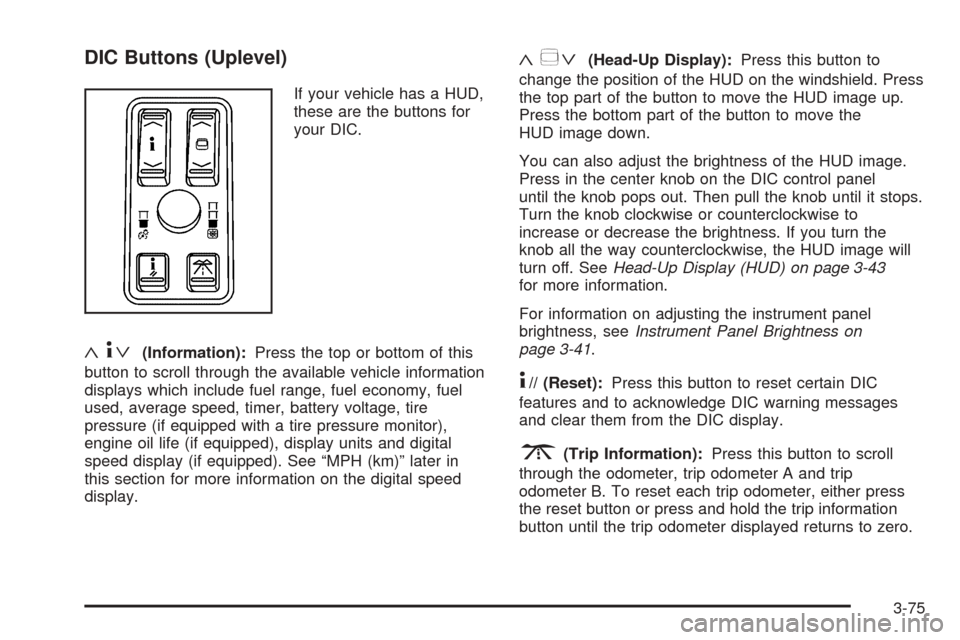
DIC Buttons (Uplevel)
If your vehicle has a HUD,
these are the buttons for
your DIC.
«4ª(Information):Press the top or bottom of this
button to scroll through the available vehicle information
displays which include fuel range, fuel economy, fuel
used, average speed, timer, battery voltage, tire
pressure (if equipped with a tire pressure monitor),
engine oil life (if equipped), display units and digital
speed display (if equipped). See “MPH (km)” later in
this section for more information on the digital speed
display.
«~ª(Head-Up Display):Press this button to
change the position of the HUD on the windshield. Press
the top part of the button to move the HUD image up.
Press the bottom part of the button to move the
HUD image down.
You can also adjust the brightness of the HUD image.
Press in the center knob on the DIC control panel
until the knob pops out. Then pull the knob until it stops.
Turn the knob clockwise or counterclockwise to
increase or decrease the brightness. If you turn the
knob all the way counterclockwise, the HUD image will
turn off. SeeHead-Up Display (HUD) on page 3-43
for more information.
For information on adjusting the instrument panel
brightness, seeInstrument Panel Brightness on
page 3-41.
4// (Reset):Press this button to reset certain DIC
features and to acknowledge DIC warning messages
and clear them from the DIC display.
3(Trip Information):Press this button to scroll
through the odometer, trip odometer A and trip
odometer B. To reset each trip odometer, either press
the reset button or press and hold the trip information
button until the trip odometer displayed returns to zero.
3-75
Page 227 of 446
Your vehicle has a feature called Retained Accessory
Power (RAP). With RAP, the audio system can be
played even after the ignition is turned off. SeeRetained
Accessory Power (RAP) on page 2-23for more
information.
Setting the Time
1. Press the tune/select knob (the right knob) to enter
the main menu.
2. Turn the tune/select knob until SET CLOCK
appears on the display.
3. Press the tune/select knob to select SET CLOCK.
4. Turn the tune/select knob to adjust the time.
5. Press the tune/select knob to update the time.
VEHICLE TIME UPDATED will appear on the
display.
If the CLOCK/RADIO DISP is con�gured into one of
the con�gurable keys, pressing the key will switch the
display back to the clock set function. The time and
date will always appear on the radio display. See
“Con�gurable Radio Display Keys” underRadio with
CD on page 3-94for more information on con�guring
the keys.
Setting the Date
1. Press the tune/select knob (the right knob) to enter
the main menu.
2. Turn the tune/select knob until SET DATE appears
on the display.
3. Press the tune/select knob to select SET DATE.
4. Turn the tune/select knob to adjust the date.
5. Press the tune/select knob to update the time.
VEHICLE DATE UPDATED will appear on the
display.
If the DATE is con�gured into one of the con�gurable
keys, pressing the key will switch the display back to
the date set function. The time and date will always
appear on the radio display. See “Con�gurable Radio
Display Keys” underRadio with CD on page 3-94
for more information on con�guring the keys.
3-93
Page 246 of 446
Radio Personalization
Accessing the Radio’s Main Menu
(Base Audio System)
There are two different procedures for accessing the
radio’s main menu depending upon whether or not your
vehicle has the Navigation system.
To access the main menu of the radio, do one of the
following:
Using the Base audio system, press the CNFG
button located on the radio or press the tune/select
knob located on the right side of the radio. Then
turn the tune/select knob clockwise or
counterclockwise to scroll through the menu items.
If your vehicle has the Navigation system, see the
Navigation System manual supplied with your
vehicle for more information on accessing the main
menu and for descriptions of the menu items for
the Navigation system.The main menu for the Base audio system consists of
the following menu items:
eBASS - MID - TREBLE
xBALANCE - FADER
eEQ EQUALIZER
H/A (HOME/AWAY) PRESETS
AUTOSTORE PRESETS
CAT CATEGORY
TA TRAFFIC ANNOUNCE
RECALL RDS (Radio Data System) MESSAGE
AF ALTERNATE FREQ. (Frequency)
ASEEK LOCAL/DISTANT
8SET CLOCK
BSET DATE
4INFO (Information)
LANG LANGUAGE
SETUP
3-112
Page 248 of 446
ASEEK LOCAL/DISTANT:This feature instructs the
audio system to seek only local radio stations with
the strongest signal or to seek all radio stations with a
strong signal in a large area. Use LOCAL when you are
in urban areas where there are several strong radio
station signals and you want to limit the number
of stations to those with the strongest signals only. Use
DISTANT when you are in rural areas where there
are fewer radio station signals available.
See “Local/Distant Selection” underRadio with CD on
page 3-94for more information.
8SET CLOCK:Use this menu item to set the time.
SeeSetting the Time on page 3-93for more information.
BSET DATE:Use this menu item to set the date.
SeeSetting the Time on page 3-93for more information.
4(Information):This menu item is used to display
XM™ satellite radio service and CD MP3 playback
information. See “
4(Information)” underRadio with CD
on page 3-94for more information.LANG (Language):To change the language displayed
on the radio, select LANGUAGE by pressing the
tune/select knob. Turn the tune/select knob to scroll
through the following available languages:
ENGLISH
GERMAN
FRENCH
SPANISH
JAPANESE
To make your selection, press the tune/select knob. If
you accidentally select a language that you did not want,
ENGLISH is always at the top of the language list.
SETUP:When you select this menu item, the following
submenu is available:
PERSONAL SETTINGS MENU
DRIVER SELECTION
DRIVER EXIT SETTINGS
CONFIGURE DISPLAY KEYS
SETUP Submenu Items
The following choices are available for programming
using the Base audio system.
3-114
Page 264 of 446
Try to adjust your speed so you can “drive” through the
curve. Maintain a reasonable, steady speed. Wait to
accelerate until you are out of the curve, and then
accelerate gently into the straightaway.
To help you steer in the direction you want to go, during
certain sharp or sudden cornering maneuvers, gear
selection is controlled. This will maximize the available
drive wheel torque and minimize the transmission
response time and shift activity. During this kind of
maneuver, the transmission shifts automatically
as vehicle speed changes.
Steering in Emergencies
There are times when steering can be more effective than
braking. For example, you come over a hill and �nd a
truck stopped in your lane, or a car suddenly pulls out
from nowhere, or a child darts out from between parked
cars and stops right in front of you. You can avoid these
problems by braking — if you can stop in time. But
sometimes you cannot; there is not room. That is the time
for evasive action — steering around the problem.
Your vehicle can perform very well in emergencies like
these. First apply your brakes.
SeeBraking on page 4-5. It is better to remove as
much speed as you can from a possible collision. Then
steer around the problem, to the left or right depending
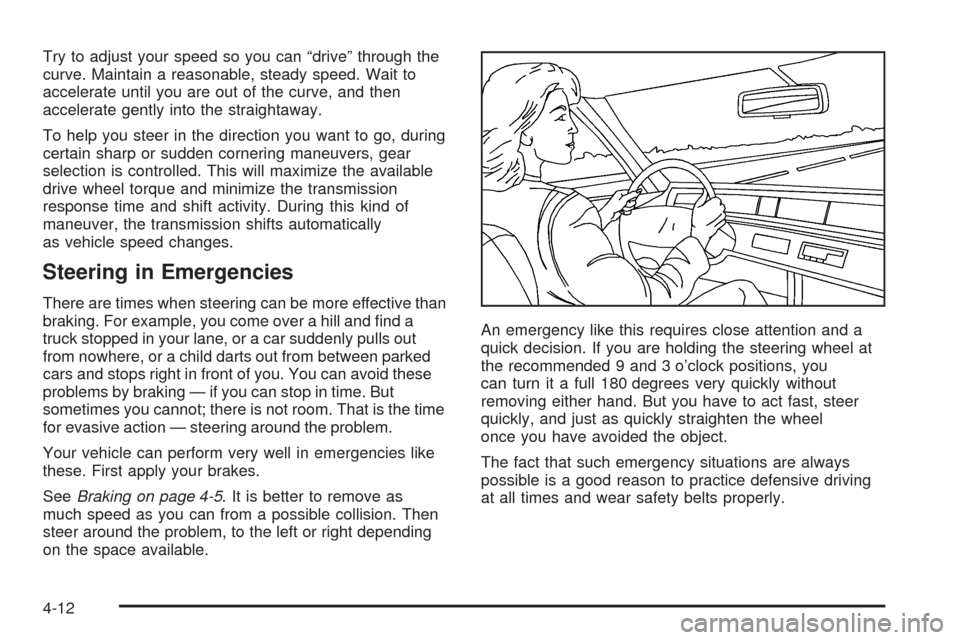
on the space available.An emergency like this requires close attention and a
quick decision. If you are holding the steering wheel at
the recommended 9 and 3 o’clock positions, you
can turn it a full 180 degrees very quickly without
removing either hand. But you have to act fast, steer
quickly, and just as quickly straighten the wheel
once you have avoided the object.
The fact that such emergency situations are always
possible is a good reason to practice defensive driving
at all times and wear safety belts properly.
4-12
Page 304 of 446
Filling the Tank
{CAUTION:
Fuel vapor burns violently and a fuel �re can
cause bad injuries. To help avoid injuries to
you and others, read and follow all the
instructions on the pump island. Turn off your
engine when you are refueling. Do not smoke
if you are near fuel or refueling your vehicle.
Keep sparks, �ames, and smoking materials
away from fuel. Do not leave the fuel pump
unattended when refueling your vehicle — this
is against the law in some places. Keep
children away from the fuel pump; never let
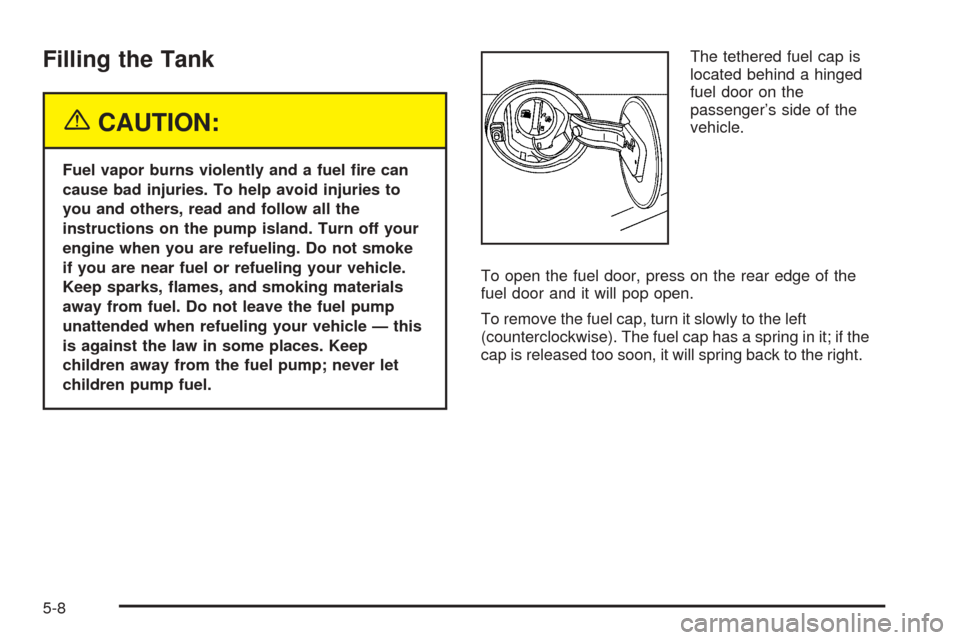
children pump fuel.The tethered fuel cap is
located behind a hinged
fuel door on the
passenger’s side of the
vehicle.
To open the fuel door, press on the rear edge of the
fuel door and it will pop open.
To remove the fuel cap, turn it slowly to the left
(counterclockwise). The fuel cap has a spring in it; if the
cap is released too soon, it will spring back to the right.
5-8
Page 305 of 446

While refueling, hang the tethered fuel cap from the
hook on the fuel door.
{CAUTION:
If you spill fuel and then something ignites it,
you could be badly burned. Fuel can spray out
on you if you open the fuel cap too quickly.
This spray can happen if your tank is nearly
full, and is more likely in hot weather. Open
the fuel cap slowly and wait for any hiss noise
to stop. Then unscrew the cap all the way.
Be careful not to spill fuel. Do not top off or over�ll the
tank, and wait a few seconds after you have �nished
pumping before removing the nozzle. Clean fuel
from painted surfaces as soon as possible. See
Washing Your Vehicle on page 5-89.
When replacing the fuel cap, turn it to the right
(clockwise) until it clicks. Make sure the cap is fully
installed. The diagnostic system can determine if the fuel
cap has been left off or improperly installed. This
would allow fuel to evaporate into the atmosphere. See
Malfunction Indicator Lamp on page 3-68.The Check Gas Cap message will appear on the Driver
Information Center (DIC) display if the fuel cap is not
reinstalled properly. SeeDIC Warnings and Messages
on page 3-78for more information.{CAUTION:
If a �re starts while you are refueling, do not
remove the nozzle. Shut off the �ow of fuel by
shutting off the pump or by notifying the
station attendant. Leave the area immediately.
Notice:If you need a new fuel cap, be sure to get
the right type. Your dealer can get one for you.
If you get the wrong type, it may not �t properly.
This may cause your malfunction indicator lamp to
light and may damage your fuel tank and emissions
system. SeeMalfunction Indicator Lamp on
page 3-68.
5-9