odometer CADILLAC STS 2005 1.G Owners Manual
[x] Cancel search | Manufacturer: CADILLAC, Model Year: 2005, Model line: STS, Model: CADILLAC STS 2005 1.GPages: 446, PDF Size: 2.58 MB
Page 92 of 446
AUTOMATIC OVERDRIVE (D):This position is for
normal driving. If you need more power for passing,
and you are:
Going less than 35 mph (55 km/h), push the
accelerator pedal about halfway down.
Going about 35 mph (55 km/h) or more, push the
accelerator all the way down.
The transmission will shift down to a lower gear
and have more power.
Notice:Spinning the tires or holding the vehicle in
one place on a hill using only the accelerator
pedal may damage the transmission. If you are
stuck, do not spin the tires. When stopping on a hill,
use the brakes to hold the vehicle in place.
FOURTH (4):This position is also used for normal
driving. However, it offers more power and lower fuel
economy than AUTOMATIC OVERDRIVE (D).
Here are examples for using FOURTH (4) instead of
AUTOMATIC OVERDRIVE (D):
When driving on hilly, winding roads.
When going down a steep hill.
This position may also offer improved trailer towing
performance in certain driving conditions.
Driver Shift Control (DSC)
Notice:If you drive your vehicle at high rpms
without upshifting while using Driver Shift
Control (DSC), you could damage your vehicle.
Always upshift when necessary while using DSC.
Your automatic transmission has a Driver Shift
Control (DSC) feature that allows you to change
gears similar to a manual transmission. To use the
DSC feature:
1. Slide the shift lever over from AUTOMATIC
OVERDRIVE (D) to the right into the DSC area.
The DIC will display which mode the transmission
is in. SeeDriver Information Center (DIC) on
page 3-73.
If you do not move the shift lever forward or
rearward, the vehicle will be in sport mode. While
driving in sport mode, the transmission may remain
in a gear longer than it would in normal driving
mode based on braking, throttle input and vehicle
lateral acceleration.
2. Press the shift lever forward to upshift or rearward
to downshift.
The odometer on the instrument panel cluster will
change to show the requested gear range when moving
the shift lever forward or rearward.
2-28
Page 135 of 446
Instrument Panel Overview...............................3-4
Hazard Warning Flashers................................3-6
Other Warning Devices...................................3-6
Horn.............................................................3-6
Power Tilt Wheel and Telescopic
Steering Column.........................................3-6
Heated Steering Wheel...................................3-7
Turn Signal/Multifunction Lever.........................3-8
Turn and Lane-Change Signals........................3-8
Headlamp High/Low-Beam Changer..................3-9
Forward Collision Alert (FCA) System................3-9
Flash-to-Pass...............................................3-13
Windshield Wipers........................................3-13
Rainsense™ II Wipers...................................3-14
Windshield Washer.......................................3-15
Headlamp Washer........................................3-16
Cruise Control..............................................3-16
Adaptive Cruise Control.................................3-20
Headlamps..................................................3-33
Wiper Activated Headlamps............................3-37
Headlamps on Reminder................................3-37
Daytime Running Lamps (DRL).......................3-38
Fog Lamps..................................................3-39
Twilight Sentinel
®..........................................3-40
Exterior Lighting Battery Saver........................3-41
Instrument Panel Brightness...........................3-41Entry Lighting...............................................3-42
Parade Dimming...........................................3-42
Reading Lamps............................................3-42
Battery Load Management.............................3-42
Inadvertent Power Battery Saver.....................3-43
Head-Up Display (HUD).................................3-43
Ultrasonic Rear Parking Assist (URPA)............3-47
Accessory Power Outlets...............................3-49
Ashtrays and Cigarette Lighter........................3-49
Climate Controls............................................3-50
Dual Climate Control System..........................3-50
Outlet Adjustment.........................................3-56
Rear Climate Control System.........................3-57
Passenger Compartment Air Filter...................3-58
Warning Lights, Gages, and Indicators............3-60
Instrument Panel Cluster................................3-61
Speedometer and Odometer...........................3-62
Tachometer.................................................3-62
Safety Belt Reminder Light.............................3-62
Airbag Readiness Light..................................3-63
Charging System Light..................................3-64
Brake System Warning Light..........................3-64
Anti-Lock Brake System Warning Light.............3-65
Low Tire Pressure Warning Light....................3-66
Traction Control System (TCS) Warning Light......3-66
Section 3 Instrument Panel
3-1
Page 196 of 446
Speedometer and Odometer
Your speedometer lets you see your speed in both
miles per hour (mph) and kilometers per hour (km/h).
See “MPH (km)” underDIC Controls and Displays
on page 3-74for more information.
The odometer mileage can be checked without the
vehicle running. Your vehicle’s odometer works together
with the driver information center. You can set a Trip
A and a Trip B odometer. See “Trip Information” under
DIC Controls and Displays on page 3-74for more
information.
If your vehicle ever needs a new odometer installed, the
new one will be set to the correct mileage total of the
old odometer.
Tachometer
This gage indicates
the engine speed in
revolutions per
minute (rpm).
Safety Belt Reminder Light
When the ignition is turned on, a chime will be provided
for several seconds to remind people to buckle their
safety belts. The driver safety belt light will also
be provided and stay on for several seconds, then
it will �ash for several more. You should buckle your
seat belt.
This chime and light will
be repeated if the driver
remains unbuckled and the
vehicle is in motion.
If the driver’s belt is buckled, neither the chime nor the
light will be provided.
3-62
Page 207 of 446
Driver Information Center (DIC)
The Driver Information Center (DIC) gives you the
status of many of your vehicle’s systems. The DIC is
also used to display warning/status messages. All
messages will appear in the DIC display located at the
bottom of the instrument panel cluster, below the
tachometer and speedometer. The DIC buttons are
located on the instrument panel, to the left of the
steering wheel.
The DIC comes on when the ignition is on. After a short
delay, the DIC will display the current driver and the
information that was last displayed before the engine
was turned off.
The top line of the DIC display shows the vehicle
system information and the warning/status messages.
The bottom line of the DIC display shows either the
odometer, the trip odometer A or the trip odometer B
information on the left side. Only one odometer
can appear at a time. See “Trip Information” under
DIC Controls and Displays on page 3-74for informationon changing the display to show the odometer or trip
odometer information. The bottom line of the DIC display
also shows the outside temperature on the right side
and the shift lever position indicator in the center.
SeeAutomatic Transmission Operation on page 2-26for
more information on the shift lever positions.
When the sport mode is active, an S will appear next to
the shift position indicator on the center of the DIC
display. When the manual mode is active, an M
will appear next to the shift position indicator. When the
normal mode is active, only the shift position indicator
will appear. See “Driver Shift Control” underAutomatic
Transmission Operation on page 2-26for more
information.
If a problem is detected, a warning message will appear
on the display. Be sure to take any message that
appears on the display seriously and remember that
clearing the message will only make the message
disappear, not correct the problem.
3-73
Page 208 of 446
DIC Controls and Displays
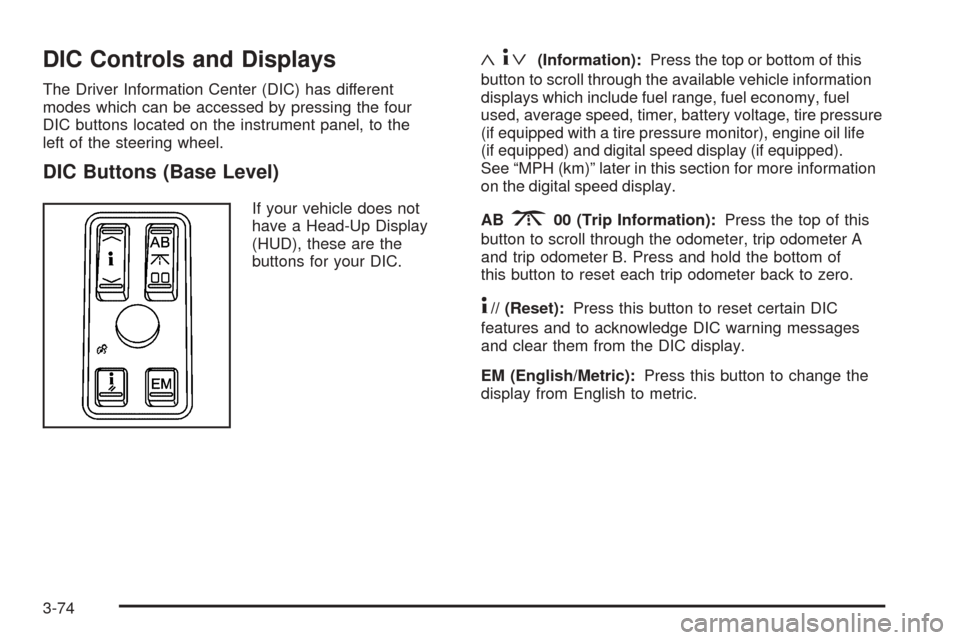
The Driver Information Center (DIC) has different
modes which can be accessed by pressing the four
DIC buttons located on the instrument panel, to the
left of the steering wheel.
DIC Buttons (Base Level)
If your vehicle does not
have a Head-Up Display
(HUD), these are the
buttons for your DIC.
«4ª(Information):Press the top or bottom of this
button to scroll through the available vehicle information
displays which include fuel range, fuel economy, fuel
used, average speed, timer, battery voltage, tire pressure
(if equipped with a tire pressure monitor), engine oil life
(if equipped) and digital speed display (if equipped).
See “MPH (km)” later in this section for more information
on the digital speed display.
AB
300 (Trip Information):Press the top of this
button to scroll through the odometer, trip odometer A
and trip odometer B. Press and hold the bottom of
this button to reset each trip odometer back to zero.
4// (Reset):Press this button to reset certain DIC
features and to acknowledge DIC warning messages
and clear them from the DIC display.
EM (English/Metric):Press this button to change the
display from English to metric.
3-74
Page 209 of 446
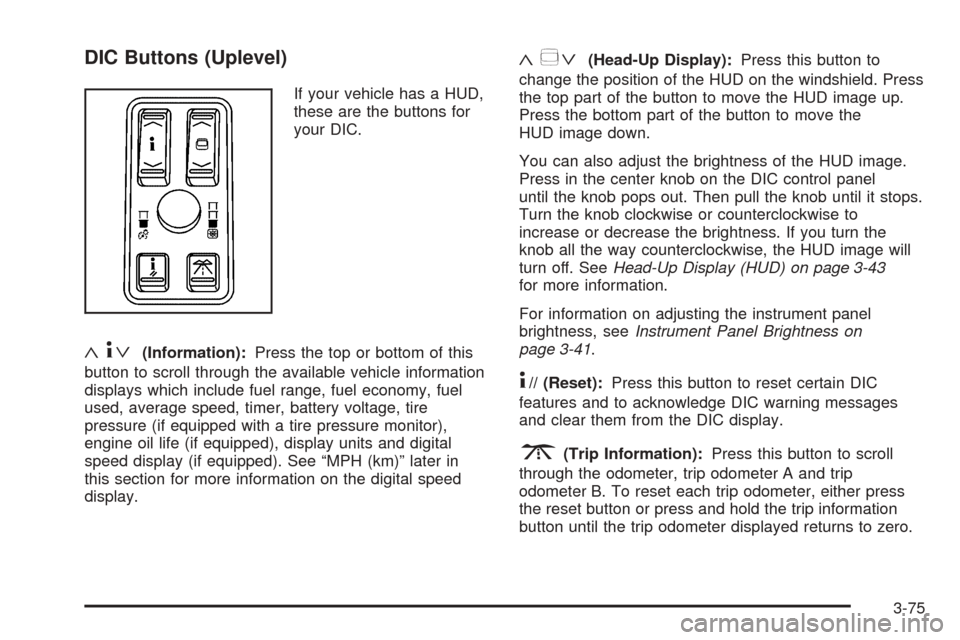
DIC Buttons (Uplevel)
If your vehicle has a HUD,
these are the buttons for
your DIC.
«4ª(Information):Press the top or bottom of this
button to scroll through the available vehicle information
displays which include fuel range, fuel economy, fuel
used, average speed, timer, battery voltage, tire
pressure (if equipped with a tire pressure monitor),
engine oil life (if equipped), display units and digital
speed display (if equipped). See “MPH (km)” later in
this section for more information on the digital speed
display.
«~ª(Head-Up Display):Press this button to
change the position of the HUD on the windshield. Press
the top part of the button to move the HUD image up.
Press the bottom part of the button to move the
HUD image down.
You can also adjust the brightness of the HUD image.
Press in the center knob on the DIC control panel
until the knob pops out. Then pull the knob until it stops.
Turn the knob clockwise or counterclockwise to
increase or decrease the brightness. If you turn the
knob all the way counterclockwise, the HUD image will
turn off. SeeHead-Up Display (HUD) on page 3-43
for more information.
For information on adjusting the instrument panel
brightness, seeInstrument Panel Brightness on
page 3-41.
4// (Reset):Press this button to reset certain DIC
features and to acknowledge DIC warning messages
and clear them from the DIC display.
3(Trip Information):Press this button to scroll
through the odometer, trip odometer A and trip
odometer B. To reset each trip odometer, either press
the reset button or press and hold the trip information
button until the trip odometer displayed returns to zero.
3-75
Page 212 of 446
For example, if you are driving in traffic making frequent
stops, the display may read one number, but if you
enter the freeway, the number may change even though
you still have the same amount of fuel in the fuel
tank. This is because different driving conditions produce
different fuel economies. Generally, freeway driving
produces better fuel economy than city driving.
Once the range drops below 40 miles (64 km) remaining,
the display will show LOW RANGE.
If your vehicle is low on fuel, the Fuel Level Low
message will be displayed. See “Fuel Level Low” under
DIC Warnings and Messages on page 3-78for more
information.
MPH (km/h)
This display, if equipped, shows the vehicle’s speed
digitally in either miles per hour (mph) or kilometers
per hour (km/h).
Trip Information Display Menu Items
The following display menu items can be displayed by
pressing the trip Information button.
Odometer
Press the trip information button until the odometer
appears on the DIC display. The odometer shows the
total distance the vehicle has been driven in either
miles or kilometers.
Trip Odometer
Press the trip information button until trip odometer A or B
appears on the DIC display. The trip odometer shows the
current distance traveled since the last reset for each trip
odometer in either miles or kilometers. Both odometers
can be used at the same time.
For base level vehicles, each trip odometer can be reset
to zero separately by pressing and holding the bottom
of the trip information button while the desired trip
odometer is displayed. For uplevel vehicles, reset each
trip odometer by pressing the reset button or by
pressing and holding the trip information button while
the desired trip odometer is displayed.
DIC Warnings and Messages
These messages will appear if there is a problem
sensed in one of your vehicle’s systems. The text
messages are the same for both the base audio and
Navigation systems unless otherwise indicated.
You must acknowledge a message to clear it from the
screen for further use. To clear a message, press
the reset button.
Be sure to take any message that appears on the
screen seriously and remember that clearing the
message will only make the message disappear, not
the problem.
3-78
Page 368 of 446
If you need to replace any of your wheels, wheel bolts
or wheel nuts, replace them only with new GM
original equipment parts. This way, you will be sure to
have the right wheel, wheel bolts and wheel nuts
for your vehicle.
{CAUTION:
Using the wrong replacement wheels, wheel
bolts or wheel nuts on your vehicle can be
dangerous. It could affect the braking and
handling of your vehicle, make your tires lose
air and make you lose control. You could have
a collision in which you or others could be
injured. Always use the correct wheel, wheel
bolts and wheel nuts for replacement.
Notice:The wrong wheel can also cause problems
with bearing life, brake cooling, speedometer or
odometer calibration, headlamp aim, bumper height,
vehicle ground clearance and tire or tire chain
clearance to the body and chassis.
SeeChanging a Flat Tire on page 5-74for more
information.
Used Replacement Wheels
{CAUTION:
Putting a used wheel on your vehicle is
dangerous. You can’t know how it’s been used
or how far it’s been driven. It could fail
suddenly and cause a crash. If you have to
replace a wheel, use a new GM original
equipment wheel.
5-72
Page 417 of 446
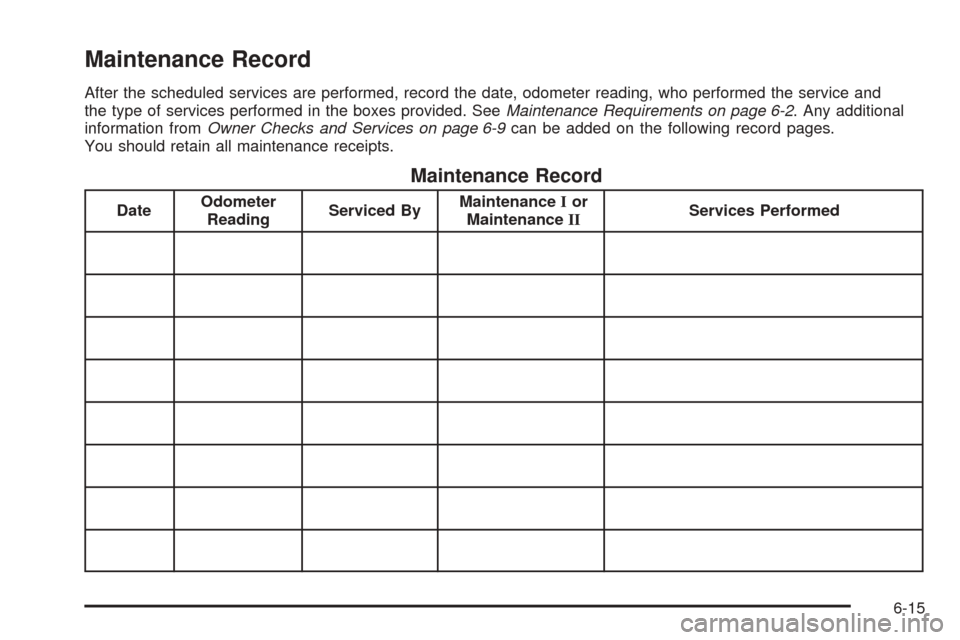
Maintenance Record
After the scheduled services are performed, record the date, odometer reading, who performed the service and
the type of services performed in the boxes provided. SeeMaintenance Requirements on page 6-2. Any additional
information fromOwner Checks and Services on page 6-9can be added on the following record pages.
You should retain all maintenance receipts.
Maintenance Record
DateOdometer
ReadingServiced ByMaintenanceIor
MaintenanceIIServices Performed
6-15
Page 418 of 446
Maintenance Record (cont’d)
DateOdometer
ReadingServiced ByMaintenanceIor
MaintenanceIIServices Performed
6-16