buttons CADILLAC XLR 2009 1.G Owner's Manual
[x] Cancel search | Manufacturer: CADILLAC, Model Year: 2009, Model line: XLR, Model: CADILLAC XLR 2009 1.GPages: 462, PDF Size: 3.72 MB
Page 224 of 462
Features and Controls
Using the Navigation System
This section presents basic information needed to
operate the navigation system.
Use the keys located on each side of the navigation
screen, as well as the available touch-sensitive screen
buttons, to operate the system. SeeNavigation System
Overview on page 4-2for more information on location.
Once the vehicle is moving, various functions become
disabled to reduce driver distraction.
Hard Keys
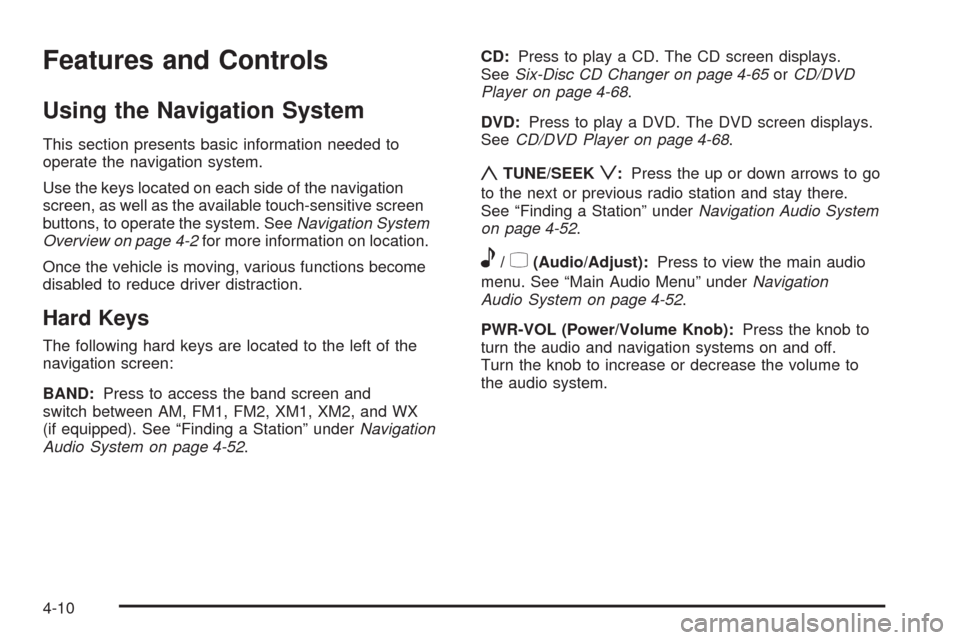
The following hard keys are located to the left of the
navigation screen:
BAND:Press to access the band screen and
switch between AM, FM1, FM2, XM1, XM2, and WX
(if equipped). See “Finding a Station” underNavigation
Audio System on page 4-52.CD:Press to play a CD. The CD screen displays.
SeeSix-Disc CD Changer on page 4-65orCD/DVD
Player on page 4-68.
DVD:Press to play a DVD. The DVD screen displays.
SeeCD/DVD Player on page 4-68.
yTUNE/SEEKz:Press the up or down arrows to go
to the next or previous radio station and stay there.
See “Finding a Station” underNavigation Audio System
on page 4-52.
e/z(Audio/Adjust):Press to view the main audio
menu. See “Main Audio Menu” underNavigation
Audio System on page 4-52.
PWR-VOL (Power/Volume Knob):Press the knob to
turn the audio and navigation systems on and off.
Turn the knob to increase or decrease the volume to
the audio system.
4-10
Page 225 of 462
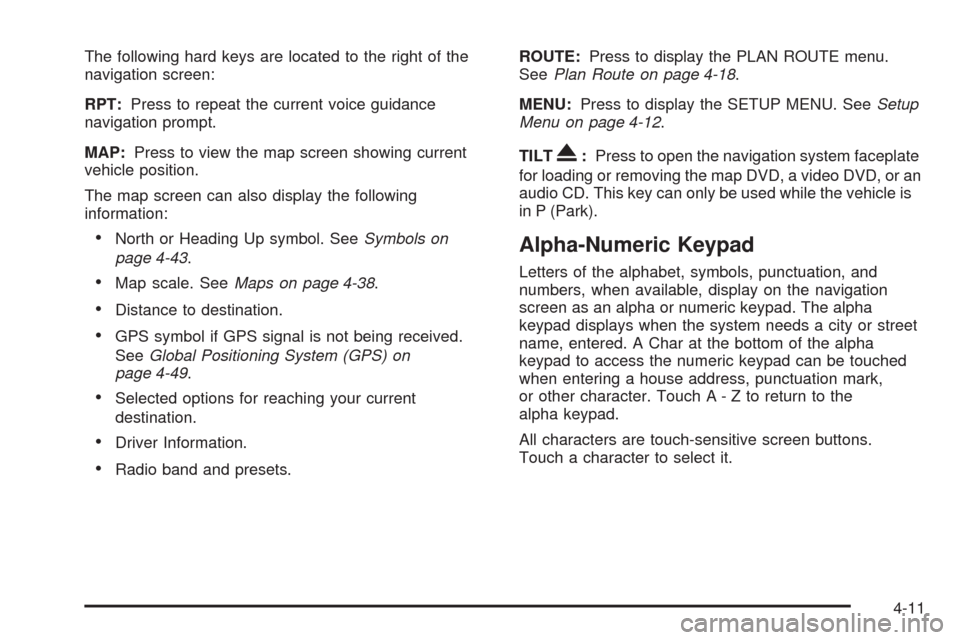
The following hard keys are located to the right of the
navigation screen:
RPT:Press to repeat the current voice guidance
navigation prompt.
MAP:Press to view the map screen showing current
vehicle position.
The map screen can also display the following
information:
North or Heading Up symbol. SeeSymbols on
page 4-43.
Map scale. SeeMaps on page 4-38.
Distance to destination.
GPS symbol if GPS signal is not being received.
SeeGlobal Positioning System (GPS) on
page 4-49.
Selected options for reaching your current
destination.
Driver Information.
Radio band and presets.ROUTE:Press to display the PLAN ROUTE menu.
SeePlan Route on page 4-18.
MENU:Press to display the SETUP MENU. SeeSetup
Menu on page 4-12.
TILT
X:Press to open the navigation system faceplate
for loading or removing the map DVD, a video DVD, or an
audio CD. This key can only be used while the vehicle is
in P (Park).
Alpha-Numeric Keypad
Letters of the alphabet, symbols, punctuation, and
numbers, when available, display on the navigation
screen as an alpha or numeric keypad. The alpha
keypad displays when the system needs a city or street
name, entered. A Char at the bottom of the alpha
keypad to access the numeric keypad can be touched
when entering a house address, punctuation mark,
or other character. Touch A - Z to return to the
alpha keypad.
All characters are touch-sensitive screen buttons.
Touch a character to select it.
4-11
Page 226 of 462
Select the space symbol to enter a space between
characters or the words of a name.
V:Select the backspace symbol if an incorrect
character has been selected.
To make the name selections easier, the system only
allows a selection of a character which can follow
the last one entered. For example, if Z is entered,
T could not be entered after it. The system highlights
the available characters and darken the unavailable
characters.
If unsuccessful when entering a name, it may need to
be entered differently. It is also possible that the
map DVD database may not contain that information or
the correct search area has not been selected. See
Database Coverage Explanations on page 4-52for more
information.
Touch Sensitive Buttons
Touch-sensitive buttons are located on the screen.
After successfully selecting a screen button, a beep is
heard. These buttons highlight when a feature is
available and are dim when not unavailable. There are
some toggle screen buttons that are light blue when
active and dark blue when inactive.
Setup Menu
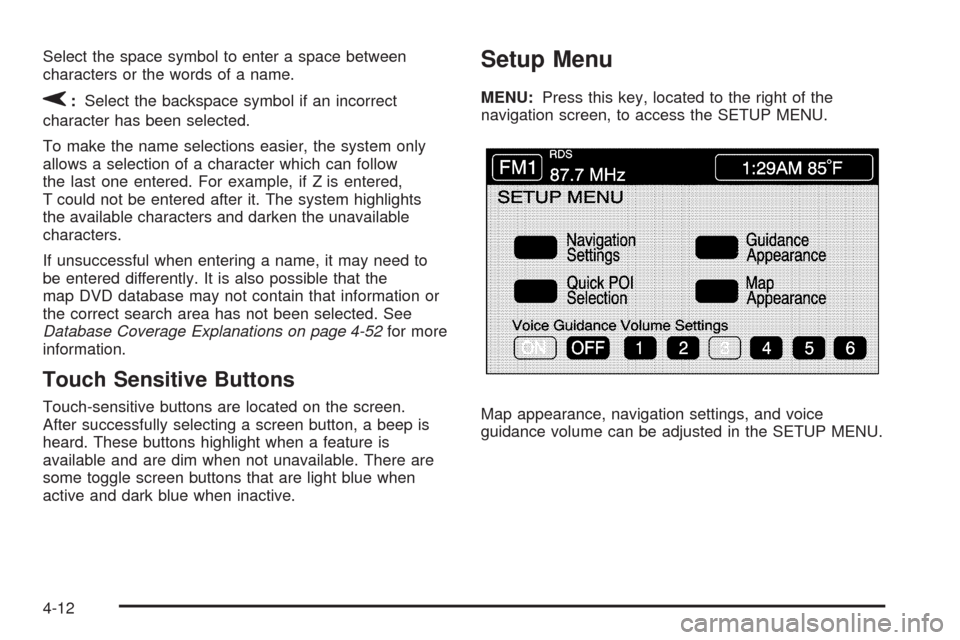
MENU:Press this key, located to the right of the
navigation screen, to access the SETUP MENU.
Map appearance, navigation settings, and voice
guidance volume can be adjusted in the SETUP MENU.
4-12
Page 232 of 462
Voice Guidance Volume Settings
This feature allows you to set the voice prompt volume
level or to turn voice prompts on or off.
Set the voice prompt volume level by touching the
numbered buttons to increase or decrease the volume
level. You may also choose to turn the voice prompts off.
Then touch Return to save the setting and to return to
the SETUP MENU.
If a voice prompt is active while the audio system is on,
the audio system volume decreases and the voice
prompts are heard through the driver side front speaker.
Voice prompts are not heard while using voice
recognition.
Plan Route
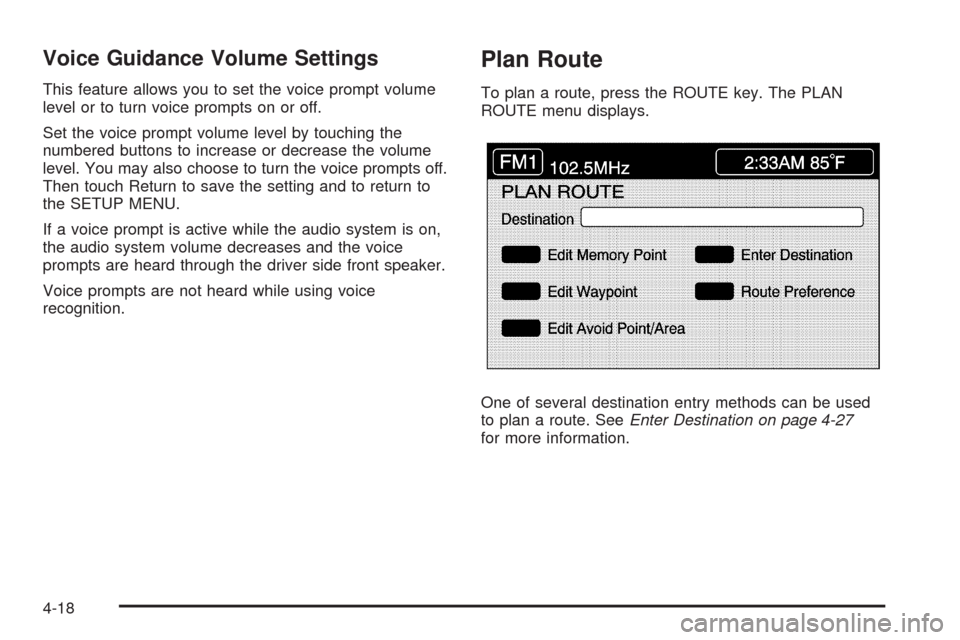
To plan a route, press the ROUTE key. The PLAN
ROUTE menu displays.
One of several destination entry methods can be used
to plan a route. SeeEnter Destination on page 4-27
for more information.
4-18
Page 240 of 462

Registering an Avoid Point/Area
To store an avoid point/area:
1. Touch Register Avoid Point/Area.
2. Enter a location. SeeEnter Destination on
page 4-27.
3. If desired, reduce or enlarge the area around the
point you want to avoid by using the REDUCE or
ENLARGE screen buttons.
If an avoid point cannot be avoided, the system
displays “Avoid Point and Area Stored. Route May
Not Avoid the Avoid Point and Areas.”
4. Touch Enter to set the area as an avoid point area.
When using the REDUCE or ENLARGE buttons, a
box appears to represent the area or an X appears
to represent the area avoided. When an avoid
point is set, the square will appear as green.
5. Touch Return to go back to the previous screen.
Editing an Avoid Point/Area
To edit an avoid point/area:
1. Touch Edit Avoid Point/Area. A list of avoided
points appear.
2. Select the avoided point/area you want to change.
A map of the avoided area appears.
3. Use REDUCE or ENLARGE to edit the avoided
point.
4. Touch Enter to set your new avoided area.
The system displays “Area Adjusted.”
5. Touch Return to go back to the previous screen.
Deleting an Avoid Point/Area
To delete an avoid point/area:
1. Touch Delete Avoid Point/Area. A list of avoided
points appear.
2. Select the avoided point/area to be deleted.
3. The system will ask to con�rm the selection.
Touch Yes to delete the avoid point/area or
No to cancel.
If Yes is selected, the area will no longer be
avoided when traveling on a planned route.
4. Touch Return to go back to the previous screen.
4-26
Page 271 of 462
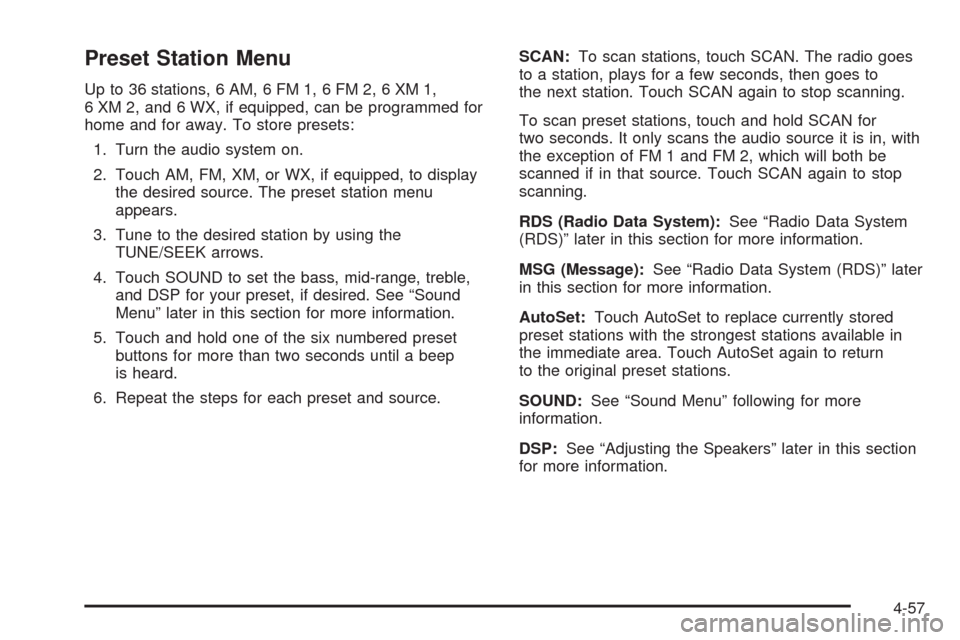
Preset Station Menu
Up to 36 stations, 6 AM, 6 FM 1, 6 FM 2, 6 XM 1,
6 XM 2, and 6 WX, if equipped, can be programmed for
home and for away. To store presets:
1. Turn the audio system on.
2. Touch AM, FM, XM, or WX, if equipped, to display
the desired source. The preset station menu
appears.
3. Tune to the desired station by using the
TUNE/SEEK arrows.
4. Touch SOUND to set the bass, mid-range, treble,
and DSP for your preset, if desired. See “Sound
Menu” later in this section for more information.
5. Touch and hold one of the six numbered preset
buttons for more than two seconds until a beep
is heard.
6. Repeat the steps for each preset and source.SCAN:To scan stations, touch SCAN. The radio goes
to a station, plays for a few seconds, then goes to
the next station. Touch SCAN again to stop scanning.
To scan preset stations, touch and hold SCAN for
two seconds. It only scans the audio source it is in, with
the exception of FM 1 and FM 2, which will both be
scanned if in that source. Touch SCAN again to stop
scanning.
RDS (Radio Data System):See “Radio Data System
(RDS)” later in this section for more information.
MSG (Message):See “Radio Data System (RDS)” later
in this section for more information.
AutoSet:Touch AutoSet to replace currently stored
preset stations with the strongest stations available in
the immediate area. Touch AutoSet again to return
to the original preset stations.
SOUND:See “Sound Menu” following for more
information.
DSP:See “Adjusting the Speakers” later in this section
for more information.
4-57
Page 272 of 462
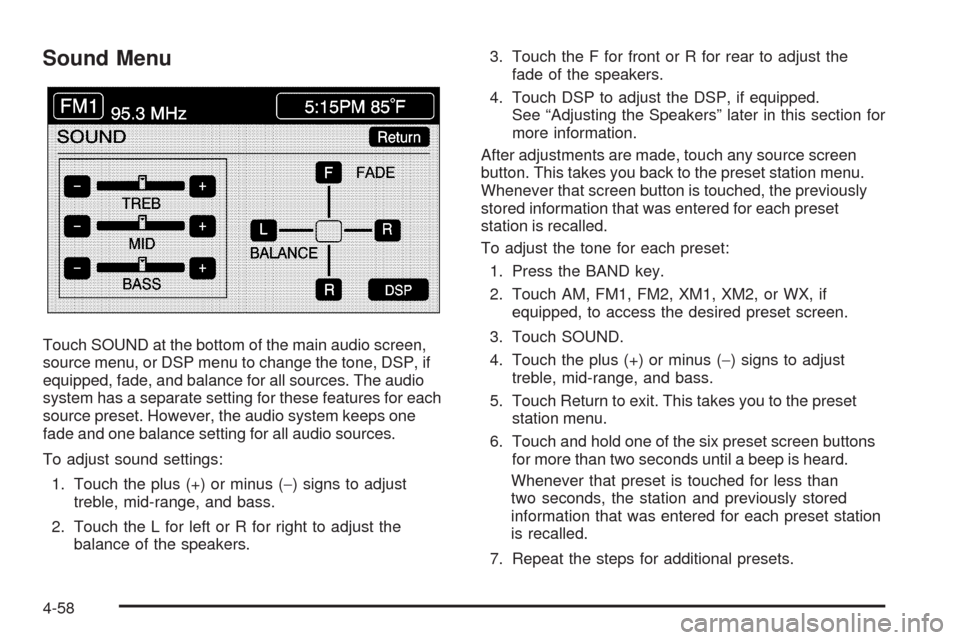
Sound Menu
Touch SOUND at the bottom of the main audio screen,
source menu, or DSP menu to change the tone, DSP, if
equipped, fade, and balance for all sources. The audio
system has a separate setting for these features for each
source preset. However, the audio system keeps one
fade and one balance setting for all audio sources.
To adjust sound settings:
1. Touch the plus (+) or minus (−) signs to adjust
treble, mid-range, and bass.
2. Touch the L for left or R for right to adjust the
balance of the speakers.3. Touch the F for front or R for rear to adjust the
fade of the speakers.
4. Touch DSP to adjust the DSP, if equipped.
See “Adjusting the Speakers” later in this section for
more information.
After adjustments are made, touch any source screen
button. This takes you back to the preset station menu.
Whenever that screen button is touched, the previously
stored information that was entered for each preset
station is recalled.
To adjust the tone for each preset:
1. Press the BAND key.
2. Touch AM, FM1, FM2, XM1, XM2, or WX, if
equipped, to access the desired preset screen.
3. Touch SOUND.
4. Touch the plus (+) or minus (−) signs to adjust
treble, mid-range, and bass.
5. Touch Return to exit. This takes you to the preset
station menu.
6. Touch and hold one of the six preset screen buttons
for more than two seconds until a beep is heard.
Whenever that preset is touched for less than
two seconds, the station and previously stored
information that was entered for each preset station
is recalled.
7. Repeat the steps for additional presets.
4-58
Page 275 of 462
current station. If the current station does not broadcast
traffic announcements, the audio system seeks to a
station which will. When the audio system �nds a station
which broadcasts traffic announcements, it will stop.
If no station is found, TA will turn off.
While a traffic announcement plays, the audio system
uses TA volume. To increase TA volume, touch the VOL
button on the steering wheel or use the VOL up or down
buttons during the announcement. See “Voice Guidance
Volume Settings” underSetup Menu on page 4-12for
more information.
When a traffic announcement comes on the current radio
station or a related network station, it will be heard even
if the volume is muted or a CD is playing. If the audio
system tunes to a related network station for a traffic
announcement, it returns to the original station when the
announcement is �nished. If the CD player was being
used, the CD will stay in the player and resume play at
the point where it stopped.
Touch RDS followed by TA again to turn TA off.
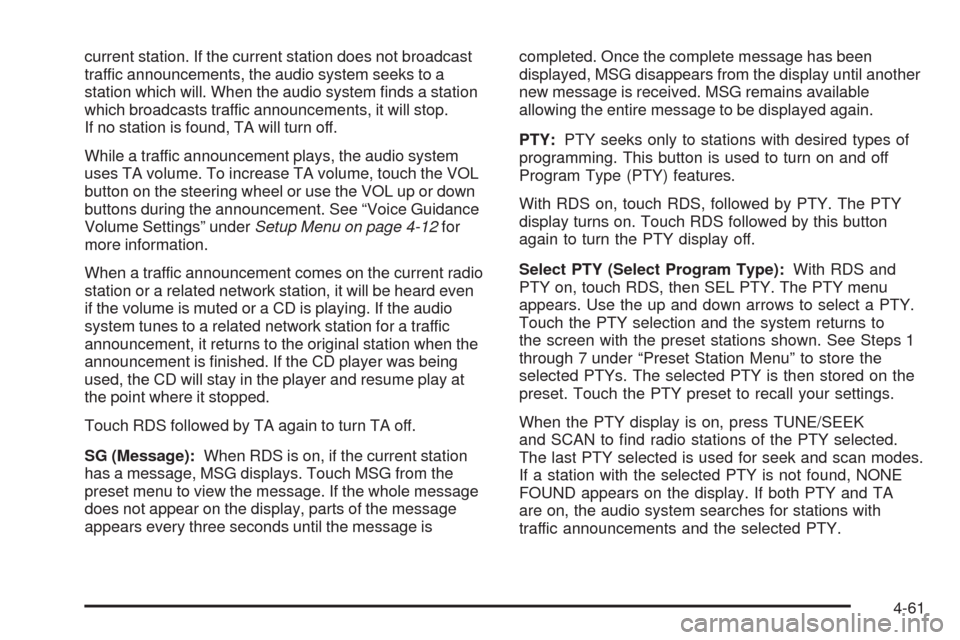
SG (Message):When RDS is on, if the current station
has a message, MSG displays. Touch MSG from the
preset menu to view the message. If the whole message
does not appear on the display, parts of the message
appears every three seconds until the message iscompleted. Once the complete message has been
displayed, MSG disappears from the display until another
new message is received. MSG remains available
allowing the entire message to be displayed again.
PTY:PTY seeks only to stations with desired types of
programming. This button is used to turn on and off
Program Type (PTY) features.
With RDS on, touch RDS, followed by PTY. The PTY
display turns on. Touch RDS followed by this button
again to turn the PTY display off.
Select PTY (Select Program Type):With RDS and
PTY on, touch RDS, then SEL PTY. The PTY menu
appears. Use the up and down arrows to select a PTY.
Touch the PTY selection and the system returns to
the screen with the preset stations shown. See Steps 1
through 7 under “Preset Station Menu” to store the
selected PTYs. The selected PTY is then stored on the
preset. Touch the PTY preset to recall your settings.
When the PTY display is on, press TUNE/SEEK
and SCAN to �nd radio stations of the PTY selected.
The last PTY selected is used for seek and scan modes.
If a station with the selected PTY is not found, NONE
FOUND appears on the display. If both PTY and TA
are on, the audio system searches for stations with
traffic announcements and the selected PTY.
4-61
Page 276 of 462
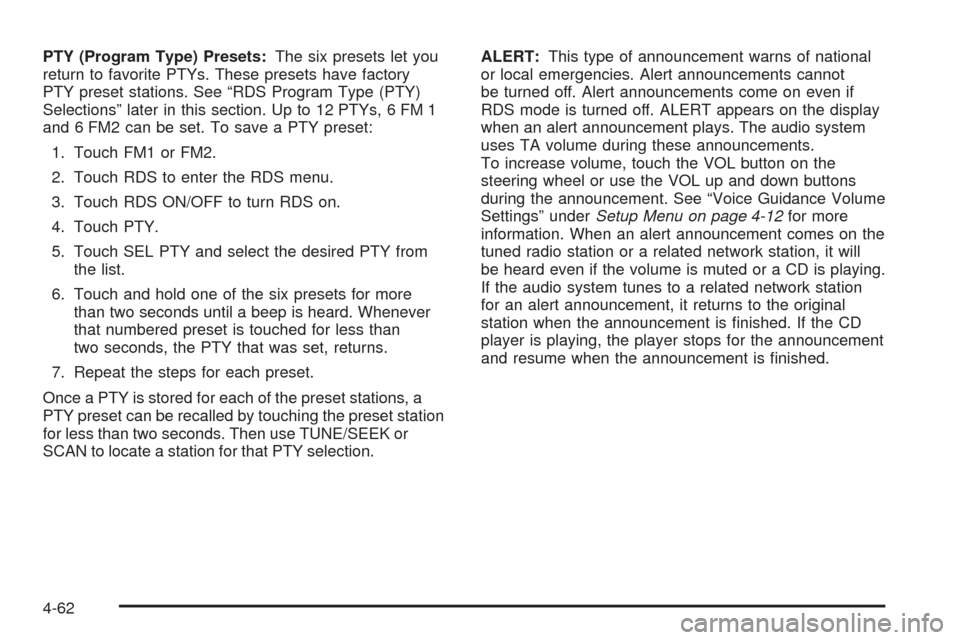
PTY (Program Type) Presets:The six presets let you
return to favorite PTYs. These presets have factory
PTY preset stations. See “RDS Program Type (PTY)
Selections” later in this section. Up to 12 PTYs, 6 FM 1
and 6 FM2 can be set. To save a PTY preset:
1. Touch FM1 or FM2.
2. Touch RDS to enter the RDS menu.
3. Touch RDS ON/OFF to turn RDS on.
4. Touch PTY.
5. Touch SEL PTY and select the desired PTY from
the list.
6. Touch and hold one of the six presets for more
than two seconds until a beep is heard. Whenever
that numbered preset is touched for less than
two seconds, the PTY that was set, returns.
7. Repeat the steps for each preset.
Once a PTY is stored for each of the preset stations, a
PTY preset can be recalled by touching the preset station
for less than two seconds. Then use TUNE/SEEK or
SCAN to locate a station for that PTY selection.ALERT:This type of announcement warns of national
or local emergencies. Alert announcements cannot
be turned off. Alert announcements come on even if
RDS mode is turned off. ALERT appears on the display
when an alert announcement plays. The audio system
uses TA volume during these announcements.
To increase volume, touch the VOL button on the
steering wheel or use the VOL up and down buttons
during the announcement. See “Voice Guidance Volume
Settings” underSetup Menu on page 4-12for more
information. When an alert announcement comes on the
tuned radio station or a related network station, it will
be heard even if the volume is muted or a CD is playing.
If the audio system tunes to a related network station
for an alert announcement, it returns to the original
station when the announcement is �nished. If the CD
player is playing, the player stops for the announcement
and resume when the announcement is �nished.
4-62
Page 280 of 462

Once the CD changer screen is accessed, you can
select one of the numbered buttons to go from
one compact disc to another among those loaded in
the CD changer and use the arrows to rewind or
fast forward through the disc selected.
The following features are also available from this
screen:
LOAD
EJECT
SCAN THE DISCS or SCAN THE TRACKS
and RANDOM ALL or RANDOM DISC.The numbered buttons (1 through 6) represent the order
of the discs loaded in the changer. If there are only
two CDs loaded, buttons 1 and 2 will only be available
to choose from.
LOAD:Touch once each time a CD is loaded into
the changer. It may take up to 10 seconds for the
changer to accept the CD into the slot depending on the
changer initializing. Repeat this procedure for loading
up to six discs. Press and hold the LOAD button until a
beep is heard to put the changer in LOAD ALL mode.
Once the Insert CD message is displayed, you can load
all six discs, one after the other.
r(Play):Touch to begin playing a CD.
RANDOM DISC:Touch to hear the tracks in random,
rather than sequential, order on the disc selected. Press
the TUNE/SEEK hard key to randomly seek through
the tracks on this disc. Touch RANDOM DISC again to
turn off random play mode.
SCAN TRACKS:Touch to hear the �rst 10 seconds of
each track on the selected disc. Touch this button
again to stop scanning. The CD mutes while scanning.
r(Rewind):Touch to rewind quickly through a
track selection. CD Changer Screen
4-66