light CADILLAC XLR V 2006 1.G Owner's Manual
[x] Cancel search | Manufacturer: CADILLAC, Model Year: 2006, Model line: XLR V, Model: CADILLAC XLR V 2006 1.GPages: 456, PDF Size: 3.74 MB
Page 92 of 456
Universal Home Remote
System
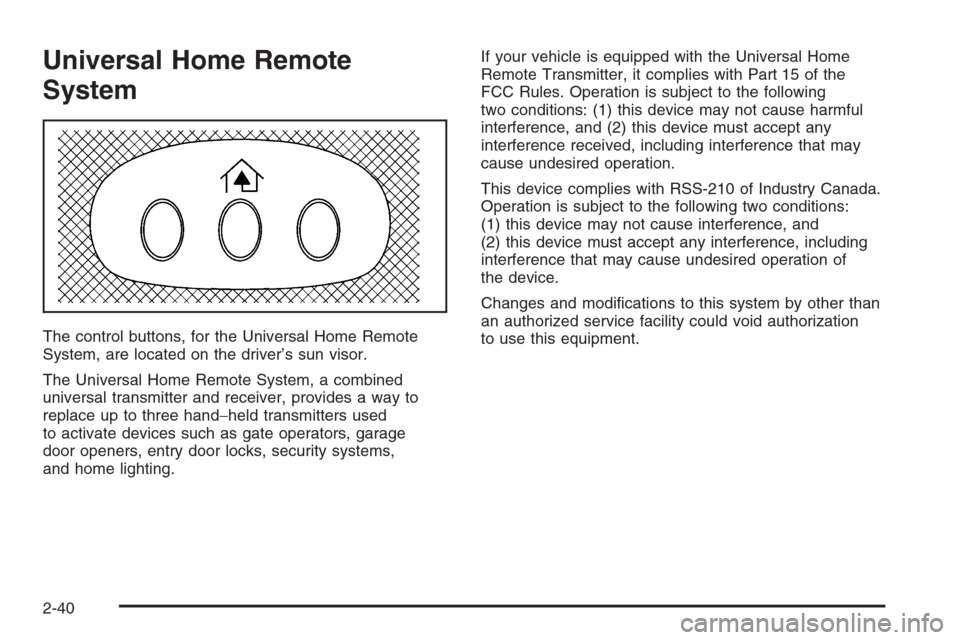
The control buttons, for the Universal Home Remote
System, are located on the driver’s sun visor.
The Universal Home Remote System, a combined
universal transmitter and receiver, provides a way to
replace up to three hand−held transmitters used
to activate devices such as gate operators, garage
door openers, entry door locks, security systems,
and home lighting.If your vehicle is equipped with the Universal Home
Remote Transmitter, it complies with Part 15 of the
FCC Rules. Operation is subject to the following
two conditions: (1) this device may not cause harmful
interference, and (2) this device must accept any
interference received, including interference that may
cause undesired operation.
This device complies with RSS-210 of Industry Canada.
Operation is subject to the following two conditions:
(1) this device may not cause interference, and
(2) this device must accept any interference, including
interference that may cause undesired operation of
the device.
Changes and modi�cations to this system by other than
an authorized service facility could void authorization
to use this equipment.
2-40
Page 94 of 456

Programming Universal Home Remote
Follow these steps to program up to three channels:
1. Press and hold down the two outside Universal
Home Remote buttons, releasing only when the
Universal Home Remote indicator light begins
to �ash, after 20 seconds. Do not hold down the
buttons for longer than 30 seconds and do not
repeat this step to program a second and/or third
hand-held transmitter to the remaining two Universal
Home Remote buttons.
2. Position the end of your hand-held transmitter
about 1 to 3 inches (3 to 8 cm) away from the
Universal Home Remote buttons while keeping
the indicator light in view.
3. Simultaneously press and hold both the desired
Universal Home Remote button and the hand-held
transmitter button. Do not release the buttons
until Step 4 has been completed.
Some entry gates and garage door openers may
require you to substitute Step 3 with the procedure
noted in “Gate Operator and Canadian
Programming” later in this section.4. The indicator light will �ash slowly at �rst and then
rapidly after Universal Home Remote successfully
receives the frequency signal from the hand-held
transmitter. Release both buttons.
5. Press and hold the newly-trained Universal Home
Remote button and observe the indicator light.
If the indicator light stays on constantly,
programming is complete and your device should
activate when the Universal Home Remote button is
pressed and released.
To program the remaining two Universal Home
Remote buttons, begin with Step 2 under
“Programming Universal Home Remote.” Do not
repeat Step 1 as this will erase all of the programmed
channels.
If the indicator light blinks rapidly for two seconds
and then turns to a constant light, continue with
Steps 6 through 8 following to complete the
programming of a rolling-code equipped device,
most commonly, a garage door opener.
6. Locate in the garage, the garage door opener
receiver (motor-head unit). Locate the “Learn”
or “Smart” button. This can usually be found where
the hanging antenna wire is attached to the
motor-head unit.
2-42
Page 95 of 456
7. Firmly press and release the “Learn” or “Smart”
button. The name and color of the button may
vary by manufacturer.
You will have 30 seconds to start Step 8.
8. Return to the vehicle. Firmly press and hold the
programmed Universal Home Remote button for
two seconds, then release. Repeat the press/hold/
release sequence a second time, and depending
on the brand of the garage door opener, or other
rolling code device, repeat this sequence a third time
to complete the programming.
The Universal Home Remote should now activate
your rolling-code equipped device.
To program the remaining two Universal Home Remote
buttons, begin with Step 2 of “Programming Universal
Home Remote.” You do not want to repeat Step 1,
as this will erase all previous programming from
the Universal Home Remote buttons.Gate Operator and Canadian
Programming
Canadian radio-frequency laws require transmitter
signals to time out or quit after several seconds of
transmission. This may not be long enough for Universal
Home Remote to pick up the signal during programming.
Similarly, some U.S. gate operators are manufactured
to time out in the same manner.
If you live in Canada, or you are having difficulty
programming a gate operator or garage door opener
by using the “Programming Universal Home Remote”
procedures, regardless of where you live, replace Step 3
under “Programming Universal Home Remote” with
the following:
Continue to press and hold the Universal Home Remote
button while you press and release every two seconds
(cycle) the hand-held transmitter button until the
frequency signal has been successfully accepted by the
Universal Home Remote. The Universal Home Remote
indicator light will �ash slowly at �rst and then rapidly.
Proceed with Step 4 under “Programming Universal
Home Remote” to complete.
2-43
Page 96 of 456
Using Universal Home Remote
Press and hold the appropriate Universal Home Remote
button for at least half of a second. The indicator light
will come on while the signal is being transmitted.
Erasing Universal Home Remote
Buttons
To erase programming from the three Universal Home
Remote buttons do the following:
1. Press and hold down the two outside buttons until
the indicator light begins to �ash, after 20 seconds.
Do not hold the two outside buttons for longer
than 30 seconds.
2. Release both buttons.
The Universal Home Remote is now in the training
(learning) mode and can be programmed at any time
beginning with Step 2 under “Programming Universal
Home Remote” shown earlier in this section.
Individual buttons cannot be erased, but they can be
reprogrammed. See “Reprogramming a Single Universal
Home Remote Button” following this section.
Reprogramming a Single Universal
Home Remote Button
To program a device to Universal Home Remote using
a Universal Home Remote button previously trained,
follow these steps:
1. Press and hold the desired Universal Home
Remote button. Do not release the button.
2. The indicator light will begin to �ash after
20 seconds. While still holding the Universal
Home Remote button, proceed with Step 2
under “Programming Universal Home Remote”
shown earlier in this section.
For additional information on Universal Home Remote,
seeCustomer Assistance Offices on page 8-4.
2-44
Page 97 of 456
Storage Areas
Glove Box
To open the glove box, lift up on the lever. The glove
box has a light inside. Use the key to lock and unlock.
Cupholder(s)
The cupholders are located under a lid in the front
console to the right of the shift lever. Press the left side
of the lid and it will open automatically.
Center Console Storage Area
There is a center console storage area located between
the seats. To open this storage area, push the latch
button and lift the lid.
There is also an upright center console storage area
between the seatbacks. To open the storage area, press
and release the button near the top so it extends out.
Then, turn the button in either direction to unlatch the lid
and pull the console lid down. After you close the lid,
press the release button back in.
Map Pocket
The map/storage pockets are located on each door
behind a cover.
Floor Mats
The driver’s side �oor mat is held in place by two snaps
and the passenger’s side is held in place by one.
Remove and Replace the Floor Mats
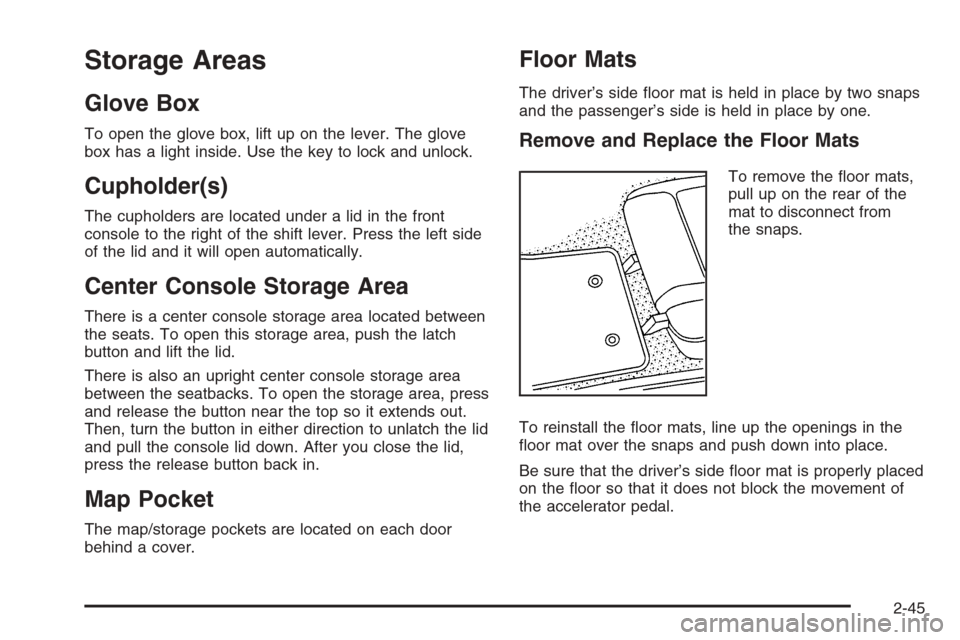
To remove the �oor mats,
pull up on the rear of the
mat to disconnect from
the snaps.
To reinstall the �oor mats, line up the openings in the
�oor mat over the snaps and push down into place.
Be sure that the driver’s side �oor mat is properly placed
on the �oor so that it does not block the movement of
the accelerator pedal.
2-45
Page 111 of 456
Instrument Panel Overview...............................3-4
Hazard Warning Flashers................................3-6
Other Warning Devices...................................3-6
Horn .............................................................3-6
Power Tilt Wheel and Telescopic Steering
Column......................................................3-6
Turn Signal/Multifunction Lever.........................3-7
Turn and Lane-Change Signals........................3-7
Headlamp High/Low-Beam Changer..................3-8
Flash-to-Pass.................................................3-8
Windshield Wipers..........................................3-9
Rainsense™ Wipers......................................3-10
Windshield Washer.......................................3-11
Headlamp Washer........................................3-11
Cruise Control..............................................3-12
Adaptive Cruise Control.................................3-15
Exterior Lamps.............................................3-28
Wiper Activated Headlamps............................3-29
Headlamps on Reminder................................3-29
Daytime Running Lamps (DRL).......................3-30
Adaptive Forward Lighting System...................3-31
Fog Lamps ..................................................3-31
Twilight Sentinel
®..........................................3-32
Exterior Lighting Battery Saver........................3-33
Instrument Panel Brightness...........................3-33
Courtesy Lamps...........................................3-33Entry/Exit Lighting.........................................3-33
Reading Lamps............................................3-33
Battery Run-Down Protection..........................3-34
Head-Up Display (HUD).................................3-34
Ultrasonic Rear Parking Assist (URPA)............3-38
Accessory Power Outlet(s).............................3-40
Ashtray(s) and Cigarette Lighter......................3-41
Climate Controls............................................3-41
Dual Climate Control System..........................3-41
Outlet Adjustment.........................................3-47
Passenger Compartment Air Filter...................3-47
Warning Lights, Gages, and Indicators............3-48
Instrument Panel Cluster................................3-49
Speedometer and Odometer...........................3-50
Trip Odometer..............................................3-50
Tachometer.................................................3-50
Safety Belt Reminder Light.............................3-50
Airbag Readiness Light..................................3-51
Passenger Airbag Status Indicator...................3-52
Voltmeter Gage............................................3-54
Brake System Warning Light..........................3-54
Anti-Lock Brake System Warning Light.............3-55
Traction Control System (TCS)
Warning Light...........................................3-56
Engine Coolant Temperature Gage..................3-57
Section 3 Instrument Panel
3-1
Page 112 of 456
Tire Pressure Light.......................................3-57
Malfunction Indicator Lamp.............................3-58
Engine Oil Pressure Gage.............................3-61
Security Light...............................................3-62
Fog Lamp Light............................................3-62
Lights On Reminder......................................3-62
Highbeam On Light.......................................3-62
Fuel Gage...................................................3-63
Driver Information Center (DIC).......................3-64
DIC Controls and Displays.............................3-64
DIC Warnings and Messages.........................3-67
Other Messages...........................................3-77
DIC Vehicle Personalization............................3-78Trip Computer................................................3-82
Oil Life Indicator...........................................3-82
Audio System(s).............................................3-82
Theft-Deterrent Feature..................................3-83
Audio Steering Wheel Controls.......................3-84
Radio Reception...........................................3-84
Care of Your CDs.........................................3-86
Care of the CD Player...................................3-86
Diversity Antenna System..............................3-86
XM™ Satellite Radio Antenna System
(Trunk Mounted)........................................3-86
XM™ Satellite Radio Antenna System
(Diversity System).....................................3-86
Section 3 Instrument Panel
3-2
Page 115 of 456
The main components of the instrument panel are the following:
A. Head-Up Display (HUD) Controls/Instrument Panel
Brightness Controls. SeeHead-Up Display (HUD)
on page 3-34orInstrument Panel Brightness
on page 3-33.
B. Turn Signal/Multifunction Lever. SeeTurn
Signal/Multifunction Lever on page 3-7.Cruise
Control. SeeCruise Control on page 3-12. Exterior
Lamps Control. SeeExterior Lamps on page 3-28.
Fog Lamps. SeeFog Lamps on page 3-31.
C. Instrument Panel Cluster. SeeInstrument Panel
Cluster on page 3-49.
D. Windshield Wiper/Washer Lever. See “Windshield
Wipers” underTurn Signal/Multifunction Lever
on page 3-7.
E. Driver Information Center (DIC) Controls/Interior
Lamps. SeeDIC Controls and Displays on
page 3-64.
F. Air Outlets. SeeOutlet Adjustment on page 3-47.
G. Hazard Warning Flasher Button. SeeHazard
Warning Flashers on page 3-6.
H. Voice Commands/Audio Controls. SeeOnStar
®
System on page 2-38orAudio Steering Wheel
Controls on page 3-84.
I. Adaptive Cruise Controls (If Equipped).
See “Adaptive Cruise Control (ACC)” under
Turn Signal/Multifunction Lever on page 3-7.J. Power Tilt Wheel and Telescopic Steering Button.
SeePower Tilt Wheel and Telescopic Steering
Column on page 3-6.
K. Horn. SeeHorn on page 3-6.
L. Audio Steering Wheel Controls. SeeAudio Steering
Wheel Controls on page 3-84.
M. Ignition Switch. SeeIgnition Positions on page 2-21.
N. Shift Lever. SeeAutomatic Transmission Operation
on page 2-25.
O. Traction Control Button. SeeTraction Control
System (TCS) on page 5-9.
P. Retractable Hardtop Button. SeeRetractable
Hardtop on page 2-47.
Q. Cupholders. SeeCupholder(s) on page 2-45.
R. Cigarette Lighter. SeeAshtray(s) and Cigarette
Lighter on page 3-41.
S. Climate Controls. SeeDual Climate Control System
on page 3-41.
T. Audio/Navigation System. SeeNavigation System
Overview on page 4-2.
U. Glove Box. SeeGlove Box on page 2-45.
3-5
Page 118 of 456
Turn Signal on Chime
A chime will remind you if you leave the turn signal
on for more than 3/4 mile (1.2 km) of driving.
If you need to leave the turn signal on for more than
3/4 mile (1.2 km), turn off the signal and then turn it
back on.
Headlamp High/Low-Beam Changer
To change the headlamps from low beam to high,
push the turn signal lever all the way forward.
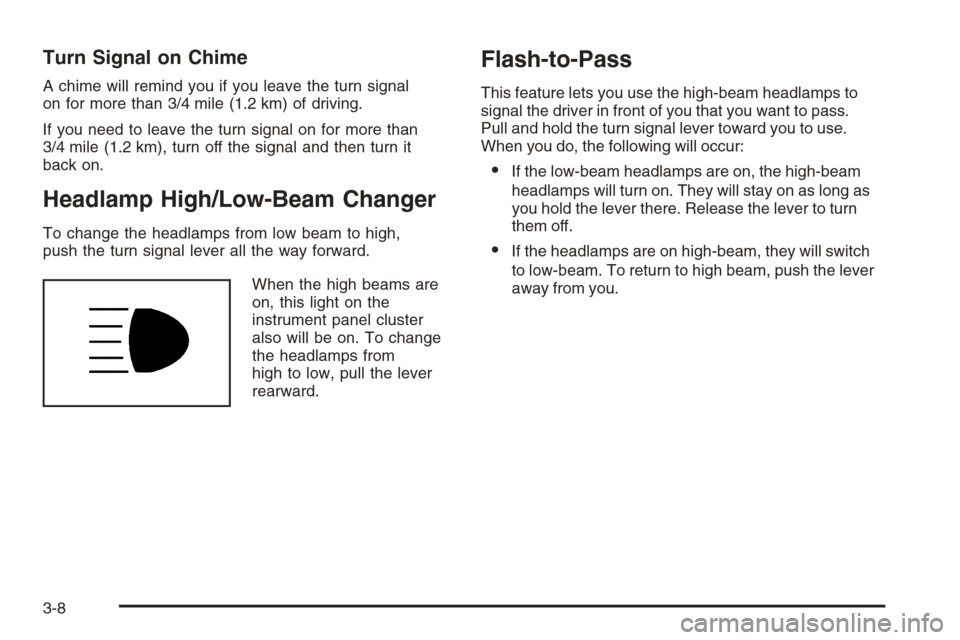
When the high beams are
on, this light on the
instrument panel cluster
also will be on. To change
the headlamps from
high to low, pull the lever
rearward.
Flash-to-Pass
This feature lets you use the high-beam headlamps to
signal the driver in front of you that you want to pass.
Pull and hold the turn signal lever toward you to use.
When you do, the following will occur:
If the low-beam headlamps are on, the high-beam
headlamps will turn on. They will stay on as long as
you hold the lever there. Release the lever to turn
them off.
If the headlamps are on high-beam, they will switch
to low-beam. To return to high beam, push the lever
away from you.
3-8
Page 120 of 456
Rainsense™ Wipers
Your vehicle has Rainsense™ wipers. The moisture
sensor for this feature is mounted on the interior side of
the windshield below the rearview mirror and is used to
automatically operate the wipers by monitoring the
amount of moisture build-up on the windshield. Wipes
occur as needed to clear the windshield depending on
driving conditions and the sensitivity setting. In light rain
or snow, fewer wipes will occur. In heavy rain or snow,
wipes will occur more frequently. The Rainsense™
wipers operate in a delay mode as well as a continuous
low or high speed as needed. If the system is left on for
long periods of time, occasional wipes may occur without
any moisture on the windshield. This is normal and
indicates that the Rainsense™ system is activated.
The Rainsense™ system is also sensitive to vibration.
The system may activate if something hits the
windshield or if the vehicle hits a bump.
The Rainsense™ system can be activated by moving
the wiper lever up to the delay position and turning
the delay adjust band to one of the �ve sensitivity levels.
The bottom delay adjust position is the lowest sensitivity
setting, level one. This allows more rain or snow to
collect on the windshield between wipes. Turning the
delay adjust band away from you to the higher sensitivity
levels allows less rain or snow to collect on the
windshield between wipes.The top position is the highest sensitivity setting, level
�ve. A single wipe will occur each time you turn the
delay adjust band to a higher sensitivity level to indicate
that the sensitivity level has been increased.
Notice:Going through an automatic car wash with
the wipers on can damage them. Turn the wipers
off when going through an automatic car wash.
The mist and wash cycles operate as normal and are not
affected by the Rainsense™ function. The Rainsense™
system can be overridden at any time by manually
changing the wiper control to low or high speed.
When Rainsense™ is active, the headlamps will
turn on automatically. If it is dark, they will remain on.
See “Wiper-Activated Headlamps” underExterior Lamps
on page 3-28for more information.
Notice:Do not place stickers or other items on
the exterior glass surface directly in front of
the moisture sensor. Doing this could cause the
moisture sensor to malfunction.
3-10