turn signal CADILLAC XLR V 2006 1.G Owner's Manual
[x] Cancel search | Manufacturer: CADILLAC, Model Year: 2006, Model line: XLR V, Model: CADILLAC XLR V 2006 1.GPages: 456, PDF Size: 3.74 MB
Page 245 of 456
Vehicle Positioning
At times, the position of the vehicle on the map may be
inaccurate due to one or more of the following
reasons:
The road system has changed.
The vehicle is driving on slippery road surfaces
such as in sand, gravel, and/or snow.
The vehicle is traveling on winding roads.
The vehicle is on a long straight road.
The vehicle is approaching a tall building or a
large vehicle.
The surface streets run parallel to a freeway.
The vehicle has just been transferred by a vehicle
carrier or a ferry.
The current position calibration is set incorrectly.
The vehicle is traveling at high speed.
The vehicle changes directions more than once,
or when the vehicle is turning on a turn table in
a parking lot.
The vehicle is entering and/or exiting a parking lot,
garage, or a lot with a roof.
The GPS signal is not received.
A roof carrier is installed on your vehicle.
The vehicle is being driven with tire chains.
The tires are replaced.
The tire pressure for your tires is incorrect.
The tires are worn.
The �rst time the map DVD is inserted.
The battery is disconnected for several days.
The vehicle is driving in heavy traffic where driving
is at low speeds, and the vehicle is stopped and
started repeatedly.
If you experience problems with your system, see your
dealer.
4-49
Page 248 of 456
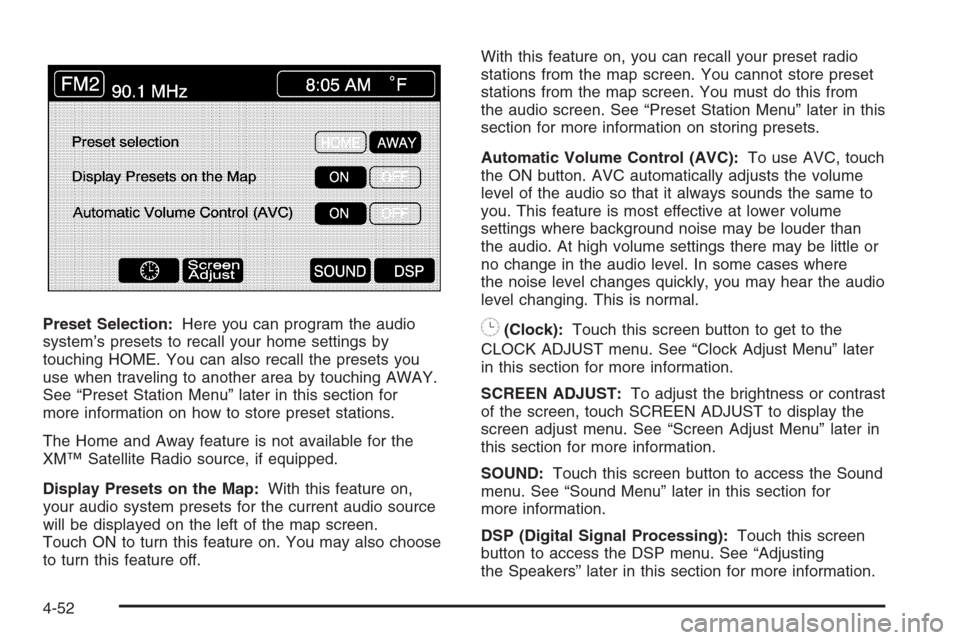
Preset Selection:Here you can program the audio
system’s presets to recall your home settings by
touching HOME. You can also recall the presets you
use when traveling to another area by touching AWAY.
See “Preset Station Menu” later in this section for
more information on how to store preset stations.
The Home and Away feature is not available for the
XM™ Satellite Radio source, if equipped.
Display Presets on the Map:With this feature on,
your audio system presets for the current audio source
will be displayed on the left of the map screen.
Touch ON to turn this feature on. You may also choose
to turn this feature off.With this feature on, you can recall your preset radio
stations from the map screen. You cannot store preset
stations from the map screen. You must do this from
the audio screen. See “Preset Station Menu” later in this
section for more information on storing presets.
Automatic Volume Control (AVC):To use AVC, touch
the ON button. AVC automatically adjusts the volume
level of the audio so that it always sounds the same to
you. This feature is most effective at lower volume
settings where background noise may be louder than
the audio. At high volume settings there may be little or
no change in the audio level. In some cases where
the noise level changes quickly, you may hear the audio
level changing. This is normal.8(Clock):Touch this screen button to get to the
CLOCK ADJUST menu. See “Clock Adjust Menu” later
in this section for more information.
SCREEN ADJUST:To adjust the brightness or contrast
of the screen, touch SCREEN ADJUST to display the
screen adjust menu. See “Screen Adjust Menu” later in
this section for more information.
SOUND:Touch this screen button to access the Sound
menu. See “Sound Menu” later in this section for
more information.
DSP (Digital Signal Processing):Touch this screen
button to access the DSP menu. See “Adjusting
the Speakers” later in this section for more information.
4-52
Page 254 of 456
To adjust the tone for each preset, do the following:
1. Press the BAND key.
2. Touch AM, FM1, FM2, XM1, XM2, or WX, if
equipped, to access the desired preset screen.
3. Touch SOUND.
4. Touch the plus (+) or minus (−) signs to adjust
treble, mid-range, and bass.
5. Touch Return to exit. This will take you to the
preset station menu.
6. Touch and hold one of the six preset screen
buttons for more than two seconds until you hear
a beep.
Whenever you touch that preset for less than
two seconds, the station and previously stored
information you have entered for each preset station
will be recalled.
7. Repeat the steps for additional presets.Adjusting the Speakers
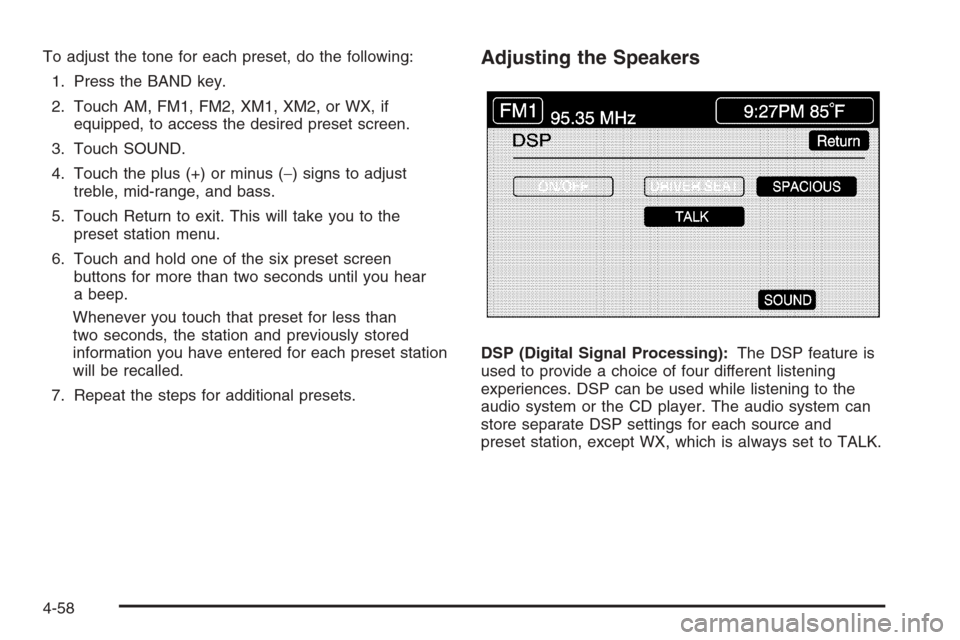
DSP (Digital Signal Processing):The DSP feature is
used to provide a choice of four different listening
experiences. DSP can be used while listening to the
audio system or the CD player. The audio system can
store separate DSP settings for each source and
preset station, except WX, which is always set to TALK.
4-58
Page 260 of 456
XM Radio Messages
Radio Display Message Condition Action Required
XM Updating Updating encryption code The encryption code in your receiver is being updated, and
no action is required. This process should take no longer
than 30 seconds.
No XM Signal Loss of signal Your system is functioning correctly, but you are in a location
that is blocking the XM signal. When you move into an open
area, the signal should return.
Loading XM Acquiring channel audio
(after 4 second delay)Your radio system is acquiring and processing audio and text
data. No action is needed. This message should disappear
shortly.
Channel Off Air Channel not in service This channel is not currently in service. Tune in to another
channel.
Channel Unavail Channel no longer
availableThis previously assigned channel is no longer assigned. Tune
to another station. If this station was one of your presets, you
may need to choose another station for that preset button.
No Info Artist Name/Feature,
Song Title, CAT not
availableArtist, song title, and/or category information may not be
available at this time on this channel. Your system is working
properly.
Not Found No channel available for
the chosen categoryThere are no channels available for the category you
selected. Your system is working properly.
4-64
Page 264 of 456

j(Pause):Touch this button to pause CD play. Touch
it again to resume play or touch the play button.
RANDOM ALL:Touch this button to hear the tracks on
all of the discs in the CD changer in random, rather than
sequential, order. Press the TUNE/SEEK hard key while
RANDOM ALL is on to randomly seek within that disc.
Touch RANDOM ALL again to turn off random mode.
SCAN DISCS:Touch this button to hear the �rst
10 seconds of �rst track on each disc. Touch this button
again to stop scanning. The CD will mute while
scanning.
[(Forward):Touch this button to fast forward quickly
through a track selection.
«TUNE SEEKª:Press the up arrow on the TUNE/
SEEK switch to seek to the next selection on the compact
disc. If playing last track of disc, pressing the up arrow will
seek to the �rst track of the next disc. Press the down
arrow to seek to the previous selection on the compact
disc. If playing the �rst track of disc, pressing the down
arrow will seek to the last track on the selected disc. The
sound will mute while seeking.RDS (Radio Data Systems):See “Radio Data Systems
(RDS)” listed previously for information on this button.
SOUND:See “Sound Menu (Tone, DSP, Fade and
Balance)” for information on this button.
DSP (Digital Signal Processing):See “Adjusting the
Speakers” listed previously for information on this button.
CD Changer Errors
CDX ERROR could be displayed for the following:
The road is too rough. The disc should play when
the road is smoother.
The disc is dirty, scratched, wet or not loaded label
side up.
The air is very humid. If so, wait about an hour and
try again.
If any error occurs repeatedly or if an error cannot be
corrected, please contact your GM dealer. If your audio
system displays an error number, write it down and
provide this information to your dealer when reporting
the error.
4-68
Page 273 of 456
Seek Up:This command will cause the selected audio
source to seek up to the next strongest signal.
Seek Down:This command will cause the selected
audio source to seek down to the next strongest signal.
Stop Scan:This command will cause the audio
source to stop scanning for the next strongest signal.
CD Changer Commands
Track Up:This command will cause the CD changer to
skip up to the next track.
Previous Track, Track Down:This command will
cause the CD changer to go to the previous track.
Screen Commands
Screen Day Mode, Day Mode On:These commands
will adjust the system’s screen setting to the day mode.
Screen Night Mode, Night Mode On:These
commands will adjust the system’s screen setting to the
night mode.
Screen Auto Mode, Auto Mode On:These commands
will adjust the system’s screen setting to auto mode.
Screen Off:This command will turn the system’s
screen display off.
Position Commands
Current Position, Current Location, Show Current
Position, Show Current Location:These commands
will cause the system to display the vehicle’s current
location on the map screen.
Map:This command will cause the system to display
the map screen.
Map Commands
Zoom In:This command will cause the system to zoom
in when on the map screen.
Zoom Out:This command will cause the system to
zoom out when on the map screen.
Maximum Scale:This command will cause the system
to zoom out to the maximum available map scale
when on the map screen.
Minimum Scale:This command will cause the system
to zoom in to the minimum available map scale when
on the map screen.
Heading Up, Change to Heading Up:These
commands will cause the system to display the Vehicle
Up heading when on the map screen. The map scale
should be set for under 2 miles (4 km).
4-77
Page 295 of 456
Check your mirrors, glance over your shoulder,
and start your left lane change signal before moving
out of the right lane to pass. When you are far
enough ahead of the passed vehicle to see its front
in your inside mirror, activate your right lane change
signal and move back into the right lane. Remember
that your passenger side outside mirror is convex.
The vehicle you just passed may seem to be farther
away from you than it really is.
Try not to pass more than one vehicle at a time on
two-lane roads. Reconsider before passing the
next vehicle.
Do not overtake a slowly moving vehicle too rapidly.
Even though the brake lamps are not �ashing,
it may be slowing down or starting to turn.
If you are being passed, make it easy for the
following driver to get ahead of you. Perhaps you
can ease a little to the right.
Loss of Control
Let us review what driving experts say about what
happens when the three control systems — brakes,
steering, and acceleration — do not have enough
friction where the tires meet the road to do what the
driver has asked.
In any emergency, do not give up. Keep trying to
steer and constantly seek an escape route or area of
less danger.
Skidding
In a skid, a driver can lose control of the vehicle.
Defensive drivers avoid most skids by taking reasonable
care suited to existing conditions, and by not overdriving
those conditions. But skids are always possible.
The three types of skids correspond to your vehicle’s
three control systems. In the braking skid, your wheels
are not rolling. In the steering or cornering skid, too much
speed or steering in a curve causes tires to slip and lose
cornering force. And in the acceleration skid, too much
throttle causes the driving wheels to spin.
A cornering skid is best handled by easing your foot
off the accelerator pedal.
5-17
Page 298 of 456
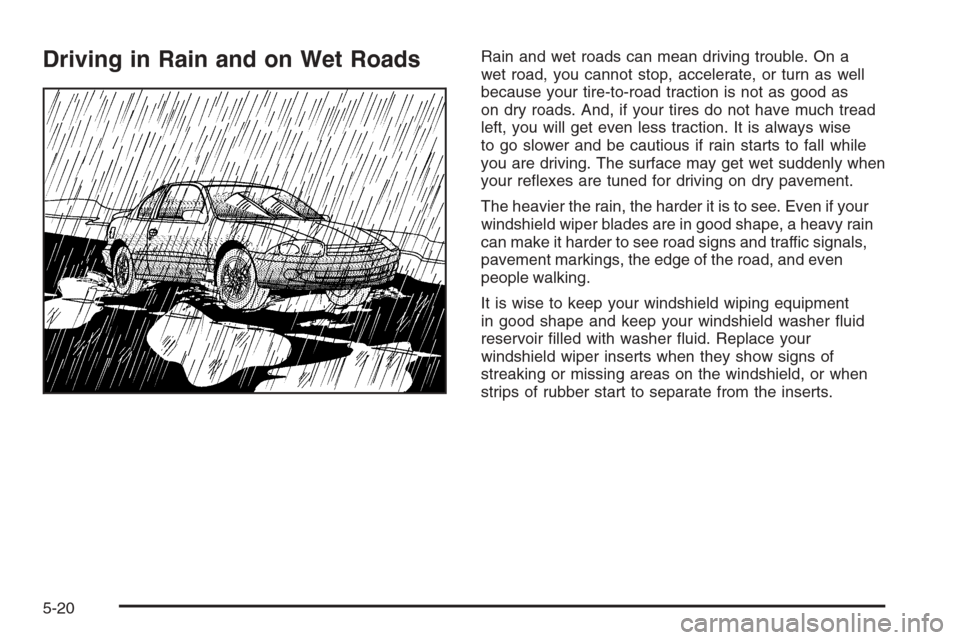
Driving in Rain and on Wet RoadsRain and wet roads can mean driving trouble. On a
wet road, you cannot stop, accelerate, or turn as well
because your tire-to-road traction is not as good as
on dry roads. And, if your tires do not have much tread
left, you will get even less traction. It is always wise
to go slower and be cautious if rain starts to fall while
you are driving. The surface may get wet suddenly when
your re�exes are tuned for driving on dry pavement.
The heavier the rain, the harder it is to see. Even if your
windshield wiper blades are in good shape, a heavy rain
can make it harder to see road signs and traffic signals,
pavement markings, the edge of the road, and even
people walking.
It is wise to keep your windshield wiping equipment
in good shape and keep your windshield washer �uid
reservoir �lled with washer �uid. Replace your
windshield wiper inserts when they show signs of
streaking or missing areas on the windshield, or when
strips of rubber start to separate from the inserts.
5-20
Page 301 of 456

Here are ways to increase your safety in city driving:
Know the best way to get to where you are
going. Get a city map and plan your trip into
an unknown part of the city just as you would for
a cross-country trip.
Try to use the freeways that rim and crisscross
most large cities. You will save time and energy.
SeeFreeway Driving on page 5-23.
Treat a green light as a warning signal. A traffic
light is there because the corner is busy enough
to need it. When a light turns green, and just before
you start to move, check both ways for vehicles
that have not cleared the intersection or may
be running the red light.
Freeway Driving
Mile for mile, freeways — also called thruways, parkways,
expressways, turnpikes, or superhighways — are the
safest of all roads. But they have their own special rules.
5-23
Page 302 of 456

The most important advice on freeway driving is:
Keep up with traffic and keep to the right. Drive at the
same speed most of the other drivers are driving.
Too-fast or too-slow driving breaks a smooth traffic �ow.
Treat the left lane on a freeway as a passing lane.
At the entrance, there is usually a ramp that leads to the
freeway. If you have a clear view of the freeway as you
drive along the entrance ramp, you should begin to check
traffic. Try to determine where you expect to blend with
the �ow. Try to merge into the gap at close to the
prevailing speed. Switch on your turn signal, check your
mirrors, and glance over your shoulder as often as
necessary. Try to blend smoothly with the traffic �ow.
Once you are on the freeway, adjust your speed to the
posted limit or to the prevailing rate if it is slower.
Stay in the right lane unless you want to pass.
Before changing lanes, check your mirrors. Then use
your turn signal.
Just before you leave the lane, glance quickly over your
shoulder to make sure there is not another vehicle in
your blind spot.
Once you are moving on the freeway, make certain
you allow a reasonable following distance.Expect to move slightly slower at night.
When you want to leave the freeway, move to the
proper lane well in advance. If you miss your exit, do
not, under any circumstances, stop and back up.
Drive on to the next exit.
The exit ramp can be curved, sometimes quite sharply.
The exit speed is usually posted. Reduce your speed
according to your speedometer, not to your sense
of motion. After driving for any distance at higher
speeds, you may tend to think you are going slower
than you actually are.
Before Leaving on a Long Trip
Make sure you are ready. Try to be well rested. If you
must start when you are not fresh — such as after
a day’s work — do not plan to make too many miles
that �rst part of the journey. Wear comfortable clothing
and shoes you can easily drive in.
Is your vehicle ready for a long trip? If you keep it
serviced and maintained, it is ready to go. If it needs
service, have it done before starting out. Of course,
you will �nd experienced and able service experts
in GM dealerships all across North America. They
will be ready and willing to help if you need it.
5-24