window CADILLAC XT4 2021 Workshop Manual
[x] Cancel search | Manufacturer: CADILLAC, Model Year: 2021, Model line: XT4, Model: CADILLAC XT4 2021Pages: 408, PDF Size: 8.33 MB
Page 273 of 408

Cadillac XT4 Owner Manual (GMNA-Localizing-U.S./Canada/Mexico-
14584367) - 2021 - CRC - 10/14/20
272 DRIVING AND OPERATING
.Automatic Emergency
Braking (AEB)
.Intelligent Brake Assist (IBA)
.Front Pedestrian Braking (FPB)
If equipped with Lane Change Alert
(LCA), the LCA detection zones that
extend back from the side of the
vehicle do not move further back
when a trailer is towed. Use caution
while changing lanes when towing a
trailer.
If equipped with Rear Cross Traffic
Alert (RCTA), use caution while
backing up when towing a trailer, as
the RCTA detection zones that extend
out from the back of the vehicle do
not move further back when a trailer
is towed.
{Warning
To prevent serious injury or death
from carbon monoxide (CO), when
towing a trailer:
.Do not drive with the liftgate,
trunk/hatch, or rear-most
window open. (Continued)
Warning (Continued)
.Fully open the air outlets on or
under the instrument panel.
.Adjust the climate control
system to a setting that brings in
only outside air. See“Climate
Control Systems” in the Index.
For more information about carbon
monoxide, see Engine Exhaust
0 226.
Towing a trailer requires experience.
The combination of the vehicle and
trailer is longer and not as responsive
as the vehicle itself. Get used to the
handling and braking of the
combination by driving on a level road
surface before driving on public roads.
The trailer structure, the tires, and the
brakes must be all be rated to carry
the intended cargo. Inadequate trailer
equipment can cause the combination
to operate in an unexpected or unsafe
manner. Before driving, inspect all
trailer hitch parts and attachments,
safety chains, electrical connectors,
lamps, tires, and mirrors. See Towing
Equipment 0277. If the trailer has electric brakes, start the combination
moving and then manually apply the
trailer brake controller to check that
the trailer brakes work. During the
trip, occasionally check that the cargo
and trailer are secure and that the
lamps and any trailer brakes are
working.
Towing with a Stability Control
System
When towing, the stability control
system might be heard. The system
reacts to vehicle movement caused by
the trailer, which mainly occurs
during cornering. This is normal when
towing heavier trailers.
Following Distance
Stay at least twice as far behind the
vehicle ahead as you would when
driving without a trailer. This can help
to avoid heavy braking and sudden
turns.
Passing
More passing distance is needed when
towing a trailer. The combination of
the vehicle and trailer will not
accelerate as quickly and is much
Page 296 of 408
Cadillac XT4 Owner Manual (GMNA-Localizing-U.S./Canada/Mexico-
14584367) - 2021 - CRC - 10/14/20
VEHICLE CARE 295
Warning (Continued)
the pressure cap, is hot. Wait for
the cooling system and pressure
cap to cool.
If No Steam Is Coming from the
Engine Compartment
If an engine overheat warning is
displayed but no steam can be seen or
heard, the problem may not be too
serious. Sometimes the engine can get
a little too hot when the vehicle:
.Climbs a long hill on a hot day.
.Stops after high-speed driving.
.Idles for long periods in traffic.
If the overheat warning is displayed
with no sign of steam: 1. Turn the air conditioning off.
2. Turn the heater on to the highest temperature and to the highest fan
speed. Open the windows as
necessary.
3. When it is safe to do so, pull off the road, shift to P (Park) or
N (Neutral), and let the engine idle. If the engine coolant temperature
gauge is no longer in the overheated
area or the engine coolant
temperature warning light no longer
displays, the vehicle can be driven.
Continue to drive the vehicle slowly
for about 10 minutes. Keep a safe
distance from the vehicle in front.
If the warning does not come back on,
continue to drive normally and have
the cooling system checked for proper
fill and function.
If the warning continues, pull over,
stop, and park the vehicle right away.
If there is no sign of steam, idle the
engine for three minutes while parked.
If the warning is still displayed, turn
off the engine until it cools down.
Washer Fluid
What to Use
When windshield washer fluid is
needed, be sure to read the
manufacturer's instructions before
use. If operating the vehicle in an area
where the temperature may fall below
freezing, use a fluid that has sufficient
protection against freezing.
Adding Washer Fluid
The appropriate message will appear
in the Driver Information Center (DIC)
when the fluid level is low.
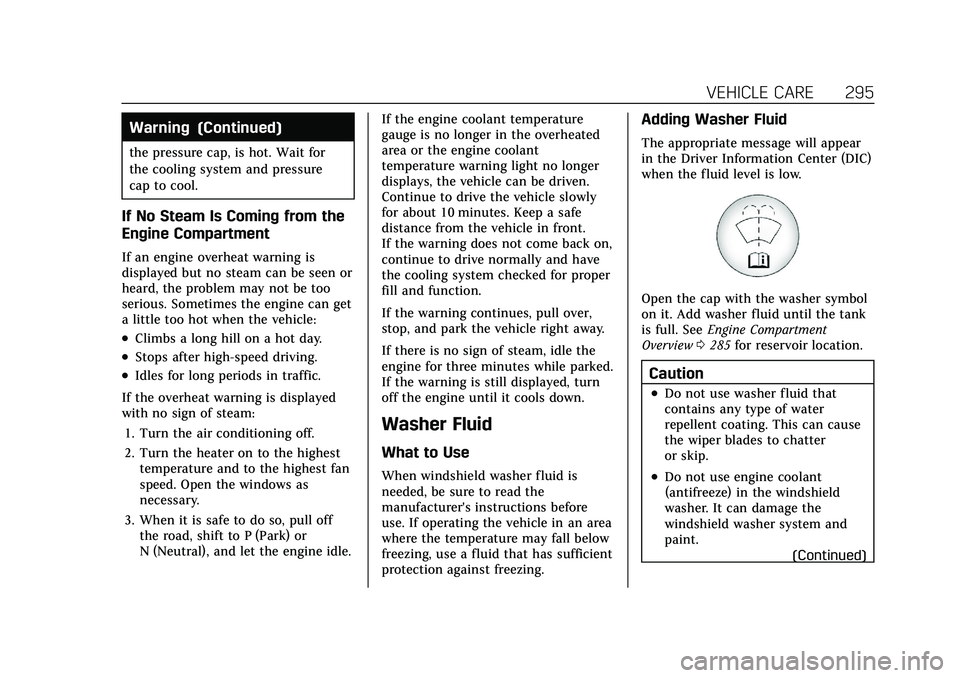
Open the cap with the washer symbol
on it. Add washer fluid until the tank
is full. See
Engine Compartment
Overview 0285 for reservoir location.
Caution
.Do not use washer fluid that
contains any type of water
repellent coating. This can cause
the wiper blades to chatter
or skip.
.Do not use engine coolant
(antifreeze) in the windshield
washer. It can damage the
windshield washer system and
paint.
(Continued)
Page 300 of 408
Cadillac XT4 Owner Manual (GMNA-Localizing-U.S./Canada/Mexico-
14584367) - 2021 - CRC - 10/14/20
VEHICLE CARE 299
.To check the parking brake's
holding ability: With the engine
running and the transmission in
N (Neutral), slowly remove foot
pressure from the regular brake
pedal. Do this until the vehicle is
held by the parking brake only.
.To check the P (Park) mechanism's
holding ability: With the engine
running, shift to P (Park). Then
release the parking brake followed
by the regular brake.
Contact your dealer if service is
required.
Wiper Blade Replacement
Windshield wiper blades should be
inspected for wear or cracking.
It is a good idea to clean or replace
the wiper blade assembly on a regular
basis or when worn. For proper
windshield wiper blade length and
type, see Maintenance Replacement
Parts 0368.
Caution
Allowing the wiper arm to touch
the windshield when no wiper blade
is installed could damage the
windshield. Any damage that occurs
would not be covered by the vehicle
warranty. Do not allow the wiper
arm to touch the windshield.
Front Wiper Blade Replacement
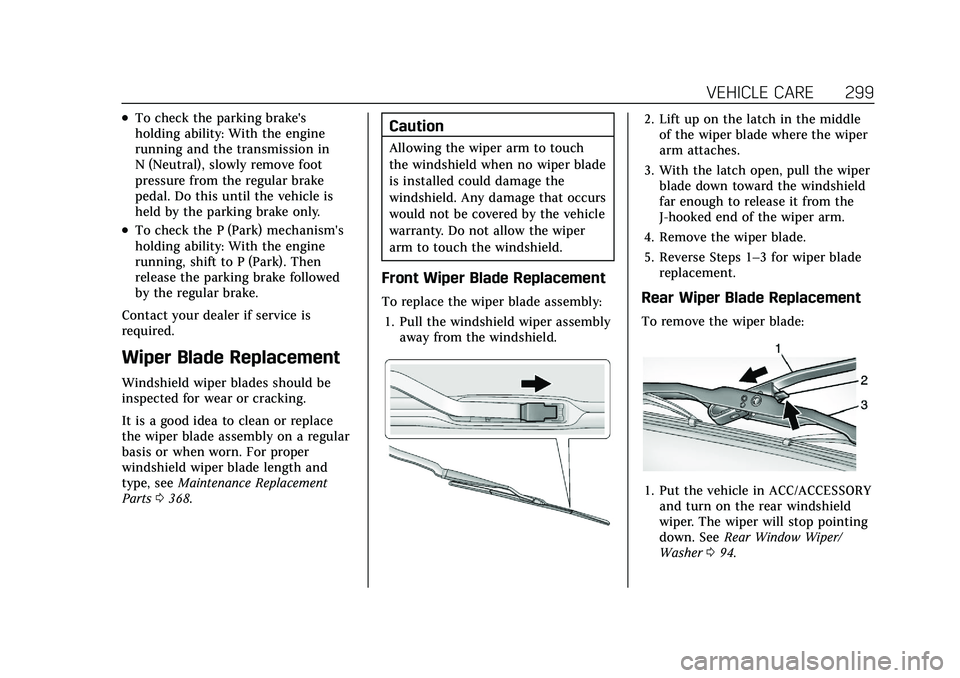
To replace the wiper blade assembly:
1. Pull the windshield wiper assembly away from the windshield.
2. Lift up on the latch in the middleof the wiper blade where the wiper
arm attaches.
3. With the latch open, pull the wiper blade down toward the windshield
far enough to release it from the
J-hooked end of the wiper arm.
4. Remove the wiper blade.
5. Reverse Steps 1–3 for wiper blade replacement.
Rear Wiper Blade Replacement
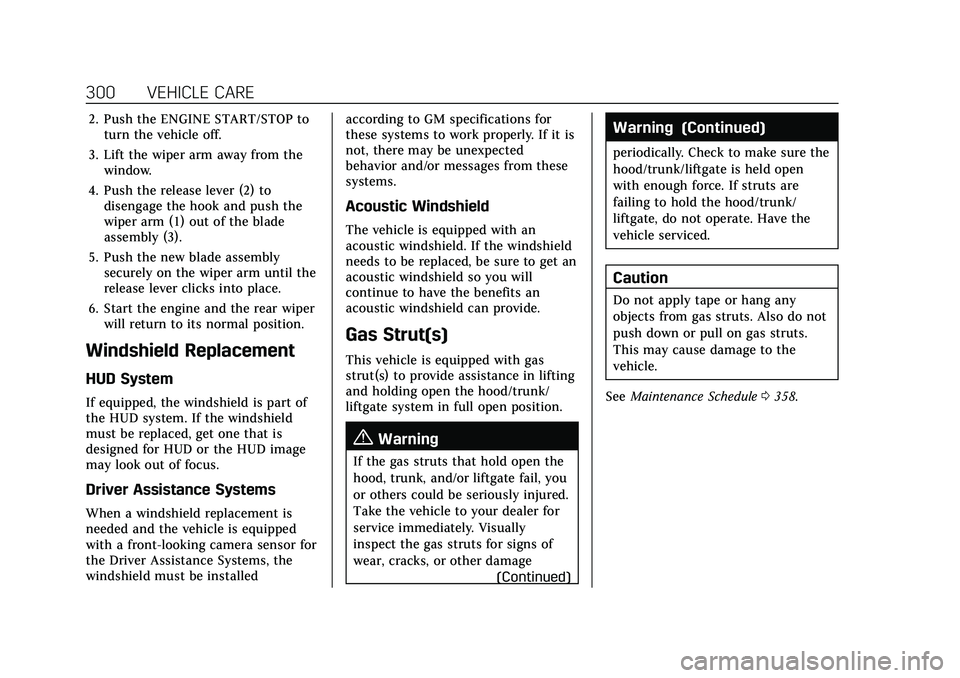
To remove the wiper blade:
1. Put the vehicle in ACC/ACCESSORYand turn on the rear windshield
wiper. The wiper will stop pointing
down. See Rear Window Wiper/
Washer 094.
Page 301 of 408
Cadillac XT4 Owner Manual (GMNA-Localizing-U.S./Canada/Mexico-
14584367) - 2021 - CRC - 10/14/20
300 VEHICLE CARE
2. Push the ENGINE START/STOP toturn the vehicle off.
3. Lift the wiper arm away from the window.
4. Push the release lever (2) to disengage the hook and push the
wiper arm (1) out of the blade
assembly (3).
5. Push the new blade assembly securely on the wiper arm until the
release lever clicks into place.
6. Start the engine and the rear wiper will return to its normal position.
Windshield Replacement
HUD System
If equipped, the windshield is part of
the HUD system. If the windshield
must be replaced, get one that is
designed for HUD or the HUD image
may look out of focus.
Driver Assistance Systems
When a windshield replacement is
needed and the vehicle is equipped
with a front-looking camera sensor for
the Driver Assistance Systems, the
windshield must be installed according to GM specifications for
these systems to work properly. If it is
not, there may be unexpected
behavior and/or messages from these
systems.
Acoustic Windshield
The vehicle is equipped with an
acoustic windshield. If the windshield
needs to be replaced, be sure to get an
acoustic windshield so you will
continue to have the benefits an
acoustic windshield can provide.
Gas Strut(s)
This vehicle is equipped with gas
strut(s) to provide assistance in lifting
and holding open the hood/trunk/
liftgate system in full open position.
{Warning
If the gas struts that hold open the
hood, trunk, and/or liftgate fail, you
or others could be seriously injured.
Take the vehicle to your dealer for
service immediately. Visually
inspect the gas struts for signs of
wear, cracks, or other damage
(Continued)
Warning (Continued)
periodically. Check to make sure the
hood/trunk/liftgate is held open
with enough force. If struts are
failing to hold the hood/trunk/
liftgate, do not operate. Have the
vehicle serviced.
Caution
Do not apply tape or hang any
objects from gas struts. Also do not
push down or pull on gas struts.
This may cause damage to the
vehicle.
See Maintenance Schedule 0358.
Page 306 of 408
Cadillac XT4 Owner Manual (GMNA-Localizing-U.S./Canada/Mexico-
14584367) - 2021 - CRC - 10/14/20
VEHICLE CARE 305
FusesUsage
7 Trailer stop/Turn LH
8 Memory seat module
9 Pedestrian friendly alert function
10 Semi-active damping system
11 DC DC Battery 1/2
12 Rear defogger
13 Heated mirror
14 –
15 Passive entry passive start
16 Front wiper
17 Passenger power seat
18 Power liftgate module
19 Driver power seat
21 Sunroof
22 Rear wiper
23 Trailer interface module 2 Fuses
Usage
26 Transmission control module/Ignition
27 Instrument panel body/ Ignition
28 Rear wiper
29 Trailer ignition
30 Malfunction indicator lamp start/stop Trailer
interface module ignition
32 Rear drive control module 1
33 –
34 Handsfree/Window switch
35 Diesel exhaust fuel heater
36 Fuel module
39 Massage
40 Steering column lock
41 –
43 Heated steering wheel Fuses
Usage
44 Seat ventilation/Front heated seat
46 Engine control module/ Ignition
48 Rear drive control module 2
49 Heating ventilation/Air conditioning blower
motor
50 –
51 –
54 –
55 –
56 Starter motor
57 –
58 –
59 High-beam headlamps left/right
60 Trailer interface module 1
61 –
62 –
Page 308 of 408
Cadillac XT4 Owner Manual (GMNA-Localizing-U.S./Canada/Mexico-
14584367) - 2021 - CRC - 10/14/20
VEHICLE CARE 307
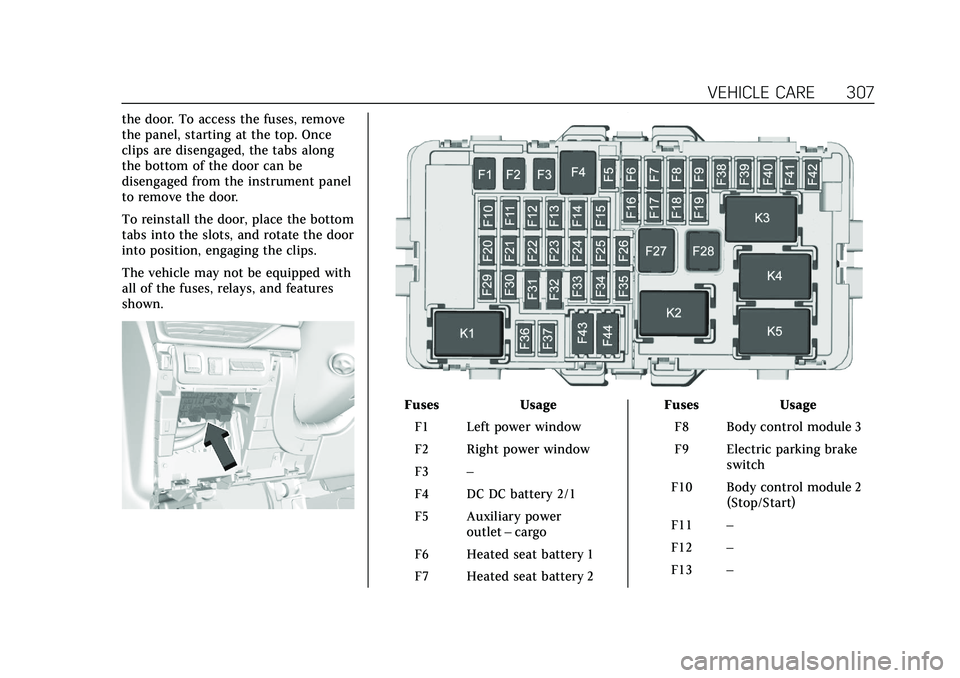
the door. To access the fuses, remove
the panel, starting at the top. Once
clips are disengaged, the tabs along
the bottom of the door can be
disengaged from the instrument panel
to remove the door.
To reinstall the door, place the bottom
tabs into the slots, and rotate the door
into position, engaging the clips.
The vehicle may not be equipped with
all of the fuses, relays, and features
shown.
FusesUsage
F1 Left power window
F2 Right power window
F3 –
F4 DC DC battery 2/1
F5 Auxiliary power outlet–cargo
F6 Heated seat battery 1
F7 Heated seat battery 2 Fuses
Usage
F8 Body control module 3
F9 Electric parking brake switch
F10 Body control module 2 (Stop/Start)
F11 –
F12 –
F13 –
Page 314 of 408
Cadillac XT4 Owner Manual (GMNA-Localizing-U.S./Canada/Mexico-
14584367) - 2021 - CRC - 10/14/20
VEHICLE CARE 313
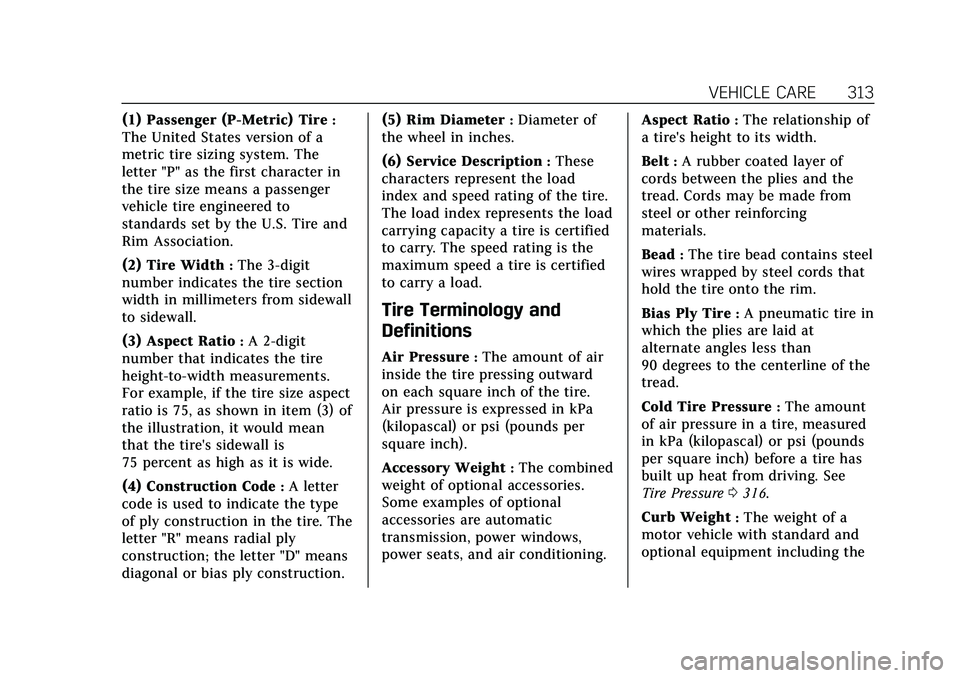
(1) Passenger (P-Metric) Tire:
The United States version of a
metric tire sizing system. The
letter "P" as the first character in
the tire size means a passenger
vehicle tire engineered to
standards set by the U.S. Tire and
Rim Association.
(2) Tire Width
:The 3-digit
number indicates the tire section
width in millimeters from sidewall
to sidewall.
(3) Aspect Ratio
:A 2-digit
number that indicates the tire
height-to-width measurements.
For example, if the tire size aspect
ratio is 75, as shown in item (3) of
the illustration, it would mean
that the tire's sidewall is
75 percent as high as it is wide.
(4) Construction Code
:A letter
code is used to indicate the type
of ply construction in the tire. The
letter "R" means radial ply
construction; the letter "D" means
diagonal or bias ply construction. (5) Rim Diameter
:Diameter of
the wheel in inches.
(6) Service Description
:These
characters represent the load
index and speed rating of the tire.
The load index represents the load
carrying capacity a tire is certified
to carry. The speed rating is the
maximum speed a tire is certified
to carry a load.
Tire Terminology and
Definitions
Air Pressure:The amount of air
inside the tire pressing outward
on each square inch of the tire.
Air pressure is expressed in kPa
(kilopascal) or psi (pounds per
square inch).
Accessory Weight
:The combined
weight of optional accessories.
Some examples of optional
accessories are automatic
transmission, power windows,
power seats, and air conditioning. Aspect Ratio
:The relationship of
a tire's height to its width.
Belt
:A rubber coated layer of
cords between the plies and the
tread. Cords may be made from
steel or other reinforcing
materials.
Bead
:The tire bead contains steel
wires wrapped by steel cords that
hold the tire onto the rim.
Bias Ply Tire
:A pneumatic tire in
which the plies are laid at
alternate angles less than
90 degrees to the centerline of the
tread.
Cold Tire Pressure
:The amount
of air pressure in a tire, measured
in kPa (kilopascal) or psi (pounds
per square inch) before a tire has
built up heat from driving. See
Tire Pressure 0316.
Curb Weight
:The weight of a
motor vehicle with standard and
optional equipment including the
Page 334 of 408
Cadillac XT4 Owner Manual (GMNA-Localizing-U.S./Canada/Mexico-
14584367) - 2021 - CRC - 10/14/20
VEHICLE CARE 333
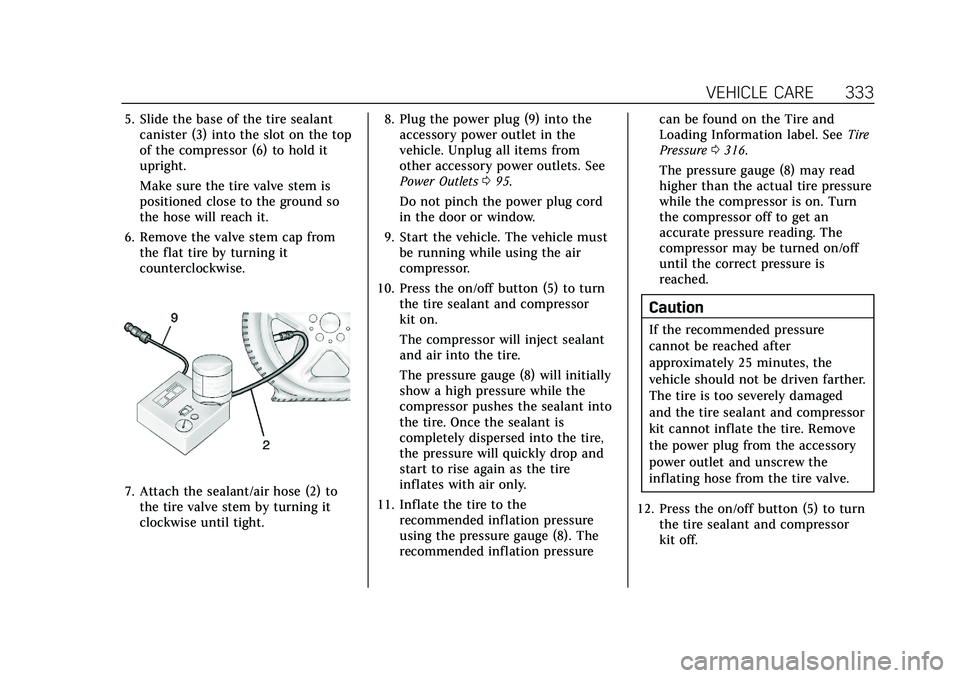
5. Slide the base of the tire sealantcanister (3) into the slot on the top
of the compressor (6) to hold it
upright.
Make sure the tire valve stem is
positioned close to the ground so
the hose will reach it.
6. Remove the valve stem cap from the flat tire by turning it
counterclockwise.
7. Attach the sealant/air hose (2) tothe tire valve stem by turning it
clockwise until tight. 8. Plug the power plug (9) into the
accessory power outlet in the
vehicle. Unplug all items from
other accessory power outlets. See
Power Outlets 095.
Do not pinch the power plug cord
in the door or window.
9. Start the vehicle. The vehicle must be running while using the air
compressor.
10. Press the on/off button (5) to turn the tire sealant and compressor
kit on.
The compressor will inject sealant
and air into the tire.
The pressure gauge (8) will initially
show a high pressure while the
compressor pushes the sealant into
the tire. Once the sealant is
completely dispersed into the tire,
the pressure will quickly drop and
start to rise again as the tire
inflates with air only.
11. Inflate the tire to the recommended inflation pressure
using the pressure gauge (8). The
recommended inflation pressure can be found on the Tire and
Loading Information label. See
Tire
Pressure 0316.
The pressure gauge (8) may read
higher than the actual tire pressure
while the compressor is on. Turn
the compressor off to get an
accurate pressure reading. The
compressor may be turned on/off
until the correct pressure is
reached.
Caution
If the recommended pressure
cannot be reached after
approximately 25 minutes, the
vehicle should not be driven farther.
The tire is too severely damaged
and the tire sealant and compressor
kit cannot inflate the tire. Remove
the power plug from the accessory
power outlet and unscrew the
inflating hose from the tire valve.
12. Press the on/off button (5) to turn the tire sealant and compressor
kit off.
Page 336 of 408
Cadillac XT4 Owner Manual (GMNA-Localizing-U.S./Canada/Mexico-
14584367) - 2021 - CRC - 10/14/20
VEHICLE CARE 335
Using the Tire Sealant and
Compressor Kit without Sealant
to Inflate a Tire (Not Punctured)
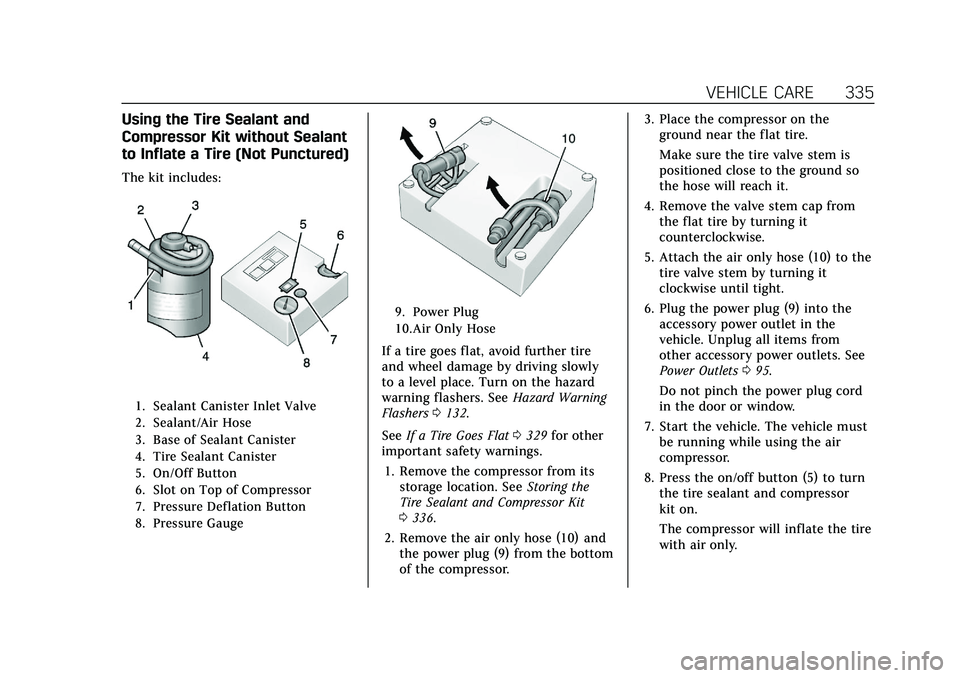
The kit includes:
1. Sealant Canister Inlet Valve
2. Sealant/Air Hose
3. Base of Sealant Canister
4. Tire Sealant Canister
5. On/Off Button
6. Slot on Top of Compressor
7. Pressure Deflation Button
8. Pressure Gauge
9. Power Plug
10.Air Only Hose
If a tire goes flat, avoid further tire
and wheel damage by driving slowly
to a level place. Turn on the hazard
warning flashers. SeeHazard Warning
Flashers 0132.
See If a Tire Goes Flat 0329 for other
important safety warnings.
1. Remove the compressor from its storage location. See Storing the
Tire Sealant and Compressor Kit
0 336.
2. Remove the air only hose (10) and the power plug (9) from the bottom
of the compressor. 3. Place the compressor on the
ground near the flat tire.
Make sure the tire valve stem is
positioned close to the ground so
the hose will reach it.
4. Remove the valve stem cap from the flat tire by turning it
counterclockwise.
5. Attach the air only hose (10) to the tire valve stem by turning it
clockwise until tight.
6. Plug the power plug (9) into the accessory power outlet in the
vehicle. Unplug all items from
other accessory power outlets. See
Power Outlets 095.
Do not pinch the power plug cord
in the door or window.
7. Start the vehicle. The vehicle must be running while using the air
compressor.
8. Press the on/off button (5) to turn the tire sealant and compressor
kit on.
The compressor will inflate the tire
with air only.
Page 349 of 408

Cadillac XT4 Owner Manual (GMNA-Localizing-U.S./Canada/Mexico-
14584367) - 2021 - CRC - 10/14/20
348 VEHICLE CARE
Appearance Care
Exterior Care
Locks
Locks are lubricated at the factory.
Use a de-icing agent only when
absolutely necessary, and have the
locks greased after using. See
Recommended Fluids and Lubricants
0367.
Washing the Vehicle
To preserve the vehicle's finish, wash
it often and out of direct sunlight.
Caution
Do not use petroleum-based, acidic,
or abrasive cleaning agents as they
can damage the vehicle's paint,
metal, or plastic parts. If damage
occurs, it would not be covered by
the vehicle warranty. Approved
cleaning products can be obtained
from your dealer. Follow all
manufacturer directions regarding
correct product usage, necessary
(Continued)
Caution (Continued)
safety precautions, and appropriate
disposal of any vehicle care
product.
Caution
Avoid using high-pressure washes
closer than 30 cm (12 in) to the
surface of the vehicle. Use of power
washers exceeding 8 274 kPa
(1,200 psi) can result in damage or
removal of paint and decals.
If using an automatic car wash, follow
the car wash instructions. The
windshield wiper and rear window
wiper, if equipped, must be off.
Remove any accessories that may be
damaged or interfere with the car
wash equipment.
Rinse the vehicle well, before washing
and after, to remove all cleaning
agents completely. If they are allowed
to dry on the surface, they could stain. Dry the finish with a soft, clean
chamois or an all-cotton towel to
avoid surface scratches and water
spotting.
Cleaning Underhood Components
Caution
Do not power wash any component
under the hood that has this
e
symbol.
This could cause damage that
would not be covered by the vehicle
warranty.
Solvents or aggressive cleaners may
harm underhood components. The
usages of these chemicals should be
avoided.
Recommend water only.
A pressure washer may be used, but
care must be utilized. The following
criteria must be followed:
.Water pressure must be kept below
14 000 KPa (2,000 PSI).
.Water temperature must be below
80 °C (180 °F).