wheel CADILLAC XT5 2017 1.G Workshop Manual
[x] Cancel search | Manufacturer: CADILLAC, Model Year: 2017, Model line: XT5, Model: CADILLAC XT5 2017 1.GPages: 339, PDF Size: 2.75 MB
Page 228 of 339

Cadillac XT5 Owner Manual (GMNA-Localizing-MidEast-10260744) - 2017 -
crc - 1/14/16
228 Driving and Operating
Collision Alert
With Head-Up Display
Without Head-Up DisplayWhen your vehicle approaches
another detected vehicle too rapidly,
the red FCA display will flash on the
windshield. Also, eight rapid
high-pitched beeps will sound from
the front, or both sides of the Safety
Alert Seat will pulse five times.
When this Collision Alert occurs, the
brake system may prepare for driver
braking to occur more rapidly which
can cause a brief, mild deceleration.
Continue to apply the brake pedal
as needed. Cruise control may be
disengaged when the Collision Alert
occurs.
Tailgating Alert
The vehicle ahead indicator will
display amber when you are
following a vehicle ahead much too
closely.
Selecting the Alert Timing
The Collision Alert control is on the
steering wheel. Press
[to set the
FCA timing to Far, Medium, or Near,
or on some vehicles, Off. The first
button press shows the current
setting on the DIC. Additional button
presses will change this setting. The
chosen setting will remain until it is
changed and will affect the timing of
both the Collision Alert and the
Tailgating Alert features. The timing
of both alerts will vary based on
vehicle speed. The faster the
vehicle speed, the farther away the
alert will occur. Consider traffic and
weather conditions when selecting
Page 235 of 339
Cadillac XT5 Owner Manual (GMNA-Localizing-MidEast-10260744) - 2017 -
crc - 1/14/16
Driving and Operating 235
both sides of the vehicle toward the
rear corners of the vehicle, see your
dealer.
If the LCA displays do not light up
when moving vehicles are in the
blind zone or are rapidly
approaching that zone and the
system is clean, the system may
need service. Take the vehicle to
your dealer.
Lane Departure
Warning (LDW)
If equipped, LDW may help avoid
crashes due to unintentional lane
departures. It may provide a
warning if the vehicle is crossing a
detected lane marking without using
a turn signal in the lane departure
direction. Since this system is part
of the Lane Keep Assist (LKA)
system, read the entire LKA section
before using this feature.
Lane Keep Assist (LKA)
If equipped, LKA may help avoid
crashes due to unintentional lane
departures. It may assist by gently
turning the steering wheel if thevehicle approaches a detected lane
marking without using a turn signal
in that direction. It may also provide
a Lane Departure Warning (LDW)
system alert as the lane marking is
crossed. The LKA system will not
assist or provide an LDW alert if it
detects that you are actively
steering. Override LKA by turning
the steering wheel. LKA uses a
camera to detect lane markings
between 60 km/h (37 mph) and
180 km/h (112 mph).
{Warning
The LKA system does not
continuously steer the vehicle.
It may not keep the vehicle in the
lane or give a Lane Departure
Warning (LDW) alert, even if a
lane marking is detected.
The LKA and LDW systems
may not:
. Provide an alert or enough
steering assist to avoid a
lane departure or crash.
(Continued)
Warning (Continued)
.Detect lane markings under
poor weather or visibility
conditions. This can occur if
the windshield or
headlamps are blocked by
dirt, snow, or ice, if they are
not in proper condition, or if
the sun shines directly into
the camera.
. Detect road edges.
. Detect lanes on winding or
hilly roads.
If LKA only detects lane markings
on one side of the road, it will
only assist or provide an LDW
alert when approaching the lane
on the side where it has detected
a lane marking. Even with LKA
and LDW, you must steer the
vehicle. Always keep your
attention on the road and
maintain proper vehicle position
within the lane, or vehicle
damage, injury, or death could (Continued)
Page 236 of 339
Cadillac XT5 Owner Manual (GMNA-Localizing-MidEast-10260744) - 2017 -
crc - 1/14/16
236 Driving and Operating
Warning (Continued)
occur. Always keep the
windshield, headlamps, and
camera sensors clean and in
good repair. Do not use LKA in
bad weather conditions.
{Warning
Using LKA while towing a trailer
or on slippery roads could cause
loss of control of the vehicle and
a crash. Turn the system off.
How the System Works
The LKA camera sensor is on the
windshield ahead of the rearview
mirror.
To turn LKA on and off, press
A
on the steering wheel.
When on,
Ais green if LKA is
available to assist and provide LDW
alerts. It may assist by gently
turning the steering wheel and display
Aas amber if the vehicle
approaches a detected lane marking
without using a turn signal in that
direction. It may also provide an
LDW alert by flashing
Aamber
as the lane marking is crossed.
Additionally, there will be three
beeps, or the driver seat will pulse
three times, on the right or left,
depending on the lane departure
direction.
The LKA system does not
continuously steer the vehicle.
If LKA does not detect active driver
steering, an alert and chime may be
provided. Move the steering wheel
to dismiss.
When the System Does Not
Seem to Work Properly
The system performance may be
affected by:
. Close vehicles ahead.
. Sudden lighting changes, such
as when driving through tunnels.
. Banked roads.
. Roads with poor lane markings,
such as two-lane roads. If the LKA system is not functioning
properly when lane markings are
clearly visible, cleaning the
windshield may help.
LKA assistance and/or LDW alerts
may occur due to tar marks,
shadows, cracks in the road,
temporary or construction lane
markings, or other road
imperfections. This is normal system
operation; the vehicle does not need
service. Turn LKA off if these
conditions continue.
Page 241 of 339
Cadillac XT5 Owner Manual (GMNA-Localizing-MidEast-10260744) - 2017 -
crc - 1/14/16
Driving and Operating 241
Following Distance
Stay at least twice as far behind the
vehicle ahead as you would when
driving the vehicle without a trailer.
This can help to avoid situations
that require heavy braking and
sudden turns.
Passing
More passing distance is needed
when towing a trailer. Because the
rig is longer, it is necessary to go
farther beyond the passed vehicle
before returning to the lane.
Backing Up
Hold the bottom of the steering
wheel with one hand. To move the
trailer to the left, move your hand to
the left. To move the trailer to the
right, move your hand to the right.
Always back up slowly and,
if possible, have someone
guide you.
Making TurnsCaution
Making very sharp turns while
trailering could cause the trailer to
come in contact with the vehicle.
The vehicle could be damaged.
Avoid making very sharp turns
while trailering.
When turning with a trailer, make
wider turns than normal so the
trailer will not strike soft shoulders,
curbs, road signs, trees, or other
objects. Use the turn signal well in
advance and avoid jerky or sudden
maneuvers.
Turn Signals When Towing a
Trailer
The turn signal indicators on the
instrument cluster flash whenever
signaling a turn or lane change.
Properly hooked up, the trailer
lamps also flash, telling other
drivers the vehicle is turning,
changing lanes, or stopping. When towing a trailer, the arrows on
the instrument cluster flash for turns
even if the bulbs on the trailer are
burned out. Check occasionally to
be sure the trailer bulbs are still
working.
Driving on Grades
Reduce speed and shift to a lower
gear before starting down a long or
steep downgrade. If the
transmission is not shifted down, the
brakes might have to be used so
much that they would get hot and no
longer work well.
The vehicle can tow in D (Drive).
Use a lower gear if the transmission
shifts too often.
When towing at high altitude on
steep uphill grades, engine coolant
boils at a lower temperature than at
normal altitudes. If the engine is
turned off immediately after towing
at high altitude on steep uphill
grades, the vehicle could show
signs similar to engine overheating.
To avoid this, let the engine run
while parked, preferably on level
ground, with the transmission in
P (Park) for a few minutes before
Page 242 of 339
Cadillac XT5 Owner Manual (GMNA-Localizing-MidEast-10260744) - 2017 -
crc - 1/14/16
242 Driving and Operating
turning the engine off. If the
overheat warning comes on, see
Engine Overheating0260.
Parking on Hills
{Warning
Parking the vehicle on a hill with
the trailer attached can be
dangerous. If something goes
wrong, the rig could start to move.
People can be injured, and both
the vehicle and the trailer can be
damaged. When possible, always
park the rig on a flat surface.
If parking the rig on a hill: 1. Press the brake pedal, but do not shift into P (Park) yet. Turn
the wheels into the curb if
facing downhill or into traffic if
facing uphill.
2. Have someone place chocks under the trailer wheels. 3. When the wheel chocks are in
place, release the brake pedal
until the chocks absorb
the load.
4. Reapply the brake pedal. Then apply the parking brake and
shift into P (Park).
5. Release the brake pedal.
Leaving After Parking on a Hill
1. Apply and hold the brake pedal while you:
.Start the engine.
. Shift into a gear.
. Release the parking brake.
2. Let up on the brake pedal.
3. Drive slowly until the trailer is clear of the chocks.
4. Stop and have someone pick up and store the chocks.
Maintenance When Trailer
Towing
The vehicle needs service more
often when pulling a trailer. Things
that are especially important in
trailer operation are automatic transmission fluid, engine oil, axle
lubricant, belts, cooling system, and
brake system. Inspect these before
and during the trip.
Check periodically to see that all
hitch nuts and bolts are tight.
Engine Cooling When Trailer
Towing
The cooling system may temporarily
overheat during severe operating
conditions. See
Engine
Overheating 0260.
Trailer Towing
Before pulling a trailer, there are
three important considerations that
have to do with weight:
.
The weight of the trailer.
. The weight of the trailer tongue.
. The total weight on the vehicle's
tires.
Page 247 of 339
Cadillac XT5 Owner Manual (GMNA-Localizing-MidEast-10260744) - 2017 -
crc - 1/14/16
Driving and Operating 247
assembly for the electric trailer
brake controller. The harness
contains the following wires:
.Blue: “To Trailer”
. Red/Black or Red/Blue:
Battery Feed
. White/Blue: Brake Apply Signal
. Black: Ground
The electric trailer brake controller
should be installed by your dealer or
a qualified service center.
Trailer Sway
Control (TSC)
Vehicles with StabiliTrak have a
TSC feature. Trailer sway is
unintended side-to-side motion of a
trailer while being towed. If the
vehicle is towing a trailer and the
TSC detects that sway is increasing,
the vehicle brakes are selectively
applied at each wheel, to help
reduce excessive trailer sway. If the
vehicle is equipped with the
Integrated Trailer Brake Control
(ITBC) system, and the trailer has the electric actuated brake system,
StabiliTrak may also apply the trailer
brakes.
If TSC is enabled, the Traction
Control System (TCS)/StabiliTrak
warning light will flash on the
instrument cluster. Vehicle speed
must be reduced. If trailer sway
continues, StabiliTrak can reduce
engine torque to help slow the
vehicle. See
Traction Control/
Electronic Stability Control 0206.
{Warning
Even if the vehicle is equipped
with TSC, trailer sway could result
in loss of control and the vehicle
could crash. If excessive trailer
sway is detected, slow down to a
safe speed. Check the trailer and
vehicle to help correct possible
causes. These could include an
improperly or overloaded trailer,
unrestrained cargo, improper
trailer hitch configuration,
excessive vehicle-trailer speed,
or improperly inflated or incorrect
(Continued)
Warning (Continued)
vehicle or trailer tires. See Towing
Equipment 0245 for trailer ratings
and hitch setup
recommendations.
Adding non-dealer accessories can
affect the vehicle performance. See
Accessories and
Modifications 0250.
Page 249 of 339
Cadillac XT5 Owner Manual (GMNA-Localizing-MidEast-10260744) - 2017 -
crc - 1/14/16
Vehicle Care 249
Vehicle Care
General Information
General Information . . . . . . . . . . 250
Accessories andModifications . . . . . . . . . . . . . . . . 250
Vehicle Checks
Doing Your OwnService Work . . . . . . . . . . . . . . . 250
Hood . . . . . . . . . . . . . . . . . . . . . . . . . 251
Engine Compartment Overview . . . . . . . . . . . . . . . . . . . . 252
Engine Oil . . . . . . . . . . . . . . . . . . . . 253
Engine Oil Life System . . . . . . . 255
Automatic Transmission Fluid . . . . . . . . . . . . . . . . . . . . . . . . 256
Engine Air Cleaner/Filter . . . . . . 256
Cooling System . . . . . . . . . . . . . . 257
Engine Coolant . . . . . . . . . . . . . . . 258
Engine Overheating . . . . . . . . . . 260
Washer Fluid . . . . . . . . . . . . . . . . . 262
Brakes . . . . . . . . . . . . . . . . . . . . . . . 263
Brake Fluid . . . . . . . . . . . . . . . . . . . 263
Battery . . . . . . . . . . . . . . . . . . . . . . . . 264
All-Wheel Drive . . . . . . . . . . . . . . . 266
Starter Switch Check . . . . . . . . . 266
Park Brake and P (Park) Mechanism Check . . . . . . . . . . 266
Wiper Blade Replacement . . . . 266 Windshield Replacement . . . . . 268
Headlamp Aiming
Headlamp Aiming . . . . . . . . . . . . 268
Bulb Replacement
Bulb Replacement . . . . . . . . . . . . 268
Halogen Bulbs . . . . . . . . . . . . . . . . 268
LED Lighting . . . . . . . . . . . . . . . . . 268
Headlamps . . . . . . . . . . . . . . . . . . . 269
Back-Up Lamps . . . . . . . . . . . . . . 269
License Plate Lamp . . . . . . . . . . 270
Electrical System
Electrical System Overload . . . 271
Fuses and Circuit Breakers . . . 271
Engine Compartment Fuse
Block . . . . . . . . . . . . . . . . . . . . . . . . 272
Instrument Panel Fuse Block . . . . . . . . . . . . . . . . . . . . . . . . 275
Rear Compartment Fuse Block . . . . . . . . . . . . . . . . . . . . . . . . 277
Wheels and Tires
Tires . . . . . . . . . . . . . . . . . . . . . . . . . . 279
All-Season Tires . . . . . . . . . . . . . . 280
Winter Tires . . . . . . . . . . . . . . . . . . 281
Summer Tires . . . . . . . . . . . . . . . . 281
Tire Pressure . . . . . . . . . . . . . . . . . 282
Tire Pressure for High-SpeedOperation . . . . . . . . . . . . . . . . . . . 283 Tire Pressure Monitor
System . . . . . . . . . . . . . . . . . . . . . . 283
Tire Pressure Monitor Operation . . . . . . . . . . . . . . . . . . . 284
Tire Inspection . . . . . . . . . . . . . . . . 287
Tire Rotation . . . . . . . . . . . . . . . . . 288
When It Is Time for New
Tires . . . . . . . . . . . . . . . . . . . . . . . . 289
Buying New Tires . . . . . . . . . . . . . 289
Different Size Tires and Wheels . . . . . . . . . . . . . . . . . . . . . . 291
Wheel Alignment and Tire Balance . . . . . . . . . . . . . . . . . . . . . 291
Wheel Replacement . . . . . . . . . . 291
Tire Chains . . . . . . . . . . . . . . . . . . . 292
If a Tire Goes Flat . . . . . . . . . . . . 293
Tire Changing . . . . . . . . . . . . . . . . 294
Compact Spare Tire . . . . . . . . . . 300
Jump Starting
Jump Starting . . . . . . . . . . . . . . . . 301
Towing the Vehicle
Towing the Vehicle . . . . . . . . . . . 303
Recreational Vehicle Towing . . . . . . . . . . . . . . . . . . . . . . 303
Appearance Care
Exterior Care . . . . . . . . . . . . . . . . . 305
Interior Care . . . . . . . . . . . . . . . . . . 310
Floor Mats . . . . . . . . . . . . . . . . . . . . 313
Page 256 of 339
Cadillac XT5 Owner Manual (GMNA-Localizing-MidEast-10260744) - 2017 -
crc - 1/14/16
256 Vehicle Care
How to Reset the Engine Oil
Life System
Reset the system whenever the
engine oil is changed so that the
system can calculate the next
engine oil change. To reset the
system:1. Using the DIC controls on the right side of the steering wheel,
display REMAINING OIL LIFE
on the DIC. See Driver
Information Center (DIC) 0135.
When remaining oil life is low,
the CHANGE ENGINE OIL
SOON message will appear on
the display. See Engine Oil
Messages 0143.
2. Press SEL on the DIC controls and hold SEL down for a few
seconds to clear the CHANGE
ENGINE OIL SOON message
and reset the oil life at 100%.
Be careful not to reset the oil
life display accidentally at any
time other than after the oil is
changed. It cannot be reset
accurately until the next oil
change. The oil life system can also be reset
as follows:
1. Turn the ignition on with the engine off.
2. Fully press and release the accelerator pedal three times
within five seconds.
If the CHANGE ENGINE OIL
SOON message is not on, the
system is reset.
The system is reset when the
CHANGE ENGINE OIL SOON
message is off.
If the CHANGE ENGINE OIL SOON
message comes back on when the
vehicle is started, the engine oil life
system has not been reset. Repeat
the procedure.
Automatic Transmission
Fluid
A transmission fluid leak is the only
reason for fluid loss. If a leak
occurs, take the vehicle to your
dealer and have it repaired as soon
as possible. See your dealer to have the fluid
and filter changed at the intervals
listed in the
Maintenance
Schedule 0316.
Engine Air Cleaner/Filter
The engine air cleaner/filter is in the
engine compartment on the
passenger side of the vehicle. See
Engine Compartment
Overview 0252.
When to Inspect the Engine Air
Cleaner/Filter
For intervals on changing and
inspecting the engine air cleaner/
filter, see Maintenance
Schedule 0316.
How to Inspect the Engine Air
Cleaner/Filter
Do not start the engine or have the
engine running with the engine air
cleaner/filter housing open. Before
removing the engine air cleaner/
filter, make sure that the engine air
cleaner/filter housing and nearby
components are free of dirt and
debris. Remove the engine air
cleaner/filter. Lightly tap and shake
Page 263 of 339
Cadillac XT5 Owner Manual (GMNA-Localizing-MidEast-10260744) - 2017 -
crc - 1/14/16
Vehicle Care 263
Brakes
Disc brake pads have built-in wear
indicators that make a high-pitched
warning sound when the brake pads
are worn and new pads are needed.
The sound can come and go or can
be heard all the time when the
vehicle is moving, except when
applying the brake pedal firmly.
{Warning
The brake wear warning sound
means that soon the brakes will
not work well. That could lead to
a crash. When the brake wear
warning sound is heard, have the
vehicle serviced.
Caution
Continuing to drive with worn-out
brake pads could result in costly
brake repair.Some driving conditions or climates
can cause a brake squeal when the
brakes are first applied or lightly
applied. This does not mean
something is wrong with the brakes.
Properly torqued wheel nuts are
necessary to help prevent brake
pulsation. When tires are rotated,
inspect brake pads for wear and
evenly tighten wheel nuts in the
proper sequence to torque
specifications. See
Capacities and
Specifications 0326.
Brake pads should be replaced as
complete sets.
Brake Pedal Travel
See your dealer if the brake pedal
does not return to normal height,
or if there is a rapid increase in
pedal travel. This could be a sign
that brake service may be required.
Replacing Brake System Parts
Always replace brake system parts
with new, approved replacement
parts. If this is not done, the brakes
may not work properly. The braking
performance expected can change
in many other ways if the wrong replacement brake parts are
installed or if parts are improperly
installed.
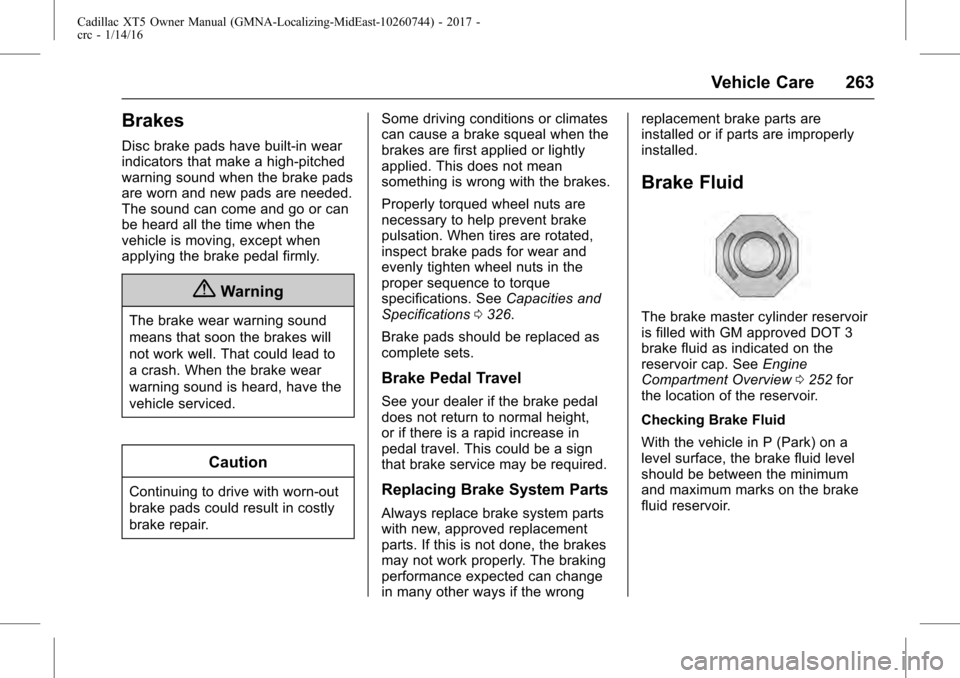
Brake Fluid
The brake master cylinder reservoir
is filled with GM approved DOT 3
brake fluid as indicated on the
reservoir cap. See
Engine
Compartment Overview 0252 for
the location of the reservoir.
Checking Brake Fluid
With the vehicle in P (Park) on a
level surface, the brake fluid level
should be between the minimum
and maximum marks on the brake
fluid reservoir.
Page 266 of 339
Cadillac XT5 Owner Manual (GMNA-Localizing-MidEast-10260744) - 2017 -
crc - 1/14/16
266 Vehicle Care
All-Wheel Drive
Transfer Case
Under normal driving conditions,
transfer case fluid does not require
maintenance unless there is a fluid
leak or unusual noise. If required,
have the transfer case serviced by
your dealer.
Starter Switch Check
{Warning
When you are doing this
inspection, the vehicle could
move suddenly. If the vehicle
moves, you or others could be
injured.
1. Before starting this check, be sure there is enough room
around the vehicle.
2. Apply both the parking brake and the regular brake. Do not use the accelerator
pedal, and be ready to turn off
the engine immediately if it
starts.
3. Try to start the engine in each gear. The vehicle should start
only in P (Park) or N (Neutral).
If the vehicle starts in any other
position, contact your dealer for
service.
Park Brake and P (Park)
Mechanism Check
{Warning
When you are doing this check,
the vehicle could begin to move.
You or others could be injured
and property could be damaged.
Make sure there is room in front
of the vehicle in case it begins to
roll. Be ready to apply the regular
brake at once should the vehicle
begin to move. Park on a fairly steep hill, with the
vehicle facing downhill. Keeping
your foot on the regular brake, set
the parking brake.
.
To check the parking brake's
holding ability: With the engine
running and the transmission in
N (Neutral), slowly remove foot
pressure from the regular brake
pedal. Do this until the vehicle is
held by the parking brake only.
. To check the P (Park)
mechanism's holding ability:
With the engine running, shift to
P (Park). Then release the
parking brake followed by the
regular brake.
Contact your dealer if service is
required.
Wiper Blade Replacement
Windshield wiper blades should be
inspected for wear or cracking.
It is a good idea to clean or replace
the wiper blade assembly on a
regular basis or when worn. For