clock CADILLAC XT5 2017 1.G Owners Manual
[x] Cancel search | Manufacturer: CADILLAC, Model Year: 2017, Model line: XT5, Model: CADILLAC XT5 2017 1.GPages: 339, PDF Size: 2.75 MB
Page 108 of 339
Cadillac XT5 Owner Manual (GMNA-Localizing-MidEast-10260744) - 2017 -
crc - 1/14/16
108 Instruments and Controls
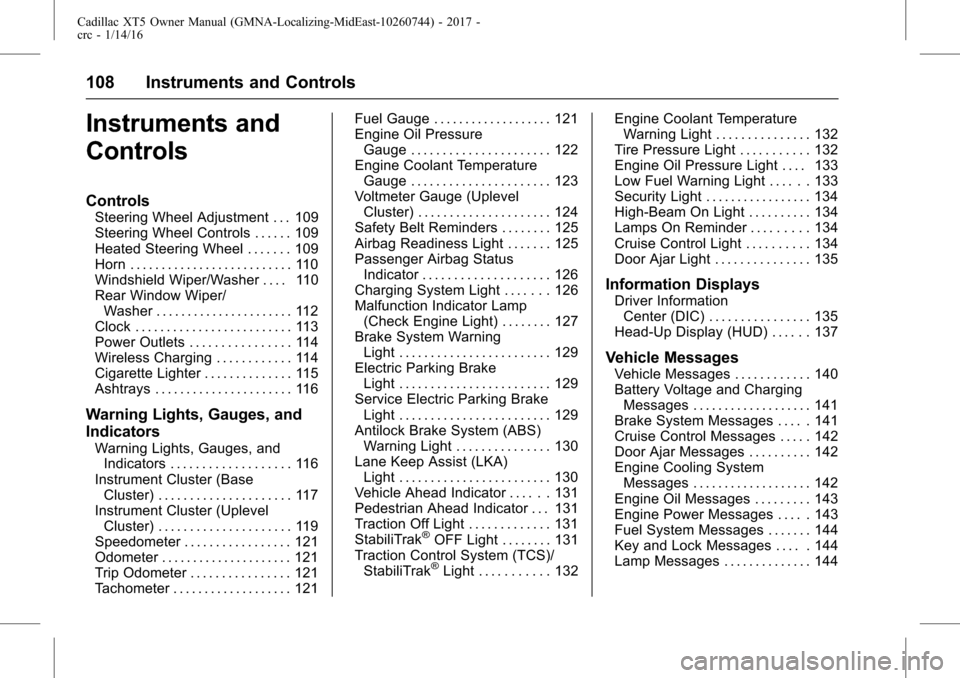
Instruments and
Controls
Controls
Steering Wheel Adjustment . . . 109
Steering Wheel Controls . . . . . . 109
Heated Steering Wheel . . . . . . . 109
Horn . . . . . . . . . . . . . . . . . . . . . . . . . . 110
Windshield Wiper/Washer . . . . 110
Rear Window Wiper/Washer . . . . . . . . . . . . . . . . . . . . . . 112
Clock . . . . . . . . . . . . . . . . . . . . . . . . . 113
Power Outlets . . . . . . . . . . . . . . . . 114
Wireless Charging . . . . . . . . . . . . 114
Cigarette Lighter . . . . . . . . . . . . . . 115
Ashtrays . . . . . . . . . . . . . . . . . . . . . . 116
Warning Lights, Gauges, and
Indicators
Warning Lights, Gauges, and Indicators . . . . . . . . . . . . . . . . . . . 116
Instrument Cluster (Base Cluster) . . . . . . . . . . . . . . . . . . . . . 117
Instrument Cluster (Uplevel Cluster) . . . . . . . . . . . . . . . . . . . . . 119
Speedometer . . . . . . . . . . . . . . . . . 121
Odometer . . . . . . . . . . . . . . . . . . . . . 121
Trip Odometer . . . . . . . . . . . . . . . . 121
Tachometer . . . . . . . . . . . . . . . . . . . 121 Fuel Gauge . . . . . . . . . . . . . . . . . . . 121
Engine Oil Pressure
Gauge . . . . . . . . . . . . . . . . . . . . . . 122
Engine Coolant Temperature Gauge . . . . . . . . . . . . . . . . . . . . . . 123
Voltmeter Gauge (Uplevel Cluster) . . . . . . . . . . . . . . . . . . . . . 124
Safety Belt Reminders . . . . . . . . 125
Airbag Readiness Light . . . . . . . 125
Passenger Airbag Status Indicator . . . . . . . . . . . . . . . . . . . . 126
Charging System Light . . . . . . . 126
Malfunction Indicator Lamp (Check Engine Light) . . . . . . . . 127
Brake System Warning Light . . . . . . . . . . . . . . . . . . . . . . . . 129
Electric Parking Brake Light . . . . . . . . . . . . . . . . . . . . . . . . 129
Service Electric Parking Brake Light . . . . . . . . . . . . . . . . . . . . . . . . 129
Antilock Brake System (ABS) Warning Light . . . . . . . . . . . . . . . 130
Lane Keep Assist (LKA) Light . . . . . . . . . . . . . . . . . . . . . . . . 130
Vehicle Ahead Indicator . . . . . . 131
Pedestrian Ahead Indicator . . . 131
Traction Off Light . . . . . . . . . . . . . 131
StabiliTrak
®OFF Light . . . . . . . . 131
Traction Control System (TCS)/ StabiliTrak
®Light . . . . . . . . . . . 132 Engine Coolant Temperature
Warning Light . . . . . . . . . . . . . . . 132
Tire Pressure Light . . . . . . . . . . . 132
Engine Oil Pressure Light . . . . 133
Low Fuel Warning Light . . . . . . 133
Security Light . . . . . . . . . . . . . . . . . 134
High-Beam On Light . . . . . . . . . . 134
Lamps On Reminder . . . . . . . . . 134
Cruise Control Light . . . . . . . . . . 134
Door Ajar Light . . . . . . . . . . . . . . . 135
Information Displays
Driver Information Center (DIC) . . . . . . . . . . . . . . . . 135
Head-Up Display (HUD) . . . . . . 137
Vehicle Messages
Vehicle Messages . . . . . . . . . . . . 140
Battery Voltage and Charging Messages . . . . . . . . . . . . . . . . . . . 141
Brake System Messages . . . . . 141
Cruise Control Messages . . . . . 142
Door Ajar Messages . . . . . . . . . . 142
Engine Cooling System Messages . . . . . . . . . . . . . . . . . . . 142
Engine Oil Messages . . . . . . . . . 143
Engine Power Messages . . . . . 143
Fuel System Messages . . . . . . . 144
Key and Lock Messages . . . . . 144
Lamp Messages . . . . . . . . . . . . . . 144
Page 113 of 339
Cadillac XT5 Owner Manual (GMNA-Localizing-MidEast-10260744) - 2017 -
crc - 1/14/16
Instruments and Controls 113
windshield wiper is performing low
or high speed wipes. If the rear
wiper control is off, the transmission
is in R (Reverse), and the front
windshield wiper is performing
interval wipes, then the rear wiper
automatically performs interval
wipes.
This feature can be turned on or off.
SeeVehicle Personalization 0151.
The windshield washer reservoir is
used for the windshield, rear
window, and rear mirror camera,
if equipped. See Rear Camera
Mirror 046. Check the fluid level in
the reservoir if either washer is not
working. See Washer Fluid 0262.
Clock
The infotainment system controls
are used to access the time and
date settings through the menu
system. See “Home Page” in the
infotainment manual for information
about how to use the menu system.
Setting the Clock
Time
To set the time:
1. From the Home Page, touch the SETTINGS screen button,
then touch Time and Date.
2. Touch Set Time, then touch + or−to increase or decrease
hours or minutes, and change
AM or PM.
3. Touch 12-24 Hr for a 12 or 24 hour clock.
4. Touch
[Back to go back to the
previous menu.
Date
To set the date: 1. Touch the SETTINGS screen button, then touch Time
and Date.
2. Touch Set Date, then touch + or−to increase or decrease
month, day, or year.
3. Touch
[Back to go back to the
previous menu. Auto Set
When on, the time and date will
automatically update.
To set auto set:
1. Touch the SETTINGS screen button, then touch Time
and Date.
2. Touch Set Time or Set Date.
3. Touch Auto Set, then select On-Cell Network or Off-Manual
to manually set the time
and date.
4. Touch
[Back to go back to the
previous menu.
If auto set is on, the time displayed
on the clock may not update
immediately when driving into a new
time zone.
Clock Display
When on, the digital clock will
display on the infotainment screen.
To set the clock display: 1. Touch the SETTINGS screen button, then touch Time
and Date.
Page 114 of 339
Cadillac XT5 Owner Manual (GMNA-Localizing-MidEast-10260744) - 2017 -
crc - 1/14/16
114 Instruments and Controls
2. Touch Clock Display, thenselect Off or On.
3. Touch
[Back to go back to the
previous menu.
Power Outlets
The accessory power outlet can be
used to plug in electrical equipment,
such as a cell phone or MP3 player.
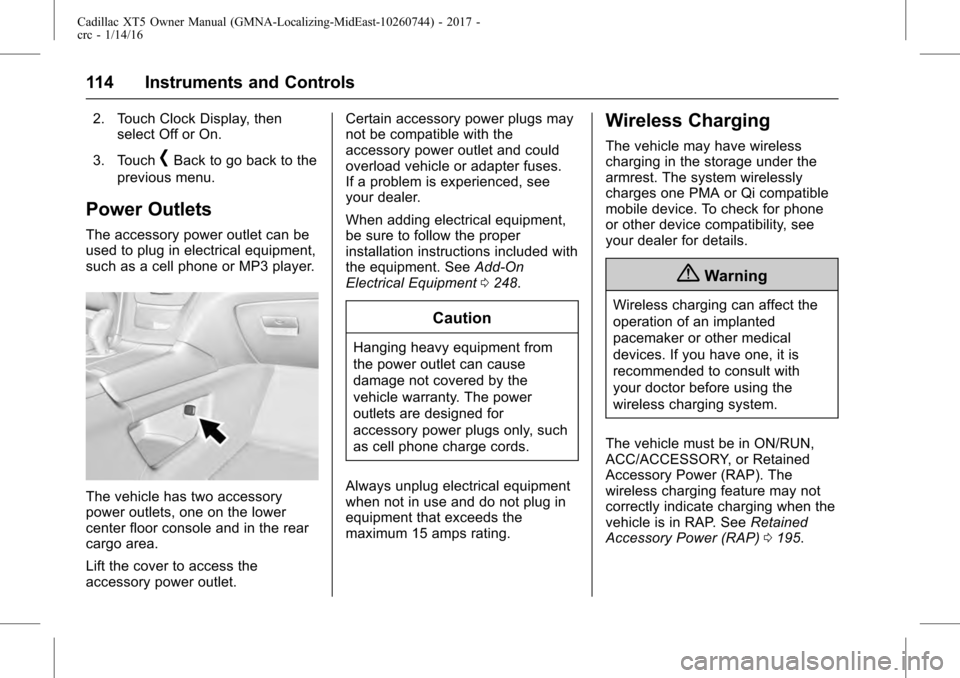
The vehicle has two accessory
power outlets, one on the lower
center floor console and in the rear
cargo area.
Lift the cover to access the
accessory power outlet. Certain accessory power plugs may
not be compatible with the
accessory power outlet and could
overload vehicle or adapter fuses.
If a problem is experienced, see
your dealer.
When adding electrical equipment,
be sure to follow the proper
installation instructions included with
the equipment. See
Add-On
Electrical Equipment 0248.
Caution
Hanging heavy equipment from
the power outlet can cause
damage not covered by the
vehicle warranty. The power
outlets are designed for
accessory power plugs only, such
as cell phone charge cords.
Always unplug electrical equipment
when not in use and do not plug in
equipment that exceeds the
maximum 15 amps rating.
Wireless Charging
The vehicle may have wireless
charging in the storage under the
armrest. The system wirelessly
charges one PMA or Qi compatible
mobile device. To check for phone
or other device compatibility, see
your dealer for details.
{Warning
Wireless charging can affect the
operation of an implanted
pacemaker or other medical
devices. If you have one, it is
recommended to consult with
your doctor before using the
wireless charging system.
The vehicle must be in ON/RUN,
ACC/ACCESSORY, or Retained
Accessory Power (RAP). The
wireless charging feature may not
correctly indicate charging when the
vehicle is in RAP. See Retained
Accessory Power (RAP) 0195.
Page 152 of 339
Cadillac XT5 Owner Manual (GMNA-Localizing-MidEast-10260744) - 2017 -
crc - 1/14/16
152 Instruments and Controls
Personalization Menus
The following list of menu items may
be available:
.Time and Date
. Language (Language)
. Valet Mode
. Radio
. Vehicle
. Bluetooth
. Apple CarPlay
. Android Auto
. Voice
. Display
. Rear Camera
. Return to Factory Settings
. Software Information
Each menu is detailed in the
following information.
Time and Date
Manually set the time and date. See
Clock 0113.
Language (Language)
Select Language, then select from
the available language(s).
The selected language will display
on the system, and voice
recognition will reflect the selected
language.
Valet Mode (If Equipped)
This will lock the infotainment
system and steering wheel controls.
It may also limit access to vehicle
storage locations (if equipped).
To enable valet mode:
1. Enter a four-digit code on the keypad.
2. Select Enter to go to the confirmation screen.
3. Re-enter the four-digit code.
Press LOCK or UNLOCK to lock or
unlock the system. Press Back to go
back to the previous menu.
Radio
Touch and the following may
display:
. Manage Favorites .
Number of Favorites Shown
. Audible Touch Feedback
. Bose Audio Pilot
. Maximum Start Up Volume
Manage Favorites
This allows favorites to be edited.
See “Manage Favorites” in
“Settings” under“Radio” in the
infotainment manual.
Number of Favorites Shown
Touch to set the number of favorites
to display.
Select the desired number or select
Auto and the infotainment system
will automatically adjust the number
of favorites shown.
Audible Touch Feedback
This allows Audible Touch
Feedback to be turned on or off.
Select Off or On.
Bose Audio Pilot
This feature adjusts the volume
based on the noise in the vehicle.
See “Bose AudioPilot Noise
Page 245 of 339
Cadillac XT5 Owner Manual (GMNA-Localizing-MidEast-10260744) - 2017 -
crc - 1/14/16
Driving and Operating 245
After loading the trailer, weigh the
trailer and then the tongue,
separately, to see if the weights are
proper. If they are not, adjustments
might be made by moving some
items around in the trailer.
Trailering may be limited by the
vehicle's ability to carry tongue
weight. Tongue weight cannot cause
the vehicle to exceed the GVWR
(Gross Vehicle Weight Rating) or
the RGAWR (Rear Gross Axle
Weight Rating). The effect of
additional weight may reduce the
trailering capacity more than the
total of the additional weight.
It is important that the vehicle does
not exceed any of its ratings—
GCWR, GVWR, RGAWR, Maximum
Trailer Rating or Tongue Weight.
The only way to be sure it is not
exceeding any of these ratings is to
weigh the vehicle and trailer.
Total Weight on the Vehicle's
Tires
Be sure the vehicle's tires are
inflated to the upper limit for cold
tires. These numbers can be found on the Certification label or see
Vehicle Load Limits
0187. Make
sure not to go over the GVW limit
for the vehicle, or the GAWR,
including the weight of the trailer
tongue. If using a weight distributing
hitch, make sure not to go over the
rear axle limit before applying the
weight distribution spring bars.
Towing Equipment
Hitches
It is important to have the correct
hitch equipment. Crosswinds, large
trucks going by, and rough roads
are a few reasons why the right
hitch is needed.
. The rear bumper on the vehicle
is not intended for hitches. Do
not attach rental hitches or other
bumper-type hitches to it. Use
only a frame-mounted hitch that
does not attach to the bumper.
. Will any holes be made in the
body of the vehicle when the
trailer hitch is installed? If there
are, then be sure to seal the
holes later when the hitch is removed. If the holes are not
sealed, dirt, water, and deadly
carbon monoxide (CO) from the
exhaust can get into the vehicle.
See
Engine Exhaust 0197.
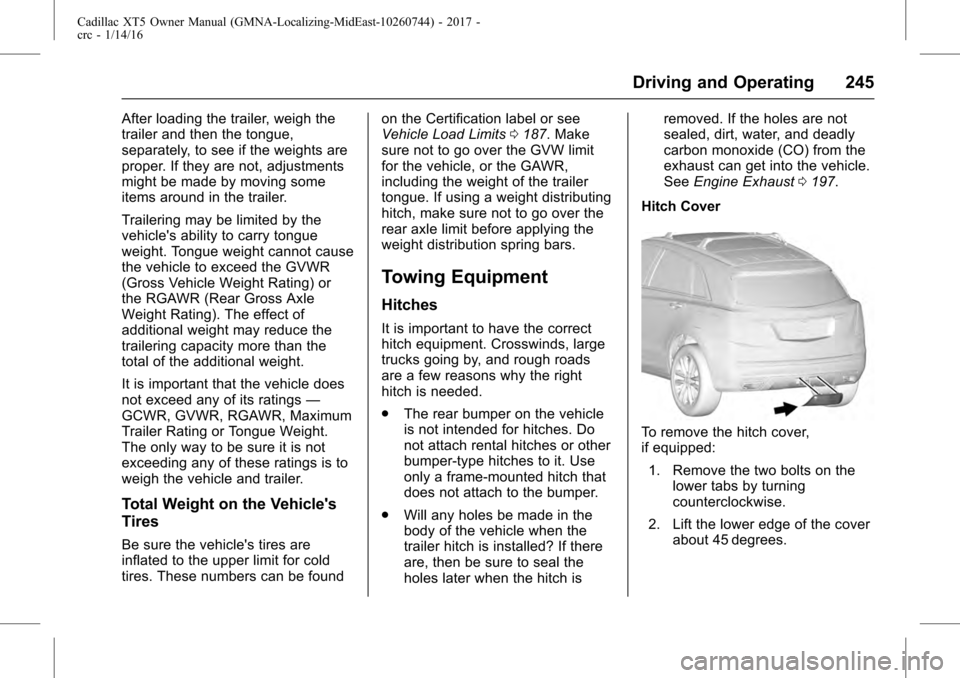
Hitch Cover
To remove the hitch cover,
if equipped: 1. Remove the two bolts on the lower tabs by turning
counterclockwise.
2. Lift the lower edge of the cover about 45 degrees.
Page 246 of 339
Cadillac XT5 Owner Manual (GMNA-Localizing-MidEast-10260744) - 2017 -
crc - 1/14/16
246 Driving and Operating
3. Pull the cover downward todisengage the upper
attachments.
To reinstall the hitch cover: 1. Hold the cover at a 45 degree angle to the vehicle and push
the upper tabs in the hitch
cover into the slots in the
fascia.
2. Move the bottom of the cover forward until the lower tabs line
up with the lower fascia slots.
3. Snap the hitch cover into place by pushing the upper corners
forward.
4. Reinstall the two bolts on the lower tabs by turning
clockwise.
Safety Chains
Always attach chains between the
vehicle and the trailer. Cross the
safety chains under the tongue of
the trailer to help prevent the tongue
from contacting the road if it
becomes separated from the hitch. Always leave just enough slack so
the rig can turn. Never allow safety
chains to drag on the ground.
Trailer Brakes
A loaded trailer that weighs more
than 454 kg (1,000 lb) needs to have
its own brake system that is
adequate for the weight of the
trailer. Be sure to read and follow
the instructions for the trailer brakes
so they are installed, adjusted, and
maintained properly.
Because the vehicle has antilock
brakes, do not tap into the vehicle's
brake system. If you do, both brake
systems will not work well, or at all.
Trailer Wiring Harness
Basic Trailer Wiring
The trailer wiring harness, with a
seven-pin connector, is located at
the rear of the vehicle and is tied to
the vehicle's frame. The harness
connector can be plugged into a
seven-pin universal heavy-duty
trailer connector available through
your dealer.The seven-wire harness contains
the following trailer circuits:
.
Yellow/Gray: Stop/Turn
Signal Left
. Green/Violet: Stop/Turn Signal
Right
. Gray/Brown: Parking Lamps
. White/Green: Back-up Lamps
. Red/Green: Battery Feed
. Black: Ground
. Blue: Electric Brakes*
*The fuse for this circuit is installed
in the underhood electrical center,
but the wires are not connected.
They should be connected by your
dealer or a qualified service center.
If the back-up lamp circuit is not
functional, contact your dealer.
Electric Trailer Brake Control
Wiring Provisions
These wiring provisions for an
electric trailer brake controller are
included with the vehicle as part of
the trailer wiring package. The
instrument panel contains blunt cut
wires above the parking brake
Page 260 of 339
Cadillac XT5 Owner Manual (GMNA-Localizing-MidEast-10260744) - 2017 -
crc - 1/14/16
260 Vehicle Care
Caution
This vehicle has a specific
coolant fill procedure. Failure to
follow this procedure could cause
the engine to overheat and be
severely damaged.
{Warning
Steam and scalding liquids from a
hot cooling system can blow out
and burn you badly. Never turn
the cap when the cooling system,
including the surge tank pressure
cap, is hot. Wait for the cooling
system and surge tank pressure
cap to cool.
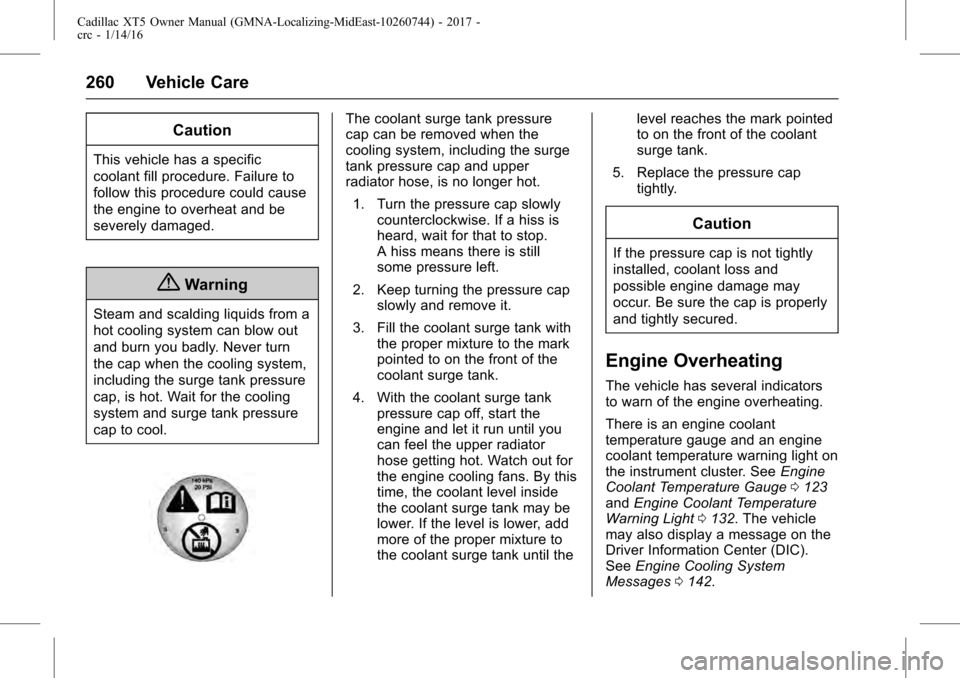
The coolant surge tank pressure
cap can be removed when the
cooling system, including the surge
tank pressure cap and upper
radiator hose, is no longer hot.1. Turn the pressure cap slowly counterclockwise. If a hiss is
heard, wait for that to stop.
A hiss means there is still
some pressure left.
2. Keep turning the pressure cap slowly and remove it.
3. Fill the coolant surge tank with the proper mixture to the mark
pointed to on the front of the
coolant surge tank.
4. With the coolant surge tank pressure cap off, start the
engine and let it run until you
can feel the upper radiator
hose getting hot. Watch out for
the engine cooling fans. By this
time, the coolant level inside
the coolant surge tank may be
lower. If the level is lower, add
more of the proper mixture to
the coolant surge tank until the level reaches the mark pointed
to on the front of the coolant
surge tank.
5. Replace the pressure cap tightly.
Caution
If the pressure cap is not tightly
installed, coolant loss and
possible engine damage may
occur. Be sure the cap is properly
and tightly secured.
Engine Overheating
The vehicle has several indicators
to warn of the engine overheating.
There is an engine coolant
temperature gauge and an engine
coolant temperature warning light on
the instrument cluster. See Engine
Coolant Temperature Gauge 0123
and Engine Coolant Temperature
Warning Light 0132. The vehicle
may also display a message on the
Driver Information Center (DIC).
See Engine Cooling System
Messages 0142.
Page 269 of 339
Cadillac XT5 Owner Manual (GMNA-Localizing-MidEast-10260744) - 2017 -
crc - 1/14/16
Vehicle Care 269
Headlamps
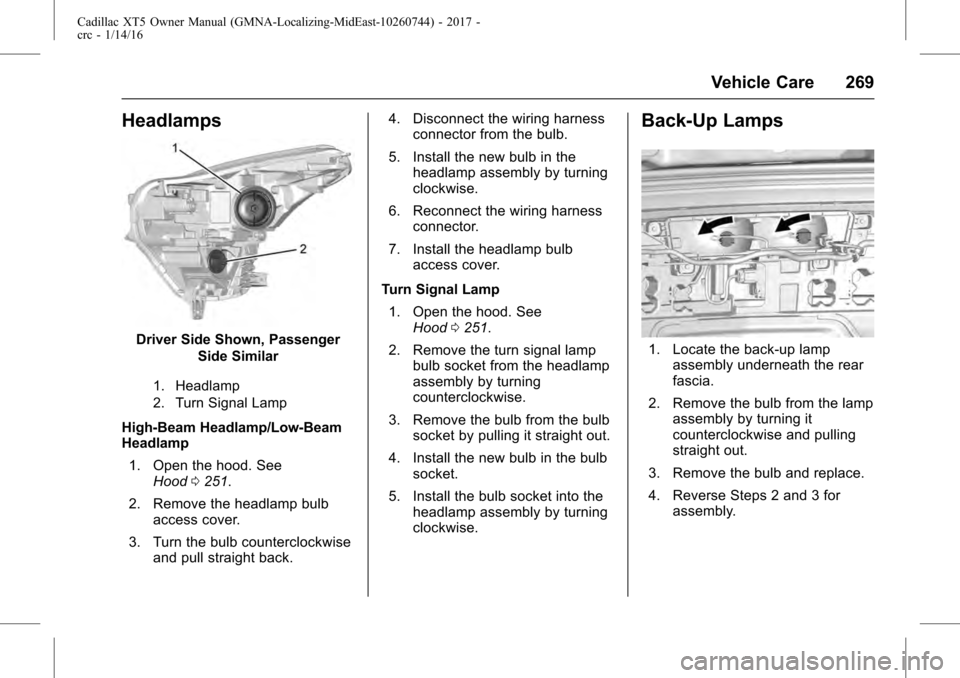
Driver Side Shown, PassengerSide Similar
1. Headlamp
2. Turn Signal Lamp
High-Beam Headlamp/Low-Beam
Headlamp
1. Open the hood. See Hood 0251.
2. Remove the headlamp bulb access cover.
3. Turn the bulb counterclockwise and pull straight back. 4. Disconnect the wiring harness
connector from the bulb.
5. Install the new bulb in the headlamp assembly by turning
clockwise.
6. Reconnect the wiring harness connector.
7. Install the headlamp bulb access cover.
Turn Signal Lamp 1. Open the hood. See Hood 0251.
2. Remove the turn signal lamp bulb socket from the headlamp
assembly by turning
counterclockwise.
3. Remove the bulb from the bulb socket by pulling it straight out.
4. Install the new bulb in the bulb socket.
5. Install the bulb socket into the headlamp assembly by turning
clockwise.
Back-Up Lamps
1. Locate the back-up lampassembly underneath the rear
fascia.
2. Remove the bulb from the lamp assembly by turning it
counterclockwise and pulling
straight out.
3. Remove the bulb and replace.
4. Reverse Steps 2 and 3 for assembly.
Page 270 of 339
Cadillac XT5 Owner Manual (GMNA-Localizing-MidEast-10260744) - 2017 -
crc - 1/14/16
270 Vehicle Care
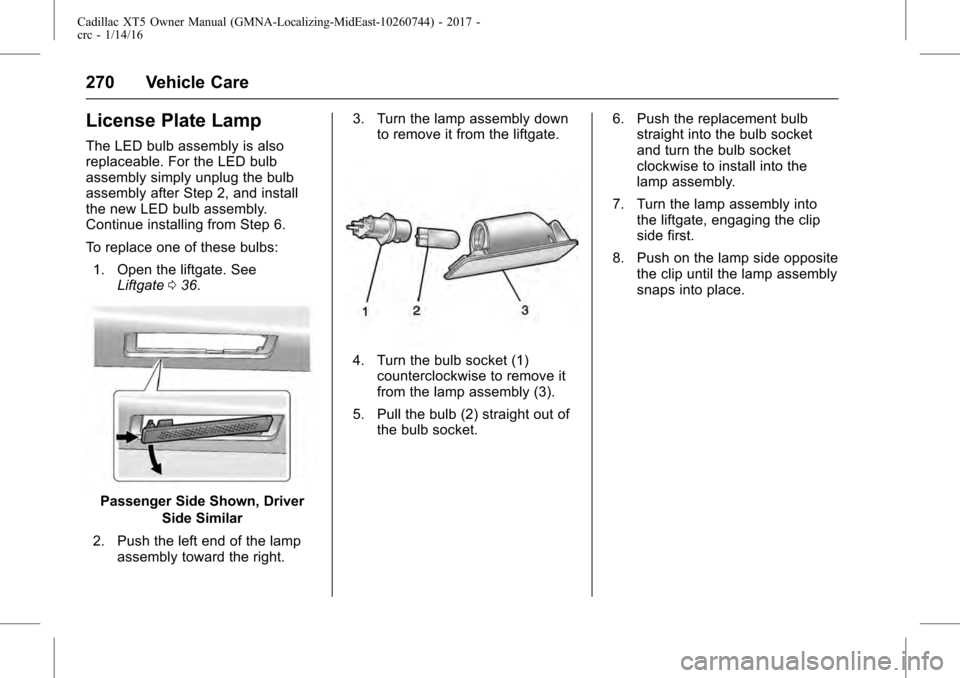
License Plate Lamp
The LED bulb assembly is also
replaceable. For the LED bulb
assembly simply unplug the bulb
assembly after Step 2, and install
the new LED bulb assembly.
Continue installing from Step 6.
To replace one of these bulbs:1. Open the liftgate. See Liftgate 036.
Passenger Side Shown, Driver
Side Similar
2. Push the left end of the lamp assembly toward the right. 3. Turn the lamp assembly down
to remove it from the liftgate.
4. Turn the bulb socket (1)counterclockwise to remove it
from the lamp assembly (3).
5. Pull the bulb (2) straight out of the bulb socket. 6. Push the replacement bulb
straight into the bulb socket
and turn the bulb socket
clockwise to install into the
lamp assembly.
7. Turn the lamp assembly into the liftgate, engaging the clip
side first.
8. Push on the lamp side opposite the clip until the lamp assembly
snaps into place.
Page 295 of 339
Cadillac XT5 Owner Manual (GMNA-Localizing-MidEast-10260744) - 2017 -
crc - 1/14/16
Vehicle Care 295
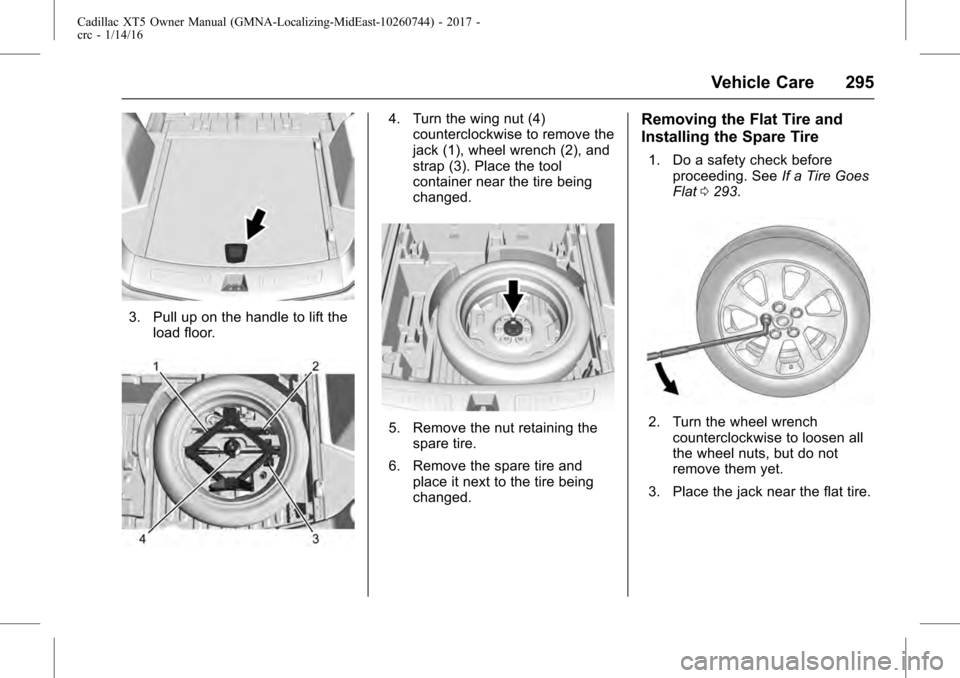
3. Pull up on the handle to lift theload floor.
4. Turn the wing nut (4)counterclockwise to remove the
jack (1), wheel wrench (2), and
strap (3). Place the tool
container near the tire being
changed.
5. Remove the nut retaining thespare tire.
6. Remove the spare tire and place it next to the tire being
changed.
Removing the Flat Tire and
Installing the Spare Tire
1. Do a safety check beforeproceeding. See If a Tire Goes
Flat 0293.
2. Turn the wheel wrench
counterclockwise to loosen all
the wheel nuts, but do not
remove them yet.
3. Place the jack near the flat tire.