center console CADILLAC XT5 2018 Convenience & Personalization Guide
[x] Cancel search | Manufacturer: CADILLAC, Model Year: 2018, Model line: XT5, Model: CADILLAC XT5 2018Pages: 20, PDF Size: 2.47 MB
Page 4 of 20
4
KEYLESS STARTAUTO ENGINE STOP/START OPERATION
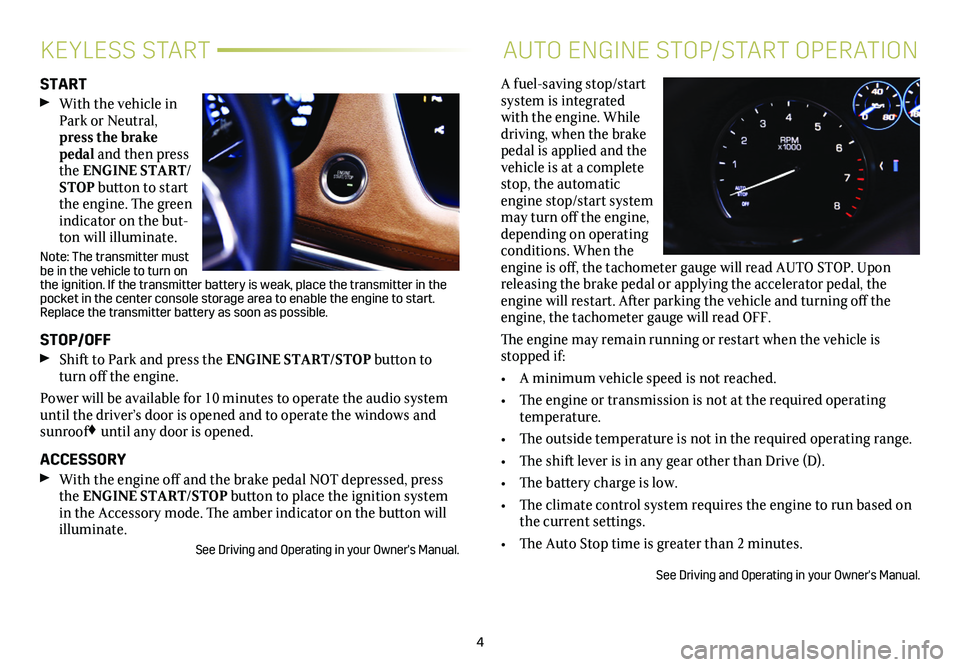
START With the vehicle in Park or Neutral, press the brake pedal and then press the ENGINE START/STOP button to start the engine. The green indicator on the but-ton will illuminate.
Note: The transmitter must be in the vehicle to turn on the ignition. If the transmitter battery is weak, place the transmitter in the pocket in the center console storage area to enable the engine to start.\
Replace the transmitter battery as soon as possible.
STOP/OFF Shift to Park and press the ENGINE START/STOP button to turn off the engine.
Power will be available for 10 minutes to operate the audio system until the driver’s door is opened and to operate the windows and sunroof♦ until any door is opened.
ACCESSORY With the engine off and the brake pedal NOT depressed, press the ENGINE START/STOP button to place the ignition system in the Accessory mode. The amber indicator on the button will illuminate.
See Driving and Operating in your Owner's Manual.
A fuel-saving stop/start system is integrated with the engine. While driving, when the brake pedal is applied and the vehicle is at a complete stop, the automatic engine stop/start
system may turn off the engine, depending on operating conditions. When the engine is off, the tachometer gauge will read AUTO STOP. Upon releasing the brake pedal or applying the accelerator pedal, the engine will restart. After parking the vehicle and turning off the engine, the tachometer gauge will read OFF.
The engine may remain running or restart when the vehicle is stopped if:
• A minimum vehicle speed is not reached.
• The engine or transmission is not at the required operating temperature.
• The outside temperature is not in the required operating range.
• The shift lever is in any gear other than Drive (D).
• The battery charge is low.
• The climate control system requires the engine to run based on the current settings.
• The Auto Stop time is greater than 2 minutes.
See Driving and Operating in your Owner's Manual.
Page 5 of 20
5
ELECTRONIC PRECISION SHIFT
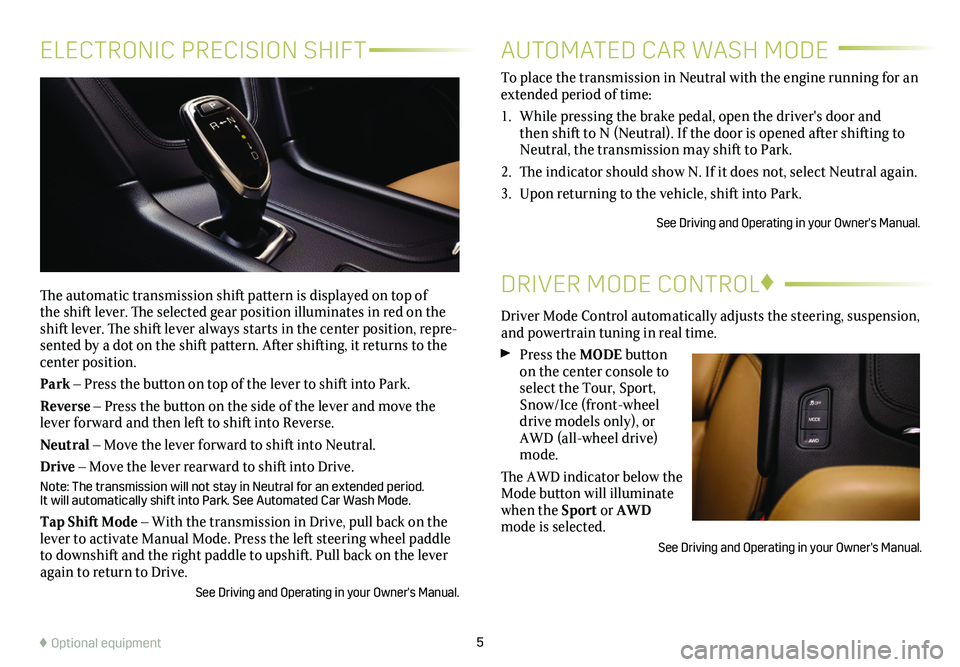
The automatic transmission shift pattern is displayed on top of the shift lever. The selected gear position illuminates in red on the shift lever. The shift lever always starts in the center position, repre-sented by a dot on the shift pattern. After shifting, it returns to the center position.
Park – Press the button on top of the lever to shift into Park.
Reverse – Press the button on the side of the lever and move the lever forward and then left to shift into Reverse.
Neutral – Move the lever forward to shift into Neutral.
Drive – Move the lever rearward to shift into Drive.
Note: The transmission will not stay in Neutral for an extended period. It will automatically shift into Park. See Automated Car Wash Mode.
Tap Shift Mode – With the transmission in Drive, pull back on the lever to activate Manual Mode. Press the left steering wheel paddle to downshift and the right paddle to upshift. Pull back on the lever again to return to Drive.
See Driving and Operating in your Owner's Manual.
DRIVER MODE CONTROL♦
Driver Mode Control automatically adjusts the steering, suspension, and powertrain tuning in real time.
Press the MODE button on the center console to select the Tour, Sport, Snow/Ice (front-wheel drive models only), or AWD (all-wheel drive) mode.
The AWD indicator below the Mode button will illuminate when the Sport or AWD mode is selected.
See Driving and Operating in your Owner's Manual.
AUTOMATED CAR WASH MODE
To place the transmission in Neutral with the engine running for an extended period of time:
1. While pressing the brake pedal, open the driver's door and then shift to N (Neutral). If the door is opened after shifting to Neutral, the transmission may shift to Park.
2. The indicator should show N. If it does not, select Neutral again.
3. Upon returning to the vehicle, shift into Park.
See Driving and Operating in your Owner's Manual.
♦ Optional equipment
Page 12 of 20
12
BLUETOOTH® SYSTEM
Before using a Bluetooth-enabled device in the vehicle, it must be paired with the in-vehicle Bluetooth system. Not all devices will support all functions. The pairing process is
disabled when the vehicle is moving. For more information, visit my.cadillac.com/learn.
PAIR A PHONE
1. To use voice recognition, press the Push to Talk button; after the beep, say "Pair Phone."
To use the infotainment screen, select Phone > Pair Device.
2. Start the pairing process on the phone. From your phone's Blue-tooth settings, select the name shown on the infotainment screen.
3. Confirm the codes that appear on the infotainment screen and the phone.
4. When pairing is complete, the phone screen is displayed. Your phone book may be downloaded depending on the phone.
See your Cadillac User Experience Manual.
WIRELESS CHARGING
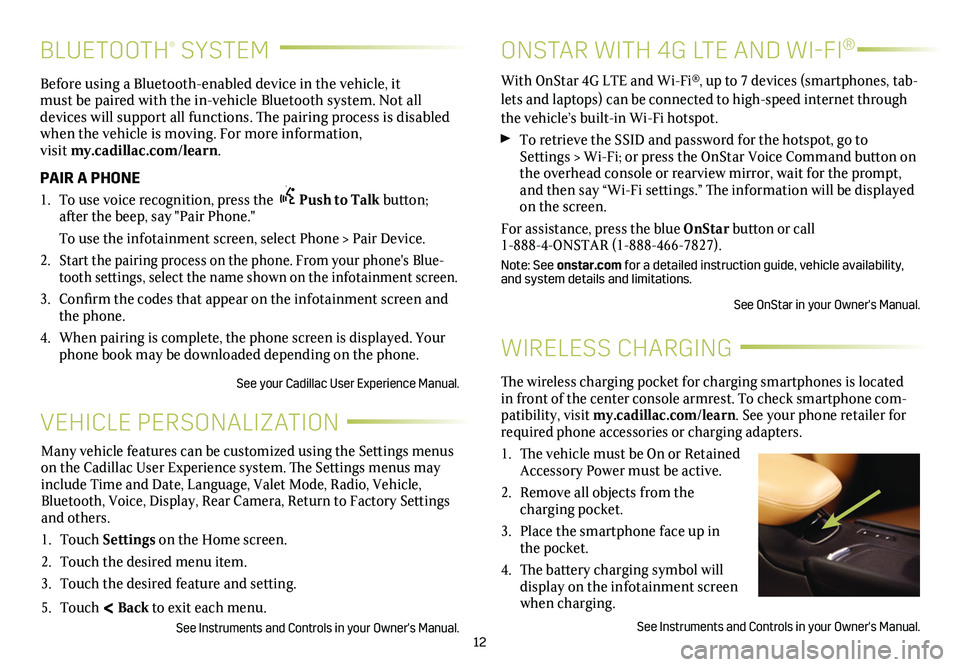
The wireless charging pocket for charging smartphones is located in front of the center console armrest. To check smartphone com-patibility, visit my.cadillac.com/learn. See your phone retailer for required phone accessories or charging adapters.
1. The vehicle must be On or Retained Accessory Power must be active.
2. Remove all objects from the charging pocket.
3. Place the smartphone face up in the pocket.
4. The battery charging symbol will display on the infotainment screen when charging.
See Instruments and Controls in your Owner's Manual.
VEHICLE PERSONALIZATION
Many vehicle features can be customized using the Settings menus on the Cadillac User Experience system. The Settings menus may include Time and Date, Language, Valet Mode, Radio, Vehicle, Bluetooth, Voice, Display, Rear Camera, Return to Factory Settings and others.
1. Touch Settings on the Home screen.
2. Touch the desired menu item.
3. Touch the desired feature and setting.
5. Touch < Back to exit each menu.
See Instruments and Controls in your Owner's Manual.
ONSTAR WITH 4G LTE AND WI-FI®
With OnStar 4G LTE and Wi-Fi®, up to 7 devices (smartphones, tab-lets and laptops) can be connected to high-speed internet through the vehicle’s built-in Wi-Fi hotspot.
To retrieve the SSID and password for the hotspot, go to Settings > Wi-Fi; or press the OnStar Voice Command button on the overhead console or rearview mirror, wait for the prompt, and then say “Wi-Fi
settings.” The information will be displayed on the screen.
For assistance, press the blue OnStar button or call 1-888-4-ONSTAR (1-888-466-7827).
Note: See onstar.com for a detailed instruction guide, vehicle availability, and system details and limitations.
See OnStar in your Owner's Manual.
Page 13 of 20
13
FRONT CLIMATE CONTROLS
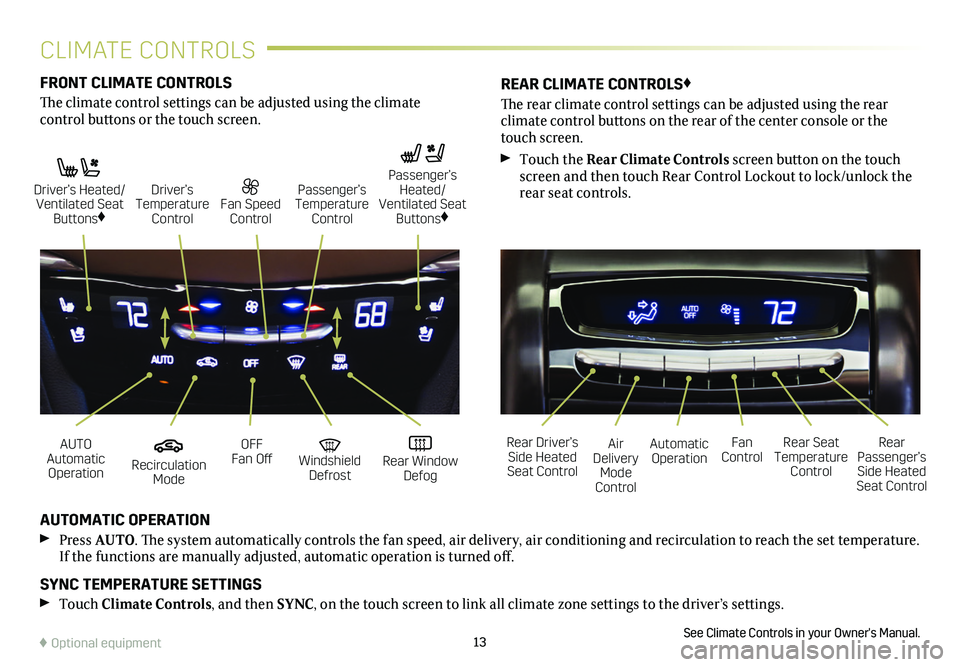
The climate control settings can be adjusted using the climate
control buttons or the touch screen.
AUTOMATIC OPERATION
Press AUTO. The system automatically controls the fan speed, air delivery, air conditioning and recirculation to reach the set temperature. If the functions are manually adjusted, automatic operation is turned off.
SYNC TEMPERATURE SETTINGS
Touch Climate Controls, and then SYNC, on the touch screen to link all climate zone settings to the driver’s settings.
See Climate Controls in your Owner's Manual.
REAR CLIMATE CONTROLS♦
The rear climate control settings can be adjusted using the rear
climate control buttons on the rear of the center console or the touch screen.
Touch the Rear Climate Controls screen button on the touch screen and then touch Rear Control Lockout to lock/unlock the rear seat controls.
Recirculation Mode
Automatic OperationAUTO Automatic Operation
Rear Driver’s Side Heated Seat Control
OFF Fan OffAir Delivery Mode Control
Windshield Defrost
Fan Control Rear Window Defog
Rear Seat Temperature Control
Rear Passenger’s Side Heated Seat Control
Driver’s Heated/ Ventilated Seat Buttons♦
Fan Speed Control
Passenger’s Temperature Control
Passenger’s Heated/ Ventilated Seat Buttons♦
Driver’s Temperature Control
♦ Optional equipment
CLIMATE CONTROLS
Page 17 of 20
17
DRIVER ASSISTANCE SYSTEMS
AUTOMATIC PARKING ASSIST
Front♦ and Rear Parking Assist – During low-speed park-ing maneuvers, the system provides “distance to closest object”
information on the Driver Information Center and the Safety Alert Seat pulses or a beep sounds (if selected). When an object is very close, the Safety Alert Seat pulses 5 times or beeps sound (if selected).
Rear Cross Traffic Alert♦ – When the vehicle is in Reverse, the system warns of traffic coming in either direction by displaying a red alert on the touch screen and the left or right side of the Safety Alert Seat pulses or beeps sound (if selected).
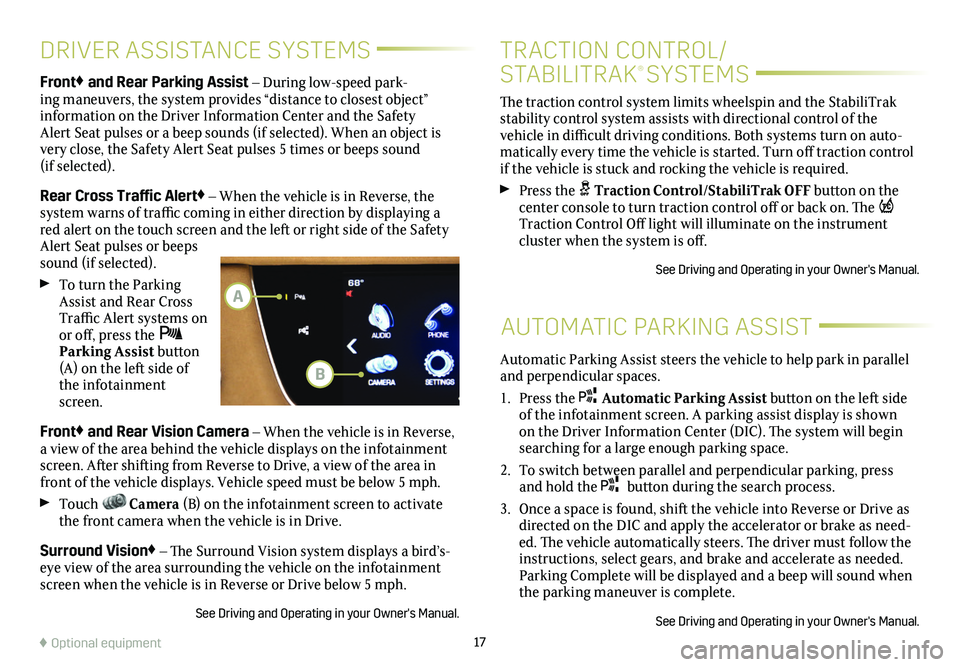
To turn the Parking Assist and Rear Cross Traffic Alert systems on or off, press the Parking Assist button (A) on the left side of the infotainment screen.
Front♦ and Rear Vision Camera – When the vehicle is in Reverse, a view of the area behind the vehicle displays on the infotainment screen. After shifting from Reverse to Drive, a view of the area in front of the vehicle displays. Vehicle speed must be below 5 mph.
Touch Camera (B) on the infotainment screen to activate the front camera when the vehicle is in Drive.
Surround Vision♦ – The Surround Vision system displays a bird’s-eye view of the area surrounding the vehicle on the infotainment screen when the vehicle is in Reverse or Drive below 5 mph.
See Driving and Operating in your Owner's Manual.
♦ Optional equipment
Automatic Parking Assist steers the vehicle to help park in parallel and perpendicular spaces.
1. Press the Automatic Parking Assist button on the left side of the infotainment screen. A parking assist
display is shown on the Driver Information Center (DIC). The system will begin searching for a large enough parking space.
2. To switch between parallel and perpendicular parking, press and hold the button during the search process.
3. Once a space is found, shift the vehicle into Reverse or Drive as directed on the DIC and apply the accelerator or brake as need-ed. The vehicle automatically steers. The driver must follow the instructions, select gears, and brake and accelerate as needed. Parking Complete will be displayed and a beep will sound when the parking maneuver is complete.
See Driving and Operating in your Owner's Manual.
B
A
The traction control system limits wheelspin and the StabiliTrak stability control system assists with directional control of the vehicle in difficult driving conditions. Both systems turn on auto-matically every time the vehicle is started. Turn off traction control if the vehicle is stuck and rocking the vehicle is required.
Press the Traction Control/StabiliTrak OFF button on the center console to turn traction control off or back on. The Traction Control Off light will illuminate on the instrument cluster when the system is off.
See Driving and Operating in your Owner's Manual.
TRACTION CONTROL/
STABILITRAK® SYSTEMS
Page 19 of 20
19
ELECTRIC PARKING BRAKE
TIRE PRESSURE MONITOR
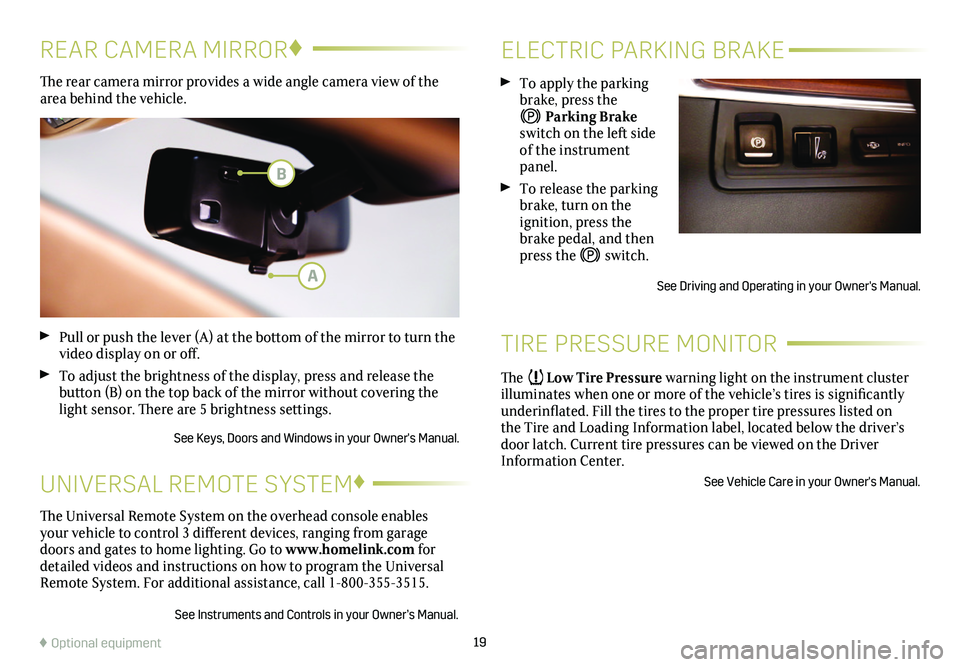
To apply the parking brake, press the
Parking Brake switch on the left side of the instrument panel.
To release the parking brake, turn on the
ignition, press the brake pedal, and then press the switch.
See Driving and Operating in your Owner's Manual.
The Low Tire Pressure warning light on the instrument cluster illuminates when one or more of the vehicle’s tires is significantly underinflated. Fill the tires to the proper tire pressures listed on the Tire and Loading Information label, located below the driver’s door latch. Current tire pressures can be viewed on the Driver Information Center.
See Vehicle Care in your Owner's Manual.
The rear camera mirror provides a wide angle camera view of the area behind the vehicle.
Pull or push the lever (A) at the bottom of the mirror to turn the video display on or off.
To adjust the brightness of the display, press and release the button (B) on the top back of the mirror without covering the light sensor. There are 5 brightness settings.
See Keys, Doors and Windows in your Owner's Manual.
REAR CAMERA MIRROR♦
♦ Optional equipment
The Universal Remote System on the overhead console enables your vehicle to control 3 different devices, ranging from garage doors and gates to home lighting. Go to www.homelink.com for detailed videos and instructions on how to program the Universal Remote System. For additional assistance, call 1-800-355-3515.
See Instruments and Controls in your Owner’s Manual.
UNIVERSAL REMOTE SYSTEM♦
A
B