lock CADILLAC XT5 2018 Owner's Manual
[x] Cancel search | Manufacturer: CADILLAC, Model Year: 2018, Model line: XT5, Model: CADILLAC XT5 2018Pages: 380, PDF Size: 6.21 MB
Page 307 of 380

Cadillac XT5 Owner Manual (GMNA-Localizing-U.S./Canada/Mexico-
11349110) - 2018 - CRC - 9/28/17
306 VEHICLE CARE
161 km (100 mi) of driving to
have the tire repaired or
replaced.
Using the Tire Sealant and
Compressor Kit without Sealant
to Inflate a Tire (Not Punctured)
The kit includes:
1. Sealant Canister Inlet Valve
2. Sealant/Air Hose
3. Base of Sealant Canister
4. Tire Sealant Canister
5. On/Off Button
6. Slot on Top of Compressor
7. Pressure Deflation Button8. Pressure Gauge
9. Power Plug
10. Air Only Hose
If a tire goes flat, avoid further tire
and wheel damage by driving slowly
to a level place. Turn on the hazard
warning flashers. See
Hazard Warning
Flashers 0163.
See If a Tire Goes Flat 0300 for other
important safety warnings.
1. Remove the compressor from its storage location. See Storing the
Tire Sealant and Compressor Kit
0 307. 2. Remove the air only hose (10)
and the power plug (9) from the
bottom of the compressor.
3. Place the compressor on the ground near the flat tire.
Make sure the tire valve stem is
positioned close to the ground so
the hose will reach it.
4. Remove the valve stem cap from the flat tire by turning it
counterclockwise.
5. Attach the air only hose (10) to the tire valve stem by turning it
clockwise until tight.
6. Plug the power plug (9) into the accessory power outlet in the
vehicle. Unplug all items from
other accessory power outlets.
See Power Outlets 0119.
If the vehicle has an accessory
power outlet, do not use the
cigarette lighter.
If the vehicle only has a cigarette
lighter, use the cigarette lighter.
Do not pinch the power plug
cord in the door or window.
Page 308 of 380
Cadillac XT5 Owner Manual (GMNA-Localizing-U.S./Canada/Mexico-
11349110) - 2018 - CRC - 9/28/17
VEHICLE CARE 307
7. Start the vehicle. The vehiclemust be running while using the
air compressor.
8. Press the on/off button (5) to turn the tire sealant and
compressor kit on.
The compressor will inflate the
tire with air only.
9. Inflate the tire to the recommended inflation pressure
using the pressure gauge (8). The
recommended inflation pressure
can be found on the Tire and
Loading Information label. See
Tire Pressure 0286.
The pressure gauge (8) may read
higher than the actual tire
pressure while the compressor is
on. Turn the compressor off to
get an accurate pressure reading.
The compressor may be turned
on/off until the correct pressure
is reached.Caution
If the recommended pressure
cannot be reached after
approximately 25 minutes, the
vehicle should not be driven farther.
The tire is too severely damaged
and the tire sealant and compressor
kit cannot inflate the tire. Remove
the power plug from the accessory
power outlet and unscrew the
inflating hose from the tire valve.
See Roadside Service 0347.
10. Press the on/off button (5) to turn the tire sealant and
compressor kit off.
Be careful while handling the
compressor as it could be warm
after usage.
11. Unplug the power plug (9) from the accessory power outlet in the
vehicle.
12. Turn the air only hose (10) counterclockwise to remove it
from the tire valve stem.
13. Replace the tire valve stem cap. 14. Return the air only hose (10) and
power plug (9) back to their
original storage location.
15. Return the equipment to its original storage location in the
vehicle.
The tire sealant and compressor kit
has accessory adapters located in a
compartment on the bottom of its
housing that can be used to inflate air
mattresses, balls, etc.
Storing the Tire Sealant
and Compressor Kit
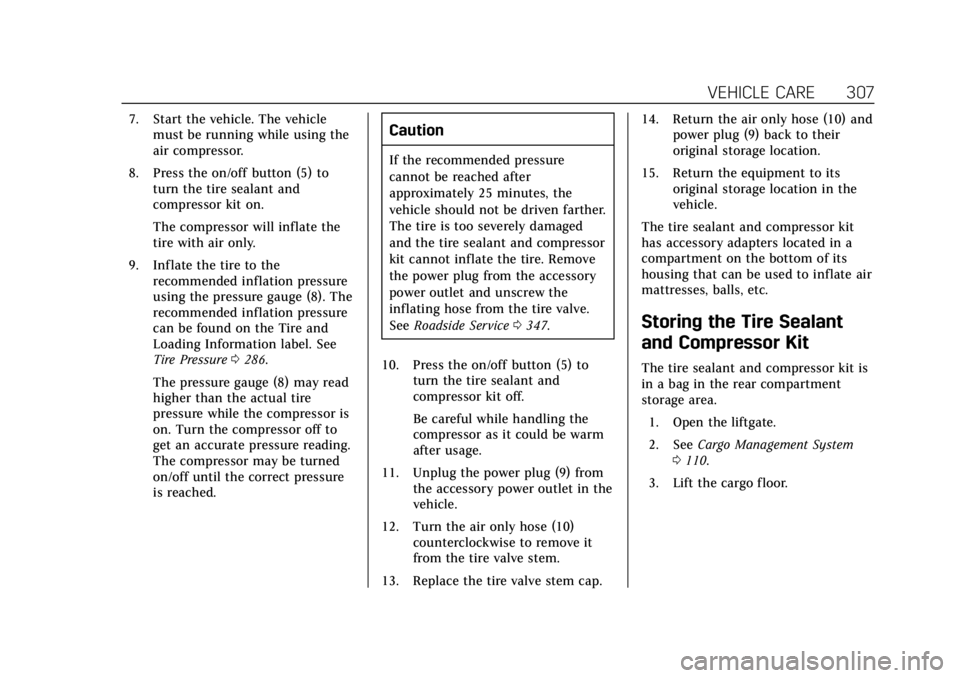
The tire sealant and compressor kit is
in a bag in the rear compartment
storage area. 1. Open the liftgate.
2. See Cargo Management System
0 110.
3. Lift the cargo floor.
Page 309 of 380

Cadillac XT5 Owner Manual (GMNA-Localizing-U.S./Canada/Mexico-
11349110) - 2018 - CRC - 9/28/17
308 VEHICLE CARE
4. Turn the retainer nutcounterclockwise to remove the
tire sealant and compressor
kit bag.
5. Remove the tire sealant and compressor kit from the bag.
To store the tire sealant and
compressor kit, reverse the steps.
Tire Changing
Removing the Spare Tire and
Tools
To access the spare tire and tools: 1. Open the liftgate. See Liftgate
0 41.
2. See Cargo Management System
0 110.
3. Pull up on the handle to lift the
load floor.
4. Turn the wing nut (4)counterclockwise to remove the
jack (1), wheel wrench (2), and
strap (3). Place the tool container
near the tire being changed.
Page 310 of 380
Cadillac XT5 Owner Manual (GMNA-Localizing-U.S./Canada/Mexico-
11349110) - 2018 - CRC - 9/28/17
VEHICLE CARE 309
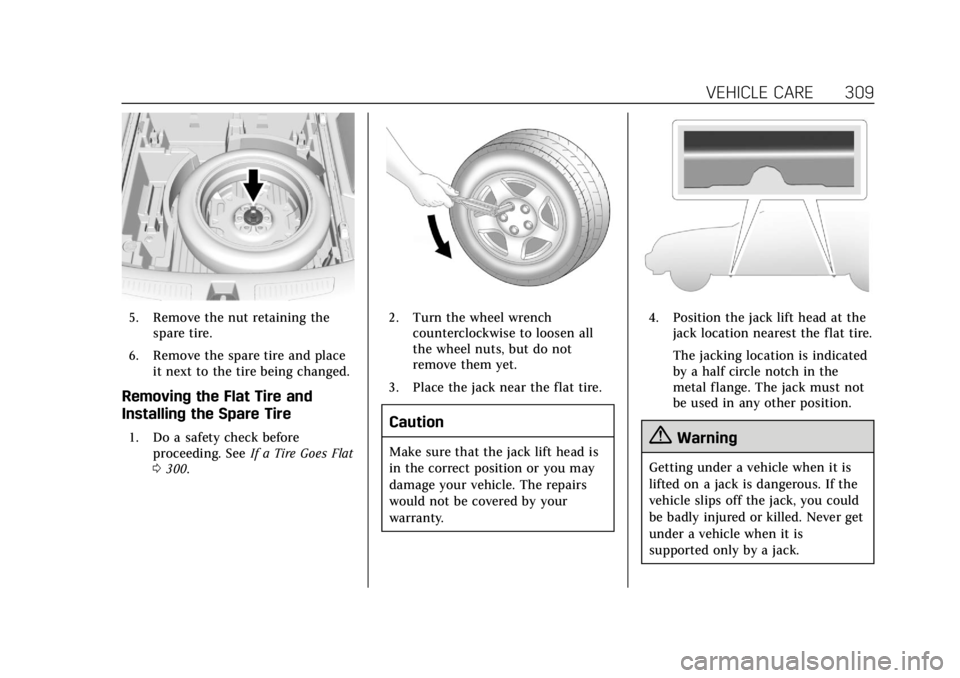
5. Remove the nut retaining thespare tire.
6. Remove the spare tire and place it next to the tire being changed.
Removing the Flat Tire and
Installing the Spare Tire
1. Do a safety check beforeproceeding. See If a Tire Goes Flat
0 300.
2. Turn the wheel wrench
counterclockwise to loosen all
the wheel nuts, but do not
remove them yet.
3. Place the jack near the flat tire.
Caution
Make sure that the jack lift head is
in the correct position or you may
damage your vehicle. The repairs
would not be covered by your
warranty.
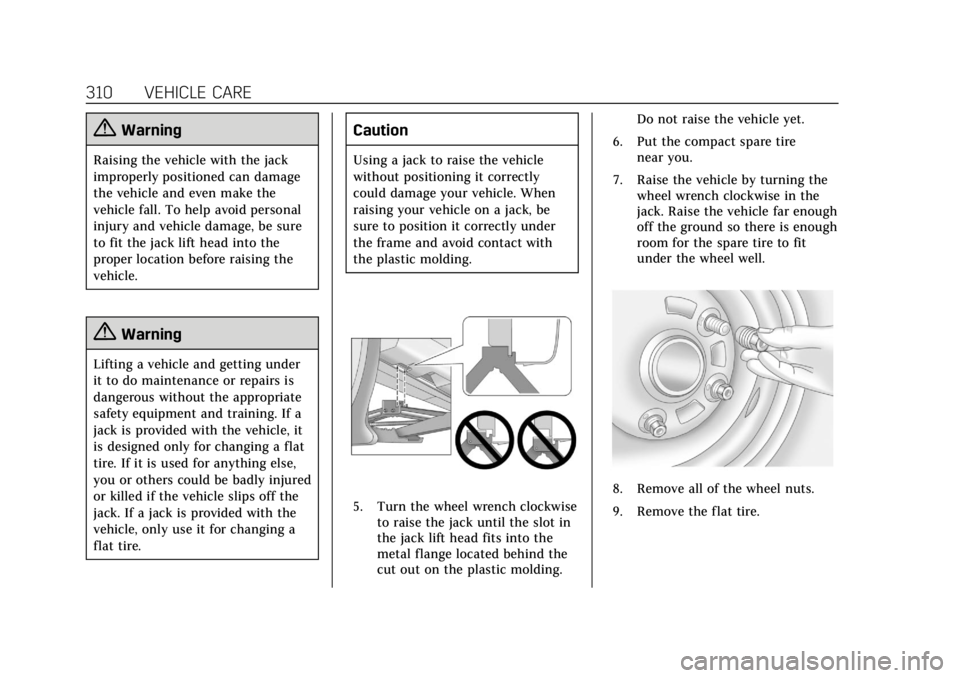
4. Position the jack lift head at the jack location nearest the flat tire.
The jacking location is indicated
by a half circle notch in the
metal flange. The jack must not
be used in any other position.
{Warning
Getting under a vehicle when it is
lifted on a jack is dangerous. If the
vehicle slips off the jack, you could
be badly injured or killed. Never get
under a vehicle when it is
supported only by a jack.
Page 311 of 380
Cadillac XT5 Owner Manual (GMNA-Localizing-U.S./Canada/Mexico-
11349110) - 2018 - CRC - 9/28/17
310 VEHICLE CARE
{Warning
Raising the vehicle with the jack
improperly positioned can damage
the vehicle and even make the
vehicle fall. To help avoid personal
injury and vehicle damage, be sure
to fit the jack lift head into the
proper location before raising the
vehicle.
{Warning
Lifting a vehicle and getting under
it to do maintenance or repairs is
dangerous without the appropriate
safety equipment and training. If a
jack is provided with the vehicle, it
is designed only for changing a flat
tire. If it is used for anything else,
you or others could be badly injured
or killed if the vehicle slips off the
jack. If a jack is provided with the
vehicle, only use it for changing a
flat tire.
Caution
Using a jack to raise the vehicle
without positioning it correctly
could damage your vehicle. When
raising your vehicle on a jack, be
sure to position it correctly under
the frame and avoid contact with
the plastic molding.
5. Turn the wheel wrench clockwiseto raise the jack until the slot in
the jack lift head fits into the
metal flange located behind the
cut out on the plastic molding. Do not raise the vehicle yet.
6. Put the compact spare tire near you.
7. Raise the vehicle by turning the wheel wrench clockwise in the
jack. Raise the vehicle far enough
off the ground so there is enough
room for the spare tire to fit
under the wheel well.
8. Remove all of the wheel nuts.
9. Remove the flat tire.
Page 312 of 380
Cadillac XT5 Owner Manual (GMNA-Localizing-U.S./Canada/Mexico-
11349110) - 2018 - CRC - 9/28/17
VEHICLE CARE 311
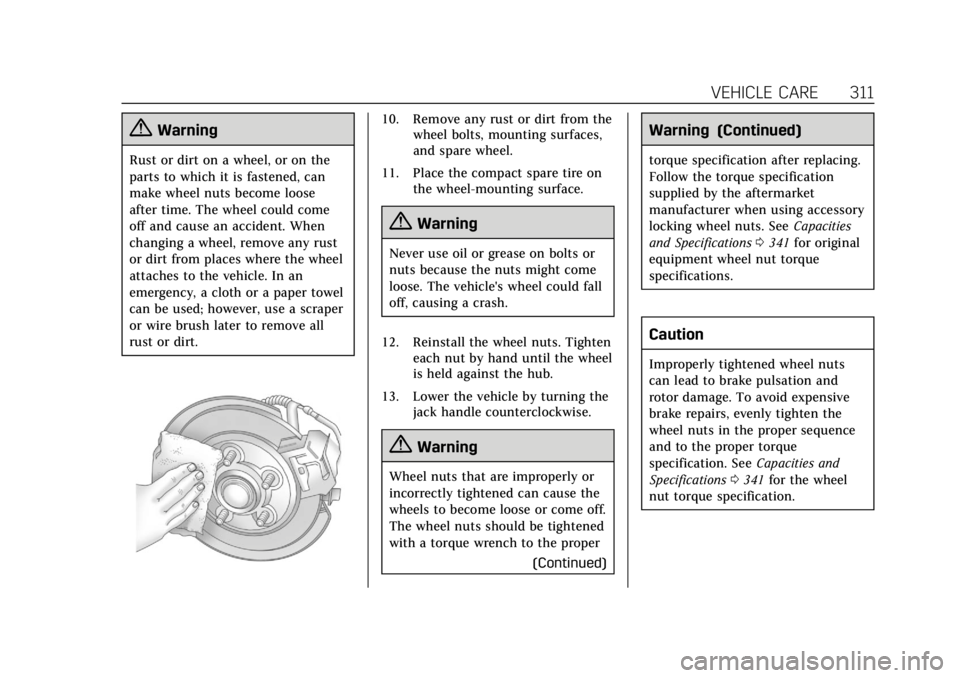
{Warning
Rust or dirt on a wheel, or on the
parts to which it is fastened, can
make wheel nuts become loose
after time. The wheel could come
off and cause an accident. When
changing a wheel, remove any rust
or dirt from places where the wheel
attaches to the vehicle. In an
emergency, a cloth or a paper towel
can be used; however, use a scraper
or wire brush later to remove all
rust or dirt.
10. Remove any rust or dirt from thewheel bolts, mounting surfaces,
and spare wheel.
11. Place the compact spare tire on the wheel-mounting surface.
{Warning
Never use oil or grease on bolts or
nuts because the nuts might come
loose. The vehicle's wheel could fall
off, causing a crash.
12. Reinstall the wheel nuts. Tighten each nut by hand until the wheel
is held against the hub.
13. Lower the vehicle by turning the jack handle counterclockwise.
{Warning
Wheel nuts that are improperly or
incorrectly tightened can cause the
wheels to become loose or come off.
The wheel nuts should be tightened
with a torque wrench to the proper
(Continued)
Warning (Continued)
torque specification after replacing.
Follow the torque specification
supplied by the aftermarket
manufacturer when using accessory
locking wheel nuts. See Capacities
and Specifications 0341 for original
equipment wheel nut torque
specifications.
Caution
Improperly tightened wheel nuts
can lead to brake pulsation and
rotor damage. To avoid expensive
brake repairs, evenly tighten the
wheel nuts in the proper sequence
and to the proper torque
specification. See Capacities and
Specifications 0341 for the wheel
nut torque specification.
Page 320 of 380

Cadillac XT5 Owner Manual (GMNA-Localizing-U.S./Canada/Mexico-
11349110) - 2018 - CRC - 9/28/17
VEHICLE CARE 319
Caution
Towing the vehicle from the rear
could damage it. Also, repairs would
not be covered by the vehicle
warranty. Never have the vehicle
towed from the rear.
Appearance Care
Exterior Care
Locks
Locks are lubricated at the factory.
Use a de-icing agent only when
absolutely necessary, and have the
locks greased after using. See
Recommended Fluids and Lubricants
0337.
Washing the Vehicle
To preserve the vehicle's finish, wash
it often and out of direct sunlight.
Caution
Do not use petroleum-based, acidic,
or abrasive cleaning agents as they
can damage the vehicle's paint,
metal, or plastic parts. If damage
occurs, it would not be covered by
the vehicle warranty. Approved
cleaning products can be obtained
from your dealer. Follow all
manufacturer directions regarding
(Continued)
Caution (Continued)
correct product usage, necessary
safety precautions, and appropriate
disposal of any vehicle care
product.
Caution
Avoid using high-pressure washes
closer than 30 cm (12 in) to the
surface of the vehicle. Use of power
washers exceeding 8,274 kPa
(1,200 psi) can result in damage or
removal of paint and decals.
Caution
Do not power wash any component
under the hood that has this
e
symbol.
This could cause damage that
would not be covered by the vehicle
warranty.
Page 324 of 380
Cadillac XT5 Owner Manual (GMNA-Localizing-U.S./Canada/Mexico-
11349110) - 2018 - CRC - 9/28/17
VEHICLE CARE 323
pads for wear and rotors for surface
condition. Inspect drum brake linings/
shoes for wear or cracks. Inspect all
other brake parts.
Steering, Suspension, and
Chassis Components
Visually inspect steering, suspension,
and chassis components for damaged,
loose, or missing parts or signs of
wear at least once a year.
Inspect power steering for proper
attachment, connections, binding,
leaks, cracks, chafing, etc.
Visually check constant velocity joint
boots and axle seals for leaks.
Body Component Lubrication
Lubricate all key lock cylinders, hood
hinges, liftgate hinges, and the steel
fuel door hinges, unless the
components are plastic. Applying
silicone grease on weatherstrips with a
clean cloth will make them last
longer, seal better, and not stick or
squeak.
Underbody Maintenance
At least twice a year, spring and fall,
use plain water to flush any corrosive
materials from the underbody. Take
care to thoroughly clean any areas
where mud and other debris can
collect.
Do not directly power wash the
transfer case and/or front/rear axle
output seals. High pressure water can
overcome the seals and contaminate
the fluid. Contaminated fluid will
decrease the life of the transfer case
and/or axles and should be replaced.
Sheet Metal Damage
If the vehicle is damaged and requires
sheet metal repair or replacement,
make sure the body repair shop
applies anti-corrosion material to
parts repaired or replaced to restore
corrosion protection.
Original manufacturer replacement
parts will provide the corrosion
protection while maintaining the
vehicle warranty.
Finish Damage
Quickly repair minor chips and
scratches with touch-up materials
available from your dealer to avoid
corrosion. Larger areas of finish
damage can be corrected in your
dealer's body and paint shop.
Chemical Paint Spotting
Airborne pollutants can fall upon and
attack painted vehicle surfaces
causing blotchy, ring-shaped
discolorations, and small, irregular
dark spots etched into the paint
surface. See“Finish Care”previously in
this section.
Interior Care
To prevent dirt particle abrasions,
regularly clean the vehicle's interior.
Immediately remove any soils.
Newspapers or dark garments can
transfer color to the vehicle’s interior.
Use a soft bristle brush to remove
dust from knobs and crevices on the
instrument cluster. Using a mild soap
solution, immediately remove hand
Page 328 of 380
Cadillac XT5 Owner Manual (GMNA-Localizing-U.S./Canada/Mexico-
11349110) - 2018 - CRC - 9/28/17
VEHICLE CARE 327
.Do not use a floor mat if the
vehicle is not equipped with a
floor mat retainer on the driver
side floor.
. Use the floor mat with the correct
side up. Do not turn it over.
. Do not place anything on top of
the driver side floor mat.
. Use only a single floor mat on the
driver side.
. Do not place one floor mat on top
of another.
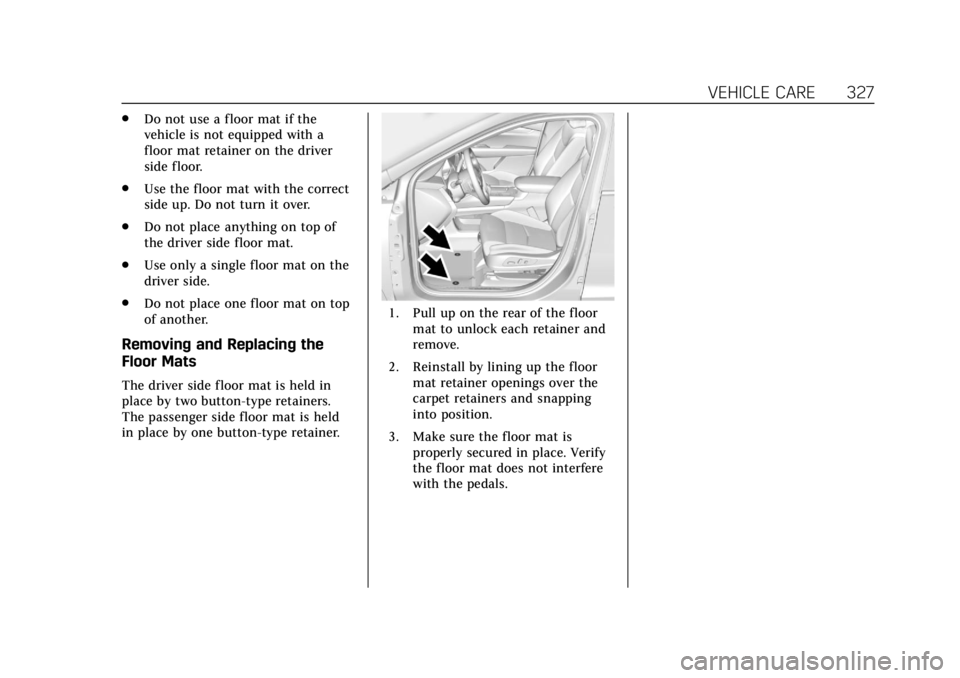
Removing and Replacing the
Floor Mats
The driver side floor mat is held in
place by two button-type retainers.
The passenger side floor mat is held
in place by one button-type retainer.
1. Pull up on the rear of the floor
mat to unlock each retainer and
remove.
2. Reinstall by lining up the floor mat retainer openings over the
carpet retainers and snapping
into position.
3. Make sure the floor mat is properly secured in place. Verify
the floor mat does not interfere
with the pedals.
Page 348 of 380
Cadillac XT5 Owner Manual (GMNA-Localizing-U.S./Canada/Mexico-
11349110) - 2018 - CRC - 9/28/17
CUSTOMER INFORMATION 347
General Motors of Canada also has a
Mobility program. See www.gm.ca or
call 1-800-GM-DRIVE (800-463-7483)
for details. TTY users call
1-800-263-3830.
Roadside Service
U.S.: 1-800-224-1400.
Canada: 1-800-882-1112.
Text Telephone (TTY) Users (U.S.
Only): 1-888-889-2438.
Service is available 24 hours a day,
365 days a year.
Calling for Service
When calling Roadside Service, have
the following information ready:
.Your name, home address, and
home telephone number
. Telephone number of your
location
. Location of the vehicle
. Model, year, color, and license
plate number of the vehicle .
Odometer reading, Vehicle
Identification Number (VIN), and
delivery date of the vehicle
. Description of the problem
Coverage
Services are provided for the duration
of the vehicle’s powertrain warranty.
In the U.S., anyone driving the vehicle
is covered. In Canada, a person driving
the vehicle without permission from
the owner is not covered.
Roadside Service is not a part of the
New Vehicle Limited Warranty.
General Motors North America and
Cadillac reserve the right to make any
changes or discontinue the Roadside
Service program at any time without
notification.
General Motors North America and
Cadillac reserve the right to limit
services or payment to an owner or
driver if they decide the claims are
made too often, or the same type of
claim is made many times.
Cadillac Owner Privileges ™
.
Emergency Fuel Delivery:
Delivery of enough fuel for the
vehicle to get to the nearest
service station.
. Lock-Out Service: Service to
unlock the vehicle if you are
locked out. A remote unlock may
be available if you have OnStar.
For security reasons, the driver
must present identification before
this service is given.
. Emergency Tow from a Public
Road or Highway: Tow to the
nearest Cadillac dealer for
warranty service, or if the vehicle
was in a crash and cannot be
driven. Assistance is not given
when the vehicle is stuck in the
sand, mud, or snow.
. Flat Tire Change: Service to
change a flat tire with a spare tire.
The spare tire, if equipped, must
be in good condition and properly
inflated. It is your responsibility
for the repair or replacement of
the tire if it is not covered by the
warranty.