buttons CADILLAC XT5 2018 Owner's Manual
[x] Cancel search | Manufacturer: CADILLAC, Model Year: 2018, Model line: XT5, Model: CADILLAC XT5 2018Pages: 380, PDF Size: 6.21 MB
Page 12 of 380
Cadillac XT5 Owner Manual (GMNA-Localizing-U.S./Canada/Mexico-
11349110) - 2018 - CRC - 9/28/17
IN BRIEF 11
To adjust the seat:
.Move the seat forward or rearward
by sliding the control forward or
rearward.
. Raise or lower the front part of the
seat cushion by moving the front
of the control up or down.
. Raise or lower the entire seat by
moving the rear of the control up
or down.
To adjust the seatback, see Reclining
Seatbacks 061.
To adjust the lumbar support, see
Lumbar Adjustment 061.
Some vehicles are equipped with a
feature that activates a vibration in
the driver seat to help the driver avoid
crashes. See Driver Assistance Systems
0 219.Memory Features
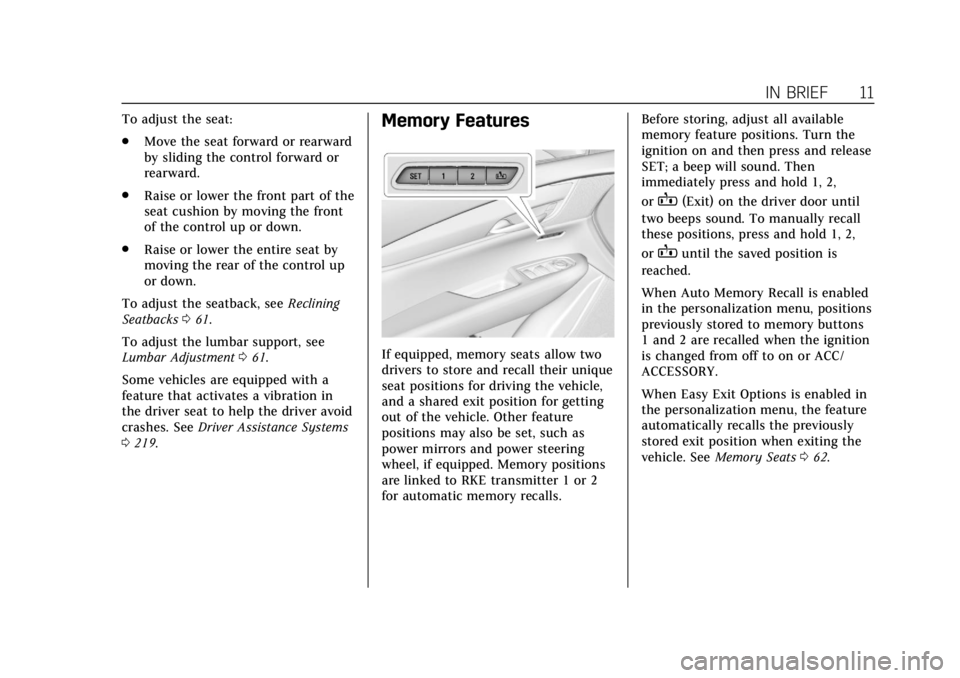
If equipped, memory seats allow two
drivers to store and recall their unique
seat positions for driving the vehicle,
and a shared exit position for getting
out of the vehicle. Other feature
positions may also be set, such as
power mirrors and power steering
wheel, if equipped. Memory positions
are linked to RKE transmitter 1 or 2
for automatic memory recalls. Before storing, adjust all available
memory feature positions. Turn the
ignition on and then press and release
SET; a beep will sound. Then
immediately press and hold 1, 2,
or
B(Exit) on the driver door until
two beeps sound. To manually recall
these positions, press and hold 1, 2,
or
Buntil the saved position is
reached.
When Auto Memory Recall is enabled
in the personalization menu, positions
previously stored to memory buttons
1 and 2 are recalled when the ignition
is changed from off to on or ACC/
ACCESSORY.
When Easy Exit Options is enabled in
the personalization menu, the feature
automatically recalls the previously
stored exit position when exiting the
vehicle. See Memory Seats 062.
Page 13 of 380
Cadillac XT5 Owner Manual (GMNA-Localizing-U.S./Canada/Mexico-
11349110) - 2018 - CRC - 9/28/17
12 IN BRIEF
Second Row Seats
Rear Seat Adjustment
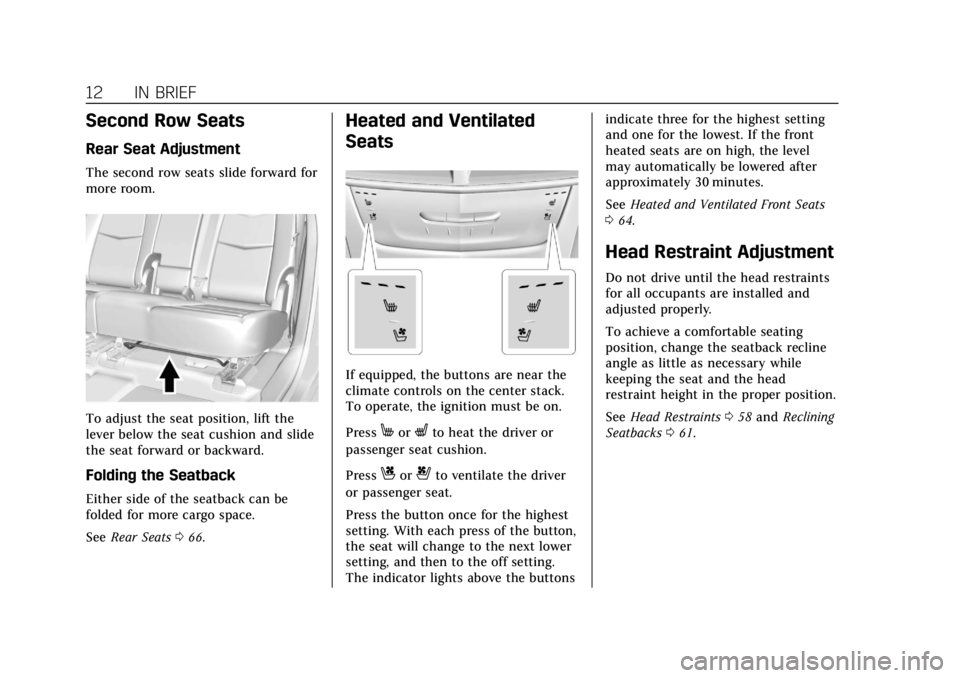
The second row seats slide forward for
more room.
To adjust the seat position, lift the
lever below the seat cushion and slide
the seat forward or backward.
Folding the Seatback
Either side of the seatback can be
folded for more cargo space.
SeeRear Seats 066.
Heated and Ventilated
Seats
If equipped, the buttons are near the
climate controls on the center stack.
To operate, the ignition must be on.
Press
MorLto heat the driver or
passenger seat cushion.
Press
Cor{to ventilate the driver
or passenger seat.
Press the button once for the highest
setting. With each press of the button,
the seat will change to the next lower
setting, and then to the off setting.
The indicator lights above the buttons indicate three for the highest setting
and one for the lowest. If the front
heated seats are on high, the level
may automatically be lowered after
approximately 30 minutes.
See
Heated and Ventilated Front Seats
0 64.
Head Restraint Adjustment
Do not drive until the head restraints
for all occupants are installed and
adjusted properly.
To achieve a comfortable seating
position, change the seatback recline
angle as little as necessary while
keeping the seat and the head
restraint height in the proper position.
See Head Restraints 058 and Reclining
Seatbacks 061.
Page 15 of 380
Cadillac XT5 Owner Manual (GMNA-Localizing-U.S./Canada/Mexico-
11349110) - 2018 - CRC - 9/28/17
14 IN BRIEF
Manual Rearview Mirror
If equipped, push the tab forward for
daytime use and pull it rearward for
nighttime use to avoid glare of the
headlamps from behind.
Automatic Dimming Rearview Mirror
If equipped, automatic dimming
reduces the glare of headlamps from
behind. The dimming feature comes
on when the vehicle is started.
Rear Camera Mirror
If equipped, this automatic dimming
rearview mirror provides a wide angle
camera view of the area behind the
vehicle. Adjust the mirror with the tab
pushed forward so that the display is
off. SeeRear Camera Mirror 051.Steering Wheel Adjustment
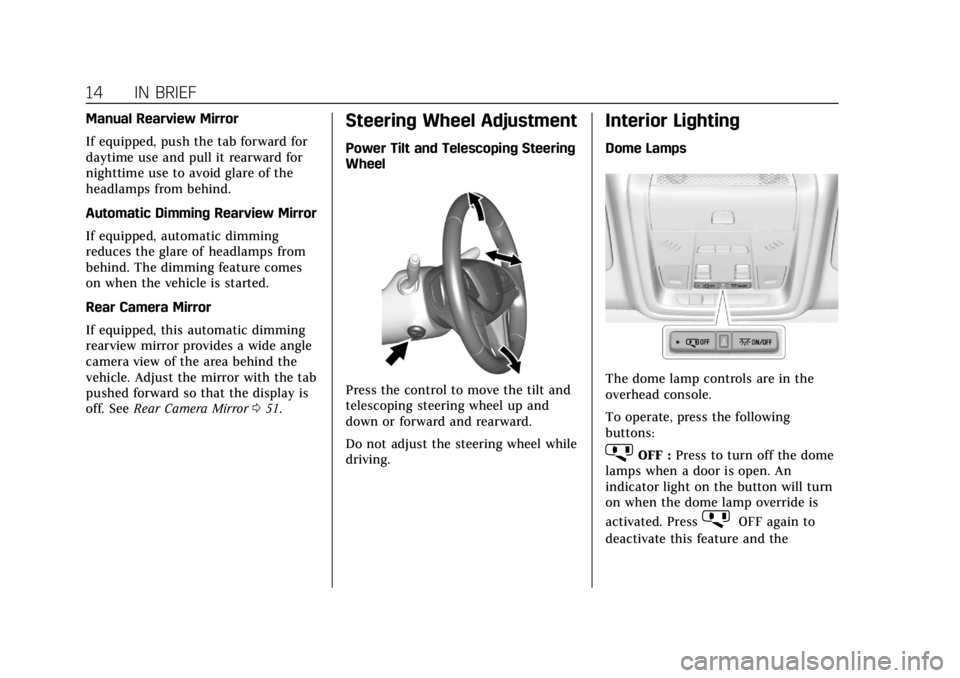
Power Tilt and Telescoping Steering
Wheel
Press the control to move the tilt and
telescoping steering wheel up and
down or forward and rearward.
Do not adjust the steering wheel while
driving.
Interior Lighting
Dome Lamps
The dome lamp controls are in the
overhead console.
To operate, press the following
buttons:
jOFF : Press to turn off the dome
lamps when a door is open. An
indicator light on the button will turn
on when the dome lamp override is
activated. Press
jOFF again to
deactivate this feature and the
Page 18 of 380
Cadillac XT5 Owner Manual (GMNA-Localizing-U.S./Canada/Mexico-
11349110) - 2018 - CRC - 9/28/17
IN BRIEF 17
INT :If equipped with Intermittent
wipers only, move the windshield
wiper lever to INT. Turn the band up
for more frequent wipes or down for
less frequent wipes.
OFF : Use to turn the wipers off.
1X : For a single wipe, briefly move
the lever down. For several wipes, hold
the lever down.
f: Pull the lever toward you to
spray windshield washer fluid and
activate the wipers.
See Windshield Wiper/Washer 0114
and Rear Window Wiper/Washer 0117.
Climate Controls
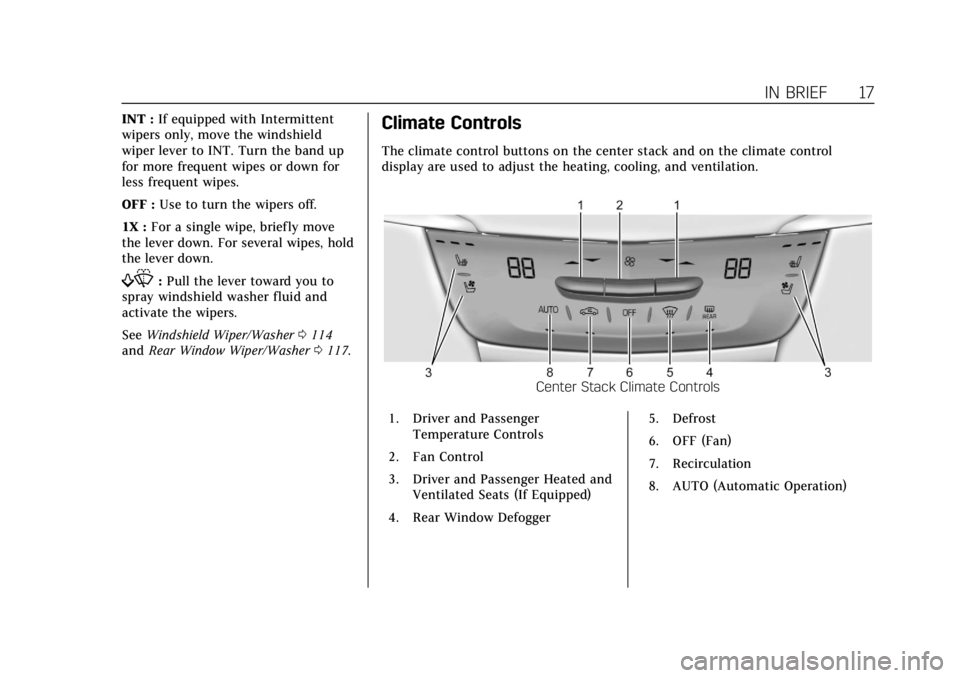
The climate control buttons on the center stack and on the climate control
display are used to adjust the heating, cooling, and ventilation.
Center Stack Climate Controls
1. Driver and Passenger Temperature Controls
2. Fan Control
3. Driver and Passenger Heated and Ventilated Seats (If Equipped)
4. Rear Window Defogger 5. Defrost
6. OFF (Fan)
7. Recirculation
8. AUTO (Automatic Operation)
Page 66 of 380
Cadillac XT5 Owner Manual (GMNA-Localizing-U.S./Canada/Mexico-
11349110) - 2018 - CRC - 10/2/17
SEATS AND RESTRAINTS 65
Warning (Continued)
may cause the seat heater to
overheat. An overheated seat heater
may cause a burn or may damage
the seat.
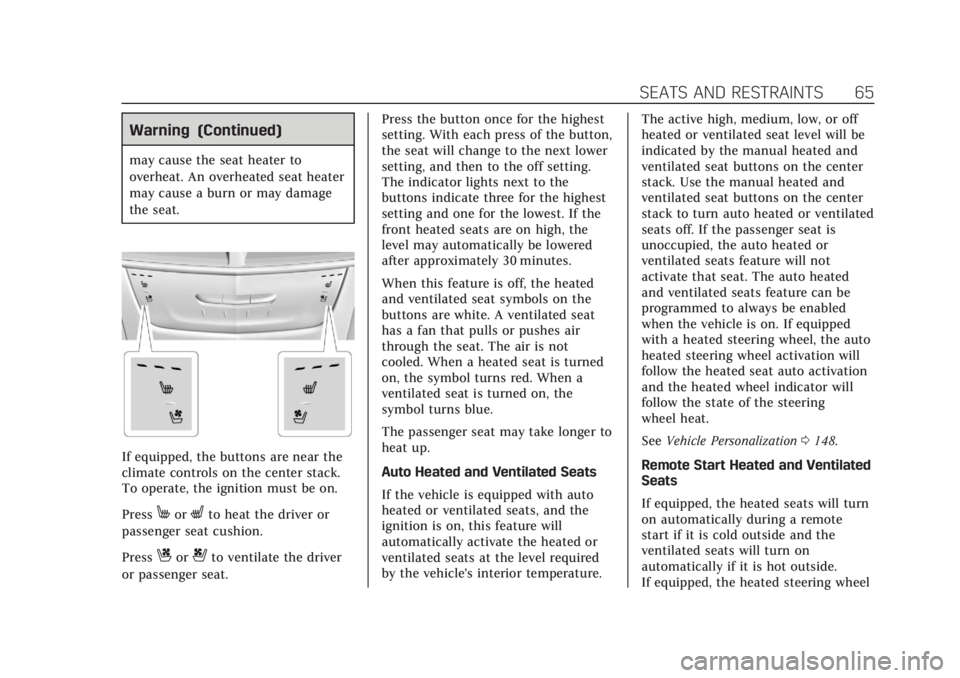
If equipped, the buttons are near the
climate controls on the center stack.
To operate, the ignition must be on.
Press
MorLto heat the driver or
passenger seat cushion.
Press
Cor{to ventilate the driver
or passenger seat. Press the button once for the highest
setting. With each press of the button,
the seat will change to the next lower
setting, and then to the off setting.
The indicator lights next to the
buttons indicate three for the highest
setting and one for the lowest. If the
front heated seats are on high, the
level may automatically be lowered
after approximately 30 minutes.
When this feature is off, the heated
and ventilated seat symbols on the
buttons are white. A ventilated seat
has a fan that pulls or pushes air
through the seat. The air is not
cooled. When a heated seat is turned
on, the symbol turns red. When a
ventilated seat is turned on, the
symbol turns blue.
The passenger seat may take longer to
heat up.
Auto Heated and Ventilated Seats
If the vehicle is equipped with auto
heated or ventilated seats, and the
ignition is on, this feature will
automatically activate the heated or
ventilated seats at the level required
by the vehicle's interior temperature.
The active high, medium, low, or off
heated or ventilated seat level will be
indicated by the manual heated and
ventilated seat buttons on the center
stack. Use the manual heated and
ventilated seat buttons on the center
stack to turn auto heated or ventilated
seats off. If the passenger seat is
unoccupied, the auto heated or
ventilated seats feature will not
activate that seat. The auto heated
and ventilated seats feature can be
programmed to always be enabled
when the vehicle is on. If equipped
with a heated steering wheel, the auto
heated steering wheel activation will
follow the heated seat auto activation
and the heated wheel indicator will
follow the state of the steering
wheel heat.
See
Vehicle Personalization 0148.
Remote Start Heated and Ventilated
Seats
If equipped, the heated seats will turn
on automatically during a remote
start if it is cold outside and the
ventilated seats will turn on
automatically if it is hot outside.
If equipped, the heated steering wheel
Page 70 of 380
Cadillac XT5 Owner Manual (GMNA-Localizing-U.S./Canada/Mexico-
11349110) - 2018 - CRC - 10/2/17
SEATS AND RESTRAINTS 69
Heated Rear Seats
{Warning
If temperature change or pain to
the skin cannot be felt, the seat
heater may cause burns. See the
Warning underHeated and
Ventilated Front Seats 064.
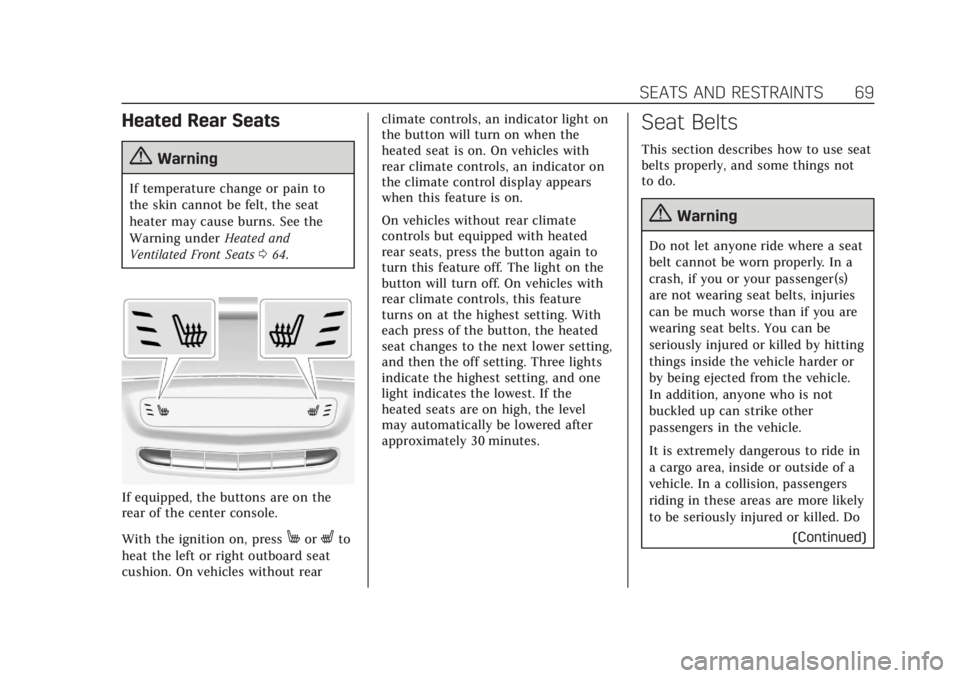
If equipped, the buttons are on the
rear of the center console.
With the ignition on, press
MorLto
heat the left or right outboard seat
cushion. On vehicles without rear climate controls, an indicator light on
the button will turn on when the
heated seat is on. On vehicles with
rear climate controls, an indicator on
the climate control display appears
when this feature is on.
On vehicles without rear climate
controls but equipped with heated
rear seats, press the button again to
turn this feature off. The light on the
button will turn off. On vehicles with
rear climate controls, this feature
turns on at the highest setting. With
each press of the button, the heated
seat changes to the next lower setting,
and then the off setting. Three lights
indicate the highest setting, and one
light indicates the lowest. If the
heated seats are on high, the level
may automatically be lowered after
approximately 30 minutes.
Seat Belts
This section describes how to use seat
belts properly, and some things not
to do.
{Warning
Do not let anyone ride where a seat
belt cannot be worn properly. In a
crash, if you or your passenger(s)
are not wearing seat belts, injuries
can be much worse than if you are
wearing seat belts. You can be
seriously injured or killed by hitting
things inside the vehicle harder or
by being ejected from the vehicle.
In addition, anyone who is not
buckled up can strike other
passengers in the vehicle.
It is extremely dangerous to ride in
a cargo area, inside or outside of a
vehicle. In a collision, passengers
riding in these areas are more likely
to be seriously injured or killed. Do
(Continued)
Page 112 of 380
Cadillac XT5 Owner Manual (GMNA-Localizing-U.S./Canada/Mexico-
11349110) - 2018 - CRC - 9/28/17
STORAGE 111
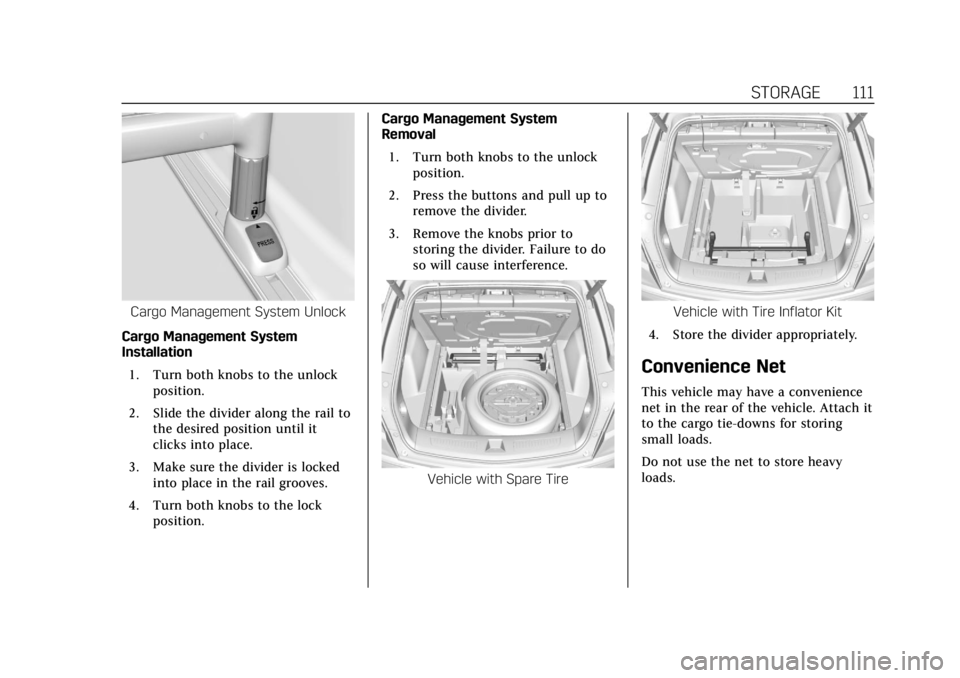
Cargo Management System Unlock
Cargo Management System
Installation 1. Turn both knobs to the unlock position.
2. Slide the divider along the rail to the desired position until it
clicks into place.
3. Make sure the divider is locked into place in the rail grooves.
4. Turn both knobs to the lock position. Cargo Management System
Removal
1. Turn both knobs to the unlock position.
2. Press the buttons and pull up to remove the divider.
3. Remove the knobs prior to storing the divider. Failure to do
so will cause interference.
Vehicle with Spare Tire
Vehicle with Tire Inflator Kit
4. Store the divider appropriately.
Convenience Net
This vehicle may have a convenience
net in the rear of the vehicle. Attach it
to the cargo tie-downs for storing
small loads.
Do not use the net to store heavy
loads.
Page 157 of 380
Cadillac XT5 Owner Manual (GMNA-Localizing-U.S./Canada/Mexico-
11349110) - 2018 - CRC - 9/28/17
156 INSTRUMENTS AND CONTROLS
Software Information
Touch to view or update the version
of the infotainment system software.
Wi-Fi
Select and the following may display:
.Wi-Fi
. Manage Wi-Fi Networks
Wi-Fi
This feature allows Wi-Fi networks to
be turned off or on.
Select Off or On.
Manage Wi-Fi Networks
Select to manage Wi-Fi networks.
Wi-Fi must be on for this feature to be
accessed.
Universal Remote
System
See Radio Frequency Statement 0353.
Universal Remote System
Programming
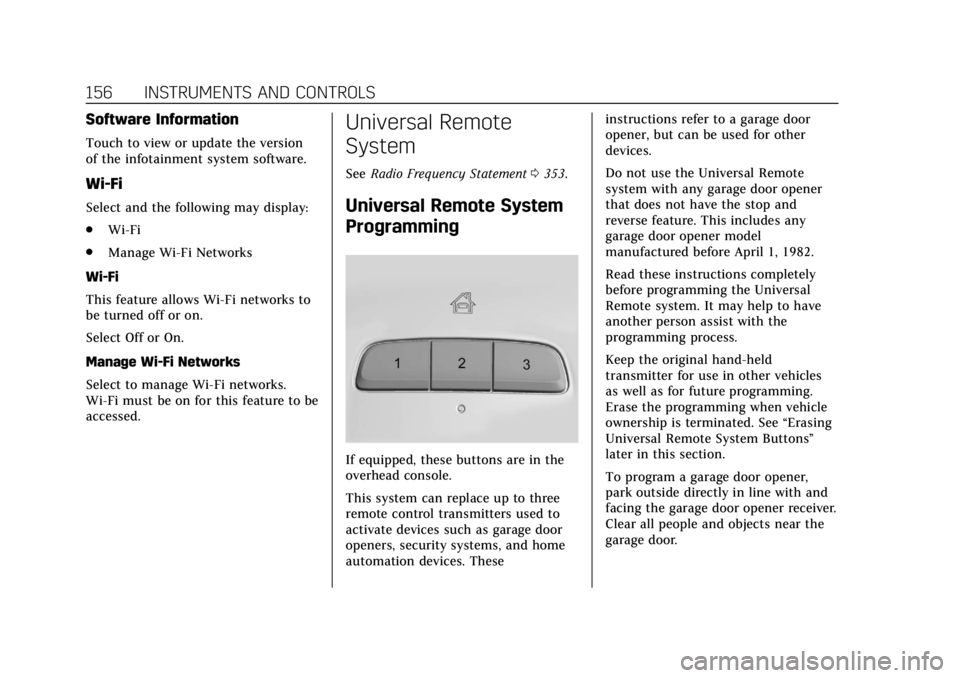
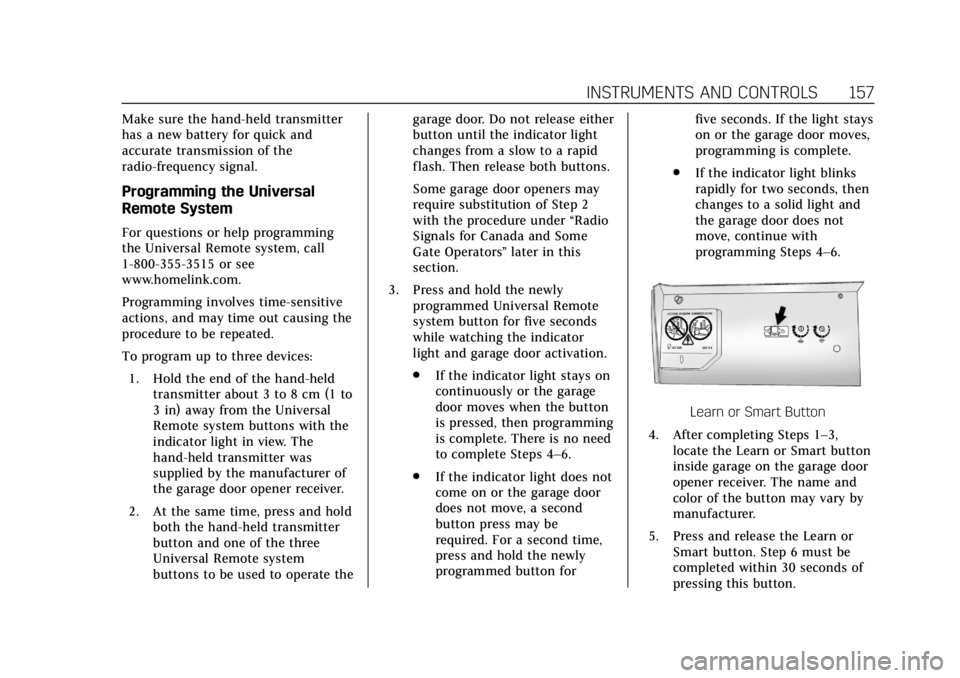
If equipped, these buttons are in the
overhead console.
This system can replace up to three
remote control transmitters used to
activate devices such as garage door
openers, security systems, and home
automation devices. These instructions refer to a garage door
opener, but can be used for other
devices.
Do not use the Universal Remote
system with any garage door opener
that does not have the stop and
reverse feature. This includes any
garage door opener model
manufactured before April 1, 1982.
Read these instructions completely
before programming the Universal
Remote system. It may help to have
another person assist with the
programming process.
Keep the original hand-held
transmitter for use in other vehicles
as well as for future programming.
Erase the programming when vehicle
ownership is terminated. See
“Erasing
Universal Remote System Buttons”
later in this section.
To program a garage door opener,
park outside directly in line with and
facing the garage door opener receiver.
Clear all people and objects near the
garage door.
Page 158 of 380
Cadillac XT5 Owner Manual (GMNA-Localizing-U.S./Canada/Mexico-
11349110) - 2018 - CRC - 9/28/17
INSTRUMENTS AND CONTROLS 157
Make sure the hand-held transmitter
has a new battery for quick and
accurate transmission of the
radio-frequency signal.
Programming the Universal
Remote System
For questions or help programming
the Universal Remote system, call
1-800-355-3515 or see
www.homelink.com.
Programming involves time-sensitive
actions, and may time out causing the
procedure to be repeated.
To program up to three devices:1. Hold the end of the hand-held transmitter about 3 to 8 cm (1 to
3 in) away from the Universal
Remote system buttons with the
indicator light in view. The
hand-held transmitter was
supplied by the manufacturer of
the garage door opener receiver.
2. At the same time, press and hold both the hand-held transmitter
button and one of the three
Universal Remote system
buttons to be used to operate the garage door. Do not release either
button until the indicator light
changes from a slow to a rapid
flash. Then release both buttons.
Some garage door openers may
require substitution of Step 2
with the procedure under
“Radio
Signals for Canada and Some
Gate Operators” later in this
section.
3. Press and hold the newly programmed Universal Remote
system button for five seconds
while watching the indicator
light and garage door activation.
.If the indicator light stays on
continuously or the garage
door moves when the button
is pressed, then programming
is complete. There is no need
to complete Steps 4–6.
. If the indicator light does not
come on or the garage door
does not move, a second
button press may be
required. For a second time,
press and hold the newly
programmed button for five seconds. If the light stays
on or the garage door moves,
programming is complete.
. If the indicator light blinks
rapidly for two seconds, then
changes to a solid light and
the garage door does not
move, continue with
programming Steps 4–6.
Learn or Smart Button
4. After completing Steps 1–3, locate the Learn or Smart button
inside garage on the garage door
opener receiver. The name and
color of the button may vary by
manufacturer.
5. Press and release the Learn or Smart button. Step 6 must be
completed within 30 seconds of
pressing this button.
Page 159 of 380
Cadillac XT5 Owner Manual (GMNA-Localizing-U.S./Canada/Mexico-
11349110) - 2018 - CRC - 9/28/17
158 INSTRUMENTS AND CONTROLS
6. Inside the vehicle, press and holdthe newly programmed Universal
Remote system button for
two seconds and then release it.
If the garage door does not move
or the lamp on the garage door
opener receiver does not flash,
press and hold the same button
a second time for two seconds,
then release it. Again, if the door
does not move or the garage
door lamp does not flash, press
and hold the same button a third
time for two seconds, then
release it.
The Universal Remote system should
now activate the garage door.
Repeat the process for programming
the two remaining buttons.
Radio Signals for Canada and
Some Gate Operators
For questions or programming help
call 1-800-355-3515 or see
www.homelink.com. Canadian radio-frequency laws and
some U.S. gate operators require
transmitter signals to time out or quit
after several seconds of transmission.
This may not be long enough for the
Universal Remote system to pick up
the signal during programming.
If the programming did not work,
replace Step 2 under
“Programming
the Universal Remote System ”with
the following:
Press and hold the Universal Remote
system button while pressing and
releasing the hand-held transmitter
button every two seconds until the
signal has been successfully accepted
by the Universal Remote system. The
Universal Remote system indicator
light will flash slowly at first and then
rapidly. Proceed with Step 3 under
“Programming the Universal Remote
System ”to complete.
Universal Remote System
Operation
Using the Universal Remote
System
Press and hold the appropriate
Universal Remote system button for at
least one-half second. The indicator
light will come on while the signal is
being transmitted.
Erasing Universal Remote
System Buttons
Erase all programmed buttons when
vehicle ownership is terminated.
To erase:
1. Press and hold the two outside buttons until the indicator light
begins to flash. This should take
about 10 seconds.
2. Release both buttons.