maintenance CADILLAC XT5 2020 User Guide
[x] Cancel search | Manufacturer: CADILLAC, Model Year: 2020, Model line: XT5, Model: CADILLAC XT5 2020Pages: 384, PDF Size: 6.52 MB
Page 162 of 384
DRIVING AND OPERATING 161
Braking
Braking action involves perception
time and reaction time. Deciding to
push the brake pedal is perception
time. Actually doing it is
reaction time.
Average driver reaction time is about
three-quarters of a second. In that
time, a vehicle moving at 100 km/h
(60 mph) travels 20 m (66 ft), which
could be a lot of distance in an
emergency.
Helpful braking tips to keep in mind
include:
.Keep enough distance between
you and the vehicle in front
of you.
. Avoid needless heavy braking.
. Keep pace with traffic.
If the engine ever stops while the
vehicle is being driven, brake normally
but do not pump the brakes. Doing so
could make the pedal harder to push
down. If the engine stops, there will
be some power brake assist but it will
be used when the brake is applied. Once the power assist is used up, it
can take longer to stop and the brake
pedal will be harder to push.
Steering
Electric Power Steering
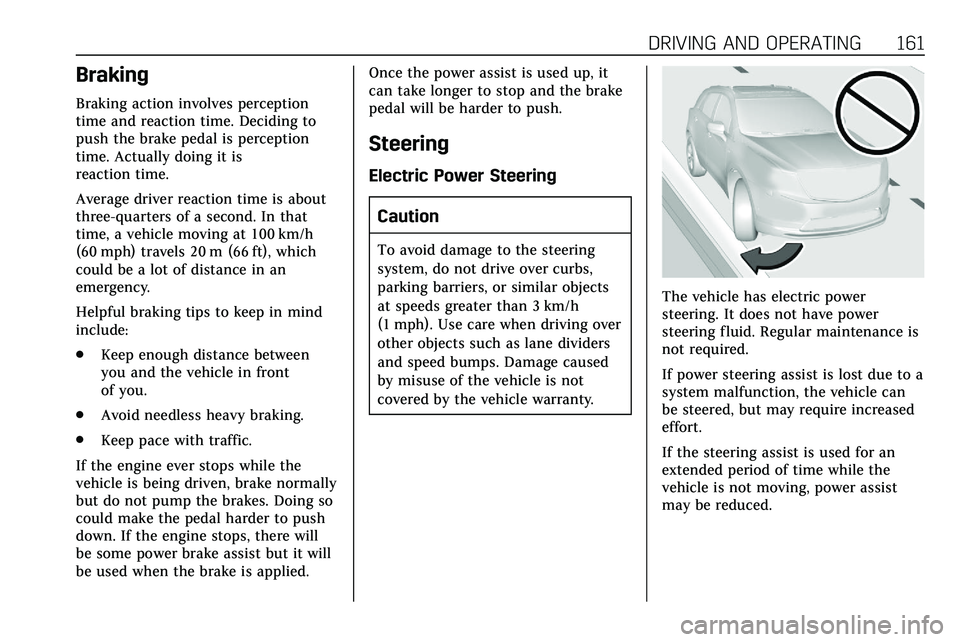
Caution
To avoid damage to the steering
system, do not drive over curbs,
parking barriers, or similar objects
at speeds greater than 3 km/h
(1 mph). Use care when driving over
other objects such as lane dividers
and speed bumps. Damage caused
by misuse of the vehicle is not
covered by the vehicle warranty.
The vehicle has electric power
steering. It does not have power
steering fluid. Regular maintenance is
not required.
If power steering assist is lost due to a
system malfunction, the vehicle can
be steered, but may require increased
effort.
If the steering assist is used for an
extended period of time while the
vehicle is not moving, power assist
may be reduced.
Page 164 of 384
DRIVING AND OPERATING 163
Defensive drivers avoid most skids by
taking reasonable care suited to
existing conditions, and by not
overdriving those conditions. But
skids are always possible.
If the vehicle starts to slide, follow
these suggestions:
.Ease your foot off the accelerator
pedal and steer the way you want
the vehicle to go. The vehicle may
straighten out. Be ready for a
second skid if it occurs.
. Slow down and adjust your driving
according to weather conditions.
Stopping distance can be longer
and vehicle control can be affected
when traction is reduced by water,
snow, ice, gravel, or other material
on the road. Learn to recognize
warning clues —such as enough
water, ice, or packed snow on the
road to make a mirrored surface
— and slow down when you have
any doubt.
. Try to avoid sudden steering,
acceleration, or braking, including
reducing vehicle speed by shifting to a lower gear. Any sudden
changes could cause the tires to
slide.
Remember: Antilock brakes help avoid
only the braking skid.
Off-Road Driving
All-Wheel Drive vehicles can be used
for off-road driving. Vehicles without
All-Wheel Drive and vehicles not
equipped with All Terrain (AT) or
On-Off Road (OOR) tires must not be
driven off-road except on a level, solid
surface. To contact the tire
manufacturer for more information
about the original equipment tires, see
the Limited Warranty and Owner
Assistance Information manual.
Controlling the vehicle is the key to
successful off-road driving. One of the
best ways to control the vehicle is to
control the speed.
{Warning
When driving off-road, bouncing
and quick changes in direction can
easily throw you out of position.
This could cause you to lose control
and crash. You and your passengers
should always wear seat belts.
Before Driving Off-Road
. Have all necessary maintenance
and service work completed.
. Fuel the vehicle, fill fluid levels,
and check inflation pressure in all
tires, including the spare,
if equipped.
. Read all the information about
All-Wheel Drive vehicles in this
manual.
. Make sure all underbody shields,
if equipped, are properly attached.
. Know the local laws that apply to
off-road driving.
Page 238 of 384
DRIVING AND OPERATING 237
2. Have someone place chocksunder the trailer wheels.
3. When the wheel chocks are in place, gradually release the brake
pedal to allow the chocks to
absorb the load of the trailer.
4. Reapply the brake pedal. Then apply the parking brake and shift
into P (Park).
5. Release the brake pedal.
Leaving After Parking on a Hill
1. Apply and hold the brake pedal. .Start the engine.
. Shift into a gear.
. Release the parking brake.
2. Let up on the brake pedal.
3. Drive slowly until the trailer is clear of the chocks.
4. Stop and have someone pick up and store the chocks.
Maintenance When Trailer
Towing
The vehicle needs service more often
when used to tow trailers. See
Maintenance Schedule 0332. It is
especially important to check the
engine oil, axle lubricant, belts,
cooling system, and brake system
before and during each trip.
Check periodically that all nuts and
bolts on the trailer hitch are tight.
Engine Cooling When Trailer
Towing
The cooling system may temporarily
overheat during severe operating
conditions. See Engine Overheating
0 264.
Trailer Towing
Caution
Towing a trailer improperly can
damage the vehicle and result in
costly repairs not covered by the
vehicle warranty. To tow a trailer
(Continued)
Caution (Continued)
correctly, follow the directions in
this section and see your dealer for
important information about
towing a trailer with the vehicle.
Trailer Weight
{Warning
Never exceed the towing capacity
for your vehicle.
Safe trailering requires monitoring the
weight, speed, altitude, road grades,
outside temperature, dimensions of
the front of the trailer, and how
frequently the vehicle is used to tow a
trailer.
Trailer Weight Ratings
When towing a trailer, the combined
weight of the vehicle, vehicle contents,
trailer, and trailer contents must be
below all of the maximum weight
ratings for the vehicle, including:
Page 247 of 384

246 DRIVING AND OPERATING
Conversions and
Add-Ons
Add-On Electrical
Equipment
{Warning
The Data Link Connector (DLC) is
used for vehicle service and
Emission Inspection/Maintenance
testing. SeeMalfunction Indicator
Lamp (Check Engine Light) 0115.
A device connected to the DLC —
such as an aftermarket fleet or
driver-behavior tracking device —
may interfere with vehicle systems.
This could affect vehicle operation
and cause a crash. Such devices
may also access information stored
in the vehicle’s systems.
Caution
Some electrical equipment can
damage the vehicle or cause
components to not work and would
not be covered by the vehicle
warranty. Always check with your
dealer before adding electrical
equipment.
Add-on equipment can drain the
vehicle's 12-volt battery, even if the
vehicle is not operating.
The vehicle has an airbag system.
Before attempting to add anything
electrical to the vehicle, see Servicing
the Airbag-Equipped Vehicle 071 and
Adding Equipment to the
Airbag-Equipped Vehicle 071.
Page 251 of 384
250 VEHICLE CARE
If equipped with remote vehicle start,
open the hood before performing any
service work to prevent remote
starting the vehicle accidentally. See
Remote Vehicle Start017.
Keep a record with all parts receipts
and list the mileage and the date of
any service work performed. See
Maintenance Records 0344.
Caution
Even small amounts of
contamination can cause damage to
vehicle systems. Do not allow
contaminants to contact the fluids,
reservoir caps, or dipsticks.
Hood
{Warning
For vehicles with auto engine stop/
start, turn the vehicle off before
opening the hood. If the vehicle is
on, the engine will start when the
hood is opened. You or others could
be injured.
{Warning
Components under the hood can
get hot from running the engine. To
help avoid the risk of burning
unprotected skin, never touch these
components until they have cooled,
and always use a glove or towel to
avoid direct skin contact.
Clear any snow from the hood before
opening.
To open the hood: 1. Pull the hood release handle with the
isymbol. It is on the
lower left side of the instrument
panel.
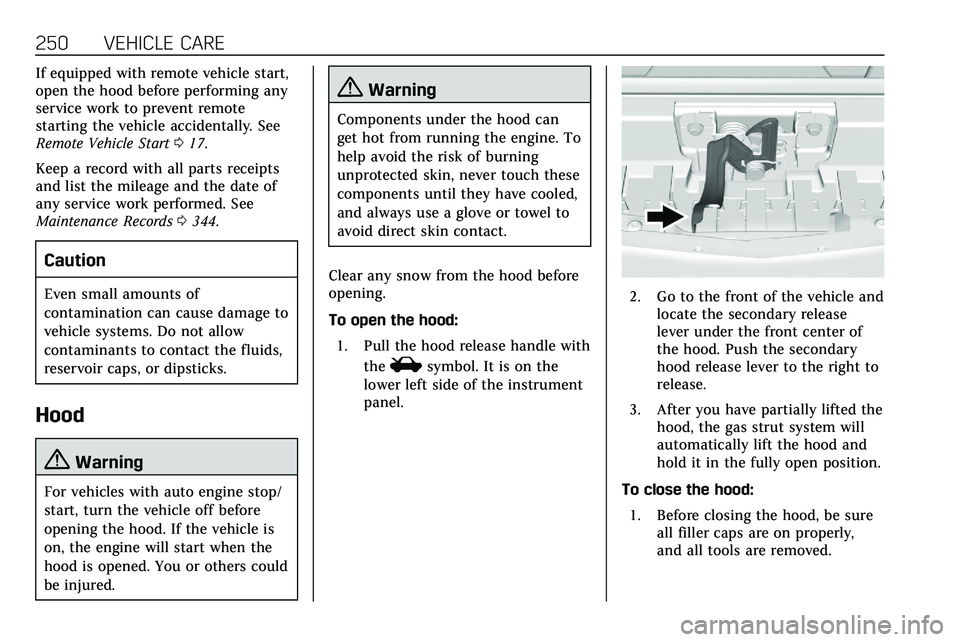
2. Go to the front of the vehicle and locate the secondary release
lever under the front center of
the hood. Push the secondary
hood release lever to the right to
release.
3. After you have partially lifted the hood, the gas strut system will
automatically lift the hood and
hold it in the fully open position.
To close the hood: 1. Before closing the hood, be sure all filler caps are on properly,
and all tools are removed.
Page 260 of 384
VEHICLE CARE 259
See your dealer to have the fluid and
filter changed at the intervals listed in
theMaintenance Schedule 0332.
Engine Air Filter Life
System
If equipped, this feature provides the
engine air filter’s remaining life and
best timing for a change. The timing
to change an engine air filter depends
on driving and environmental
conditions.
When to Change the Engine Air
Filter
When the Driver Information Center
(DIC) displays a message to replace
the engine air filter at the next oil
change, follow this timing.
When the DIC displays a message to
replace the engine air filter soon,
replace the engine air filter at the
earliest convenience.
The system must be reset after the
engine air filter is changed.
If the DIC displays a message to check
the engine air filter system, see your
dealer.
How to Reset the Engine Air
Filter Life System
To reset:
1. Place the vehicle in P (Park).
2. Display the Air Filter Life on the DIC. See Driver Information Center
(DIC) 0124.
3. Press SELon the steering wheel
to move to the Reset/Disable
display area. Select Reset then
press SELfor several seconds.
4. Press SELto confirm the reset.
Engine Air Cleaner/Filter
The engine air cleaner/filter is in the
engine compartment on the passenger
side of the vehicle. See Engine
Compartment Overview 0252.
When to Inspect/Replace the
Engine Air Cleaner/Filter
If the vehicle is not equipped with the
engine air filter life system, see
Maintenance Schedule 0332.
How to Inspect/Replace the
Engine Air Cleaner/Filter
Do not start the engine or have the
engine running with the engine air
cleaner/filter housing open. Before
removing the engine air cleaner/filter,
make sure that the engine air cleaner/
filter housing and nearby components
are free of dirt and debris. Remove the
engine air cleaner/filter. Do not clean
the engine air cleaner/filter or
components with water or
compressed air.
To inspect or replace the engine air
cleaner/filter:
Page 262 of 384
VEHICLE CARE 261
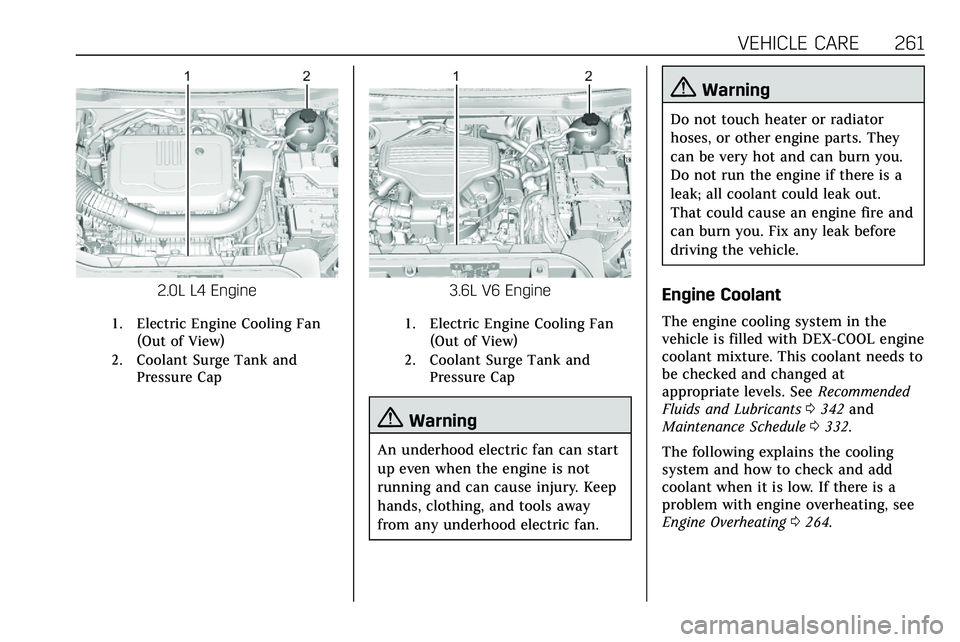
2.0L L4 Engine
1. Electric Engine Cooling Fan(Out of View)
2. Coolant Surge Tank and Pressure Cap
3.6L V6 Engine
1. Electric Engine Cooling Fan
(Out of View)
2. Coolant Surge Tank and Pressure Cap
{Warning
An underhood electric fan can start
up even when the engine is not
running and can cause injury. Keep
hands, clothing, and tools away
from any underhood electric fan.
{Warning
Do not touch heater or radiator
hoses, or other engine parts. They
can be very hot and can burn you.
Do not run the engine if there is a
leak; all coolant could leak out.
That could cause an engine fire and
can burn you. Fix any leak before
driving the vehicle.
Engine Coolant
The engine cooling system in the
vehicle is filled with DEX-COOL engine
coolant mixture. This coolant needs to
be checked and changed at
appropriate levels. See Recommended
Fluids and Lubricants 0342 and
Maintenance Schedule 0332.
The following explains the cooling
system and how to check and add
coolant when it is low. If there is a
problem with engine overheating, see
Engine Overheating 0264.
Page 269 of 384
268 VEHICLE CARE
new brake linings are installed. Add or
remove fluid, as necessary, only when
work is done on the brake hydraulic
system.
{Warning
If too much brake fluid is added, it
can spill on the engine and burn,
if the engine is hot enough. You or
others could be burned, and the
vehicle could be damaged. Add
brake fluid only when work is done
on the brake hydraulic system.
When the brake fluid falls to a low
level, the brake warning light comes
on. See Brake System Warning Light
0 117.
Brake fluid absorbs water over time
which degrades the effectiveness of
the brake fluid. Replace brake fluid at
the specified intervals to prevent
increased stopping distance. See
Maintenance Schedule 0332. What to Add
Use only GM approved DOT 3 brake
fluid from a clean, sealed container.
See
Recommended Fluids and
Lubricants 0342.{Warning
The wrong or contaminated brake
fluid could result in damage to the
brake system. This could result in
the loss of braking leading to a
possible injury. Always use the
proper GM approved brake fluid.
Caution
If brake fluid is spilled on the
vehicle's painted surfaces, the paint
finish can be damaged. Immediately
wash off any painted surface.
Battery - North America
The original equipment battery is
maintenance free. Do not remove the
cap and do not add fluid. Refer to the replacement number on
the original battery label when a new
battery is needed. For replacement of
the battery, see your dealer.
The vehicle has an Absorbed Glass
Mat (AGM) 12-volt battery.
Installation of a standard 12-volt
battery will result in reduced 12-volt
battery life.
When using a 12-volt battery charger
on the 12-volt AGM battery, some
chargers have an AGM battery setting
on the charger. If available, use the
AGM setting on the charger, to limit
charge voltage to 14.8 volts.
Stop/Start System
This vehicle has a Stop/Start system
to shut off the engine to help
conserve fuel. See
Stop/Start System
0 177.
{Warning
WARNING: Battery posts,
terminals, and related accessories
contain lead and lead compounds,
(Continued)
Page 270 of 384

VEHICLE CARE 269
Warning (Continued)
chemicals known to the State of
California to cause cancer and birth
defects or other reproductive harm.
Batteries also contain other
chemicals known to the State of
California to cause cancer.WASH
HANDS AFTER HANDLING. For
more information go to
www.P65Warnings.ca.gov/
passenger-vehicle.
See California Proposition 65 Warning
0 248 and the back cover.
Vehicle Storage
{Warning
Batteries have acid that can burn
you and gas that can explode. You
can be badly hurt if you are not
careful. See Jump Starting - North
America 0316 for tips on working
around a battery without
getting hurt. Infrequent Usage: Remove the black,
negative (−) cable from the battery to
keep the battery from running down.
Extended Storage: Remove the black,
negative (−) cable from the battery or
use a battery trickle charger.
All-Wheel Drive
Transfer Case
Under normal driving conditions,
transfer case fluid does not require
maintenance unless there is a fluid
leak or unusual noise. If required,
have the transfer case serviced by
your dealer.
Starter Switch Check
{Warning
When you are doing this inspection,
the vehicle could move suddenly.
If the vehicle moves, you or others
could be injured.
1. Before starting this check, be
sure there is enough room
around the vehicle.
2. Apply both the parking brake and the regular brake.
Do not use the accelerator pedal,
and be ready to turn off the
engine immediately if it starts.
3. Try to start the engine in each gear. The vehicle should start
only in P (Park) or N (Neutral).
If the vehicle starts in any other
position, contact your dealer for
service.
Park Brake and P (Park)
Mechanism Check
{Warning
When you are doing this check, the
vehicle could begin to move. You or
others could be injured and
property could be damaged. Make
sure there is room in front of the
vehicle in case it begins to roll. Be
(Continued)
Page 271 of 384
270 VEHICLE CARE
Warning (Continued)
ready to apply the regular brake at
once should the vehicle begin
to move.
Park on a fairly steep hill, with the
vehicle facing downhill. Keeping your
foot on the regular brake, set the
parking brake.
. To check the parking brake's
holding ability: With the engine
running and the transmission in
N (Neutral), slowly remove foot
pressure from the regular brake
pedal. Do this until the vehicle is
held by the parking brake only.
. To check the P (Park) mechanism's
holding ability: With the engine
running, shift to P (Park). Then
release the parking brake followed
by the regular brake.
Contact your dealer if service is
required.
Wiper Blade Replacement
Windshield wiper blades should be
inspected for wear or cracking.
It is a good idea to clean or replace
the wiper blade assembly on a regular
basis or when worn. For proper
windshield wiper blade length and
type, see Maintenance Replacement
Parts 0343.
Caution
Allowing the wiper arm to touch
the windshield when no wiper blade
is installed could damage the
windshield. Any damage that occurs
would not be covered by the vehicle
warranty. Do not allow the wiper
arm to touch the windshield.
Front Wiper Blade Replacement
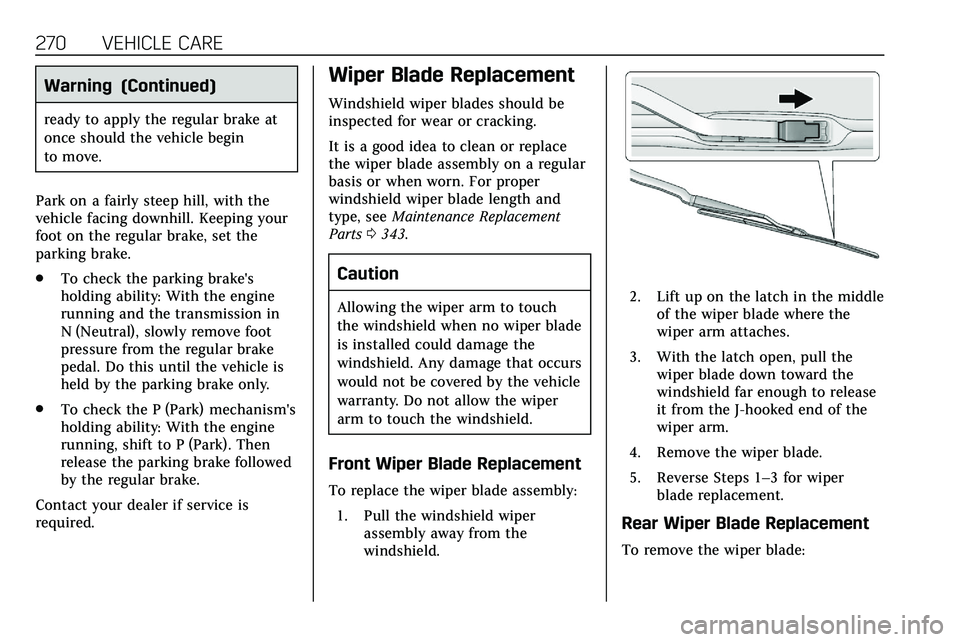
To replace the wiper blade assembly:
1. Pull the windshield wiper assembly away from the
windshield.
2. Lift up on the latch in the middleof the wiper blade where the
wiper arm attaches.
3. With the latch open, pull the wiper blade down toward the
windshield far enough to release
it from the J-hooked end of the
wiper arm.
4. Remove the wiper blade.
5. Reverse Steps 1–3 for wiper blade replacement.
Rear Wiper Blade Replacement
To remove the wiper blade: