brake light CADILLAC XT5 2020 Owner's Guide
[x] Cancel search | Manufacturer: CADILLAC, Model Year: 2020, Model line: XT5, Model: CADILLAC XT5 2020Pages: 384, PDF Size: 6.52 MB
Page 205 of 384
204 DRIVING AND OPERATING
feel or sound different than if the
brakes were applied manually. This is
normal.
Stationary or Very Slow-Moving
Objects
{Warning
ACC may not detect and react to
stopped or slow-moving vehicles
ahead of you. For example, the
system may not brake for a vehicle
it has never detected moving. This
can occur in stop-and-go traffic or
when a vehicle suddenly appears
due to a vehicle ahead changing
lanes. Your vehicle may not stop
and could cause a crash. Use
caution when using ACC. Your
complete attention is always
required while driving and you
should be ready to take action and
apply the brakes.
ACC Automatically Disengages
ACC may automatically disengage and
the driver will need to manually apply
the brakes to slow the vehicle when: .
The sensors are blocked.
. The Traction Control System (TCS)
or StabiliTrak/ESC system has
activated or been disabled.
. There is a fault in the system.
. The radar falsely reports blockage
when driving in a desert or remote
area with no other vehicles or
roadside objects. A DIC message
may display to indicate that ACC
is temporarily unavailable.
The ACC indicator will turn white
when ACC is no longer active.
Notification to Resume ACC
ACC will maintain a follow gap behind
a detected vehicle and slow your
vehicle to a stop behind that vehicle.
If the stopped vehicle ahead has
driven away and ACC has not
resumed, the vehicle ahead indicator
will flash as a reminder to check
traffic ahead before proceeding. In
addition, the left and right sides of the
Safety Alert Seat will pulse three
times, or three beeps will sound. See
”Alert Type ”and “Adaptive Cruise Go Notifier”
in“Collision/Detection
Systems” underVehicle Personalization
0 131.
When the vehicle ahead drives away,
press RES+ or the accelerator pedal to
resume cruise control. If stopped for
more than two minutes or if the driver
door is opened and the driver seat belt
is unbuckled, the ACC automatically
applies the Electric Parking Brake
(EPB) to hold the vehicle. The EPB
status light will turn on. See Electric
Parking Brake 0191. To release the
EPB, press the accelerator pedal.
A DIC warning message may display
indicating to shift to P (Park) before
exiting the vehicle. See Vehicle
Messages 0130.
{Warning
If ACC has stopped the vehicle, and
if ACC is disengaged, turned off,
or canceled, the vehicle will no
longer be held at a stop. The vehicle
can move. When ACC is holding the
(Continued)
Page 207 of 384
206 DRIVING AND OPERATING
When following a vehicle and entering
a curve, ACC may not detect the
vehicle ahead and may accelerate to
the set speed. When this happens, the
vehicle ahead indicator will not
appear.
ACC may detect a vehicle that is not
in your lane and apply the brakes.
ACC may occasionally provide an alert
and/or braking that is considered
unnecessary. It could respond to
vehicles in different lanes, signs,
guardrails, and other stationary
objects when entering or exiting a
curve. This is normal operation. The
vehicle does not need service.Other Vehicle Lane Changes
ACC will not detect a vehicle ahead
until it is completely in the lane. The
brakes may need to be manually
applied.
Do Not Use ACC on Hills and When
Towing a Trailer
Do not use ACC when driving on steep
hills or when towing a trailer. ACC will
not detect a vehicle in the lane while
driving on steep hills. The driver will
often need to take over acceleration
and braking on steep hills, especially
when towing a trailer. If the brakes are
applied, the ACC disengages.
Disengaging ACC
There are three ways to
disengage ACC:
.
Step lightly on the brake pedal.
. Press
*.
. Press
J.
Erasing Speed Memory
The cruise control set speed is erased
from memory if
Jis pressed or if the
ignition is turned off.
Cleaning the Sensing System
The camera sensor on the windshield
behind the rearview mirror and the
radar sensors on the front of the
vehicle can become blocked by snow,
Page 215 of 384
214 DRIVING AND OPERATING
{Warning
There may be instances where
unexpected or undesired automatic
braking occurs. If this happens,
either press the brake pedal or
firmly press the accelerator pedal to
release the brakes from the RAB
system. Before releasing the brakes,
check the RVC and check the area
around the vehicle to make sure it
is safe to proceed.
Rear Cross Traffic Alert (RCTA)
If equipped, RCTA displays a red
warning triangle with a left or right
pointing arrow on the infotainment
display to warn of traffic coming from
the left or right. This system detects
objects coming from up to 20 m (65 ft)
from the left or right side of the
vehicle. When an object is detected,
either three beeps sound from the left
or right or three Safety Alert Seat
pulses occur on the left or right side,
depending on the direction of the
detected vehicle. Use caution while backing up when
towing a trailer, as the RCTA
detection zones that extend out from
the back of the vehicle do not move
further back when a trailer is towed.
See
Radio Frequency Statement 0358.
Turning the Features On or Off
PressXon the center stack to turn
on or off the Front and Rear Park
Assist, Reverse Automatic Braking
(RAB), and the Backing Warning
System at the same time. The
indicator light next to the button
comes on when the features are on
and turns off when the features have
been disabled.
Turn off Park Assist, RCTA, and RAB
when towing a trailer.
RCTA can be turned on or off through
vehicle personalization. See “Collision/
Detection Systems” underVehicle
Personalization 0131.
Automatic Parking Assist (APA)
with Braking
If equipped, APA searches for and
steers the vehicle into parallel and
perpendicular parking spots. When
using APA, you must still shift gears,
while the system applies the brakes
and accelerator. A display and audible
beeps help to guide parking
maneuvers.
Do not use APA when towing a trailer.
{Warning
APA may not detect objects in the
parking space, objects that are soft
or narrow, objects high off the
ground such as flatbed trucks,
objects below ground level such as
large potholes, or moving objects
(e.g. pedestrians). Always verify that
the parking space is appropriate for
parking a vehicle. APA does not
respond to changes in the parking
space, such as movement of an
adjacent vehicle, or a person or
object entering the parking space.
(Continued)
Page 218 of 384
DRIVING AND OPERATING 217
Warning (Continued)
.The pedestrian is not directly
behind the vehicle, fully
visible to the Rear Vision
Camera (RVC), or standing
upright.
. The pedestrian is part of a
group.
. The pedestrian is a child.
. Visibility is poor, including
nighttime conditions, fog,
rain, or snow.
. The RVC is blocked by dirt,
snow, or ice.
. The RVC, taillamps,
or back-up lamps are not
cleaned or in proper working
condition.
. The vehicle is not in
R (Reverse).
To help avoid death or injury,
always check for pedestrians
around the vehicle before backing
up. Be ready to take action and (Continued)
Warning (Continued)
apply the brakes. SeeDefensive
Driving 0160. Keep the RVC,
taillamps, and back-up lamps clean
and in good repair.
Rear Pedestrian Alert can be set to Off
or Alert. See “Rear Pedestrian
Detection ”in “Collision/Detection
Systems” underVehicle Personalization
0 131. If equipped, alerts can be set to
beeps or seat pulses. See “Alert Type”
in “Collision/Detection Systems” under
Vehicle Personalization 0131.
Assistance Systems for
Driving
If equipped, when driving the vehicle
in a forward gear, Forward Collision
Alert (FCA), Lane Departure Warning
(LDW), Lane Keep Assist (LKA), Side
Blind Zone Alert (SBZA), Lane Change
Alert (LCA), Automatic Emergency
Braking (AEB), and/or the Front
Pedestrian Braking (FPB) System can
help to avoid a crash or reduce crash
damage.
Forward Collision Alert
(FCA) System
If equipped, the FCA system may help
to avoid or reduce the harm caused by
front-end crashes. When approaching
a vehicle ahead too quickly, FCA
provides a red flashing alert on the
windshield and rapidly beeps or pulses
the driver seat. FCA also lights an
amber visual alert if following another
vehicle too closely.
FCA detects vehicles within a distance
of approximately 60 m (197 ft) and
operates at speeds above 8 km/h
(5 mph). If the vehicle has Adaptive
Cruise Control (ACC), it can detect
vehicles to distances of approximately
110 m (360 ft) and operates at all
speeds. See Adaptive Cruise Control
0 198.
{Warning
FCA is a warning system and does
not apply the brakes. When
approaching a slower-moving or
stopped vehicle ahead too rapidly,
(Continued)
Page 225 of 384

224 DRIVING AND OPERATING
With the Front Pedestrian Braking
system turned on, Night Vision
provides a red Head-Up Display (HUD)
alert when the system detects that the
vehicle is approaching a pedestrian
ahead too quickly. In addition, an alert
beeps or the Safety Alert Seat pulses,
if equipped. SeeFront Pedestrian
Braking (FPB) System 0221.
{Warning
The system does not detect all
objects or the vehicle distance from
objects. The system may not
provide a warning with enough time
to help avoid a crash.
1. Low-Beam Headlamps
2. High-Beam Headlamps
3. Night Vision System
By selecting a view on the instrument
cluster, the Night Vision image can be
displayed. See Instrument Cluster 0108
. The Night Vision system can operate
only if:
. The ignition is on.
. The vehicle is in P (Park) or a
forward gear.
. It is dark enough outside.
. The headlamps are on, except
when parked. Adjust the instrument panel
brightness to make the image no
brighter than necessary. Turn the
image off by selecting another view
on the instrument cluster.
Warm objects, such as pedestrians,
animals, and other moving vehicles,
should appear whiter on the Night
Vision display. Cold objects, such as
the sky, signs, and parked vehicles,
should appear darker. Night Vision
only shows objects that are warmer or
colder than the surroundings. It does
not detect brake lamps, turn signals,
emergency flashers, traffic lights,
or sign information.
Use this system as an aid by
occasionally glancing at the image. Do
not stare at the image or use the
image under well-lit conditions.
{Warning
Do not stare at the image while
driving as this might cause
important objects ahead not to be
seen. You could crash, and you or
others could be injured.
Page 248 of 384
VEHICLE CARE 247
Vehicle Care
General Information
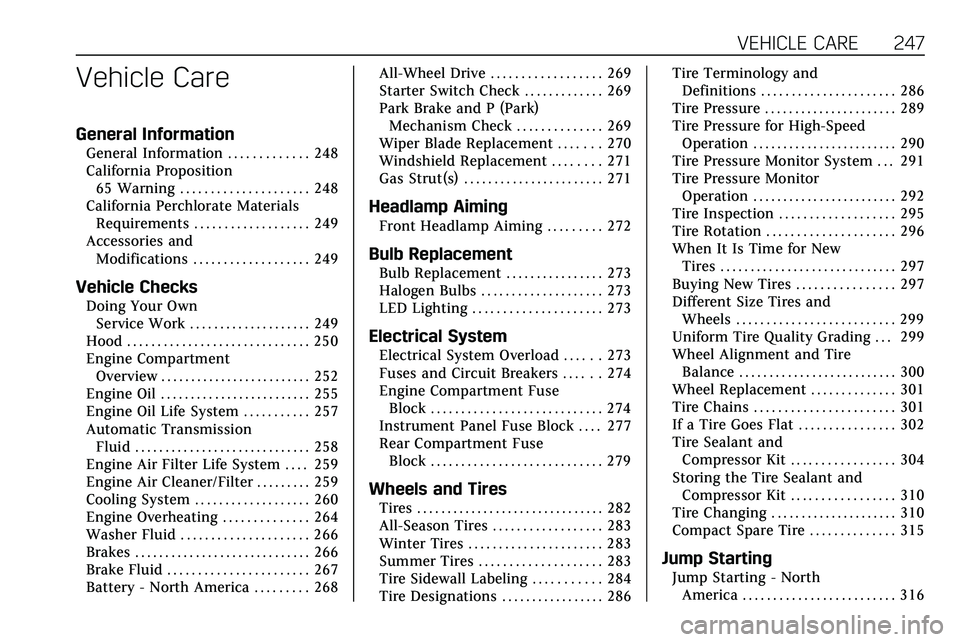
General Information . . . . . . . . . . . . . 248
California Proposition65 Warning . . . . . . . . . . . . . . . . . . . . . 248
California Perchlorate Materials Requirements . . . . . . . . . . . . . . . . . . . 249
Accessories and Modifications . . . . . . . . . . . . . . . . . . . 249
Vehicle Checks
Doing Your OwnService Work . . . . . . . . . . . . . . . . . . . . 249
Hood . . . . . . . . . . . . . . . . . . . . . . . . . . . . . . 250
Engine Compartment Overview . . . . . . . . . . . . . . . . . . . . . . . . . 252
Engine Oil . . . . . . . . . . . . . . . . . . . . . . . . . 255
Engine Oil Life System . . . . . . . . . . . 257
Automatic Transmission Fluid . . . . . . . . . . . . . . . . . . . . . . . . . . . . . 258
Engine Air Filter Life System . . . . 259
Engine Air Cleaner/Filter . . . . . . . . . 259
Cooling System . . . . . . . . . . . . . . . . . . . 260
Engine Overheating . . . . . . . . . . . . . . 264
Washer Fluid . . . . . . . . . . . . . . . . . . . . . 266
Brakes . . . . . . . . . . . . . . . . . . . . . . . . . . . . . 266
Brake Fluid . . . . . . . . . . . . . . . . . . . . . . . 267
Battery - North America . . . . . . . . . 268 All-Wheel Drive . . . . . . . . . . . . . . . . . . 269
Starter Switch Check . . . . . . . . . . . . . 269
Park Brake and P (Park)
Mechanism Check . . . . . . . . . . . . . . 269
Wiper Blade Replacement . . . . . . . 270
Windshield Replacement . . . . . . . . 271
Gas Strut(s) . . . . . . . . . . . . . . . . . . . . . . . 271
Headlamp Aiming
Front Headlamp Aiming . . . . . . . . . 272
Bulb Replacement
Bulb Replacement . . . . . . . . . . . . . . . . 273
Halogen Bulbs . . . . . . . . . . . . . . . . . . . . 273
LED Lighting . . . . . . . . . . . . . . . . . . . . . 273
Electrical System
Electrical System Overload . . . . . . 273
Fuses and Circuit Breakers . . . . . . 274
Engine Compartment Fuse
Block . . . . . . . . . . . . . . . . . . . . . . . . . . . . 274
Instrument Panel Fuse Block . . . . 277
Rear Compartment Fuse Block . . . . . . . . . . . . . . . . . . . . . . . . . . . . 279
Wheels and Tires
Tires . . . . . . . . . . . . . . . . . . . . . . . . . . . . . . . 282
All-Season Tires . . . . . . . . . . . . . . . . . . 283
Winter Tires . . . . . . . . . . . . . . . . . . . . . . 283
Summer Tires . . . . . . . . . . . . . . . . . . . . 283
Tire Sidewall Labeling . . . . . . . . . . . 284
Tire Designations . . . . . . . . . . . . . . . . . 286 Tire Terminology and
Definitions . . . . . . . . . . . . . . . . . . . . . . 286
Tire Pressure . . . . . . . . . . . . . . . . . . . . . . 289
Tire Pressure for High-Speed Operation . . . . . . . . . . . . . . . . . . . . . . . . 290
Tire Pressure Monitor System . . . 291
Tire Pressure Monitor Operation . . . . . . . . . . . . . . . . . . . . . . . . 292
Tire Inspection . . . . . . . . . . . . . . . . . . . 295
Tire Rotation . . . . . . . . . . . . . . . . . . . . . 296
When It Is Time for New Tires . . . . . . . . . . . . . . . . . . . . . . . . . . . . . 297
Buying New Tires . . . . . . . . . . . . . . . . 297
Different Size Tires and Wheels . . . . . . . . . . . . . . . . . . . . . . . . . . 299
Uniform Tire Quality Grading . . . 299
Wheel Alignment and Tire Balance . . . . . . . . . . . . . . . . . . . . . . . . . . 300
Wheel Replacement . . . . . . . . . . . . . . 301
Tire Chains . . . . . . . . . . . . . . . . . . . . . . . 301
If a Tire Goes Flat . . . . . . . . . . . . . . . . 302
Tire Sealant and Compressor Kit . . . . . . . . . . . . . . . . . 304
Storing the Tire Sealant and Compressor Kit . . . . . . . . . . . . . . . . . 310
Tire Changing . . . . . . . . . . . . . . . . . . . . . 310
Compact Spare Tire . . . . . . . . . . . . . . 315
Jump Starting
Jump Starting - North America . . . . . . . . . . . . . . . . . . . . . . . . . 316
Page 268 of 384
VEHICLE CARE 267
Warning (Continued)
crash. When the brake wear
warning sound is heard, have the
vehicle serviced.
Caution
Continuing to drive with worn-out
brake pads could result in costly
brake repair.
Some driving conditions or climates
can cause a brake squeal when the
brakes are first applied or lightly
applied. This does not mean
something is wrong with the brakes.
Properly torqued wheel nuts are
necessary to help prevent brake
pulsation. When tires are rotated,
inspect brake pads for wear and
evenly tighten wheel nuts in the
proper sequence to torque
specifications. See Capacities and
Specifications 0346. Brake pads should be replaced as
complete sets.
Brake Pedal Travel
See your dealer if the brake pedal does
not return to normal height, or if
there is a rapid increase in pedal
travel. This could be a sign that brake
service may be required.
Replacing Brake System Parts
Always replace brake system parts
with new, approved replacement parts.
If this is not done, the brakes may not
work properly. The braking
performance expected can change in
many other ways if the wrong
replacement brake parts are installed
or if parts are improperly installed.
Brake Fluid
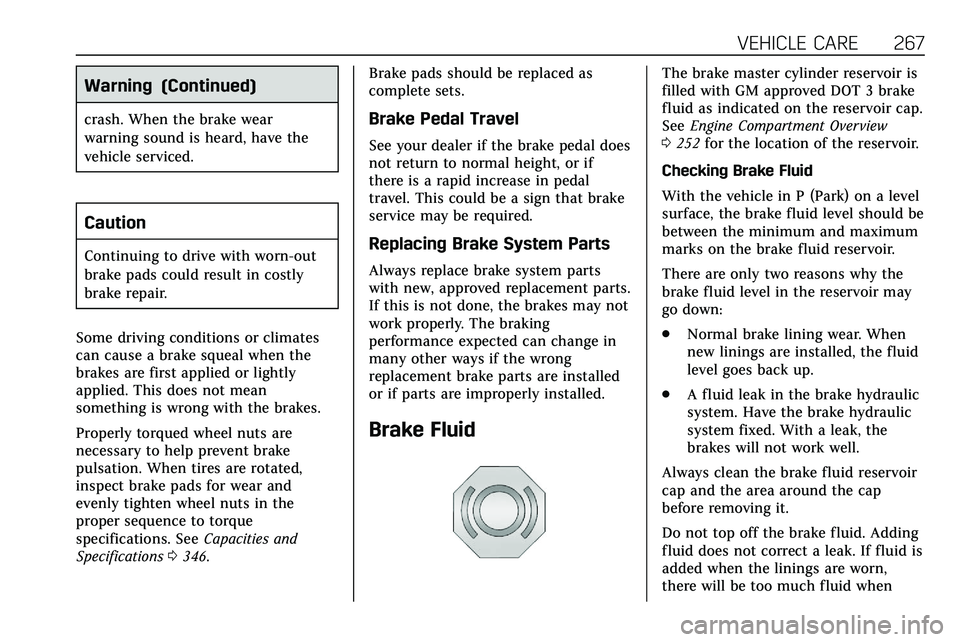
The brake master cylinder reservoir is
filled with GM approved DOT 3 brake
fluid as indicated on the reservoir cap.
See
Engine Compartment Overview
0 252 for the location of the reservoir.
Checking Brake Fluid
With the vehicle in P (Park) on a level
surface, the brake fluid level should be
between the minimum and maximum
marks on the brake fluid reservoir.
There are only two reasons why the
brake fluid level in the reservoir may
go down:
. Normal brake lining wear. When
new linings are installed, the fluid
level goes back up.
. A fluid leak in the brake hydraulic
system. Have the brake hydraulic
system fixed. With a leak, the
brakes will not work well.
Always clean the brake fluid reservoir
cap and the area around the cap
before removing it.
Do not top off the brake fluid. Adding
fluid does not correct a leak. If fluid is
added when the linings are worn,
there will be too much fluid when
Page 269 of 384
268 VEHICLE CARE
new brake linings are installed. Add or
remove fluid, as necessary, only when
work is done on the brake hydraulic
system.
{Warning
If too much brake fluid is added, it
can spill on the engine and burn,
if the engine is hot enough. You or
others could be burned, and the
vehicle could be damaged. Add
brake fluid only when work is done
on the brake hydraulic system.
When the brake fluid falls to a low
level, the brake warning light comes
on. See Brake System Warning Light
0 117.
Brake fluid absorbs water over time
which degrades the effectiveness of
the brake fluid. Replace brake fluid at
the specified intervals to prevent
increased stopping distance. See
Maintenance Schedule 0332. What to Add
Use only GM approved DOT 3 brake
fluid from a clean, sealed container.
See
Recommended Fluids and
Lubricants 0342.{Warning
The wrong or contaminated brake
fluid could result in damage to the
brake system. This could result in
the loss of braking leading to a
possible injury. Always use the
proper GM approved brake fluid.
Caution
If brake fluid is spilled on the
vehicle's painted surfaces, the paint
finish can be damaged. Immediately
wash off any painted surface.
Battery - North America
The original equipment battery is
maintenance free. Do not remove the
cap and do not add fluid. Refer to the replacement number on
the original battery label when a new
battery is needed. For replacement of
the battery, see your dealer.
The vehicle has an Absorbed Glass
Mat (AGM) 12-volt battery.
Installation of a standard 12-volt
battery will result in reduced 12-volt
battery life.
When using a 12-volt battery charger
on the 12-volt AGM battery, some
chargers have an AGM battery setting
on the charger. If available, use the
AGM setting on the charger, to limit
charge voltage to 14.8 volts.
Stop/Start System
This vehicle has a Stop/Start system
to shut off the engine to help
conserve fuel. See
Stop/Start System
0 177.
{Warning
WARNING: Battery posts,
terminals, and related accessories
contain lead and lead compounds,
(Continued)
Page 280 of 384
VEHICLE CARE 279
FusesUsage
F16 Sunroof
F17 Body control module 1
F18 Instrument cluster
F19 –
F20 Rear seat entertainment
F21 Body control module 4
F22 Infotainment/USB data/Aux jack
F23 Body control module 2
F24 USB charger/ Wireless charging
F25 Park aid/electronic transmission range
system
F26 Communications integration module
F27 Video Fuses
Usage
F28 Heating, ventilation, and air conditioning
display
F29 Radio
F30 Steering wheel adjustment controls
F31 Electronic brake control module
electric brake
booster
F32 DC AC inverter
F33 Driver power seat
F34 Passenger power seat
F35 Battery IEC 1 feed
F36 Electric power steering
F37 Rear seat entertainment/USB
charge/Wireless
charging module
F38 Body control module 8
F39 – Circuit
Breakers Usage
F40 –
F41 –
F42 Auxiliary power outlet/Lighter
Rear Compartment Fuse
Block
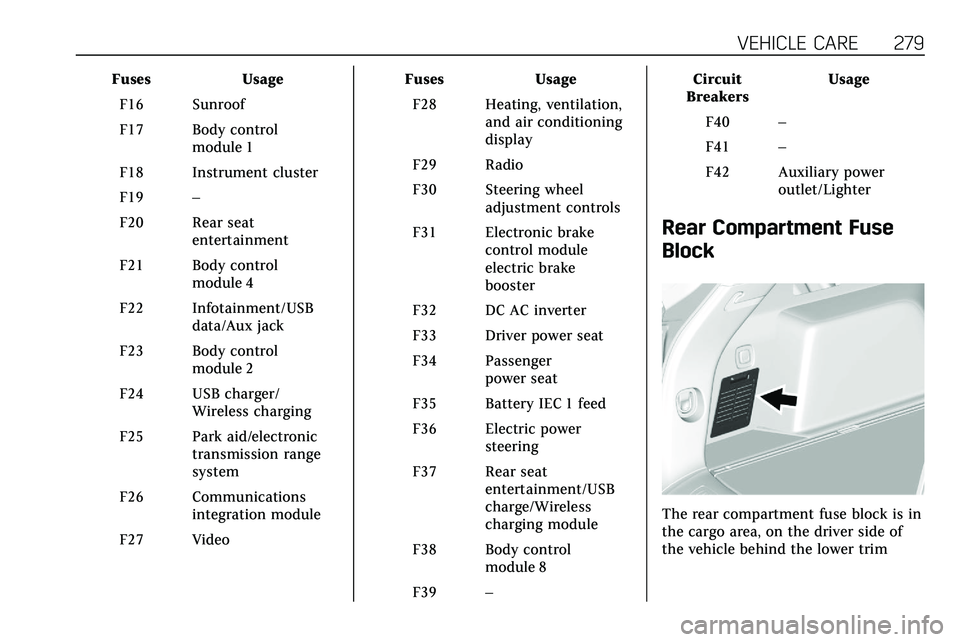
The rear compartment fuse block is in
the cargo area, on the driver side of
the vehicle behind the lower trim
Page 294 of 384

VEHICLE CARE 293
TPMS Malfunction Light and
Message
The TPMS will not function properly if
one or more of the TPMS sensors are
missing or inoperable. When the
system detects a malfunction, the low
tire pressure warning light flashes for
about one minute and then stays on
for the remainder of the ignition cycle.
A DIC warning message also displays.
The malfunction light and DIC
warning message come on at each
ignition cycle until the problem is
corrected. Some of the conditions that
can cause these to come on are:
.One of the road tires has been
replaced with the spare tire. The
spare tire does not have a TPMS
sensor. The malfunction light and
DIC message should go off after
the road tire is replaced and the
sensor matching process is
performed successfully. See “TPMS
Sensor Matching Process ”later in
this section.
. The TPMS sensor matching
process was not done or not
completed successfully after
rotating the tires. The malfunction light and the DIC message should
go off after successfully
completing the sensor matching
process. See "TPMS Sensor
Matching Process" later in this
section.
. One or more TPMS sensors are
missing or damaged. The
malfunction light and the DIC
message should go off when the
TPMS sensors are installed and
the sensor matching process is
performed successfully. See your
dealer for service.
. Replacement tires or wheels do
not match the original equipment
tires or wheels. Tires and wheels
other than those recommended
could prevent the TPMS from
functioning properly. See Buying
New Tires 0297.
. Operating electronic devices or
being near facilities using radio
wave frequencies similar to the
TPMS could cause the TPMS
sensors to malfunction.
If the TPMS is not functioning
properly it cannot detect or signal a
low tire pressure condition. See your dealer for service if the TPMS
malfunction light and DIC message
come on and stay on.Tire Fill Alert (If Equipped)
This feature provides visual and
audible alerts outside the vehicle to
help when inflating an underinflated
tire to the recommended cold tire
pressure.
When the low tire pressure warning
light comes on:
1. Park the vehicle in a safe, level place.
2. Set the parking brake firmly.
3. Place the vehicle in P (Park).
4. Add air to the tire that is underinflated. The turn signal
lamp will flash.
When the recommended
pressure is reached, the horn
sounds once and the turn signal
lamp will stop flashing and
briefly turn solid.