Jack CADILLAC XT5 2020 Owner's Manual
[x] Cancel search | Manufacturer: CADILLAC, Model Year: 2020, Model line: XT5, Model: CADILLAC XT5 2020Pages: 384, PDF Size: 6.52 MB
Page 280 of 384

VEHICLE CARE 279
FusesUsage
F16 Sunroof
F17 Body control module 1
F18 Instrument cluster
F19 –
F20 Rear seat entertainment
F21 Body control module 4
F22 Infotainment/USB data/Aux jack
F23 Body control module 2
F24 USB charger/ Wireless charging
F25 Park aid/electronic transmission range
system
F26 Communications integration module
F27 Video Fuses
Usage
F28 Heating, ventilation, and air conditioning
display
F29 Radio
F30 Steering wheel adjustment controls
F31 Electronic brake control module
electric brake
booster
F32 DC AC inverter
F33 Driver power seat
F34 Passenger power seat
F35 Battery IEC 1 feed
F36 Electric power steering
F37 Rear seat entertainment/USB
charge/Wireless
charging module
F38 Body control module 8
F39 – Circuit
Breakers Usage
F40 –
F41 –
F42 Auxiliary power outlet/Lighter
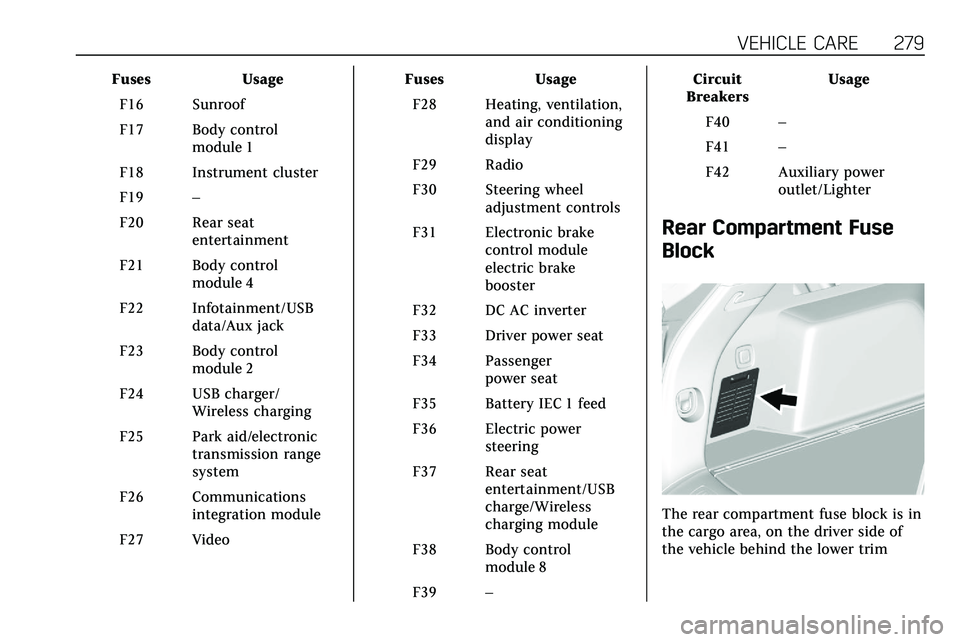
Rear Compartment Fuse
Block
The rear compartment fuse block is in
the cargo area, on the driver side of
the vehicle behind the lower trim
Page 304 of 384

VEHICLE CARE 303
{Warning
Lifting a vehicle and getting under
it to do maintenance or repairs is
dangerous without the appropriate
safety equipment and training. If a
jack is provided with the vehicle, it
is designed only for changing a flat
tire. If it is used for anything else,
you or others could be badly injured
or killed if the vehicle slips off the
jack. If a jack is provided with the
vehicle, only use it for changing a
flat tire.
If a tire goes flat, avoid further tire
and wheel damage by driving slowly
to a level place, well off the road,
if possible. Turn on the hazard
warning flashers. See Hazard Warning
Flashers 0143.
{Warning
Changing a tire can be dangerous.
The vehicle can slip off the jack and
roll over or fall causing injury or
(Continued)
Warning (Continued)
death. Find a level place to change
the tire. To help prevent the vehicle
from moving:
1. Set the parking brake firmly.
2. Put an automatictransmission in P (Park) or a
manual transmission in
1 (First) or R (Reverse).
3. Turn off the engine and do not restart while the vehicle
is raised.
4. Do not allow passengers to remain in the vehicle.
5. Place wheel blocks, if equipped, on both sides of
the tire at the opposite corner
of the tire being changed.
This vehicle may come with a jack
and spare tire or a tire sealant and
compressor kit. To use the jacking
equipment to change a spare tire
safely, follow the instructions below.
Then see Tire Changing 0310. To use the tire sealant and compressor kit,
see
Tire Sealant and Compressor Kit
0 304.
When the vehicle has a flat tire (2),
use the following example as a guide
to assist you in the placement of
wheel blocks (1), if equipped.
1. Wheel Block (If Equipped)
2. Flat Tire
The following information explains
how to repair or change a tire.
Page 312 of 384

VEHICLE CARE 311
4. Turn the wing nut (4)counterclockwise to remove the
jack (1), wheel wrench (2), and
strap (3). Place the tool container
near the tire being changed.5. Remove the nut retaining thespare tire.
6. Remove the spare tire and place it next to the tire being changed.
Removing the Flat Tire and
Installing the Spare Tire
1. Do a safety check beforeproceeding. See If a Tire Goes Flat
0 302.
2. Turn the wheel wrench
counterclockwise to loosen all
the wheel nuts, but do not
remove them yet.
3. Place the jack near the flat tire.
Caution
Make sure that the jack lift head is
in the correct position or you may
damage your vehicle. The repairs
would not be covered by your
warranty.
Page 313 of 384

312 VEHICLE CARE
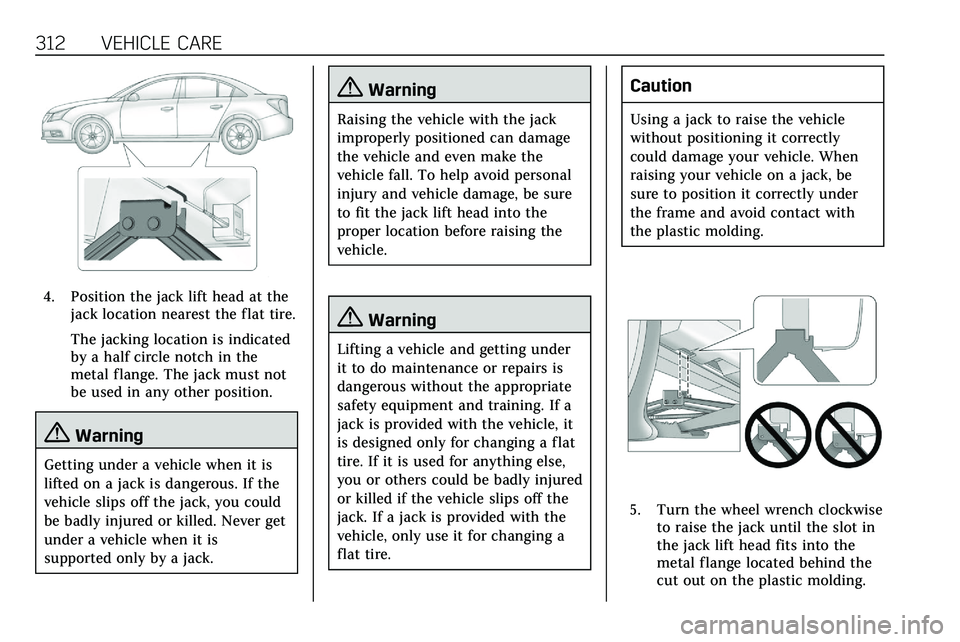
4. Position the jack lift head at thejack location nearest the flat tire.
The jacking location is indicated
by a half circle notch in the
metal flange. The jack must not
be used in any other position.
{Warning
Getting under a vehicle when it is
lifted on a jack is dangerous. If the
vehicle slips off the jack, you could
be badly injured or killed. Never get
under a vehicle when it is
supported only by a jack.
{Warning
Raising the vehicle with the jack
improperly positioned can damage
the vehicle and even make the
vehicle fall. To help avoid personal
injury and vehicle damage, be sure
to fit the jack lift head into the
proper location before raising the
vehicle.
{Warning
Lifting a vehicle and getting under
it to do maintenance or repairs is
dangerous without the appropriate
safety equipment and training. If a
jack is provided with the vehicle, it
is designed only for changing a flat
tire. If it is used for anything else,
you or others could be badly injured
or killed if the vehicle slips off the
jack. If a jack is provided with the
vehicle, only use it for changing a
flat tire.
Caution
Using a jack to raise the vehicle
without positioning it correctly
could damage your vehicle. When
raising your vehicle on a jack, be
sure to position it correctly under
the frame and avoid contact with
the plastic molding.
5. Turn the wheel wrench clockwiseto raise the jack until the slot in
the jack lift head fits into the
metal flange located behind the
cut out on the plastic molding.
Page 314 of 384

VEHICLE CARE 313
Do not raise the vehicle yet.
6. Put the compact spare tire near you.
7. Raise the vehicle by turning the wheel wrench clockwise in the
jack. Raise the vehicle far enough
off the ground so there is enough
room for the spare tire to fit
under the wheel well.
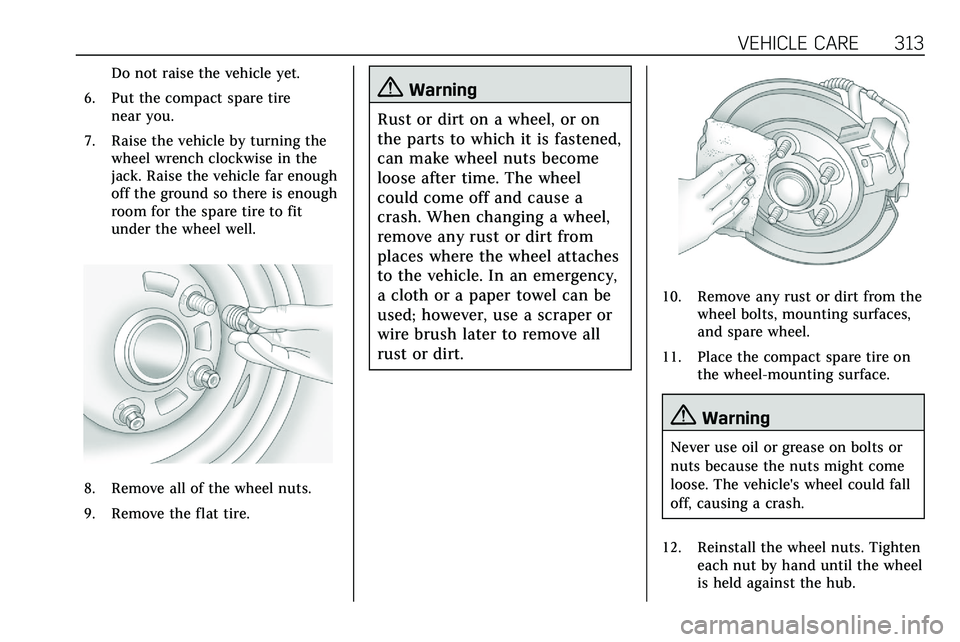
8. Remove all of the wheel nuts.
9. Remove the flat tire.
{Warning
Rust or dirt on a wheel, or on
the parts to which it is fastened,
can make wheel nuts become
loose after time. The wheel
could come off and cause a
crash. When changing a wheel,
remove any rust or dirt from
places where the wheel attaches
to the vehicle. In an emergency,
a cloth or a paper towel can be
used; however, use a scraper or
wire brush later to remove all
rust or dirt.
10. Remove any rust or dirt from the wheel bolts, mounting surfaces,
and spare wheel.
11. Place the compact spare tire on the wheel-mounting surface.
{Warning
Never use oil or grease on bolts or
nuts because the nuts might come
loose. The vehicle's wheel could fall
off, causing a crash.
12. Reinstall the wheel nuts. Tighten each nut by hand until the wheel
is held against the hub.
Page 315 of 384

314 VEHICLE CARE
13. Lower the vehicle by turning thejack handle counterclockwise.
{Warning
Wheel nuts that are improperly or
incorrectly tightened can cause the
wheels to become loose or come off.
The wheel nuts should be tightened
with a torque wrench to the proper
torque specification after replacing.
Follow the torque specification
supplied by the aftermarket
manufacturer when using accessory
locking wheel nuts. See Capacities
and Specifications 0346 for original
equipment wheel nut torque
specifications.
Caution
Improperly tightened wheel nuts
can lead to brake pulsation and
rotor damage. To avoid expensive
brake repairs, evenly tighten the
wheel nuts in the proper sequence
(Continued)
Caution (Continued)
and to the proper torque
specification. SeeCapacities and
Specifications 0346 for the wheel
nut torque specification.
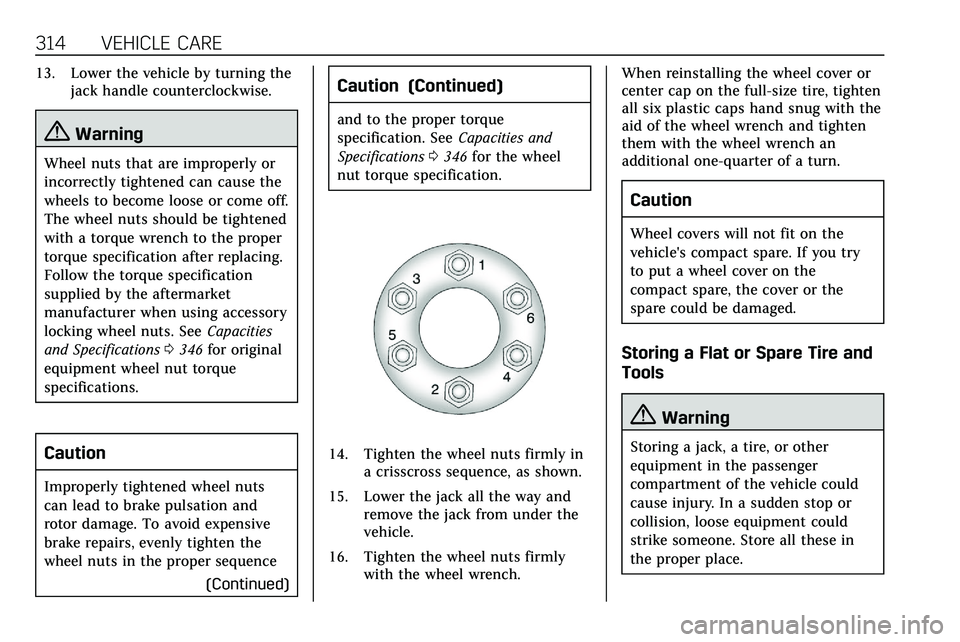
14. Tighten the wheel nuts firmly in a crisscross sequence, as shown.
15. Lower the jack all the way and remove the jack from under the
vehicle.
16. Tighten the wheel nuts firmly with the wheel wrench. When reinstalling the wheel cover or
center cap on the full-size tire, tighten
all six plastic caps hand snug with the
aid of the wheel wrench and tighten
them with the wheel wrench an
additional one-quarter of a turn.
Caution
Wheel covers will not fit on the
vehicle's compact spare. If you try
to put a wheel cover on the
compact spare, the cover or the
spare could be damaged.
Storing a Flat or Spare Tire and
Tools
{Warning
Storing a jack, a tire, or other
equipment in the passenger
compartment of the vehicle could
cause injury. In a sudden stop or
collision, loose equipment could
strike someone. Store all these in
the proper place.