remove seats CADILLAC XT5 2020 Owner's Manual
[x] Cancel search | Manufacturer: CADILLAC, Model Year: 2020, Model line: XT5, Model: CADILLAC XT5 2020Pages: 384, PDF Size: 6.52 MB
Page 13 of 384
12 KEYS, DOORS, AND WINDOWS
Keyless Access Operation
With the Keyless Access system, you
can lock and unlock the doors and
access the liftgate without removing
the RKE transmitter from your pocket,
purse, briefcase, etc. The RKE
transmitter should be within 1 m (3 ft)
of the liftgate or door being opened.
Keyless Access can be programmed to
unlock all doors on the first lock/
unlock press from the driver door. See
Vehicle Personalization0131.
If equipped with memory seats, RKE
transmitters 1 and 2 are linked to
seating positions of memory 1 or 2.
See Memory Seats 046.
Keyless Unlocking/Locking from the
Driver Door
When the doors are locked and the
RKE transmitter is within 1 m (3 ft) of
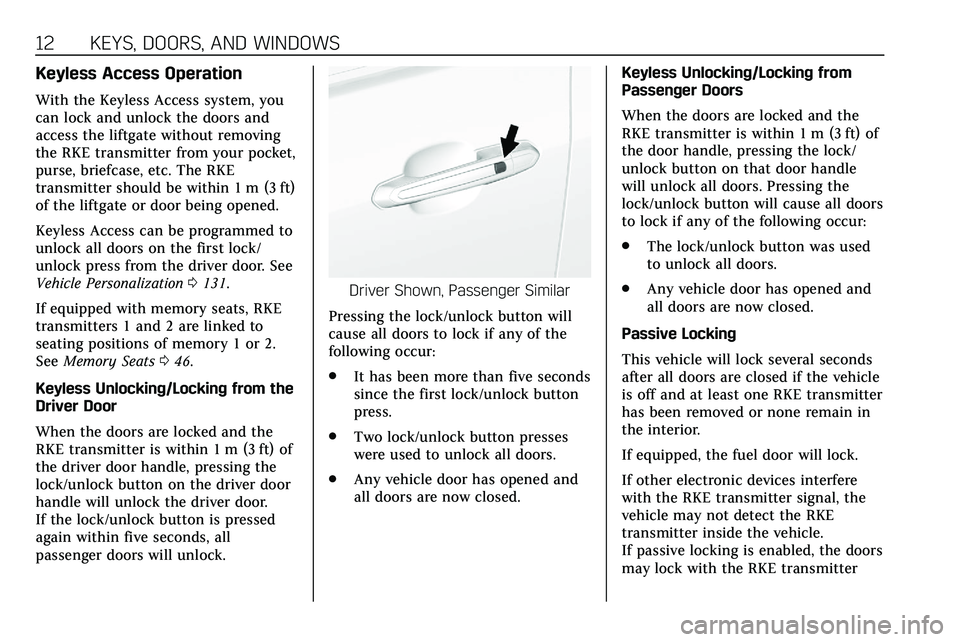
the driver door handle, pressing the
lock/unlock button on the driver door
handle will unlock the driver door.
If the lock/unlock button is pressed
again within five seconds, all
passenger doors will unlock.
Driver Shown, Passenger Similar
Pressing the lock/unlock button will
cause all doors to lock if any of the
following occur:
. It has been more than five seconds
since the first lock/unlock button
press.
. Two lock/unlock button presses
were used to unlock all doors.
. Any vehicle door has opened and
all doors are now closed. Keyless Unlocking/Locking from
Passenger Doors
When the doors are locked and the
RKE transmitter is within 1 m (3 ft) of
the door handle, pressing the lock/
unlock button on that door handle
will unlock all doors. Pressing the
lock/unlock button will cause all doors
to lock if any of the following occur:
.
The lock/unlock button was used
to unlock all doors.
. Any vehicle door has opened and
all doors are now closed.
Passive Locking
This vehicle will lock several seconds
after all doors are closed if the vehicle
is off and at least one RKE transmitter
has been removed or none remain in
the interior.
If equipped, the fuel door will lock.
If other electronic devices interfere
with the RKE transmitter signal, the
vehicle may not detect the RKE
transmitter inside the vehicle.
If passive locking is enabled, the doors
may lock with the RKE transmitter
Page 15 of 384
14 KEYS, DOORS, AND WINDOWS
driver door and turn the key
counterclockwise, to the unlock
position, five times within
10 seconds.
The DIC displays READY FOR
REMOTE #2, 3, 4, ETC.
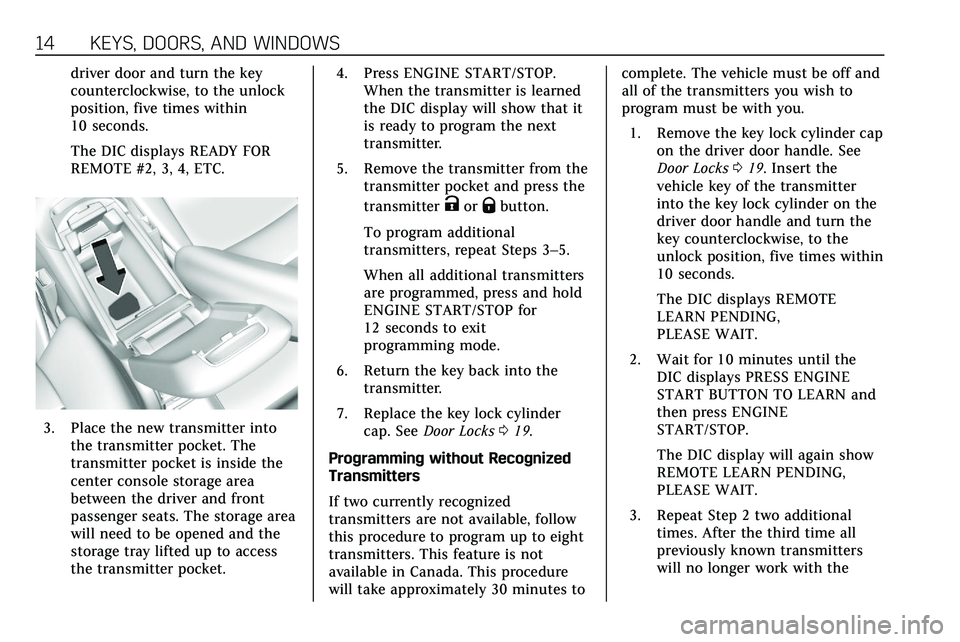
3. Place the new transmitter intothe transmitter pocket. The
transmitter pocket is inside the
center console storage area
between the driver and front
passenger seats. The storage area
will need to be opened and the
storage tray lifted up to access
the transmitter pocket. 4. Press ENGINE START/STOP.
When the transmitter is learned
the DIC display will show that it
is ready to program the next
transmitter.
5. Remove the transmitter from the transmitter pocket and press the
transmitter
KorQbutton.
To program additional
transmitters, repeat Steps 3–5.
When all additional transmitters
are programmed, press and hold
ENGINE START/STOP for
12 seconds to exit
programming mode.
6. Return the key back into the transmitter.
7. Replace the key lock cylinder cap. See Door Locks 019.
Programming without Recognized
Transmitters
If two currently recognized
transmitters are not available, follow
this procedure to program up to eight
transmitters. This feature is not
available in Canada. This procedure
will take approximately 30 minutes to complete. The vehicle must be off and
all of the transmitters you wish to
program must be with you.
1. Remove the key lock cylinder cap on the driver door handle. See
Door Locks 019. Insert the
vehicle key of the transmitter
into the key lock cylinder on the
driver door handle and turn the
key counterclockwise, to the
unlock position, five times within
10 seconds.
The DIC displays REMOTE
LEARN PENDING,
PLEASE WAIT.
2. Wait for 10 minutes until the DIC displays PRESS ENGINE
START BUTTON TO LEARN and
then press ENGINE
START/STOP.
The DIC display will again show
REMOTE LEARN PENDING,
PLEASE WAIT.
3. Repeat Step 2 two additional times. After the third time all
previously known transmitters
will no longer work with the
Page 16 of 384
KEYS, DOORS, AND WINDOWS 15
vehicle. Remaining transmitters
can be relearned during the next
steps.
The DIC display should now
show READY FOR REMOTE # 1.
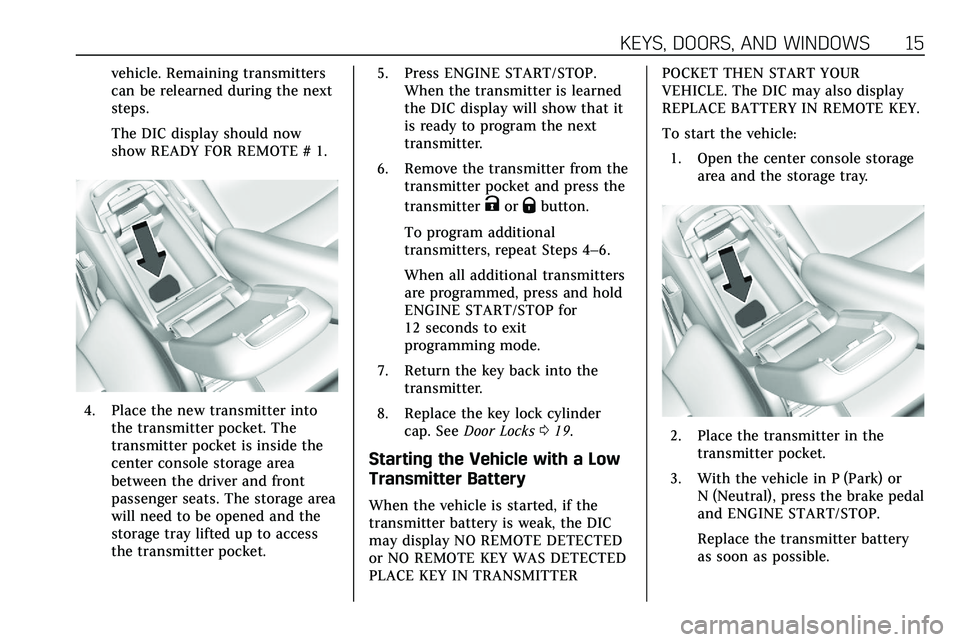
4. Place the new transmitter intothe transmitter pocket. The
transmitter pocket is inside the
center console storage area
between the driver and front
passenger seats. The storage area
will need to be opened and the
storage tray lifted up to access
the transmitter pocket. 5. Press ENGINE START/STOP.
When the transmitter is learned
the DIC display will show that it
is ready to program the next
transmitter.
6. Remove the transmitter from the transmitter pocket and press the
transmitter
KorQbutton.
To program additional
transmitters, repeat Steps 4–6.
When all additional transmitters
are programmed, press and hold
ENGINE START/STOP for
12 seconds to exit
programming mode.
7. Return the key back into the transmitter.
8. Replace the key lock cylinder cap. See Door Locks 019.
Starting the Vehicle with a Low
Transmitter Battery
When the vehicle is started, if the
transmitter battery is weak, the DIC
may display NO REMOTE DETECTED
or NO REMOTE KEY WAS DETECTED
PLACE KEY IN TRANSMITTER POCKET THEN START YOUR
VEHICLE. The DIC may also display
REPLACE BATTERY IN REMOTE KEY.
To start the vehicle:
1. Open the center console storage area and the storage tray.
2. Place the transmitter in thetransmitter pocket.
3. With the vehicle in P (Park) or N (Neutral), press the brake pedal
and ENGINE START/STOP.
Replace the transmitter battery
as soon as possible.
Page 18 of 384
KEYS, DOORS, AND WINDOWS 17
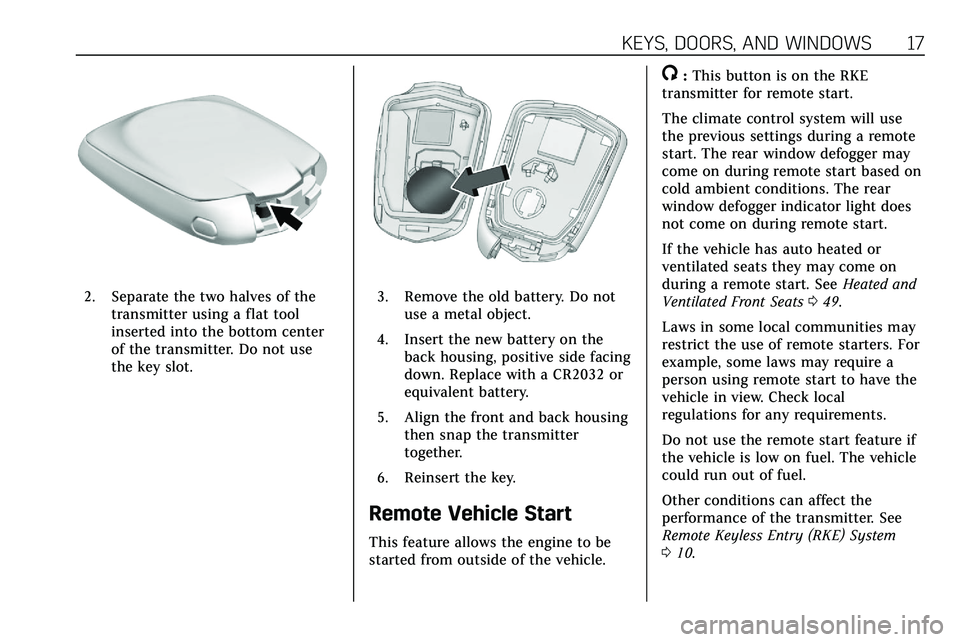
2. Separate the two halves of thetransmitter using a flat tool
inserted into the bottom center
of the transmitter. Do not use
the key slot.3. Remove the old battery. Do notuse a metal object.
4. Insert the new battery on the back housing, positive side facing
down. Replace with a CR2032 or
equivalent battery.
5. Align the front and back housing then snap the transmitter
together.
6. Reinsert the key.
Remote Vehicle Start
This feature allows the engine to be
started from outside of the vehicle.
/: This button is on the RKE
transmitter for remote start.
The climate control system will use
the previous settings during a remote
start. The rear window defogger may
come on during remote start based on
cold ambient conditions. The rear
window defogger indicator light does
not come on during remote start.
If the vehicle has auto heated or
ventilated seats they may come on
during a remote start. See Heated and
Ventilated Front Seats 049.
Laws in some local communities may
restrict the use of remote starters. For
example, some laws may require a
person using remote start to have the
vehicle in view. Check local
regulations for any requirements.
Do not use the remote start feature if
the vehicle is low on fuel. The vehicle
could run out of fuel.
Other conditions can affect the
performance of the transmitter. See
Remote Keyless Entry (RKE) System
0 10.
Page 48 of 384
SEATS AND RESTRAINTS 47
Vehicle Personalization Settings
.To have the Seat Entry Memory
movement begin when the vehicle
is started, select the Settings
menu, then Vehicle, then Seating
Position, and then Seat Entry
Memory. Select On or Off. See
“Seat Entry Memory” later in this
section.
. To begin Seat Exit Memory
movement when the vehicle is
turned off and the driver door is
opened, or when the vehicle is
turned off with the driver door
already opened, select the Settings
menu, then Vehicle, then Seating
Position, and then Seat Exit
Memory. Select On or Off. See
“Seat Exit Memory” later in this
section.
. See Vehicle Personalization 0131
for additional setting information.
Identifying Driver Number
To identify the driver number: 1. Move your RKE transmitter away from the vehicle. 2. Start the vehicle with another
key or RKE transmitter. The DIC
should display the driver number
for the other RKE transmitter.
Turn the vehicle off and remove
the key or RKE transmitter from
the vehicle.
3. Start the vehicle with the initial key or RKE transmitter. The DIC
should display the driver number
of your RKE transmitter.
Saving Memory Positions
Read these instructions completely
before saving memory positions.
To save preferred driving positions
1 and 2: 1. Turn the vehicle on or to ACC/ ACCESSORY.
A DIC welcome message may
indicate driver number 1 or 2.
2. Adjust all available memory features to the desired driving
position.
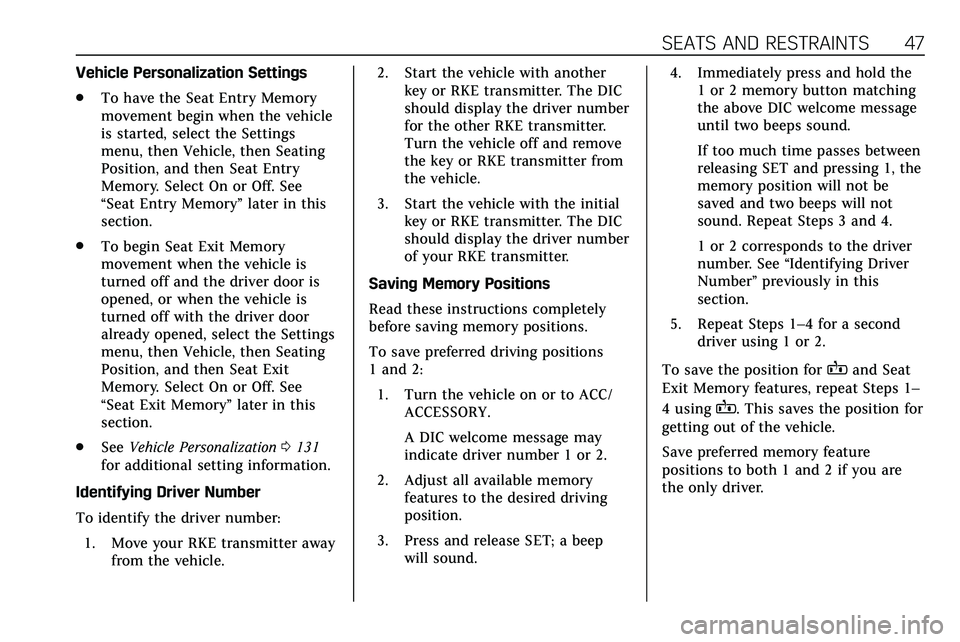
3. Press and release SET; a beep will sound. 4. Immediately press and hold the
1 or 2 memory button matching
the above DIC welcome message
until two beeps sound.
If too much time passes between
releasing SET and pressing 1, the
memory position will not be
saved and two beeps will not
sound. Repeat Steps 3 and 4.
1 or 2 corresponds to the driver
number. See “Identifying Driver
Number” previously in this
section.
5. Repeat Steps 1–4 for a second driver using 1 or 2.
To save the position for
Band Seat
Exit Memory features, repeat Steps 1–
4 using
B. This saves the position for
getting out of the vehicle.
Save preferred memory feature
positions to both 1 and 2 if you are
the only driver.
Page 50 of 384
SEATS AND RESTRAINTS 49
.Power steering wheel, if equipped
Obstructions
If something has blocked the driver
seat and/or power steering wheel
while recalling a memory position, the
recall may stop. Remove the
obstruction and try the recall again.
If the memory position still does not
recall, see your dealer.
Heated and Ventilated
Front Seats
{Warning
If temperature change or pain to
the skin cannot be felt, the seat
heater may cause burns. To reduce
the risk of burns, use care when
using the seat heater, especially for
long periods of time. Do not place
anything on the seat that insulates
against heat, such as a blanket,
cushion, cover, or similar item. This
may cause the seat heater to (Continued)
Warning (Continued)
overheat. An overheated seat heater
may cause a burn or may damage
the seat.
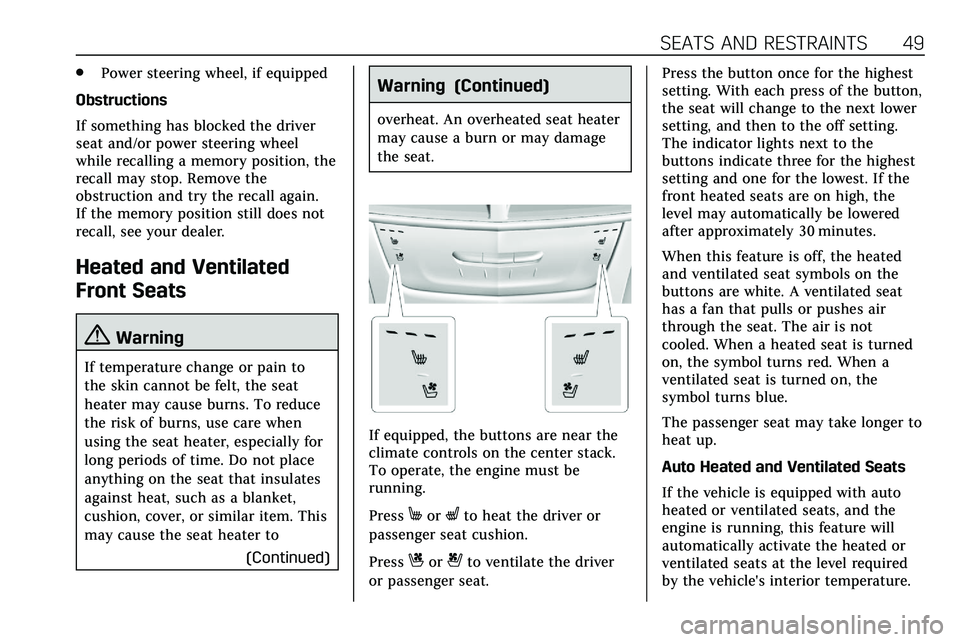
If equipped, the buttons are near the
climate controls on the center stack.
To operate, the engine must be
running.
Press
MorLto heat the driver or
passenger seat cushion.
Press
Cor{to ventilate the driver
or passenger seat. Press the button once for the highest
setting. With each press of the button,
the seat will change to the next lower
setting, and then to the off setting.
The indicator lights next to the
buttons indicate three for the highest
setting and one for the lowest. If the
front heated seats are on high, the
level may automatically be lowered
after approximately 30 minutes.
When this feature is off, the heated
and ventilated seat symbols on the
buttons are white. A ventilated seat
has a fan that pulls or pushes air
through the seat. The air is not
cooled. When a heated seat is turned
on, the symbol turns red. When a
ventilated seat is turned on, the
symbol turns blue.
The passenger seat may take longer to
heat up.
Auto Heated and Ventilated Seats
If the vehicle is equipped with auto
heated or ventilated seats, and the
engine is running, this feature will
automatically activate the heated or
ventilated seats at the level required
by the vehicle's interior temperature.
Page 70 of 384
SEATS AND RESTRAINTS 69
may or may not turn off the front
outboard passenger frontal airbag,
depending upon the person's seating
posture and body build. Everyone in
the vehicle who has outgrown child
restraints should wear a seat belt
properly—whether or not there is an
airbag for that person.
{Warning
If the airbag readiness light ever
comes on and stays on, it means
that something may be wrong with
the airbag system. To help avoid
injury to yourself or others, have
the vehicle serviced right away. See
Airbag Readiness Light 0114 for
more information, including
important safety information.
If the On Indicator Is Lit for a
Child Restraint
The passenger sensing system is
designed to turn off the front
outboard passenger frontal airbag if
the system determines that an infant is present in a child restraint. If a
child restraint has been installed and
the ON indicator is lit:
1. Turn the vehicle off.
2. Remove the child restraint from the vehicle.
3. Remove any additional items from the seat such as blankets,
cushions, seat covers, seat
heaters, or seat massagers.
4. Reinstall the child restraint following the directions provided
by the child restraint
manufacturer and refer to
Securing Child Restraints (With the
Seat Belt in the Rear Seat) 086 or
Securing Child Restraints (With the
Seat Belt in the Front Seat) 088.
Make sure the seat belt retractor
is locked by pulling the shoulder
belt all the way out of the
retractor when installing the
child restraint, even if the child
restraint is equipped with a seat
belt lock off. When the retractor
lock is set, the belt can be
tightened but not pulled out of
the retractor. 5. If, after reinstalling the child
restraint and restarting the
vehicle, the ON indicator is still
lit, turn the vehicle off. Then
slightly recline the vehicle
seatback and adjust the seat
cushion, if adjustable, to make
sure that the vehicle seatback is
not pushing the child restraint
into the seat cushion.
Also make sure the child
restraint is not trapped under the
vehicle head restraint. If this
happens, adjust the head
restraint. See Head Restraints
0 43.
6. Restart the vehicle.
The passenger sensing system may or
may not turn off the airbag for a child
in a child restraint depending upon
the child’s size. It is better to secure
the child restraint in a rear seat. Never
put a rear-facing child restraint in the
front seat, even if the ON indicator is
not lit.
Page 71 of 384
70 SEATS AND RESTRAINTS
If the Off Indicator Is Lit for an
Adult-Sized Occupant
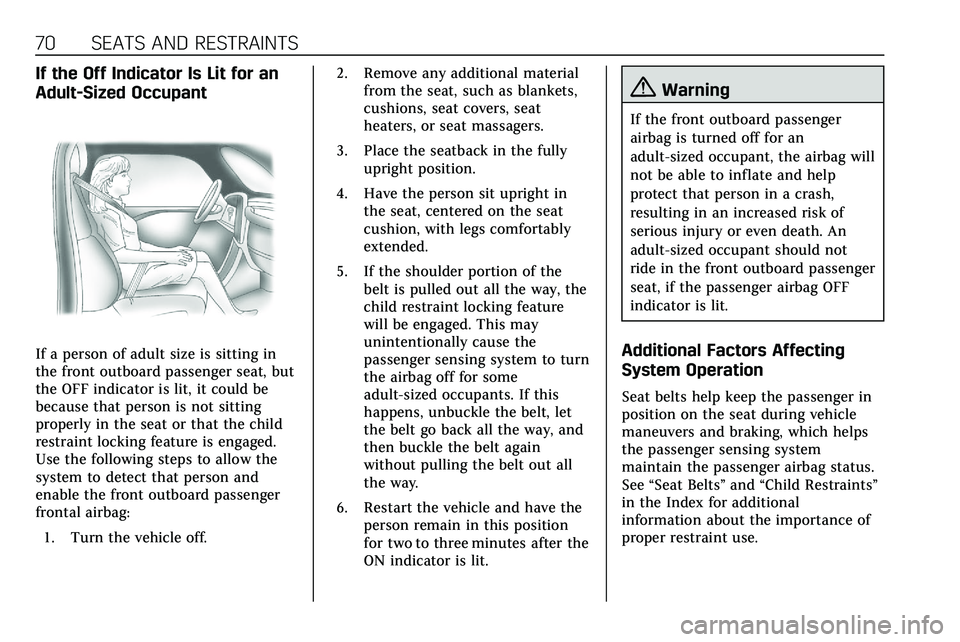
If a person of adult size is sitting in
the front outboard passenger seat, but
the OFF indicator is lit, it could be
because that person is not sitting
properly in the seat or that the child
restraint locking feature is engaged.
Use the following steps to allow the
system to detect that person and
enable the front outboard passenger
frontal airbag:1. Turn the vehicle off. 2. Remove any additional material
from the seat, such as blankets,
cushions, seat covers, seat
heaters, or seat massagers.
3. Place the seatback in the fully upright position.
4. Have the person sit upright in the seat, centered on the seat
cushion, with legs comfortably
extended.
5. If the shoulder portion of the belt is pulled out all the way, the
child restraint locking feature
will be engaged. This may
unintentionally cause the
passenger sensing system to turn
the airbag off for some
adult-sized occupants. If this
happens, unbuckle the belt, let
the belt go back all the way, and
then buckle the belt again
without pulling the belt out all
the way.
6. Restart the vehicle and have the person remain in this position
for two to three minutes after the
ON indicator is lit.
{Warning
If the front outboard passenger
airbag is turned off for an
adult-sized occupant, the airbag will
not be able to inflate and help
protect that person in a crash,
resulting in an increased risk of
serious injury or even death. An
adult-sized occupant should not
ride in the front outboard passenger
seat, if the passenger airbag OFF
indicator is lit.
Additional Factors Affecting
System Operation
Seat belts help keep the passenger in
position on the seat during vehicle
maneuvers and braking, which helps
the passenger sensing system
maintain the passenger airbag status.
See “Seat Belts” and“Child Restraints”
in the Index for additional
information about the importance of
proper restraint use.
Page 72 of 384
SEATS AND RESTRAINTS 71
A thick layer of additional material,
such as a blanket or cushion,
or aftermarket equipment such as seat
covers, seat heaters, and seat
massagers can affect how well the
passenger sensing system operates.
We recommend that you not use seat
covers or other aftermarket equipment
except when approved by GM for your
specific vehicle. SeeAdding Equipment
to the Airbag-Equipped Vehicle 071 for
more information about modifications
that can affect how the system
operates.
The ON indicator may be lit if an
object, such as a briefcase, handbag,
grocery bag, laptop, or other electronic
device, is put on an unoccupied seat.
If this is not desired, remove the
object from the seat.
{Warning
Stowing articles under the
passenger seat or between the
passenger seat cushion and
seatback may interfere with the
proper operation of the passenger
sensing system.
Servicing the
Airbag-Equipped Vehicle
Airbags affect how the vehicle should
be serviced. There are parts of the
airbag system in several places around
the vehicle. Your dealer and the
service manual have information
about servicing the vehicle and the
airbag system. To purchase a service
manual, see Publication Ordering
Information 0358.
{Warning
For up to 10 seconds after the
vehicle is turned off and the battery
is disconnected, an airbag can still
inflate during improper service. You
can be injured if you are close to an
airbag when it inflates. Avoid
yellow connectors. They are
probably part of the airbag system.
Be sure to follow proper service
procedures, and make sure the
person performing work for you is
qualified to do so.
Adding Equipment to the
Airbag-Equipped Vehicle
Adding accessories that change the
vehicle's frame, bumper system,
height, front end, or side sheet metal
may keep the airbag system from
working properly.
The operation of the airbag system
can also be affected by changing,
including improperly repairing or
replacing, any parts of the following:
.
Airbag system, including airbag
modules, front or side impact
sensors, sensing and diagnostic
module, or airbag wiring
. Front seats, including stitching,
seams or zippers
. Seat belts
. Steering wheel, instrument panel,
overhead console, ceiling trim,
or pillar garnish trim
. Inner door seals, including
speakers
Your dealer and the service manual
have information about the location of
the airbag modules and sensors,
Page 89 of 384

88 SEATS AND RESTRAINTS
5. To tighten the belt, push downon the child restraint, pull the
shoulder portion of the belt to
tighten the lap portion of the
belt, and feed the shoulder belt
back into the retractor. When
installing a forward-facing child
restraint, it may be helpful to use
your knee to push down on the
child restraint as you tighten
the belt.
Try to pull the belt out of the
retractor to make sure the
retractor is locked. If the
retractor is not locked, repeat
Steps 4 and 5. 6. If the child restraint has a top
tether, follow the child restraint
manufacturer's instructions
regarding the use of the top
tether. See Lower Anchors and
Tethers for Children (LATCH
System) 080.
7. Before placing a child in the child restraint, make sure it is
securely held in place. To check,
grasp the child restraint at the
seat belt path and attempt to
move it side to side and back
and forth. When the child
restraint is properly installed,
there should be no more than
2.5 cm (1 in) of movement.
To remove the child restraint,
unbuckle the vehicle seat belt and let
it return to the stowed position. If the
top tether is attached to a top tether
anchor, disconnect it.
Securing Child Restraints
(With the Seat Belt in the
Front Seat)
This vehicle has airbags. A rear seat is
a safer place to secure a
forward-facing child restraint. See
Where to Put the Restraint 079.
In addition, the vehicle has a
passenger sensing system which is
designed to turn off the front
outboard passenger frontal airbag
under certain conditions. See
Passenger Sensing System 067 and
Passenger Airbag Status Indicator 0114
for more information, including
important safety information.
Never put a rear-facing child seat in
the front. This is because the risk to
the rear-facing child is so great, if the
airbag deploys.
{Warning
A child in a rear-facing child
restraint can be seriously injured or
killed if the front outboard
(Continued)