wheel change CADILLAC XT5 2020 Owner's Manual
[x] Cancel search | Manufacturer: CADILLAC, Model Year: 2020, Model line: XT5, Model: CADILLAC XT5 2020Pages: 384, PDF Size: 6.52 MB
Page 7 of 384
6 INTRODUCTION
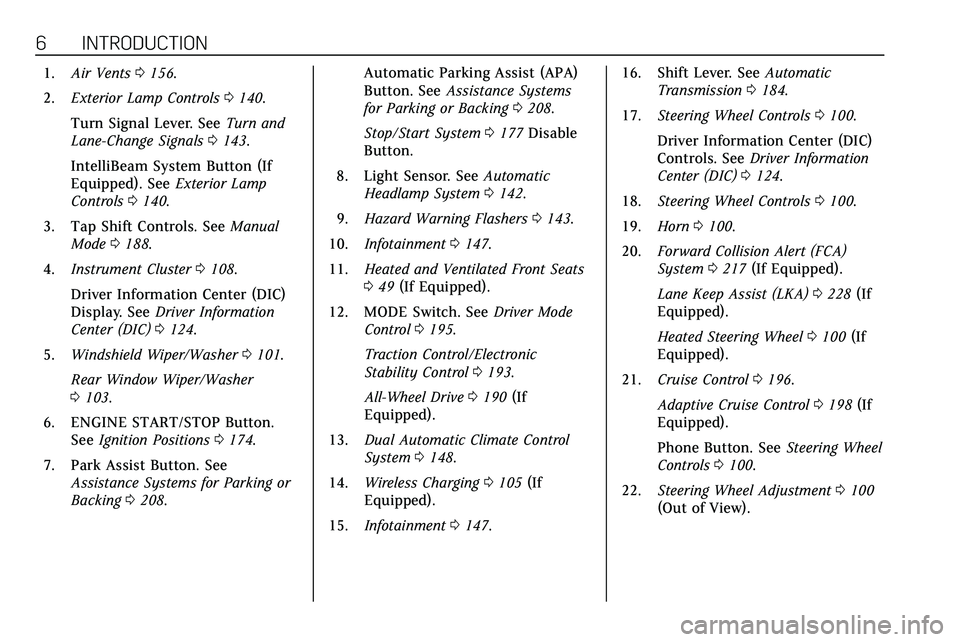
1.Air Vents 0156.
2. Exterior Lamp Controls 0140.
Turn Signal Lever. See Turn and
Lane-Change Signals 0143.
IntelliBeam System Button (If
Equipped). See Exterior Lamp
Controls 0140.
3. Tap Shift Controls. See Manual
Mode 0188.
4. Instrument Cluster 0108.
Driver Information Center (DIC)
Display. See Driver Information
Center (DIC) 0124.
5. Windshield Wiper/Washer 0101.
Rear Window Wiper/Washer
0 103.
6. ENGINE START/STOP Button. See Ignition Positions 0174.
7. Park Assist Button. See Assistance Systems for Parking or
Backing 0208. Automatic Parking Assist (APA)
Button. See
Assistance Systems
for Parking or Backing 0208.
Stop/Start System 0177 Disable
Button.
8. Light Sensor. See Automatic
Headlamp System 0142.
9. Hazard Warning Flashers 0143.
10. Infotainment 0147.
11. Heated and Ventilated Front Seats
049 (If Equipped).
12. MODE Switch. See Driver Mode
Control 0195.
Traction Control/Electronic
Stability Control 0193.
All-Wheel Drive 0190 (If
Equipped).
13. Dual Automatic Climate Control
System 0148.
14. Wireless Charging 0105 (If
Equipped).
15. Infotainment 0147. 16. Shift Lever. See
Automatic
Transmission 0184.
17. Steering Wheel Controls 0100.
Driver Information Center (DIC)
Controls. See Driver Information
Center (DIC) 0124.
18. Steering Wheel Controls 0100.
19. Horn 0100.
20. Forward Collision Alert (FCA)
System 0217 (If Equipped).
Lane Keep Assist (LKA) 0228 (If
Equipped).
Heated Steering Wheel 0100 (If
Equipped).
21. Cruise Control 0196.
Adaptive Cruise Control 0198 (If
Equipped).
Phone Button. See Steering Wheel
Controls 0100.
22. Steering Wheel Adjustment 0100
(Out of View).
Page 33 of 384
32 KEYS, DOORS, AND WINDOWS
.A message to service the steering
column lock indicates that an
issue has been detected with the
column lock feature and the
vehicle should be serviced.
. A message that the steering
column is locked indicates that
the engine is running, but the
steering column is still locked. It is
normal for the column to be
locked during a remote start, but
the column should unlock after
the brake pedal is pressed and the
vehicle is started. No message will
display during a remote start.
. A message that the steering wheel
must be turned and the vehicle
must be started again indicates
that the column lock mechanism
is bound, the column locking
device was unable to unlock the
steering column, and the vehicle
did not start. If this happens,
immediately turn the steering
wheel from side to side to unbind
the column lock. If this does not
unlock the steering column, turn
the vehicle off and open the driver
door to reset the system. Then turn the vehicle on and
immediately turn the steering
wheel side to side for about
15 seconds. In some cases, it may
take significant force to unbind
the column.
To keep the steering column from
binding, straighten the front wheels
before turning off the vehicle.
Immobilizer
See Radio Frequency Statement 0358.
Immobilizer Operation
This vehicle has a passive
theft-deterrent system.
The system does not have to be
manually armed or disarmed.
The vehicle is automatically
immobilized when the vehicle is
turned off.
The immobilization system is
disarmed when the ignition is on or in
ACC/ACCESSORY and a valid
transmitter is present in the vehicle.
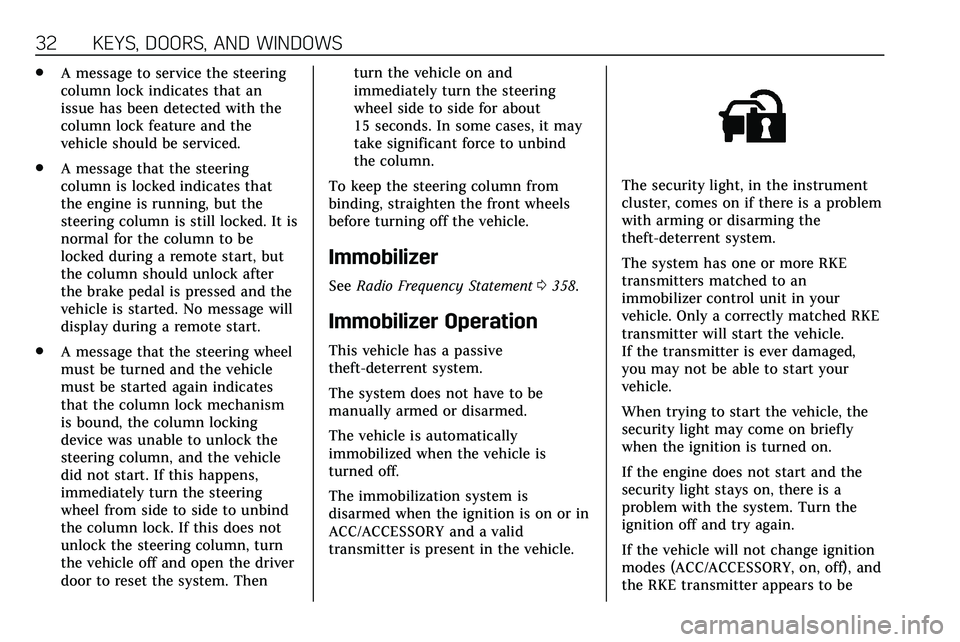
The security light, in the instrument
cluster, comes on if there is a problem
with arming or disarming the
theft-deterrent system.
The system has one or more RKE
transmitters matched to an
immobilizer control unit in your
vehicle. Only a correctly matched RKE
transmitter will start the vehicle.
If the transmitter is ever damaged,
you may not be able to start your
vehicle.
When trying to start the vehicle, the
security light may come on briefly
when the ignition is turned on.
If the engine does not start and the
security light stays on, there is a
problem with the system. Turn the
ignition off and try again.
If the vehicle will not change ignition
modes (ACC/ACCESSORY, on, off), and
the RKE transmitter appears to be
Page 47 of 384
46 SEATS AND RESTRAINTS
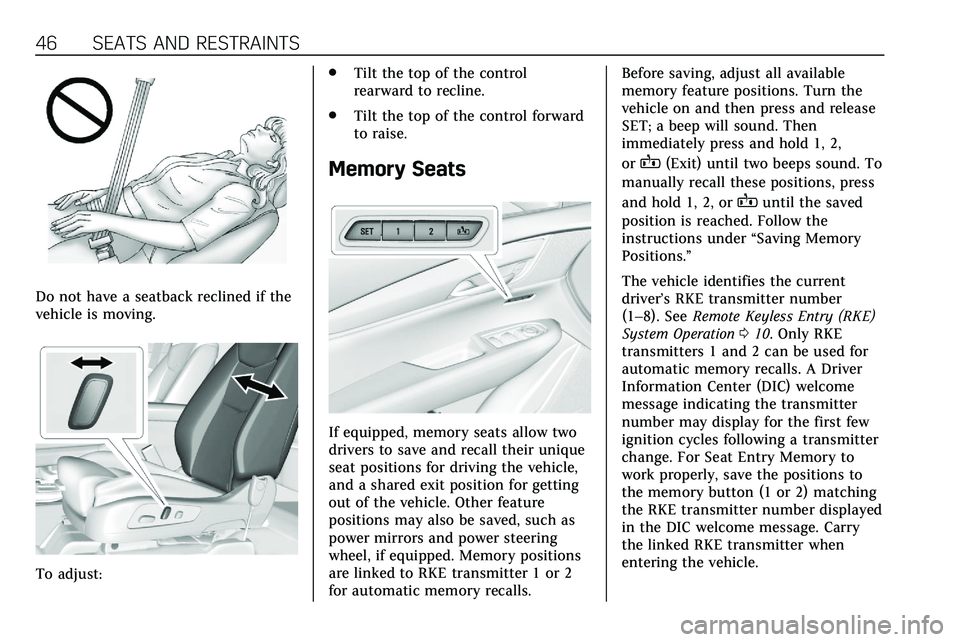
Do not have a seatback reclined if the
vehicle is moving.
To adjust:.
Tilt the top of the control
rearward to recline.
. Tilt the top of the control forward
to raise.
Memory Seats
If equipped, memory seats allow two
drivers to save and recall their unique
seat positions for driving the vehicle,
and a shared exit position for getting
out of the vehicle. Other feature
positions may also be saved, such as
power mirrors and power steering
wheel, if equipped. Memory positions
are linked to RKE transmitter 1 or 2
for automatic memory recalls. Before saving, adjust all available
memory feature positions. Turn the
vehicle on and then press and release
SET; a beep will sound. Then
immediately press and hold 1, 2,
or
B(Exit) until two beeps sound. To
manually recall these positions, press
and hold 1, 2, or
Buntil the saved
position is reached. Follow the
instructions under “Saving Memory
Positions.”
The vehicle identifies the current
driver’s RKE transmitter number
(1–8). See Remote Keyless Entry (RKE)
System Operation 010. Only RKE
transmitters 1 and 2 can be used for
automatic memory recalls. A Driver
Information Center (DIC) welcome
message indicating the transmitter
number may display for the first few
ignition cycles following a transmitter
change. For Seat Entry Memory to
work properly, save the positions to
the memory button (1 or 2) matching
the RKE transmitter number displayed
in the DIC welcome message. Carry
the linked RKE transmitter when
entering the vehicle.
Page 50 of 384
SEATS AND RESTRAINTS 49
.Power steering wheel, if equipped
Obstructions
If something has blocked the driver
seat and/or power steering wheel
while recalling a memory position, the
recall may stop. Remove the
obstruction and try the recall again.
If the memory position still does not
recall, see your dealer.
Heated and Ventilated
Front Seats
{Warning
If temperature change or pain to
the skin cannot be felt, the seat
heater may cause burns. To reduce
the risk of burns, use care when
using the seat heater, especially for
long periods of time. Do not place
anything on the seat that insulates
against heat, such as a blanket,
cushion, cover, or similar item. This
may cause the seat heater to (Continued)
Warning (Continued)
overheat. An overheated seat heater
may cause a burn or may damage
the seat.
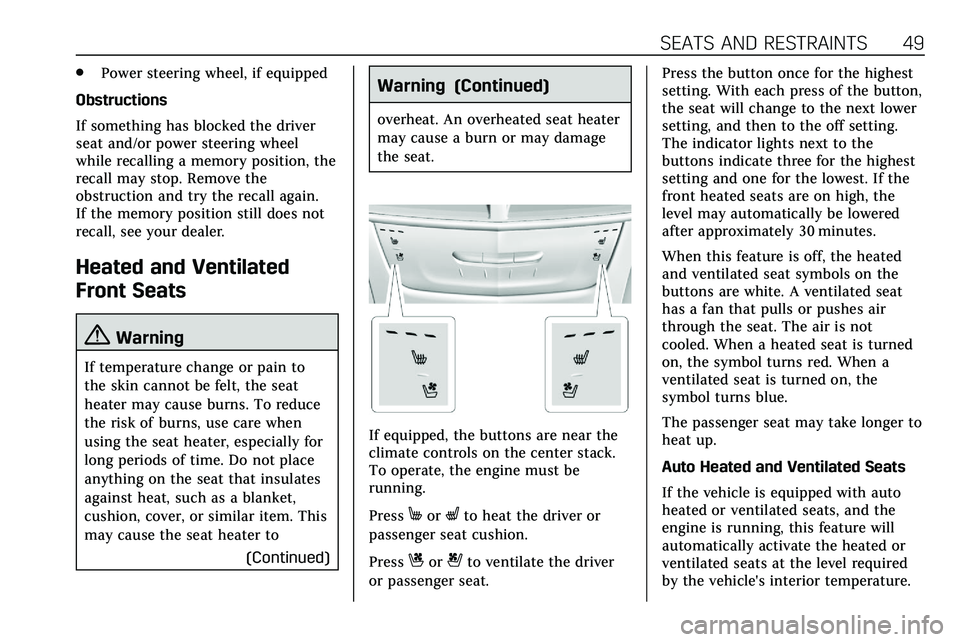
If equipped, the buttons are near the
climate controls on the center stack.
To operate, the engine must be
running.
Press
MorLto heat the driver or
passenger seat cushion.
Press
Cor{to ventilate the driver
or passenger seat. Press the button once for the highest
setting. With each press of the button,
the seat will change to the next lower
setting, and then to the off setting.
The indicator lights next to the
buttons indicate three for the highest
setting and one for the lowest. If the
front heated seats are on high, the
level may automatically be lowered
after approximately 30 minutes.
When this feature is off, the heated
and ventilated seat symbols on the
buttons are white. A ventilated seat
has a fan that pulls or pushes air
through the seat. The air is not
cooled. When a heated seat is turned
on, the symbol turns red. When a
ventilated seat is turned on, the
symbol turns blue.
The passenger seat may take longer to
heat up.
Auto Heated and Ventilated Seats
If the vehicle is equipped with auto
heated or ventilated seats, and the
engine is running, this feature will
automatically activate the heated or
ventilated seats at the level required
by the vehicle's interior temperature.
Page 72 of 384
SEATS AND RESTRAINTS 71
A thick layer of additional material,
such as a blanket or cushion,
or aftermarket equipment such as seat
covers, seat heaters, and seat
massagers can affect how well the
passenger sensing system operates.
We recommend that you not use seat
covers or other aftermarket equipment
except when approved by GM for your
specific vehicle. SeeAdding Equipment
to the Airbag-Equipped Vehicle 071 for
more information about modifications
that can affect how the system
operates.
The ON indicator may be lit if an
object, such as a briefcase, handbag,
grocery bag, laptop, or other electronic
device, is put on an unoccupied seat.
If this is not desired, remove the
object from the seat.
{Warning
Stowing articles under the
passenger seat or between the
passenger seat cushion and
seatback may interfere with the
proper operation of the passenger
sensing system.
Servicing the
Airbag-Equipped Vehicle
Airbags affect how the vehicle should
be serviced. There are parts of the
airbag system in several places around
the vehicle. Your dealer and the
service manual have information
about servicing the vehicle and the
airbag system. To purchase a service
manual, see Publication Ordering
Information 0358.
{Warning
For up to 10 seconds after the
vehicle is turned off and the battery
is disconnected, an airbag can still
inflate during improper service. You
can be injured if you are close to an
airbag when it inflates. Avoid
yellow connectors. They are
probably part of the airbag system.
Be sure to follow proper service
procedures, and make sure the
person performing work for you is
qualified to do so.
Adding Equipment to the
Airbag-Equipped Vehicle
Adding accessories that change the
vehicle's frame, bumper system,
height, front end, or side sheet metal
may keep the airbag system from
working properly.
The operation of the airbag system
can also be affected by changing,
including improperly repairing or
replacing, any parts of the following:
.
Airbag system, including airbag
modules, front or side impact
sensors, sensing and diagnostic
module, or airbag wiring
. Front seats, including stitching,
seams or zippers
. Seat belts
. Steering wheel, instrument panel,
overhead console, ceiling trim,
or pillar garnish trim
. Inner door seals, including
speakers
Your dealer and the service manual
have information about the location of
the airbag modules and sensors,
Page 111 of 384
110 INSTRUMENTS AND CONTROLS
Cluster Menu
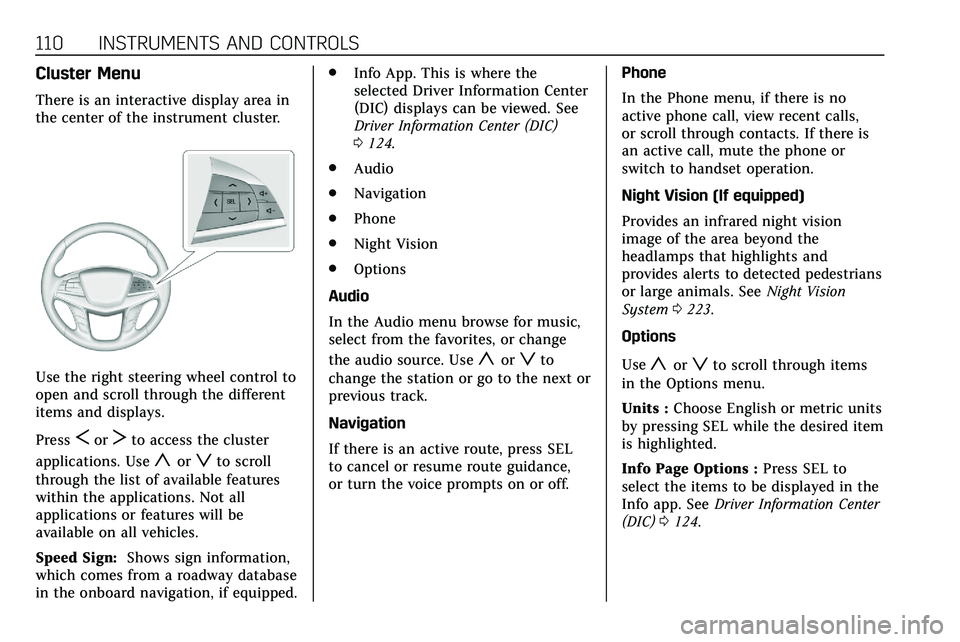
There is an interactive display area in
the center of the instrument cluster.
Use the right steering wheel control to
open and scroll through the different
items and displays.
Press
SorTto access the cluster
applications. Use
yorzto scroll
through the list of available features
within the applications. Not all
applications or features will be
available on all vehicles.
Speed Sign: Shows sign information,
which comes from a roadway database
in the onboard navigation, if equipped. .
Info App. This is where the
selected Driver Information Center
(DIC) displays can be viewed. See
Driver Information Center (DIC)
0124.
. Audio
. Navigation
. Phone
. Night Vision
. Options
Audio
In the Audio menu browse for music,
select from the favorites, or change
the audio source. Use
yorzto
change the station or go to the next or
previous track.
Navigation
If there is an active route, press SEL
to cancel or resume route guidance,
or turn the voice prompts on or off. Phone
In the Phone menu, if there is no
active phone call, view recent calls,
or scroll through contacts. If there is
an active call, mute the phone or
switch to handset operation.
Night Vision (If equipped)
Provides an infrared night vision
image of the area beyond the
headlamps that highlights and
provides alerts to detected pedestrians
or large animals. See
Night Vision
System 0223.
Options
Useyorzto scroll through items
in the Options menu.
Units : Choose English or metric units
by pressing SEL while the desired item
is highlighted.
Info Page Options : Press SEL to
select the items to be displayed in the
Info app. See Driver Information Center
(DIC) 0124.
Page 126 of 384
INSTRUMENTS AND CONTROLS 125
SEL :Press to open a menu or select a
menu item. Press and hold to reset
values on certain screens.
Info Page Options
The info displays on the DIC can be
turned on or off through the
Options menu.
1. Press SEL while viewing the Options page in one of the
interactive display zones on the
cluster.
2. Scroll to Info Pages and press
T.
3. Press
yorzto move through
the list of possible info displays.
4. Press SEL while an item is highlighted to select or deselect
that item.
The info pages can also be turned on
or off through the DIC page Info Page
Options.
DIC Information Displays
The following is the list of all possible
DIC information displays. Some of the
information displays may not be
available for your particular vehicle. While in the Info Page Options menu,
the info pages can be restored to the
default factory settings by pressing
and holding
Ron the left steering
wheel controls and SEL on the right
steering wheel controls at the
same time.
Speed : Shows the vehicle speed in
either kilometers per hour (km/h) or
miles per hour (mph).
Trip 1 or Trip 2 and Average Fuel
Economy : The Trip display shows the
current distance traveled, in either
kilometers (km) or miles (mi), since
the trip odometer was last reset. The
trip odometer can be reset through
the Trip display, or by pressing SEL
and selecting yes or no while this
display is active.
Shows the approximate fuel economy
in kilometers per liter (km/L), liters
per 100 kilometers (L/100km), or miles
per gallon (mpg).. This number is
calculated based on the number of L/
100 km (mpg) recorded since the last
time this menu item was reset. This
number reflects only the approximate
average fuel economy that the vehicle
has right now, and will change as driving conditions change. The
Average Fuel Economy can be reset by
pressing SEL and selecting yes or no
while this display is active.
Fuel Range :
Shows the approximate
distance the vehicle can be driven
without refueling. LOW will be
displayed when the vehicle is low on
fuel. The fuel range estimate is based
on an average of the vehicle's fuel
economy over recent driving history
and the amount of fuel remaining in
the fuel tank.
Oil Life : Shows an estimate of the
oil's remaining useful life.
If REMAINING OIL LIFE 99% is
displayed, that means 99% of the
current oil life remains.
When the remaining oil life is low, the
CHANGE ENGINE OIL SOON message
will appear on the display. The oil
should be changed as soon as
possible. See Engine Oil0255. In
addition to the engine oil life system
monitoring the oil life, additional
maintenance is recommended. See
Maintenance Schedule 0332.
Page 128 of 384
INSTRUMENTS AND CONTROLS 127
Transmission Fluid Temperature :
Shows the temperature of the
automatic transmission fluid in either
degrees Celsius (°C) or degrees
Fahrenheit (°F).
Off Road :Displays vehicle pitch and
roll information, road wheel angle,
and four-wheel drive (4WD) status.
Engine Boost : Displays engine
manifold pressure relative to ambient
air pressure. It will display boost
pressure generated by the
turbocharging system.
Info Page Options : Scroll to choose
which info pages appear on the DIC.
Press SEL to select or deselect.
Blank Page : Allows for no
information to be displayed in the
cluster info display areas.Head-Up Display (HUD)
{Warning
If the HUD image is too bright or
too high in your field of view, it
may take you more time to see
things you need to see when it is
dark outside. Be sure to keep the
HUD image dim and placed low in
your field of view.
If equipped with HUD, some
information concerning the operation
of the vehicle is projected onto the
windshield. The image is projected
through the HUD lens on top of the
instrument panel. The information
appears as an image focused out
toward the front of the vehicle.
Caution
If you try to use the HUD image as
a parking aid, you may misjudge
the distance and damage your
vehicle. Do not use the HUD image
as a parking aid. The HUD information can be
displayed in various languages. The
speedometer reading and other
numerical values can be displayed in
either English or metric units.
The language selection is changed
through the radio and the units of
measurement is changed through the
instrument cluster. See
Vehicle
Personalization 0131 and "Options"
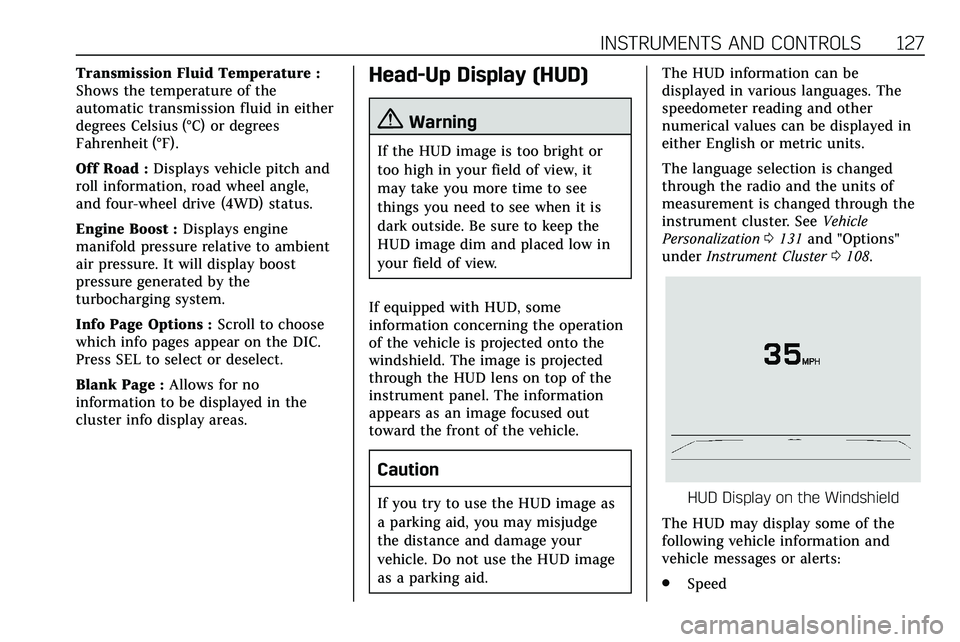
under Instrument Cluster 0108.HUD Display on the Windshield
The HUD may display some of the
following vehicle information and
vehicle messages or alerts:
. Speed
Page 129 of 384
128 INSTRUMENTS AND CONTROLS
.Tachometer
. Audio
. Phone
. Navigation
. Collision Alert
. Adaptive Cruise Control and set
speed
. Lane Departure
. Low Fuel
Some vehicle messages or alerts
displayed in the HUD may be cleared
by using the steering wheel controls.
See Vehicle Messages 0130.
Some information shown may not be
available on your vehicle if it is not
equipped with these features.
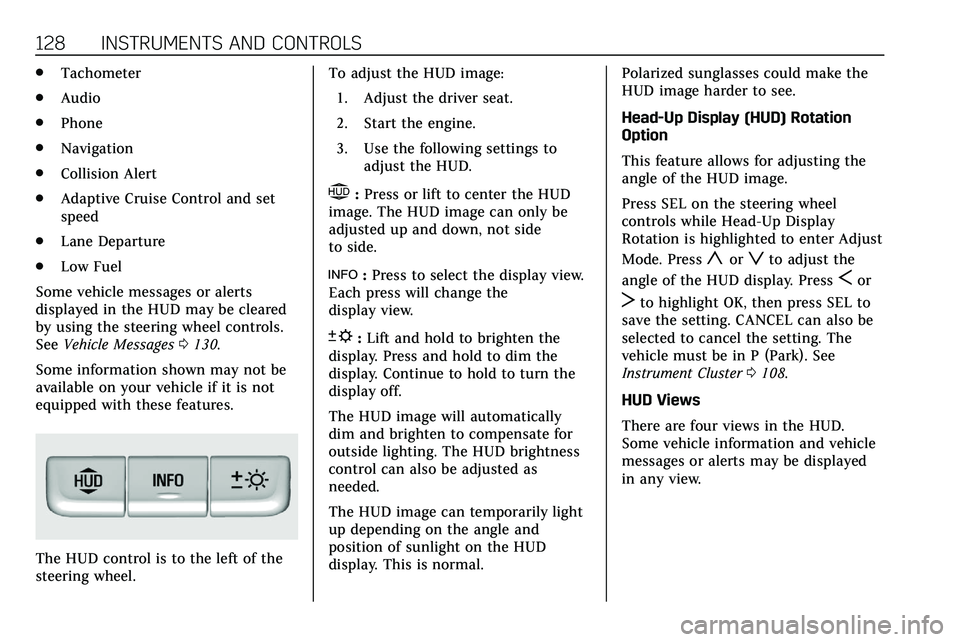
The HUD control is to the left of the
steering wheel. To adjust the HUD image:
1. Adjust the driver seat.
2. Start the engine.
3. Use the following settings to adjust the HUD.
$:Press or lift to center the HUD
image. The HUD image can only be
adjusted up and down, not side
to side.
!: Press to select the display view.
Each press will change the
display view.
D: Lift and hold to brighten the
display. Press and hold to dim the
display. Continue to hold to turn the
display off.
The HUD image will automatically
dim and brighten to compensate for
outside lighting. The HUD brightness
control can also be adjusted as
needed.
The HUD image can temporarily light
up depending on the angle and
position of sunlight on the HUD
display. This is normal. Polarized sunglasses could make the
HUD image harder to see.
Head-Up Display (HUD) Rotation
Option
This feature allows for adjusting the
angle of the HUD image.
Press SEL on the steering wheel
controls while Head-Up Display
Rotation is highlighted to enter Adjust
Mode. Press
yorzto adjust the
angle of the HUD display. Press
Sor
Tto highlight OK, then press SEL to
save the setting. CANCEL can also be
selected to cancel the setting. The
vehicle must be in P (Park). See
Instrument Cluster 0108.
HUD Views
There are four views in the HUD.
Some vehicle information and vehicle
messages or alerts may be displayed
in any view.
Page 133 of 384
132 INSTRUMENTS AND CONTROLS
Rear Seat Reminder
This allows for a chime and a message
when the rear door has been opened
before or during operation of the
vehicle.
Touch Off or On.
Climate and Air Quality
Touch and the following may display:
.Auto Fan Speed
. Auto Cooled Seats
. Auto Heated Seats
. Auto Defog
. Auto Rear Defog
. Ionizer
Auto Fan Speed
This setting specifies the amount of
airf low when the climate control fan
setting is Auto Fan.
Touch Low, Medium, or High. Auto Cooled Seats
This setting automatically turns on
and regulates the ventilated seats
when the cabin temperature is warm.
See
Heated and Ventilated Front Seats
0 49.
Touch Off or On.
Auto Heated Seats
This setting automatically turns on
and regulates the heated seats when
the cabin temperature is cool. The
auto heated seats can be turned off by
using the heated seat buttons on the
center stack. See Heated and Ventilated
Front Seats 049.
If equipped with Auto Heated Steering
Wheel, this feature will turn on when
the Auto Heated Seats turn on.
Touch Off or On.
Auto Defog
This setting automatically turns the
front defogger on when the engine is
started.
Touch Off or On. Auto Rear Defog
Auto Rear Defog turns on the rear
window defogger based on
temperature and humidity conditions.
Touch Off or On.
Ionizer
If equipped and on, this feature helps
to clean the air inside the vehicle and
remove contaminants such as pollen,
odors, and dust. See
Dual Automatic
Climate Control System 0148.
Touch Off or On.
Collision / Detection Systems
Touch and the following may display:
. Alert Type
. Forward Collision System
. Front Pedestrian Detection
. Rear Pedestrian Detection
. Rear Camera Park Assist Symbols
. Rear Cross Traffic Alert
. Adaptive Cruise Go Notifier
. Lane Change Alert