change wheel CADILLAC XT5 2021 Owner's Manual
[x] Cancel search | Manufacturer: CADILLAC, Model Year: 2021, Model line: XT5, Model: CADILLAC XT5 2021Pages: 426, PDF Size: 8.73 MB
Page 6 of 426
Cadillac XT5 Owner Manual (GMNA-Localizing-U.S./Canada/Mexico-
14590481) - 2021 - CRC - 10/22/20
INTRODUCTION 5
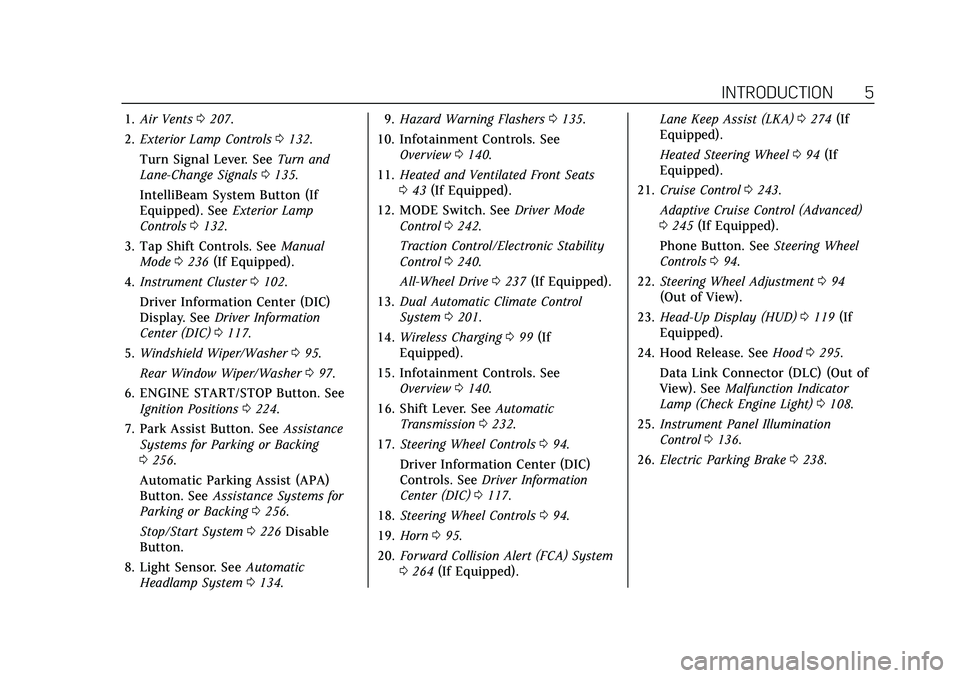
1.Air Vents 0207.
2. Exterior Lamp Controls 0132.
Turn Signal Lever. See Turn and
Lane-Change Signals 0135.
IntelliBeam System Button (If
Equipped). See Exterior Lamp
Controls 0132.
3. Tap Shift Controls. See Manual
Mode 0236 (If Equipped).
4. Instrument Cluster 0102.
Driver Information Center (DIC)
Display. See Driver Information
Center (DIC) 0117.
5. Windshield Wiper/Washer 095.
Rear Window Wiper/Washer 097.
6. ENGINE START/STOP Button. See Ignition Positions 0224.
7. Park Assist Button. See Assistance
Systems for Parking or Backing
0 256.
Automatic Parking Assist (APA)
Button. See Assistance Systems for
Parking or Backing 0256.
Stop/Start System 0226 Disable
Button.
8. Light Sensor. See Automatic
Headlamp System 0134. 9.
Hazard Warning Flashers 0135.
10. Infotainment Controls. See Overview 0140.
11. Heated and Ventilated Front Seats
043 (If Equipped).
12. MODE Switch. See Driver Mode
Control 0242.
Traction Control/Electronic Stability
Control 0240.
All-Wheel Drive 0237 (If Equipped).
13. Dual Automatic Climate Control
System 0201.
14. Wireless Charging 099 (If
Equipped).
15. Infotainment Controls. See Overview 0140.
16. Shift Lever. See Automatic
Transmission 0232.
17. Steering Wheel Controls 094.
Driver Information Center (DIC)
Controls. See Driver Information
Center (DIC) 0117.
18. Steering Wheel Controls 094.
19. Horn 095.
20. Forward Collision Alert (FCA) System
0264 (If Equipped). Lane Keep Assist (LKA)
0274 (If
Equipped).
Heated Steering Wheel 094 (If
Equipped).
21. Cruise Control 0243.
Adaptive Cruise Control (Advanced)
0 245 (If Equipped).
Phone Button. See Steering Wheel
Controls 094.
22. Steering Wheel Adjustment 094
(Out of View).
23. Head-Up Display (HUD) 0119 (If
Equipped).
24. Hood Release. See Hood0295.
Data Link Connector (DLC) (Out of
View). See Malfunction Indicator
Lamp (Check Engine Light) 0108.
25. Instrument Panel Illumination
Control 0136.
26. Electric Parking Brake 0238.
Page 29 of 426
Cadillac XT5 Owner Manual (GMNA-Localizing-U.S./Canada/Mexico-
14590481) - 2021 - CRC - 10/22/20
28 KEYS, DOORS, AND WINDOWS
pressed and the vehicle is started.
No message will display during a
remote start.
.A message that the steering wheel
must be turned and the vehicle
must be started again indicates that
the column lock mechanism is
bound, the column locking device
was unable to unlock the steering
column, and the vehicle did not
start. If this happens, immediately
turn the steering wheel from side to
side to unbind the column lock.
If this does not unlock the steering
column, turn the vehicle off and
open the driver door to reset the
system. Then turn the vehicle on
and immediately turn the steering
wheel side to side for about
15 seconds. In some cases, it may
take significant force to unbind the
column.
To keep the steering column from
binding, straighten the front wheels
before turning off the vehicle.
Immobilizer
See Radio Frequency Statement 0401.
Immobilizer Operation
This vehicle has a passive
theft-deterrent system.
The system does not have to be
manually armed or disarmed.
The vehicle is automatically
immobilized when the vehicle is
turned off.
The immobilization system is
disarmed when the ignition is on or in
ACC/ACCESSORY and a valid
transmitter is present in the vehicle.
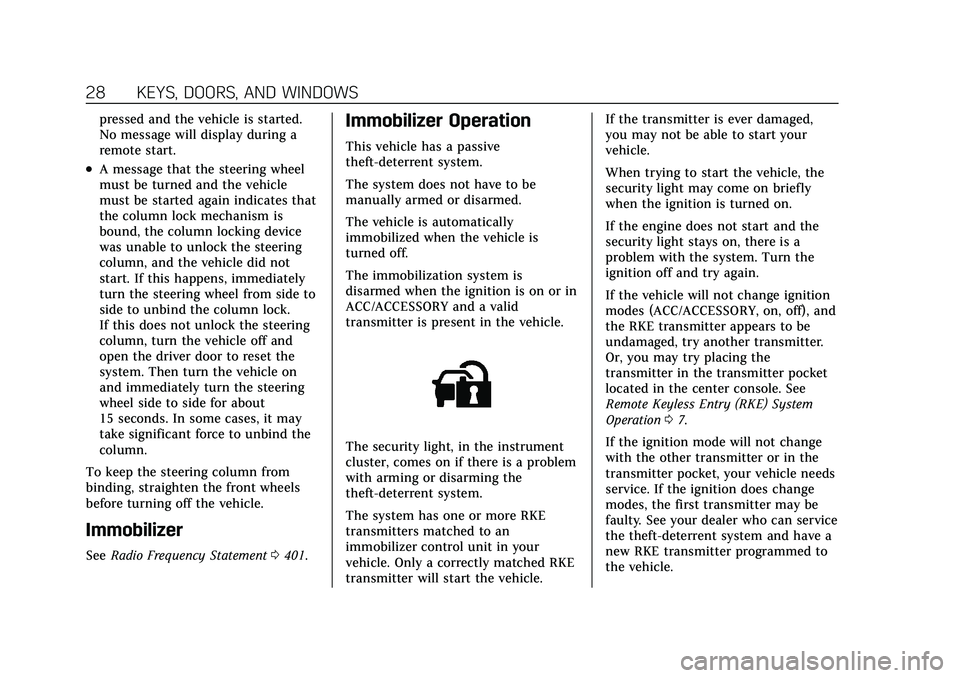
The security light, in the instrument
cluster, comes on if there is a problem
with arming or disarming the
theft-deterrent system.
The system has one or more RKE
transmitters matched to an
immobilizer control unit in your
vehicle. Only a correctly matched RKE
transmitter will start the vehicle. If the transmitter is ever damaged,
you may not be able to start your
vehicle.
When trying to start the vehicle, the
security light may come on briefly
when the ignition is turned on.
If the engine does not start and the
security light stays on, there is a
problem with the system. Turn the
ignition off and try again.
If the vehicle will not change ignition
modes (ACC/ACCESSORY, on, off), and
the RKE transmitter appears to be
undamaged, try another transmitter.
Or, you may try placing the
transmitter in the transmitter pocket
located in the center console. See
Remote Keyless Entry (RKE) System
Operation
07.
If the ignition mode will not change
with the other transmitter or in the
transmitter pocket, your vehicle needs
service. If the ignition does change
modes, the first transmitter may be
faulty. See your dealer who can service
the theft-deterrent system and have a
new RKE transmitter programmed to
the vehicle.
Page 42 of 426
Cadillac XT5 Owner Manual (GMNA-Localizing-U.S./Canada/Mexico-
14590481) - 2021 - CRC - 10/22/20
SEATS AND RESTRAINTS 41
.Tilt the top of the control rearward
to recline.
.Tilt the top of the control forward
to raise.
Memory Seats
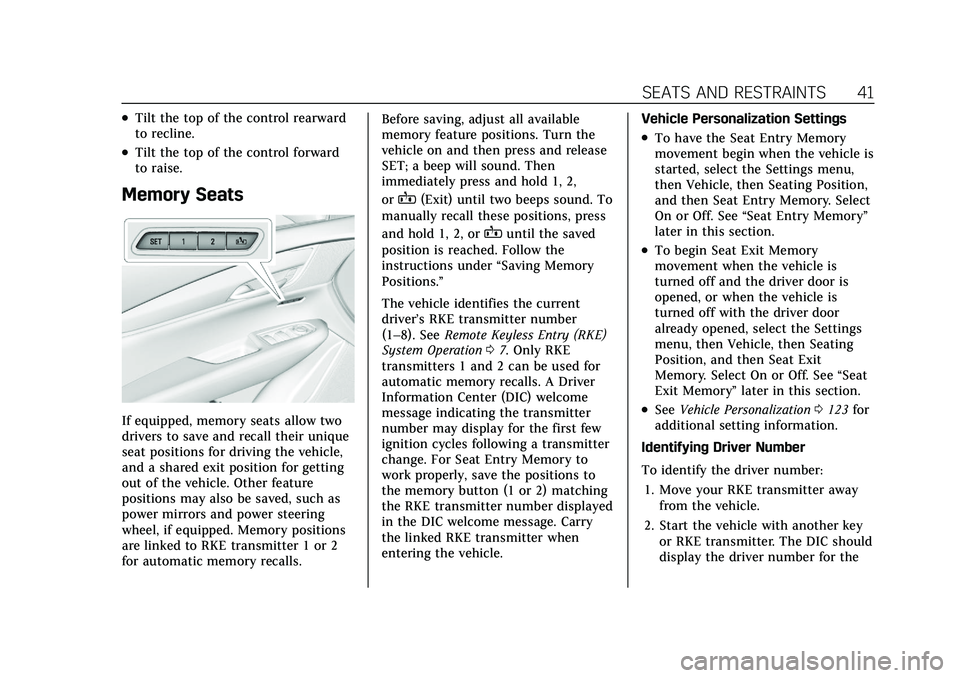
If equipped, memory seats allow two
drivers to save and recall their unique
seat positions for driving the vehicle,
and a shared exit position for getting
out of the vehicle. Other feature
positions may also be saved, such as
power mirrors and power steering
wheel, if equipped. Memory positions
are linked to RKE transmitter 1 or 2
for automatic memory recalls.Before saving, adjust all available
memory feature positions. Turn the
vehicle on and then press and release
SET; a beep will sound. Then
immediately press and hold 1, 2,
or
B(Exit) until two beeps sound. To
manually recall these positions, press
and hold 1, 2, or
Buntil the saved
position is reached. Follow the
instructions under “Saving Memory
Positions.”
The vehicle identifies the current
driver’s RKE transmitter number
(1–8). See Remote Keyless Entry (RKE)
System Operation 07. Only RKE
transmitters 1 and 2 can be used for
automatic memory recalls. A Driver
Information Center (DIC) welcome
message indicating the transmitter
number may display for the first few
ignition cycles following a transmitter
change. For Seat Entry Memory to
work properly, save the positions to
the memory button (1 or 2) matching
the RKE transmitter number displayed
in the DIC welcome message. Carry
the linked RKE transmitter when
entering the vehicle. Vehicle Personalization Settings
.To have the Seat Entry Memory
movement begin when the vehicle is
started, select the Settings menu,
then Vehicle, then Seating Position,
and then Seat Entry Memory. Select
On or Off. See
“Seat Entry Memory ”
later in this section.
.To begin Seat Exit Memory
movement when the vehicle is
turned off and the driver door is
opened, or when the vehicle is
turned off with the driver door
already opened, select the Settings
menu, then Vehicle, then Seating
Position, and then Seat Exit
Memory. Select On or Off. See “Seat
Exit Memory” later in this section.
.SeeVehicle Personalization 0123 for
additional setting information.
Identifying Driver Number
To identify the driver number: 1. Move your RKE transmitter away from the vehicle.
2. Start the vehicle with another key or RKE transmitter. The DIC should
display the driver number for the
Page 44 of 426
Cadillac XT5 Owner Manual (GMNA-Localizing-U.S./Canada/Mexico-
14590481) - 2021 - CRC - 10/22/20
SEATS AND RESTRAINTS 43
The shift lever must be in P (Park) to
start Seat Entry Memory. Seat Entry
Memory recall will complete if the
vehicle is shifted out of P (Park) prior
to reaching the saved memory
position.
To stop Seat Entry Memory recall
movement, turn the vehicle off or
press any of the following controls:
.Power seat
.Memory SET, 1, 2, orB
.Power mirror, with the driver or
passenger side mirror selected
.Power steering wheel, if equipped
If the saved memory seat position
does not automatically recall or recalls
to the wrong positions, the driver’s
RKE transmitter number (1 or 2) may
not match the memory button
number that positions were saved to.
Try storing the position to the other
memory button or try the other RKE
transmitter.
Seat Exit Memory
Seat Exit Memory is not linked to an
RKE transmitter. The position saved to
Bis used for all drivers. To turn Seat Exit Memory on or off, see "Vehicle
Personalization Settings" previously in
this section and
Vehicle Personalization
0 123.
If turned on, the position saved to
B
is automatically recalled when one of
the following occurs:
.The vehicle is turned off and the
driver door is opened within a
short time.
.The vehicle is turned off with the
driver door open.
To stop Seat Exit Memory movement,
press any of the following memory
controls:
.Power seat
.Memory SET, 1, 2, orB
.Power mirror, with the driver or
passenger side mirror selected
.Power steering wheel, if equipped
Obstructions
If something has blocked the driver
seat while recalling a memory
position, the recall may stop. Remove
the obstruction and try the recall
again. If the memory position still
does not recall, see your dealer.
Heated and Ventilated
Front Seats
{Warning
If temperature change or pain to
the skin cannot be felt, the seat
heater may cause burns. To reduce
the risk of burns, use care when
using the seat heater, especially for
long periods of time. Do not place
anything on the seat that insulates
against heat, such as a blanket,
cushion, cover, or similar item. This
may cause the seat heater to
overheat. An overheated seat heater
may cause a burn or may damage
the seat.
Page 45 of 426
Cadillac XT5 Owner Manual (GMNA-Localizing-U.S./Canada/Mexico-
14590481) - 2021 - CRC - 10/22/20
44 SEATS AND RESTRAINTS
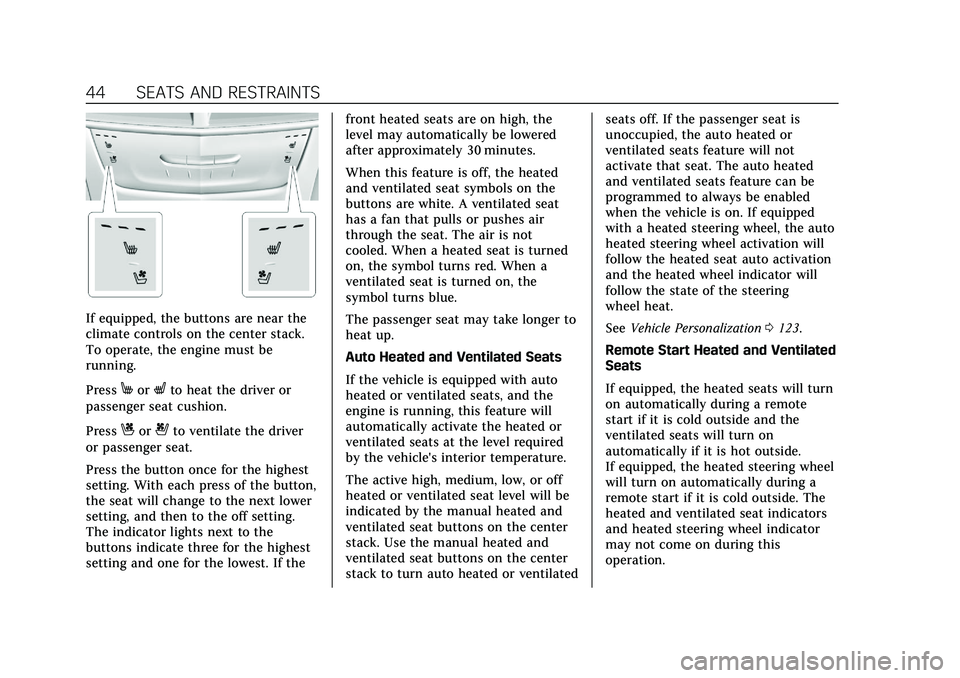
If equipped, the buttons are near the
climate controls on the center stack.
To operate, the engine must be
running.
Press
MorLto heat the driver or
passenger seat cushion.
Press
Cor{to ventilate the driver
or passenger seat.
Press the button once for the highest
setting. With each press of the button,
the seat will change to the next lower
setting, and then to the off setting.
The indicator lights next to the
buttons indicate three for the highest
setting and one for the lowest. If the front heated seats are on high, the
level may automatically be lowered
after approximately 30 minutes.
When this feature is off, the heated
and ventilated seat symbols on the
buttons are white. A ventilated seat
has a fan that pulls or pushes air
through the seat. The air is not
cooled. When a heated seat is turned
on, the symbol turns red. When a
ventilated seat is turned on, the
symbol turns blue.
The passenger seat may take longer to
heat up.
Auto Heated and Ventilated Seats
If the vehicle is equipped with auto
heated or ventilated seats, and the
engine is running, this feature will
automatically activate the heated or
ventilated seats at the level required
by the vehicle's interior temperature.
The active high, medium, low, or off
heated or ventilated seat level will be
indicated by the manual heated and
ventilated seat buttons on the center
stack. Use the manual heated and
ventilated seat buttons on the center
stack to turn auto heated or ventilatedseats off. If the passenger seat is
unoccupied, the auto heated or
ventilated seats feature will not
activate that seat. The auto heated
and ventilated seats feature can be
programmed to always be enabled
when the vehicle is on. If equipped
with a heated steering wheel, the auto
heated steering wheel activation will
follow the heated seat auto activation
and the heated wheel indicator will
follow the state of the steering
wheel heat.
See
Vehicle Personalization 0123.
Remote Start Heated and Ventilated
Seats
If equipped, the heated seats will turn
on automatically during a remote
start if it is cold outside and the
ventilated seats will turn on
automatically if it is hot outside.
If equipped, the heated steering wheel
will turn on automatically during a
remote start if it is cold outside. The
heated and ventilated seat indicators
and heated steering wheel indicator
may not come on during this
operation.
Page 66 of 426

Cadillac XT5 Owner Manual (GMNA-Localizing-U.S./Canada/Mexico-
14590481) - 2021 - CRC - 10/22/20
SEATS AND RESTRAINTS 65
massagers can affect how well the
passenger sensing system operates.
We recommend that you not use seat
covers or other aftermarket equipment
except when approved by GM for your
specific vehicle. SeeAdding Equipment
to the Airbag-Equipped Vehicle 065 for
more information about modifications
that can affect how the system
operates.
The ON indicator may be lit if an
object, such as a briefcase, handbag,
grocery bag, laptop, or other electronic
device, is put on an unoccupied seat.
If this is not desired, remove the
object from the seat.
{Warning
Stowing articles under the
passenger seat or between the
passenger seat cushion and
seatback may interfere with the
proper operation of the passenger
sensing system.
Servicing the
Airbag-Equipped Vehicle
Airbags affect how the vehicle should
be serviced. There are parts of the
airbag system in several places around
the vehicle. Your dealer and the
service manual have information
about servicing the vehicle and the
airbag system. To purchase a service
manual, see Publication Ordering
Information 0401.
{Warning
For up to 10 seconds after the
vehicle is turned off and the battery
is disconnected, an airbag can still
inflate during improper service. You
can be injured if you are close to an
airbag when it inflates. Avoid
yellow connectors. They are
probably part of the airbag system.
Be sure to follow proper service
procedures, and make sure the
person performing work for you is
qualified to do so.
Adding Equipment to the
Airbag-Equipped Vehicle
Adding accessories that change the
vehicle's frame, bumper system,
height, front end, or side sheet metal
may keep the airbag system from
working properly.
The operation of the airbag system
can also be affected by changing,
including improperly repairing or
replacing, any parts of the following:
.Airbag system, including airbag
modules, front or side impact
sensors, sensing and diagnostic
module, or airbag wiring
.Front seats, including stitching,
seams or zippers
.Seat belts
.Steering wheel, instrument panel,
overhead console, ceiling trim,
or pillar garnish trim
.Inner door seals, including speakers
Your dealer and the service manual
have information about the location of
the airbag modules and sensors,
Page 110 of 426
Cadillac XT5 Owner Manual (GMNA-Localizing-U.S./Canada/Mexico-
14590481) - 2021 - CRC - 10/22/20
INSTRUMENTS AND CONTROLS 109
Caution
Modifications to the engine,
transmission, exhaust, intake,
or fuel system, or the use of
replacement tires that do not meet
the original tire specifications, can
cause this light to come on. This
could lead to costly repairs not
covered by the vehicle warranty.
This could also affect the vehicle’s
ability to pass an Emissions
Inspection/Maintenance test. See
Accessories and Modifications0294.
If the light is f lashing : A
malfunction has been detected that
could damage the emission control
system and increase vehicle
emissions. Diagnosis and service may
be required.
To help prevent damage, reduce
vehicle speed and avoid hard
accelerations and uphill grades.
If towing a trailer, reduce the amount
of cargo being hauled as soon as
possible. If the light continues to flash, find a
safe place to park. Turn the vehicle off
and wait at least 10 seconds before
restarting the engine. If the light is
still flashing, follow the previous
guidelines and see your dealer for
service as soon as possible.
If the light is on steady :
A
malfunction has been detected.
Diagnosis and service may be
required.
Check the following:
.If fuel has been added to the vehicle
using the capless fuel funnel
adapter, make sure that it has been
removed. See “Filling the Tank with
a Portable Gas Can ”under Filling the
Tank 0277. The diagnostic system
can detect if the adapter has been
left installed in the vehicle, allowing
fuel to evaporate into the
atmosphere. A few driving trips with
the adapter removed may turn off
the light.
.Poor fuel quality can cause
inefficient engine operation and
poor driveability, which may go
away once the engine is warmed up.
If this occurs, change the fuel brand. It may require at least one
full tank of the proper fuel to turn
the light off. See
Recommended Fuel
(3.6L V6 Engine) 0276 or
Recommended Fuel (2.0L L4 Engine)
0 276.
If the light remains on, see your
dealer.
Emissions Inspection and
Maintenance Programs
If the vehicle requires an Emissions
Inspection/Maintenance test, the test
equipment will likely connect to the
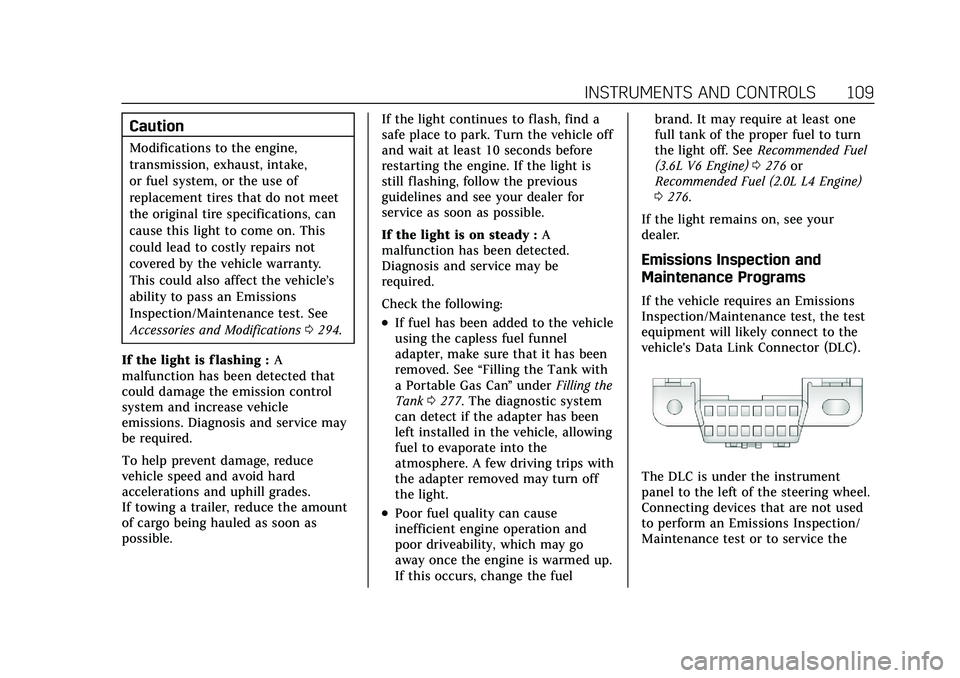
vehicle's Data Link Connector (DLC).
The DLC is under the instrument
panel to the left of the steering wheel.
Connecting devices that are not used
to perform an Emissions Inspection/
Maintenance test or to service the
Page 121 of 426
Cadillac XT5 Owner Manual (GMNA-Localizing-U.S./Canada/Mexico-
14590481) - 2021 - CRC - 10/22/20
120 INSTRUMENTS AND CONTROLS
If equipped with HUD, some
information concerning the operation
of the vehicle is projected onto the
windshield. The image is projected
through the HUD lens on top of the
instrument panel. The information
appears as an image focused out
toward the front of the vehicle.
Caution
If you try to use the HUD image as
a parking aid, you may misjudge
the distance and damage your
vehicle. Do not use the HUD image
as a parking aid.
The HUD information can be
displayed in various languages. The
speedometer reading and other
numerical values can be displayed in
either English or metric units.
The language selection is changed
through the radio and the units of
measurement is changed through the
instrument cluster. See Vehicle
Personalization 0123 and "Options"
under Instrument Cluster 0102.
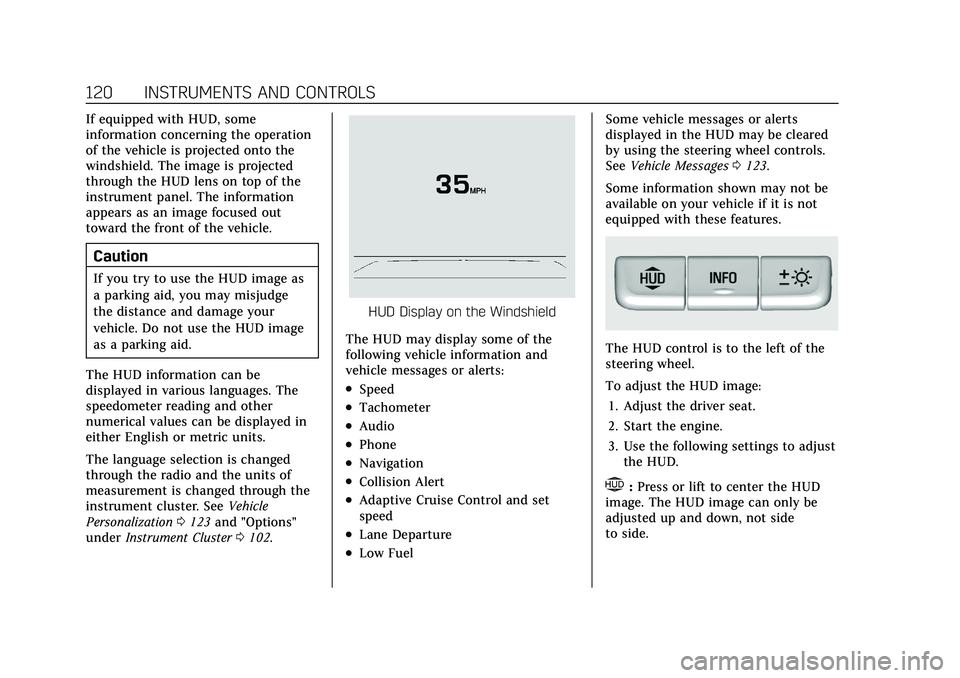
HUD Display on the Windshield
The HUD may display some of the
following vehicle information and
vehicle messages or alerts:
.Speed
.Tachometer
.Audio
.Phone
.Navigation
.Collision Alert
.Adaptive Cruise Control and set
speed
.Lane Departure
.Low Fuel Some vehicle messages or alerts
displayed in the HUD may be cleared
by using the steering wheel controls.
See
Vehicle Messages 0123.
Some information shown may not be
available on your vehicle if it is not
equipped with these features.
The HUD control is to the left of the
steering wheel.
To adjust the HUD image: 1. Adjust the driver seat.
2. Start the engine.
3. Use the following settings to adjust the HUD.
$:Press or lift to center the HUD
image. The HUD image can only be
adjusted up and down, not side
to side.
Page 122 of 426
Cadillac XT5 Owner Manual (GMNA-Localizing-U.S./Canada/Mexico-
14590481) - 2021 - CRC - 10/22/20
INSTRUMENTS AND CONTROLS 121
!:Press to select the display view.
Each press will change the
display view.
D: Lift and hold to brighten the
display. Press and hold to dim the
display. Continue to hold to turn the
display off.
The HUD image will automatically
dim and brighten to compensate for
outside lighting. The HUD brightness
control can also be adjusted as
needed.
The HUD image can temporarily light
up depending on the angle and
position of sunlight on the HUD
display. This is normal.
Polarized sunglasses could make the
HUD image harder to see.
Head-Up Display (HUD) Rotation
Option
This feature allows for adjusting the
angle of the HUD image.
Press SEL on the steering wheel
controls while Head-Up Display
Rotation is highlighted to enter Adjust
Mode. Press
yorzto adjust the
angle of the HUD display. Press
Sor
Tto highlight OK, then press SEL to
save the setting. CANCEL can also be
selected to cancel the setting. The
vehicle must be in P (Park). See
Instrument Cluster 0102.
HUD Views
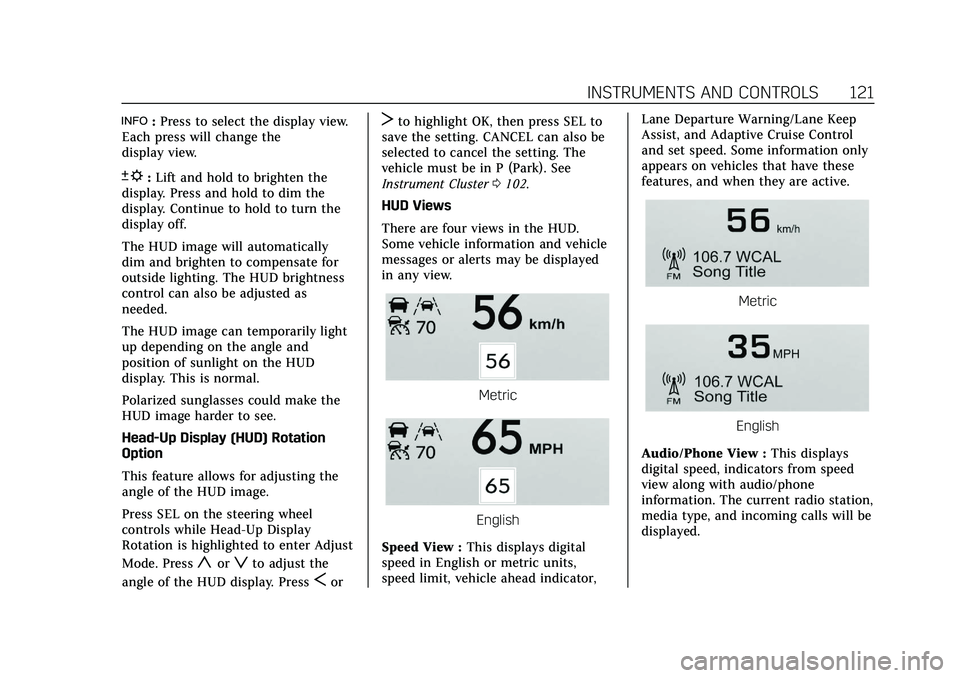
There are four views in the HUD.
Some vehicle information and vehicle
messages or alerts may be displayed
in any view.
Metric
English
Speed View : This displays digital
speed in English or metric units,
speed limit, vehicle ahead indicator, Lane Departure Warning/Lane Keep
Assist, and Adaptive Cruise Control
and set speed. Some information only
appears on vehicles that have these
features, and when they are active.
Metric
English
Audio/Phone View : This displays
digital speed, indicators from speed
view along with audio/phone
information. The current radio station,
media type, and incoming calls will be
displayed.
Page 129 of 426
Cadillac XT5 Owner Manual (GMNA-Localizing-U.S./Canada/Mexico-
14590481) - 2021 - CRC - 10/22/20
128 INSTRUMENTS AND CONTROLS
vehicle with the RKE transmitter. See
Remote Keyless Entry (RKE) System
Operation07.
Touch Off, On with Horn Chirp, or On.
Remote Left in Vehicle Alert
This feature sounds an alert when the
RKE transmitter is left in the vehicle.
This menu also enables Remote No
Longer in Vehicle Alert.
Touch Off or On.
Seating Position
Touch and the following may display:
.Seat Entry Memory
.Seat Exit Memory
Seat Entry Memory
This feature automatically recalls the
previously stored 1 or 2 button
positions when the ignition is changed
from off to on or ACC/ACCESSORY.
See Memory Seats 041.
Touch Off or On.
Seat Exit Memory
This feature automatically recalls the
previously stored exit button positions
when the ignition is changed from on or ACC/ACCESSORY to off if the driver
door is open or opened. See
Memory
Seats 041.
Touch Off or On.
Teen Driver
See “Teen Driver” underSettings 0181.
Valet Mode
This will lock the infotainment system
and steering wheel controls. It may
also limit access to vehicle storage
locations, if equipped.
To enable valet mode:
1. Enter a four-digit code on the keypad.
2. Touch Enter to go to the confirmation screen.
3. Re-enter the four-digit code.
Touch Lock or Unlock to lock or
unlock the system. Touch Back to go
back to the previous menu.
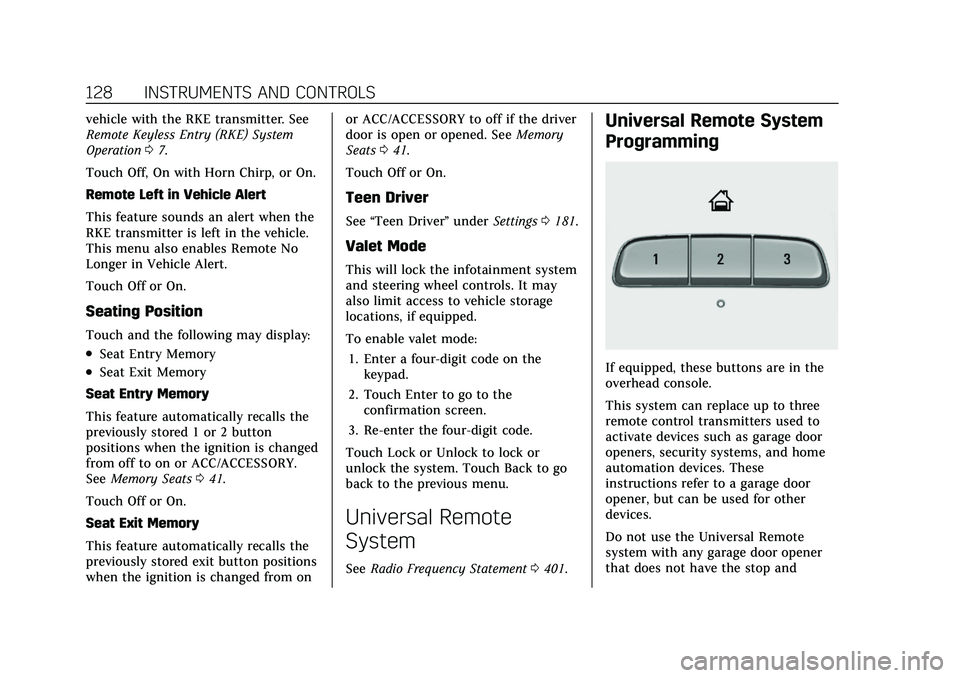
Universal Remote
System
See Radio Frequency Statement 0401.
Universal Remote System
Programming
If equipped, these buttons are in the
overhead console.
This system can replace up to three
remote control transmitters used to
activate devices such as garage door
openers, security systems, and home
automation devices. These
instructions refer to a garage door
opener, but can be used for other
devices.
Do not use the Universal Remote
system with any garage door opener
that does not have the stop and