reset CADILLAC XT5 2021 Owner's Manual
[x] Cancel search | Manufacturer: CADILLAC, Model Year: 2021, Model line: XT5, Model: CADILLAC XT5 2021Pages: 426, PDF Size: 8.73 MB
Page 18 of 426

Cadillac XT5 Owner Manual (GMNA-Localizing-U.S./Canada/Mexico-
14590481) - 2021 - CRC - 10/22/20
KEYS, DOORS, AND WINDOWS 17
3. Slide the cap forward and press theforward edge to install the cap in
place.
4. Release the door handle. 5. Check that the cap is secure.
Free-Turning Locks
The door key lock cylinder turns freely
when either the wrong key is used,
or the correct key is not fully inserted.
The free-turning door lock feature
prevents the lock from being forced
open. To reset the lock, turn it to the
vertical position with the correct key
fully inserted. Remove the key and
insert it again. If this does not reset
the lock, turn the key halfway around
in the cylinder and repeat the reset
procedure.
Power Door Locks
Q: Press to lock the doors.
If equipped, the fuel door is also
locked or unlocked using these
features.
K: Press to unlock the doors.
Delayed Locking
This feature delays the locking of the
doors until five seconds after all doors
are closed, and only when the vehicle
is OFF.
Delayed locking can only be turned on
when Open Door Anti Lockout has
been turned off.
When
Qis pressed on the power door
lock switch while the door is open, a
chime will sound three times
indicating delayed locking is active.
The doors will lock automatically
five seconds after all doors are closed.
If a door is reopened before that time,
the five-second timer will reset when
all doors are closed again.
Press
Qon the door lock switch again
or press
Qon the RKE transmitter to
lock the doors immediately.
Page 24 of 426

Cadillac XT5 Owner Manual (GMNA-Localizing-U.S./Canada/Mexico-
14590481) - 2021 - CRC - 10/22/20
KEYS, DOORS, AND WINDOWS 23
To operate, move your foot in a
forward kicking motion under the left
side of the rear bumper, at the
location of the projected logo, then
pull it back. Then step back. The kick
must come within 14 cm (6 in) of the
rear bumper to activate.
Caution
Splashing water may cause the
liftgate to open. Keep the RKE
transmitter away from the rear
bumper detection area or turn the
liftgate mode to OFF when cleaning
or working near the rear bumper to
avoid accidental opening.
.Do not sweep your foot side to side.
.Do not keep your foot under the
bumper; the liftgate will not
activate.
.Do not touch the liftgate until it has
stopped moving.
.This feature may be temporarily
disabled under some conditions.
If the liftgate does not respond to
the kick, open or close the liftgate
by another method or start the
vehicle. The feature will be
re-enabled.
When closing the liftgate using this
feature, there will be a short delay.
The taillamps will flash and a chime
will sound. Step away from the liftgate
before it starts moving.
Projected Logo
If equipped with this feature, a vehicle
logo will be projected for one minute
onto the ground near the rear bumper
when an RKE transmitter is detected
within approximately 2 m (6 ft). The
projected logo may not be visible
under brighter daytime conditions.
1. 1 m (3 ft) Hands-Free Operation Detection Zone
2. 2 m (6 ft) Projected Logo Detection Zone
The projected logo shows where the
kicking motion is to take place.
The projected logo will only be
available for this RKE transmitter after
it has been out of range for at least
20 seconds.
If an RKE transmitter is again
detected within approximately 2 m
(6 ft) of the liftgate, or another
hands-free operation has been
detected, the one-minute timer will be
reset.
Page 29 of 426

Cadillac XT5 Owner Manual (GMNA-Localizing-U.S./Canada/Mexico-
14590481) - 2021 - CRC - 10/22/20
28 KEYS, DOORS, AND WINDOWS
pressed and the vehicle is started.
No message will display during a
remote start.
.A message that the steering wheel
must be turned and the vehicle
must be started again indicates that
the column lock mechanism is
bound, the column locking device
was unable to unlock the steering
column, and the vehicle did not
start. If this happens, immediately
turn the steering wheel from side to
side to unbind the column lock.
If this does not unlock the steering
column, turn the vehicle off and
open the driver door to reset the
system. Then turn the vehicle on
and immediately turn the steering
wheel side to side for about
15 seconds. In some cases, it may
take significant force to unbind the
column.
To keep the steering column from
binding, straighten the front wheels
before turning off the vehicle.
Immobilizer
See Radio Frequency Statement 0401.
Immobilizer Operation
This vehicle has a passive
theft-deterrent system.
The system does not have to be
manually armed or disarmed.
The vehicle is automatically
immobilized when the vehicle is
turned off.
The immobilization system is
disarmed when the ignition is on or in
ACC/ACCESSORY and a valid
transmitter is present in the vehicle.
The security light, in the instrument
cluster, comes on if there is a problem
with arming or disarming the
theft-deterrent system.
The system has one or more RKE
transmitters matched to an
immobilizer control unit in your
vehicle. Only a correctly matched RKE
transmitter will start the vehicle. If the transmitter is ever damaged,
you may not be able to start your
vehicle.
When trying to start the vehicle, the
security light may come on briefly
when the ignition is turned on.
If the engine does not start and the
security light stays on, there is a
problem with the system. Turn the
ignition off and try again.
If the vehicle will not change ignition
modes (ACC/ACCESSORY, on, off), and
the RKE transmitter appears to be
undamaged, try another transmitter.
Or, you may try placing the
transmitter in the transmitter pocket
located in the center console. See
Remote Keyless Entry (RKE) System
Operation
07.
If the ignition mode will not change
with the other transmitter or in the
transmitter pocket, your vehicle needs
service. If the ignition does change
modes, the first transmitter may be
faulty. See your dealer who can service
the theft-deterrent system and have a
new RKE transmitter programmed to
the vehicle.
Page 31 of 426

Cadillac XT5 Owner Manual (GMNA-Localizing-U.S./Canada/Mexico-
14590481) - 2021 - CRC - 10/22/20
30 KEYS, DOORS, AND WINDOWS
Power Folding Mirrors
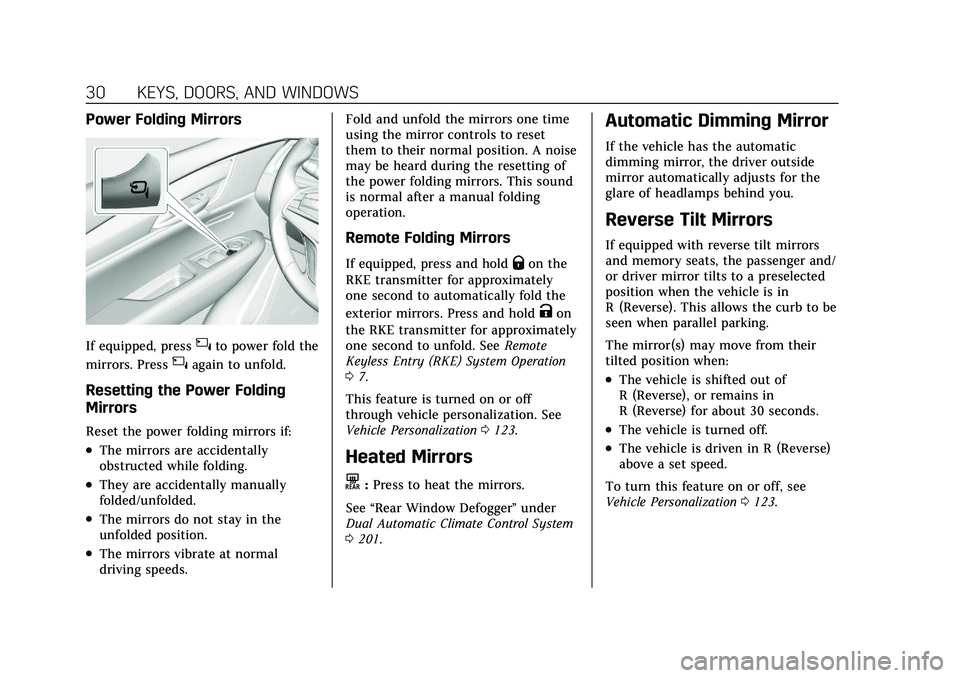
If equipped, press{to power fold the
mirrors. Press
{again to unfold.
Resetting the Power Folding
Mirrors
Reset the power folding mirrors if:
.The mirrors are accidentally
obstructed while folding.
.They are accidentally manually
folded/unfolded.
.The mirrors do not stay in the
unfolded position.
.The mirrors vibrate at normal
driving speeds. Fold and unfold the mirrors one time
using the mirror controls to reset
them to their normal position. A noise
may be heard during the resetting of
the power folding mirrors. This sound
is normal after a manual folding
operation.
Remote Folding Mirrors
If equipped, press and holdQon the
RKE transmitter for approximately
one second to automatically fold the
exterior mirrors. Press and hold
Kon
the RKE transmitter for approximately
one second to unfold. See Remote
Keyless Entry (RKE) System Operation
0 7.
This feature is turned on or off
through vehicle personalization. See
Vehicle Personalization 0123.
Heated Mirrors
K:Press to heat the mirrors.
See “Rear Window Defogger” under
Dual Automatic Climate Control System
0 201.
Automatic Dimming Mirror
If the vehicle has the automatic
dimming mirror, the driver outside
mirror automatically adjusts for the
glare of headlamps behind you.
Reverse Tilt Mirrors
If equipped with reverse tilt mirrors
and memory seats, the passenger and/
or driver mirror tilts to a preselected
position when the vehicle is in
R (Reverse). This allows the curb to be
seen when parallel parking.
The mirror(s) may move from their
tilted position when:
.The vehicle is shifted out of
R (Reverse), or remains in
R (Reverse) for about 30 seconds.
.The vehicle is turned off.
.The vehicle is driven in R (Reverse)
above a set speed.
To turn this feature on or off, see
Vehicle Personalization 0123.
Page 98 of 426

Cadillac XT5 Owner Manual (GMNA-Localizing-U.S./Canada/Mexico-
14590481) - 2021 - CRC - 10/22/20
INSTRUMENTS AND CONTROLS 97
Keep this area of the windshield clear
of debris to allow for best system
performance.
AUTO :Move the windshield wiper
lever to AUTO. Turn the band on the
wiper lever to adjust the sensitivity.
.Turn the band up for more
sensitivity to moisture.
.Turn the band down for less
sensitivity to moisture.
.Move the windshield wiper lever out
of the AUTO position to deactivate
Rainsense.
To turn the Rainsense feature on or
off, see “Rain Sense Wipers ”under
Vehicle Personalization 0123. Wiper Arm Assembly Protection
When using an automatic car wash,
move the windshield wiper lever to
OFF. This disables the automatic
Rainsense windshield wipers.
With Rainsense, if the transmission is
in N (Neutral) and the vehicle speed is
very slow, the wipers will
automatically stop at the base of the
windshield.
The wiper operations return to normal
when the transmission is no longer in
N (Neutral) or the vehicle speed has
increased.
Rear Window Wiper/
Washer
The rear window wiper/washer
controls are on the end of the
windshield wiper lever.
Turn the controls to adjust the
setting.
OFF :
Turns the wiper off.
INT : Turns on the rear wiper with a
delay between wipes.
ON : Turns on the rear wiper.
1:Push the windshield wiper lever
forward to spray washer fluid on the
rear window and the Rear Mirror
Camera Lens, if equipped. See Rear
Camera Mirror 031. The wipers will
clear the rear window and either stop
or return to your preset speed. For
more washer cycles, push and hold
the lever.
The rear window wiper/washer will
not operate if the liftgate is open or
ajar. If the liftgate is opened while the
rear wiper is on, the wiper returns to
the parked position and stops.
Page 106 of 426

Cadillac XT5 Owner Manual (GMNA-Localizing-U.S./Canada/Mexico-
14590481) - 2021 - CRC - 10/22/20
INSTRUMENTS AND CONTROLS 105
Odometer
The odometer shows how far the
vehicle has been driven, in either
kilometers or miles.
Trip Odometer
The trip odometer shows how far the
vehicle has been driven since the trip
odometer was last reset.
The trip odometer is accessed and
reset through the Driver Information
Center (DIC). SeeDriver Information
Center (DIC) 0117.
Tachometer
The tachometer displays the engine
speed in revolutions per minute (rpm).
For vehicles with the Stop/Start
system, when the ignition is on, the
tachometer indicates the vehicle
status. When pointing to AUTO STOP,
the engine is off but the vehicle is on
and can move. The engine could auto
start at any time. When the indicator
points to OFF, the vehicle is off. When the engine is on, the
tachometer will indicate the engine’s
revolutions per minute (rpm). The
tachometer may vary by several
hundred rpm, during Auto Stop mode,
when the engine is shutting off and
restarting.
Fuel Gauge
When the ignition is on, the fuel
gauge indicates about how much fuel
is left in the tank.
There is an arrow near the fuel gauge
pointing to the side of the vehicle the
fuel door is on.When the indicator nears empty, the
low fuel light comes on. There still is
a little fuel left, but the vehicle should
be refueled soon.
Here are three things that some
owners ask about. None of these show
a problem with the fuel gauge:
.It takes a little more, or less fuel to
fill up than the gauge indicated. For
example, the gauge may have
indicated the tank was half full, but
it actually took a little more, or less
than half the tank's capacity to fill
the tank.
.The gauge moves a little while
turning a corner, speeding up or
braking.
.The gauge takes a few seconds to
stabilize after the ignition is turned
on and goes back to empty when
the ignition is turned off.
Page 112 of 426

Cadillac XT5 Owner Manual (GMNA-Localizing-U.S./Canada/Mexico-
14590481) - 2021 - CRC - 10/22/20
INSTRUMENTS AND CONTROLS 111
English Uplevel
This light comes on when the parking
brake is applied. If the light continues
flashing after the parking brake is
released, or while driving, there is a
problem with the Electric Parking
Brake system. A message may also
display in the Driver Information
Center (DIC).
If the light does not come on,
or remains flashing, see your dealer.
Service Electric Parking
Brake Light
The service electric parking brake light
should come on briefly when the
vehicle is started. If it does not come
on, have it fixed so it will be ready to
warn if there is a problem. For
vehicles with the reconfigurable
cluster, this light may not come on
when the vehicle is started.
If this light stays on, the vehicle
should be taken to a dealer as soon as
possible. See Electric Parking Brake
0 238. A message may also display in
the Driver Information Center (DIC).
Antilock Brake System
(ABS) Warning Light
This warning light should come on
briefly when the vehicle is turned on.
If the light does not come on, have it
fixed so it will be ready to warn if
there is a problem. If the light comes on while driving,
safely stop as soon as it is possible
and turn off the vehicle. Then turn on
the vehicle again to reset the system.
If the ABS warning light stays on,
or comes on again while driving, the
vehicle needs service. A chime may
also sound when the light stays on.
If the ABS warning light is the only
light on, the vehicle has regular
brakes, but ABS is not functioning.
If both the ABS warning light and the
brake system warning light are on,
ABS is not functioning and there is a
problem with the regular brakes. See
your dealer for service.
See
Brake System Warning Light 0110.
Performance Shifting Light
If equipped, this light may display
green when Sport Mode is activated
and certain driving conditions are
Page 118 of 426

Cadillac XT5 Owner Manual (GMNA-Localizing-U.S./Canada/Mexico-
14590481) - 2021 - CRC - 10/22/20
INSTRUMENTS AND CONTROLS 117
Door Ajar Light
This light comes on when a door is
open or not securely latched. Before
driving, check that all doors are
properly closed.
Information Displays
Driver Information
Center (DIC)
The DIC is displayed in the
instrument cluster. It shows the status
of many vehicle systems.
yorz:Press to go to the previous
or next selection.
SorT: Press to move between the
interactive display zones in the
cluster. Press
Sto go back to the
previous menu.
SEL : Press to open a menu or select a
menu item. Press and hold to reset
values on certain screens.
Info Page Options
The info displays on the DIC can be
turned on or off through the
Options menu. 1. Press SEL while viewing the
Options page in one of the
interactive display zones on the
cluster.
2. Scroll to Info Pages and press
T.
3. Press
yorzto move through the
list of possible info displays.
4. Press SEL while an item is highlighted to select or deselect
that item.
The info pages can also be turned on
or off through the DIC page Info Page
Options.
DIC Information Displays
The following is the list of all possible
DIC information displays. Some of the
information displays may not be
available for your particular vehicle.
While in the Info Page Options menu,
the info pages can be restored to the
default factory settings by pressing
and holding
Ron the left steering
wheel controls and SEL on the right
steering wheel controls at the
same time.
Page 119 of 426

Cadillac XT5 Owner Manual (GMNA-Localizing-U.S./Canada/Mexico-
14590481) - 2021 - CRC - 10/22/20
118 INSTRUMENTS AND CONTROLS
Speed :Shows the vehicle speed in
either kilometers per hour (km/h) or
miles per hour (mph).
Trip 1 or Trip 2 and Average Fuel
Economy : The Trip display shows the
current distance traveled, in either
kilometers (km) or miles (mi), since
the trip odometer was last reset. The
trip odometer can be reset through
the Trip display, or by pressing SEL
and selecting yes or no while this
display is active.
Shows the approximate fuel economy
in kilometers per liter (km/L), liters
per 100 kilometers (L/100km), or miles
per gallon (mpg).. This number is
calculated based on the number of
L/100 km (mpg) recorded since the
last time this menu item was reset.
This number reflects only the
approximate average fuel economy
that the vehicle has right now, and
will change as driving conditions
change. The Average Fuel Economy
can be reset by pressing SEL and
selecting yes or no while this display
is active. Fuel Range :
Shows the approximate
distance the vehicle can be driven
without refueling. LOW will be
displayed when the vehicle is low on
fuel. The fuel range estimate is based
on an average of the vehicle's fuel
economy over recent driving history
and the amount of fuel remaining in
the fuel tank.
Oil Life : Shows an estimate of the
oil's remaining useful life.
If REMAINING OIL LIFE 99% is
displayed, that means 99% of the
current oil life remains.
When the remaining oil life is low, the
CHANGE ENGINE OIL SOON message
will appear on the display. The oil
should be changed as soon as
possible. See Engine Oil0299. In
addition to the engine oil life system
monitoring the oil life, additional
maintenance is recommended. See
Maintenance Schedule 0374.
The Oil Life display must be reset
after each oil change. It will not reset
itself. Do not reset the Oil Life display
accidentally at any time other than
when the oil has just been changed. It cannot be reset accurately until the
next oil change. To reset, see
Engine
Oil Life System 0301.
Tire Pressure : Shows the
approximate pressures of all four tires.
Tire pressure is displayed in either
kilopascal (kPa) or in pounds per
square inch (psi). If the pressure is
low, the value for that tire is shown in
amber. See Tire Pressure Monitor
System 0334 and
Tire Pressure Monitor Operation 0335.
Air Filter Life : Shows an estimate of
the engine air filter’s remaining useful
life and the state of the system.
Engine Air Filter Life 95% means 95%
of the current air filter life remains.
Messages will display based on the
engine air filter life and the state of
the system. When the REPLACE AT
NEXT OIL CHANGE message displays,
the engine air filter should be replaced
at the time of the next oil change.
When the REPLACE SOON message
displays, the engine air filter should
be replaced at the earliest
convenience.
Page 120 of 426

Cadillac XT5 Owner Manual (GMNA-Localizing-U.S./Canada/Mexico-
14590481) - 2021 - CRC - 10/22/20
INSTRUMENTS AND CONTROLS 119
The Air Filter Life display must be
reset after the engine air filter
replacement. To reset, seeEngine Air
Filter Life System 0302.
Fuel Economy : Displays average fuel
economy, the best fuel economy over
the selected distance, and a bar graph
showing instantaneous fuel economy.
Average Speed : Displays the average
vehicle speed of the vehicle in
kilometers per hour (km/h) or miles
per hour (mph). This average is based
on the various vehicle speeds recorded
since the last reset. Reset the average
speed by pressing SEL while this
display is active to show a
confirmation window to select yes
or no.
Timer : This display can be used as a
timer. To start the timer, press SEL
while this display is active. The
display will show the amount of time
that has passed since the timer was
last reset. To stop the timer, press SEL
briefly while this display is active and
the timer is running.
Press SEL while this display is active
to reset the timer. Follow Distance/Gap Setting :
When
Adaptive Cruise Control (ACC) is not
engaged, the current follow time to
the vehicle ahead is displayed as a
time value on this page. When ACC
has been engaged, the display
switches to the gap setting page. This
page shows the current gap setting
along with the vehicle ahead telltale.
Driver Assistance : If equipped,
shows information for Lane Keep
Assist (LKA) and Forward Collision
Alert (FCA).
Battery Voltage : Shows the current
battery voltage.
Coolant Temperature : Shows the
engine coolant temperature in either
degrees Celsius (°C) or degrees
Fahrenheit (°F).
Oil Temperature : Shows the engine
oil temperature in either degrees
Celsius (°C) or degrees Fahrenheit (°F).
Transmission Fluid Temperature :
Shows the temperature of the
automatic transmission fluid in either
degrees Celsius (°C) or degrees
Fahrenheit (°F). Off Road :
Displays vehicle pitch and
roll information, road wheel angle,
and four-wheel drive (4WD) status.
Engine Boost : If equipped, displays
engine manifold pressure relative to
ambient air pressure. It will display
boost pressure generated by the
turbocharging system.
Info Page Options : Scroll to choose
which info pages appear on the DIC.
Press SEL to select or deselect.
Blank Page : Allows for no
information to be displayed in the
cluster info display areas.
Head-Up Display (HUD)
{Warning
If the HUD image is too bright or
too high in your field of view, it
may take you more time to see
things you need to see when it is
dark outside. Be sure to keep the
HUD image dim and placed low in
your field of view.