display CADILLAC XT6 2020 User Guide
[x] Cancel search | Manufacturer: CADILLAC, Model Year: 2020, Model line: XT6, Model: CADILLAC XT6 2020Pages: 385, PDF Size: 6.63 MB
Page 54 of 385
Cadillac XT6 Owner Manual (GMNA-Localizing-U.S./Canada-12984300) -
2020 - CRC - 3/19/19
SEATS AND RESTRAINTS 53
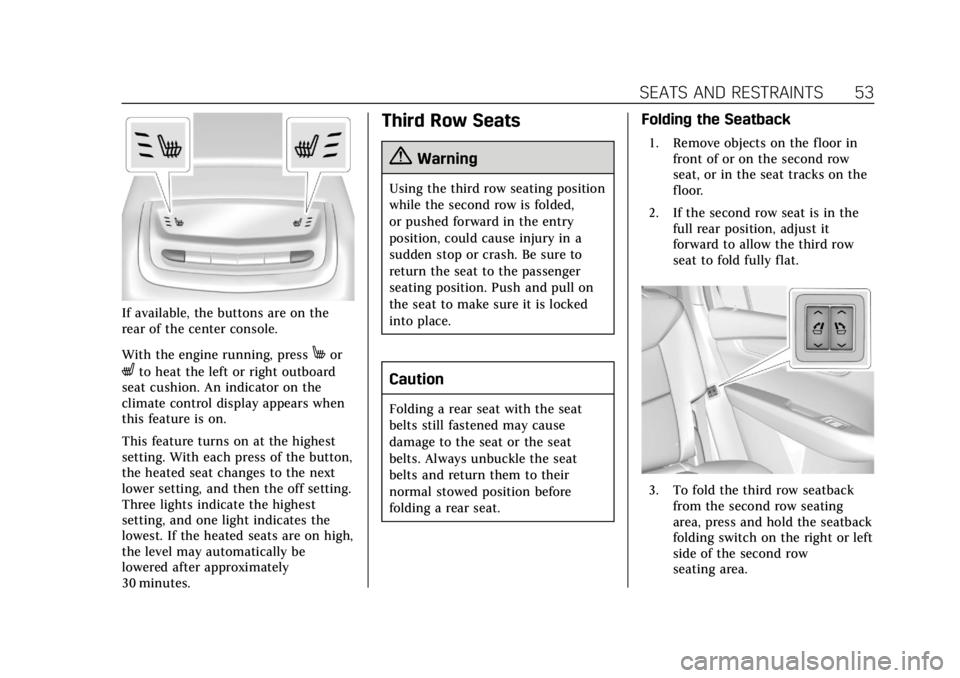
If available, the buttons are on the
rear of the center console.
With the engine running, press
Mor
Lto heat the left or right outboard
seat cushion. An indicator on the
climate control display appears when
this feature is on.
This feature turns on at the highest
setting. With each press of the button,
the heated seat changes to the next
lower setting, and then the off setting.
Three lights indicate the highest
setting, and one light indicates the
lowest. If the heated seats are on high,
the level may automatically be
lowered after approximately
30 minutes.
Third Row Seats
{Warning
Using the third row seating position
while the second row is folded,
or pushed forward in the entry
position, could cause injury in a
sudden stop or crash. Be sure to
return the seat to the passenger
seating position. Push and pull on
the seat to make sure it is locked
into place.
Caution
Folding a rear seat with the seat
belts still fastened may cause
damage to the seat or the seat
belts. Always unbuckle the seat
belts and return them to their
normal stowed position before
folding a rear seat.
Folding the Seatback
1. Remove objects on the floor in
front of or on the second row
seat, or in the seat tracks on the
floor.
2. If the second row seat is in the full rear position, adjust it
forward to allow the third row
seat to fold fully flat.
3. To fold the third row seatbackfrom the second row seating
area, press and hold the seatback
folding switch on the right or left
side of the second row
seating area.
Page 62 of 385
Cadillac XT6 Owner Manual (GMNA-Localizing-U.S./Canada-12984300) -
2020 - CRC - 3/19/19
SEATS AND RESTRAINTS 61
Automatic Seat Belt Tightening
System, a message displays on the
Driver Information Center (DIC). If a
system unavailable message displays
repeatedly or if a service message
displays, see your dealer. Other seat
belt functions are not affected by the
Automatic Seat Belt Tightening
System.
Seat Belt Pretensioners
This vehicle has seat belt
pretensioners for the front outboard
occupants. Although the seat belt
pretensioners cannot be seen, they are
part of the seat belt assembly. They
can help tighten the seat belts during
the early stages of a moderate to
severe frontal, near frontal, or rear
crash if the threshold conditions for
pretensioner activation are met. Seat
belt pretensioners can also help
tighten the seat belts in a side crash
or a rollover event.
Pretensioners work only once. If the
pretensioners activate in a crash, the
pretensioners and probably other
parts of the vehicle’s seat belt systemwill need to be replaced. See
Replacing
Seat Belt System Parts after a Crash
0 63.
Do not sit on the outboard seat belt
while entering or exiting the vehicle or
at any time while sitting in the seat.
Sitting on the seat belt can damage
the webbing and hardware.
Rear Seat Belt Comfort Guides
Rear seat belt comfort guides may
provide added seat belt comfort for
older children who have outgrown
booster seats and for some adults.
When installed on a shoulder belt, the
comfort guide positions the shoulder
belt away from the neck and head.
The comfort guides for the second row
outboard seating positions of this
vehicle are provided in a package in
the glove box or cargo area.
Instructions are included with the
comfort guides.
Third Row Seating Positions
Comfort guides are available through
your dealer for the third row seating
positions. Instructions are included
with the comfort guides.
Seat Belt Use During
Pregnancy
Seat belts work for everyone,
including pregnant women. Like all
occupants, they are more likely to be
seriously injured if they do not wear
seat belts.
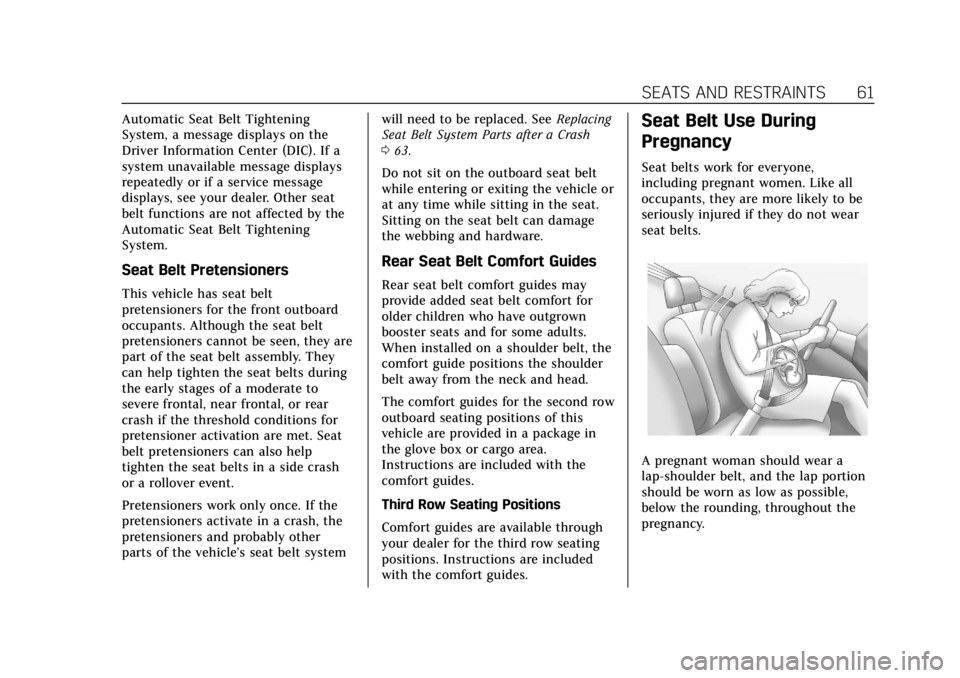
A pregnant woman should wear a
lap-shoulder belt, and the lap portion
should be worn as low as possible,
below the rounding, throughout the
pregnancy.
Page 105 of 385
Cadillac XT6 Owner Manual (GMNA-Localizing-U.S./Canada-12984300) -
2020 - CRC - 3/19/19
104 INSTRUMENTS AND CONTROLS
Instruments and
Controls
Controls
Steering Wheel Adjustment . . . . . 105
Steering Wheel Controls . . . . . . . . . 105
Heated Steering Wheel . . . . . . . . . . 105
Horn . . . . . . . . . . . . . . . . . . . . . . . . . . . . . . . 105
Windshield Wiper/Washer . . . . . . . 106
Rear Window Wiper/Washer . . . . 107
Compass . . . . . . . . . . . . . . . . . . . . . . . . . . 108
Clock . . . . . . . . . . . . . . . . . . . . . . . . . . . . . . 109
Power Outlets . . . . . . . . . . . . . . . . . . . . . 109
Wireless Charging . . . . . . . . . . . . . . . . 110
Warning Lights, Gauges, and
Indicators
Warning Lights, Gauges, andIndicators . . . . . . . . . . . . . . . . . . . . . . . 112
Instrument Cluster . . . . . . . . . . . . . . . 113
Speedometer . . . . . . . . . . . . . . . . . . . . . . 116
Odometer . . . . . . . . . . . . . . . . . . . . . . . . . 116
Trip Odometer . . . . . . . . . . . . . . . . . . . . 116
Tachometer . . . . . . . . . . . . . . . . . . . . . . . 116
Fuel Gauge . . . . . . . . . . . . . . . . . . . . . . . . 117
Engine Coolant Temperature Gauge . . . . . . . . . . . . . . . . . . . . . . . . . . . . 117
Seat Belt Reminders . . . . . . . . . . . . . . 118 Airbag Readiness Light . . . . . . . . . . 119
Passenger Airbag Status
Indicator . . . . . . . . . . . . . . . . . . . . . . . . . 119
Charging System Light . . . . . . . . . . . 120
Malfunction Indicator Lamp (Check Engine Light) . . . . . . . . . . . 120
Brake System Warning Light . . . . 122
Electric Parking Brake Light . . . . . 122
Service Electric Parking Brake Light . . . . . . . . . . . . . . . . . . . . . . . . . . . . . 123
Antilock Brake System (ABS) Warning Light . . . . . . . . . . . . . . . . . . 123
All-Wheel-Drive Light . . . . . . . . . . . . 123
Lane Keep Assist (LKA) Light . . . 124
Vehicle Ahead Indicator . . . . . . . . . 124
Pedestrian Ahead Indicator . . . . . . 124
Traction Off Light . . . . . . . . . . . . . . . . 125
StabiliTrak OFF Light . . . . . . . . . . . . 125
Traction Control System (TCS)/ StabiliTrak Light . . . . . . . . . . . . . . . . 125
Driver Mode Control Light . . . . . . . 126
Tire Pressure Light . . . . . . . . . . . . . . . 126
Engine Oil Pressure Light . . . . . . . . 126
Low Fuel Warning Light . . . . . . . . . 127
Security Light . . . . . . . . . . . . . . . . . . . . . 127
High-Beam On Light . . . . . . . . . . . . . 127
Lamps On Reminder . . . . . . . . . . . . . 128
Cruise Control Light . . . . . . . . . . . . . . 128
Door Ajar Light . . . . . . . . . . . . . . . . . . . 128
Information Displays
Driver Information Center (DIC) . . . . . . . . . . . . . . . . . . . . . 128
Head-Up Display (HUD) . . . . . . . . . 131
Vehicle Messages
Vehicle Messages . . . . . . . . . . . . . . . . . 134
Engine Power Messages . . . . . . . . . . 135
Vehicle Speed Messages . . . . . . . . . 135
Vehicle Personalization
Vehicle Personalization . . . . . . . . . . 135
Universal Remote System
Universal Remote System . . . . . . . . 141
Universal Remote System Programming . . . . . . . . . . . . . . . . . . . 141
Universal Remote System Operation . . . . . . . . . . . . . . . . . . . . . . . . 143
Page 106 of 385
Cadillac XT6 Owner Manual (GMNA-Localizing-U.S./Canada-12984300) -
2020 - CRC - 3/19/19
INSTRUMENTS AND CONTROLS 105
Controls
Steering Wheel Adjustment
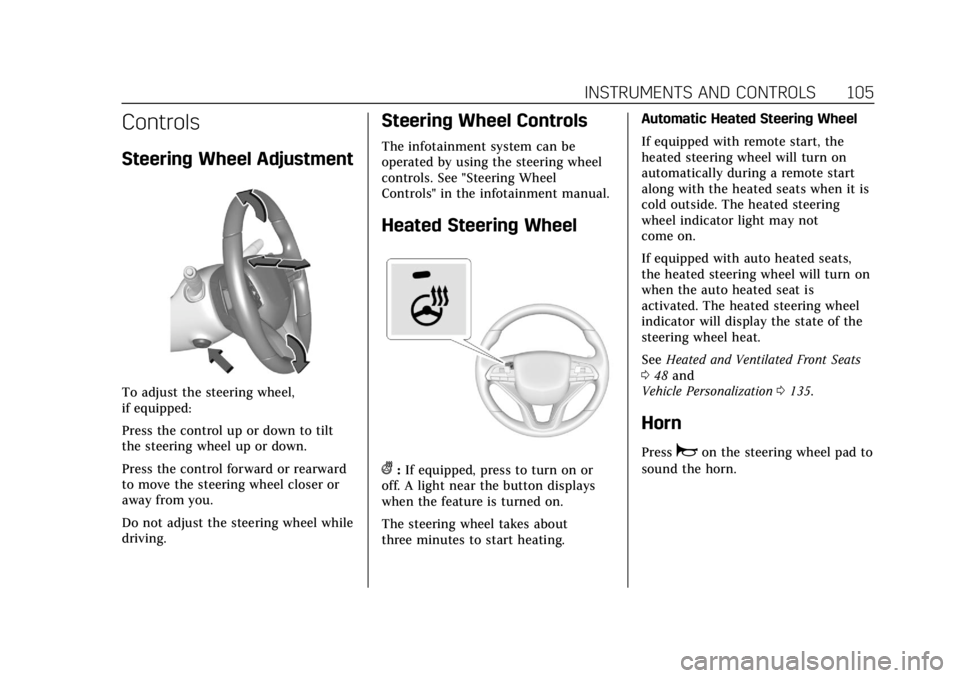
To adjust the steering wheel,
if equipped:
Press the control up or down to tilt
the steering wheel up or down.
Press the control forward or rearward
to move the steering wheel closer or
away from you.
Do not adjust the steering wheel while
driving.
Steering Wheel Controls
The infotainment system can be
operated by using the steering wheel
controls. See "Steering Wheel
Controls" in the infotainment manual.
Heated Steering Wheel
(:If equipped, press to turn on or
off. A light near the button displays
when the feature is turned on.
The steering wheel takes about
three minutes to start heating. Automatic Heated Steering Wheel
If equipped with remote start, the
heated steering wheel will turn on
automatically during a remote start
along with the heated seats when it is
cold outside. The heated steering
wheel indicator light may not
come on.
If equipped with auto heated seats,
the heated steering wheel will turn on
when the auto heated seat is
activated. The heated steering wheel
indicator will display the state of the
steering wheel heat.
See
Heated and Ventilated Front Seats
0 48 and
Vehicle Personalization 0135.
Horn
Pressaon the steering wheel pad to
sound the horn.
Page 109 of 385
Cadillac XT6 Owner Manual (GMNA-Localizing-U.S./Canada-12984300) -
2020 - CRC - 3/19/19
108 INSTRUMENTS AND CONTROLS
INT :Turns on the rear wiper with a
delay between wipes.
ON : Turns on the rear wiper.
1:Push the windshield wiper
lever forward to spray washer fluid on
the rear window. The wipers will clear
the rear window and either stop or
return to your preset speed. For more
washer cycles, push and hold the
lever.
The rear window wiper/washer will
not operate if the liftgate is open or
ajar. If the liftgate is opened while the
rear wiper is on, the wiper returns to
the parked position and stops.
See “Rear Camera Washer” later in this
section.
Rear Wiper Arm Assembly
Protection
When using an automatic car wash,
move the rear wiper control to OFF to
disable the rear wiper. In some
vehicles, if the transmission is in
N (Neutral) and the vehicle speed is
very slow, the rear wiper will
automatically park under the rear
spoiler. The wiper operations return to normal
when the transmission is no longer in
N (Neutral) or the vehicle speed has
increased.
Auto Wipe in Reverse Gear
If the rear wiper control is off, the rear
wiper will automatically operate
continuously when the transmission is
in R (Reverse), and the front
windshield wiper is performing low or
high speed wipes. If the rear wiper
control is off, the transmission is in
R (Reverse), and the front windshield
wiper is performing INT wipes, then
the rear wiper automatically performs
INT wipes.
This feature can be turned on or off.
See
Vehicle Personalization 0135.
The windshield washer reservoir is
used for the windshield, rear window,
and rear mirror camera, if equipped.
See Rear Camera Mirror 034. Check
the fluid level in the reservoir if either
washer is not working. See Washer
Fluid 0273.
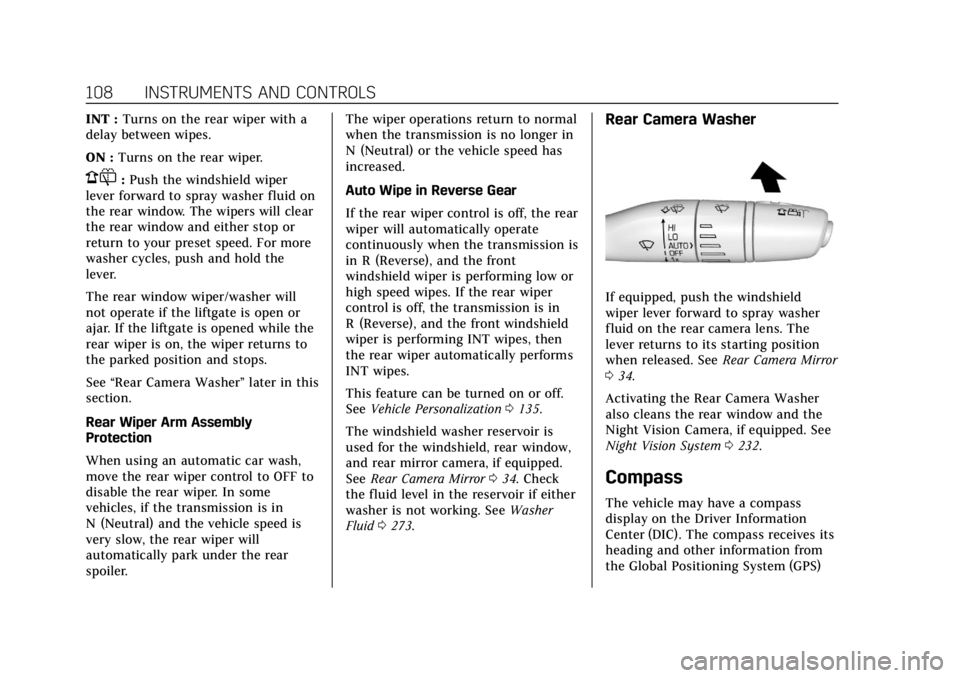
Rear Camera Washer
If equipped, push the windshield
wiper lever forward to spray washer
fluid on the rear camera lens. The
lever returns to its starting position
when released. See Rear Camera Mirror
0 34.
Activating the Rear Camera Washer
also cleans the rear window and the
Night Vision Camera, if equipped. See
Night Vision System 0232.
Compass
The vehicle may have a compass
display on the Driver Information
Center (DIC). The compass receives its
heading and other information from
the Global Positioning System (GPS)
Page 110 of 385
Cadillac XT6 Owner Manual (GMNA-Localizing-U.S./Canada-12984300) -
2020 - CRC - 3/19/19
INSTRUMENTS AND CONTROLS 109
antenna, StabiliTrak/Electronic
Stability Control (ESC), and vehicle
speed information.
The compass system is designed to
operate for a certain number of miles
or degrees of turn before needing a
signal from the GPS satellites. When
the compass display shows CAL, drive
the vehicle for a short distance in an
open area where it can receive a GPS
signal. The compass system will
automatically determine when a GPS
signal is restored and provide a
heading again.
Clock
The time and date for the clock can be
set using the infotainment system. See
“Time/Date”in “System ”under
“Settings ”in the infotainment manual.
Power Outlets
Power Outlets 12-Volt Direct Current
The vehicle has two 12-volt outlets
that can be used to plug in electrical
equipment, such as a cell phone or
MP3 player.
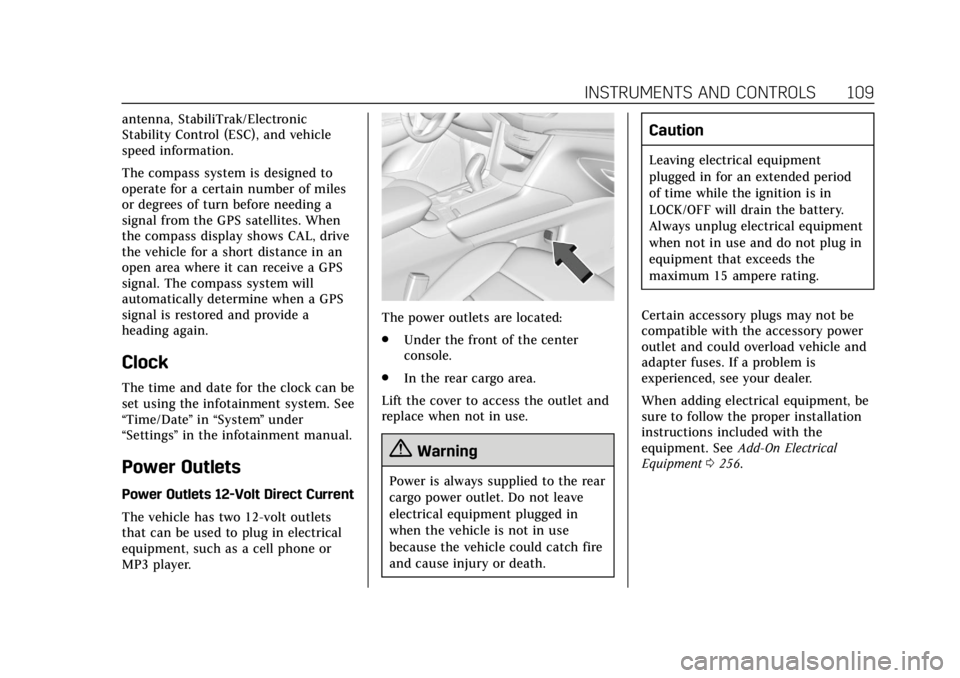
The power outlets are located:
.
Under the front of the center
console.
. In the rear cargo area.
Lift the cover to access the outlet and
replace when not in use.
{Warning
Power is always supplied to the rear
cargo power outlet. Do not leave
electrical equipment plugged in
when the vehicle is not in use
because the vehicle could catch fire
and cause injury or death.
Caution
Leaving electrical equipment
plugged in for an extended period
of time while the ignition is in
LOCK/OFF will drain the battery.
Always unplug electrical equipment
when not in use and do not plug in
equipment that exceeds the
maximum 15 ampere rating.
Certain accessory plugs may not be
compatible with the accessory power
outlet and could overload vehicle and
adapter fuses. If a problem is
experienced, see your dealer.
When adding electrical equipment, be
sure to follow the proper installation
instructions included with the
equipment. See Add-On Electrical
Equipment 0256.
Page 112 of 385
Cadillac XT6 Owner Manual (GMNA-Localizing-U.S./Canada-12984300) -
2020 - CRC - 3/19/19
INSTRUMENTS AND CONTROLS 111
To charge a compatible smartphone:1. Remove all objects from the charging pocket. The system may
not charge if there are any
objects between the smartphone
and the charging pocket.
2. With the smartphone screen facing the rear of the vehicle,
slowly insert the smartphone
into the charging pocket until a
green
}appears onVon the
infotainment display. This
indicates that the smartphone is
properly positioned and charging.
If
}turns yellow, ensure that
the charging pocket is clear of
any objects and that the
smartphone is capable of
wireless charging before
repositioning it. If a smartphone
is inserted into the pocket
and
}does not display, remove
the smartphone from the pocket,
turn it 180 degrees, and wait
three seconds before inserting
the smartphone into the pocket
again. The smartphone may become
warm during charging. This is
normal. In warmer temperatures,
the speed of charging may be
reduced.
To maximize the charge rate,
ensure the smartphone is fully
seated and centered in the holder
with nothing under it. A thick
smartphone case may prevent
the wireless charger from
working, or may reduce the
charging performance. See your
dealer for additional information.
Software Acknowledgements
Certain Wireless Charging Module
product from LG Electronics, Inc.
("LGE") contains the open source
software detailed below. Refer to the
indicated open source licenses (as are
included following this notice) for the
terms and conditions of their use. OSS Notice Information
To obtain the source code that is
contained in this product, please visit
http://opensource.lge.com. In addition
to the source code, all referred license
terms, warranty disclaimers and
copyright notices are available for
download. LG Electronics will also
provide open source code to you on
CD-ROM for a charge covering the
cost of performing such distribution
(such as the cost of media, shipping,
and handling) upon email request to
[email protected]. This offer is
valid for three (3) years from the date
on which you purchased the product.
Page 116 of 385
Cadillac XT6 Owner Manual (GMNA-Localizing-U.S./Canada-12984300) -
2020 - CRC - 3/19/19
INSTRUMENTS AND CONTROLS 115
Cluster Menu
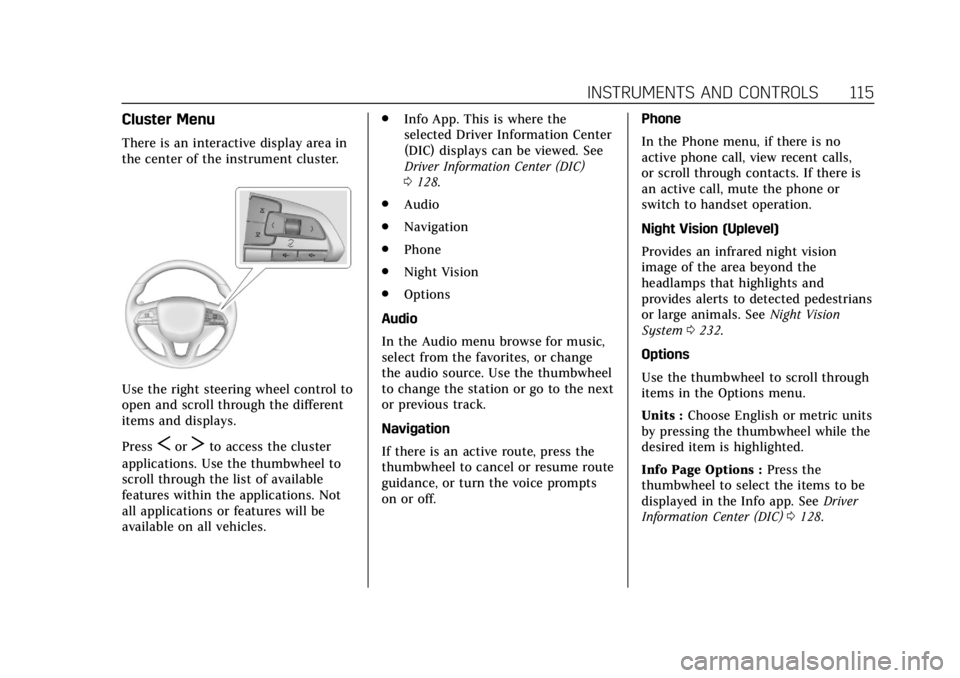
There is an interactive display area in
the center of the instrument cluster.
Use the right steering wheel control to
open and scroll through the different
items and displays.
Press
SorTto access the cluster
applications. Use the thumbwheel to
scroll through the list of available
features within the applications. Not
all applications or features will be
available on all vehicles. .
Info App. This is where the
selected Driver Information Center
(DIC) displays can be viewed. See
Driver Information Center (DIC)
0128.
. Audio
. Navigation
. Phone
. Night Vision
. Options
Audio
In the Audio menu browse for music,
select from the favorites, or change
the audio source. Use the thumbwheel
to change the station or go to the next
or previous track.
Navigation
If there is an active route, press the
thumbwheel to cancel or resume route
guidance, or turn the voice prompts
on or off. Phone
In the Phone menu, if there is no
active phone call, view recent calls,
or scroll through contacts. If there is
an active call, mute the phone or
switch to handset operation.
Night Vision (Uplevel)
Provides an infrared night vision
image of the area beyond the
headlamps that highlights and
provides alerts to detected pedestrians
or large animals. See
Night Vision
System 0232.
Options
Use the thumbwheel to scroll through
items in the Options menu.
Units : Choose English or metric units
by pressing the thumbwheel while the
desired item is highlighted.
Info Page Options : Press the
thumbwheel to select the items to be
displayed in the Info app. See Driver
Information Center (DIC) 0128.
Page 117 of 385
Cadillac XT6 Owner Manual (GMNA-Localizing-U.S./Canada-12984300) -
2020 - CRC - 3/19/19
116 INSTRUMENTS AND CONTROLS
Display :Press the thumbwheel to
enter the Display menu. Select to turn
on or off the speedometer, time, fuel
range, or, if equipped, compass or
speed sign.
Speed Warning : The Speed Warning
display allows the driver to set a
warning at a speed that they do not
want to exceed. To set the Speed
Warning press the thumbwheel when
Speed Warning is displayed. Use the
thumbwheel to adjust the value and
press to set the speed.
Once the speed is set, this feature can
be turned off by pressing the
thumbwheel while viewing this page.
If the selected speed limit is exceeded,
a pop-up warning is displayed with a
chime.
Head-up Display (HUD) (Uplevel) :
If equipped, this feature allows for
adjusting the angle of the HUD image
and changing or turning off the Speed
Limit Sign.
HUD Rotation (Uplevel): Press the
thumbwheel while Adjust Rotation is
highlighted to enter Adjust Mode.
Scroll to adjust the angle of the HUD display. Press the thumbwheel to
confirm and save the setting. This
feature may only be available in
P (Park).
Speed Sign: If equipped, press the
thumbwheel while Speed Sign is
highlighted to turn it on or off.
Software Information :
Displays open
source software information.
Speedometer
The speedometer shows the vehicle's
speed in either kilometers per hour
(km/h) or miles per hour (mph).
Odometer
The odometer shows how far the
vehicle has been driven, in either
kilometers or miles.
Trip Odometer
The trip odometer shows how far the
vehicle has been driven since the trip
odometer was last reset. The trip odometer is accessed and
reset through the Driver Information
Center (DIC). See
Driver Information
Center (DIC) 0128.
Tachometer
The tachometer displays the engine
speed in revolutions per minute (rpm).
For vehicles with the Stop/Start
system, when the ignition is on, the
tachometer indicates the vehicle
status. When pointing to AUTO STOP,
the engine is off but the vehicle is on
and can move. The engine could auto
start at any time. When the indicator
points to OFF, the vehicle is off.
When the engine is on, the
tachometer will indicate the engine’s
revolutions per minute (rpm). The
tachometer may vary by several
hundred rpm’s, during Auto Stop
mode, when the engine is shutting off
and restarting.
Page 121 of 385
Cadillac XT6 Owner Manual (GMNA-Localizing-U.S./Canada-12984300) -
2020 - CRC - 3/19/19
120 INSTRUMENTS AND CONTROLS
{Warning
If the airbag readiness light ever
comes on and stays on, it means
that something may be wrong with
the airbag system. To help avoid
injury to yourself or others, have
the vehicle serviced right away. See
Airbag Readiness Light0119 for
more information, including
important safety information.
Charging System Light
The charging system light comes on
briefly when the ignition is turned on,
but the engine is not running, as a
check to show the light is working.
It should go out when the engine is
started. If the light stays on, or comes on
while driving, there may be a problem
with the electrical charging system.
Have it checked by your dealer.
Driving while this light is on could
drain the battery.
When this light comes on, or is
flashing, the Driver Information
Center (DIC) also displays a message.
If a short distance must be driven
with the light on, be sure to turn off
all accessories, such as the radio and
air conditioner.
Malfunction Indicator Lamp
(Check Engine Light)
This light is part of the vehicle’s
emission control on-board diagnostic
system. If this light is on while the
engine is running, a malfunction has
been detected and the vehicle may
require service. The light should come
on to show that it is working when
the ignition is in Service Mode. See
Ignition Positions
0180.
Malfunctions are often indicated by
the system before any problem is
noticeable. Being aware of the light
and seeking service promptly when it
comes on may prevent damage.
Caution
If the vehicle is driven continually
with this light on, the emission
control system may not work as
well, the fuel economy may be
lower, and the vehicle may not run
smoothly. This could lead to costly
repairs that might not be covered
by the vehicle warranty.