change time CADILLAC XT6 2020 Owner's Manual
[x] Cancel search | Manufacturer: CADILLAC, Model Year: 2020, Model line: XT6, Model: CADILLAC XT6 2020Pages: 385, PDF Size: 6.63 MB
Page 31 of 385
Cadillac XT6 Owner Manual (GMNA-Localizing-U.S./Canada-12984300) -
2020 - CRC - 3/19/19
30 KEYS, DOORS, AND WINDOWS
To avoid setting off the alarm by
accident:
.Lock the vehicle after all
occupants have left the vehicle
and all doors are closed.
. Always unlock a door with the
RKE transmitter or use the Keyless
Access system.
Unlocking the driver door with the key
will not disarm the system or turn off
the alarm.
How to Detect a Tamper
Condition
IfKis pressed and the horn chirps
and the lights flash three times, the
alarm was activated while the alarm
system was armed.
If the alarm system has been
activated, a message will appear on
the DIC.
Power Sounder, Inclination
Sensor, and Intrusion Sensor
In addition to the standard
theft-deterrent system features, this
system may also have an inclination
sensor, an intrusion sensor, and power
sounder.
The power sounder provides an
audible alarm that is different from
the vehicle’s horn. It has its own
power source, and can sound an alarm
when the vehicle’s battery is
compromised.
The inclination sensor can set off the
alarm if it senses movement of the
vehicle, such as a change in vehicle
orientation.
The intrusion sensor monitors the
vehicle interior, and can set off the
alarm if it senses an unauthorized
entry into the vehicle’s interior. Do
not allow passengers or pets to remain
in the vehicle when the intrusion
sensor is activated. Before arming the theft-deterrent
system and activating the intrusion
sensor:
.
Make sure all doors and windows
are completely closed.
. Secure any loose items such as a
sunshades.
. Make sure there are no
obstructions blocking the sensors
in the front overhead console.
Inclination and Intrusion
Sensors Disable Switch
It is recommended that the inclination
and intrusion sensors be deactivated if
pets are left in the vehicle or if the
vehicle is being transported.
With the vehicle turned off, press
o
in the overhead console. The indicator
light will come on momentarily,
indicating that the sensor has been
disabled until the next time the alarm
system is armed.
Page 34 of 385
Cadillac XT6 Owner Manual (GMNA-Localizing-U.S./Canada-12984300) -
2020 - CRC - 3/19/19
KEYS, DOORS, AND WINDOWS 33
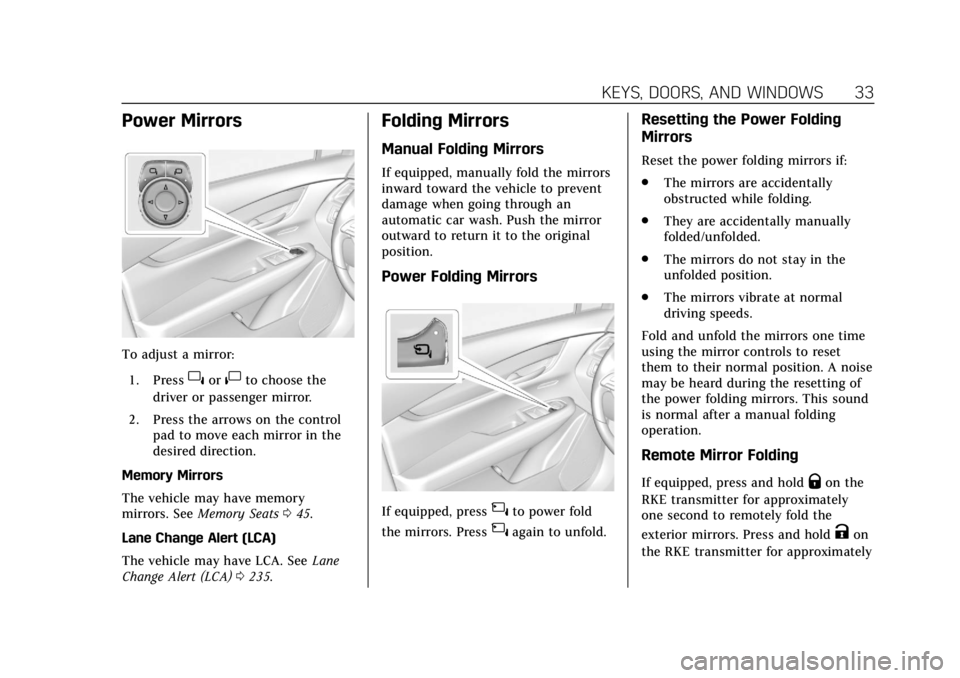
Power Mirrors
To adjust a mirror:1. Press
}or|to choose the
driver or passenger mirror.
2. Press the arrows on the control pad to move each mirror in the
desired direction.
Memory Mirrors
The vehicle may have memory
mirrors. See Memory Seats 045.
Lane Change Alert (LCA)
The vehicle may have LCA. See Lane
Change Alert (LCA) 0235.
Folding Mirrors
Manual Folding Mirrors
If equipped, manually fold the mirrors
inward toward the vehicle to prevent
damage when going through an
automatic car wash. Push the mirror
outward to return it to the original
position.
Power Folding Mirrors
If equipped, press{to power fold
the mirrors. Press
{again to unfold.
Resetting the Power Folding
Mirrors
Reset the power folding mirrors if:
. The mirrors are accidentally
obstructed while folding.
. They are accidentally manually
folded/unfolded.
. The mirrors do not stay in the
unfolded position.
. The mirrors vibrate at normal
driving speeds.
Fold and unfold the mirrors one time
using the mirror controls to reset
them to their normal position. A noise
may be heard during the resetting of
the power folding mirrors. This sound
is normal after a manual folding
operation.
Remote Mirror Folding
If equipped, press and holdQon the
RKE transmitter for approximately
one second to remotely fold the
exterior mirrors. Press and hold
Kon
the RKE transmitter for approximately
Page 41 of 385
Cadillac XT6 Owner Manual (GMNA-Localizing-U.S./Canada-12984300) -
2020 - CRC - 3/19/19
40 KEYS, DOORS, AND WINDOWS
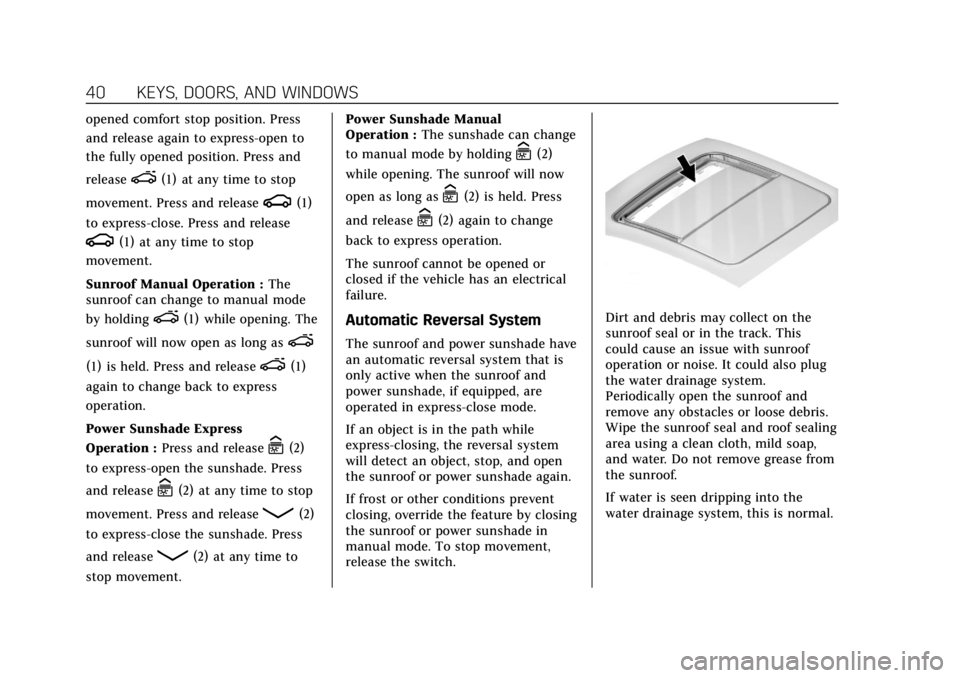
opened comfort stop position. Press
and release again to express-open to
the fully opened position. Press and
release
e(1) at any time to stop
movement. Press and release
g(1)
to express-close. Press and release
g(1) at any time to stop
movement.
Sunroof Manual Operation : The
sunroof can change to manual mode
by holding
e(1) while opening. The
sunroof will now open as long as
e
(1) is held. Press and releasee(1)
again to change back to express
operation.
Power Sunshade Express
Operation : Press and release
C(2)
to express-open the sunshade. Press
and release
C(2) at any time to stop
movement. Press and release
Q(2)
to express-close the sunshade. Press
and release
Q(2) at any time to
stop movement. Power Sunshade Manual
Operation :
The sunshade can change
to manual mode by holding
C(2)
while opening. The sunroof will now
open as long as
C(2) is held. Press
and release
C(2) again to change
back to express operation.
The sunroof cannot be opened or
closed if the vehicle has an electrical
failure.
Automatic Reversal System
The sunroof and power sunshade have
an automatic reversal system that is
only active when the sunroof and
power sunshade, if equipped, are
operated in express-close mode.
If an object is in the path while
express-closing, the reversal system
will detect an object, stop, and open
the sunroof or power sunshade again.
If frost or other conditions prevent
closing, override the feature by closing
the sunroof or power sunshade in
manual mode. To stop movement,
release the switch.
Dirt and debris may collect on the
sunroof seal or in the track. This
could cause an issue with sunroof
operation or noise. It could also plug
the water drainage system.
Periodically open the sunroof and
remove any obstacles or loose debris.
Wipe the sunroof seal and roof sealing
area using a clean cloth, mild soap,
and water. Do not remove grease from
the sunroof.
If water is seen dripping into the
water drainage system, this is normal.
Page 49 of 385
Cadillac XT6 Owner Manual (GMNA-Localizing-U.S./Canada-12984300) -
2020 - CRC - 3/19/19
48 SEATS AND RESTRAINTS
number that positions were saved to.
Try storing the position to the other
memory button or try the other RKE
transmitter.
Seat Exit Memory
Seat Exit Memory is not linked to an
RKE transmitter. The position saved to
Bis used for all drivers. To turn Seat
Exit Memory on or off, see "Vehicle
Personalization Settings" previously in
this section and Vehicle Personalization
0 135.
If turned on, the position saved to
B
is automatically recalled when one of
the following occurs:
. The vehicle is turned off and the
driver door is opened within a
short time.
. The vehicle is turned off with the
driver door open.
To stop Seat Exit Memory movement,
press any of the following memory
controls:
. Power seat
. Memory SET, 1, 2, or
B
.Power mirror, with the driver or
passenger side mirror selected
. Power steering wheel, if equipped
Obstructions
If something has blocked the driver
seat and/or power steering wheel
while recalling a memory position, the
recall may stop. Remove the
obstruction and try the recall again.
If the memory position still does not
recall, see your dealer.
Heated and Ventilated
Front Seats
{Warning
If temperature change or pain to
the skin cannot be felt, the seat
heater may cause burns. To reduce
the risk of burns, use care when
using the seat heater, especially for
long periods of time. Do not place
anything on the seat that insulates
against heat, such as a blanket,
cushion, cover, or similar item. This (Continued)
Warning (Continued)
may cause the seat heater to
overheat. An overheated seat heater
may cause a burn or may damage
the seat.
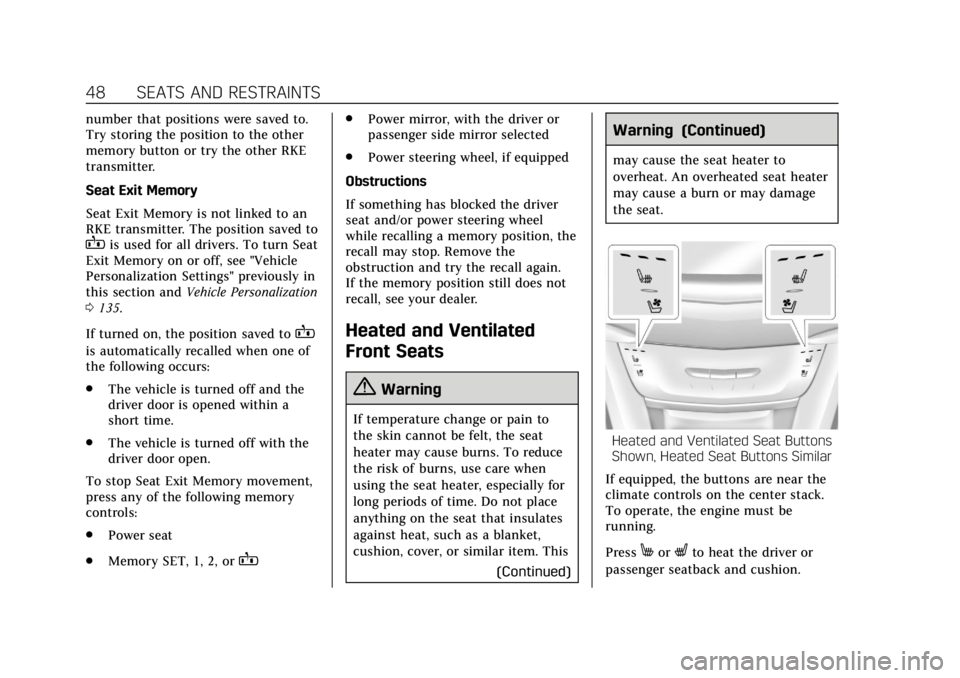
Heated and Ventilated Seat ButtonsShown, Heated Seat Buttons Similar
If equipped, the buttons are near the
climate controls on the center stack.
To operate, the engine must be
running.
Press
MorLto heat the driver or
passenger seatback and cushion.
Page 78 of 385
Cadillac XT6 Owner Manual (GMNA-Localizing-U.S./Canada-12984300) -
2020 - CRC - 3/19/19
SEATS AND RESTRAINTS 77
Infants and Young Children
Everyone in a vehicle needs
protection! This includes infants and
all other children. Neither the distance
traveled nor the age and size of the
traveler changes the need, for
everyone, to use safety restraints. In
fact, the law in every state in the
United States and in every Canadian
province says children up to some age
must be restrained while in a vehicle.
{Warning
Children can be seriously injured or
strangled if a shoulder belt is
wrapped around their neck. The
shoulder belt can tighten but
cannot be loosened if it is locked.
The shoulder belt locks when it is
pulled all the way out of the
retractor. It unlocks when the
shoulder belt is allowed to go all
the way back into the retractor, but
it cannot do this if it is wrapped
around a child’s neck. If the
shoulder belt is locked and(Continued)
Warning (Continued)
tightened around a child’s neck, the
only way to loosen the belt is to
cut it.
Never leave children unattended in
a vehicle and never allow children
to play with the seat belts.
Every time infants and young children
ride in vehicles, they should have the
protection provided by appropriate
child restraints. Neither the vehicle's
seat belt system nor its airbag system
is designed for them.
Children who are not restrained
properly can strike other people,
or can be thrown out of the vehicle.
{Warning
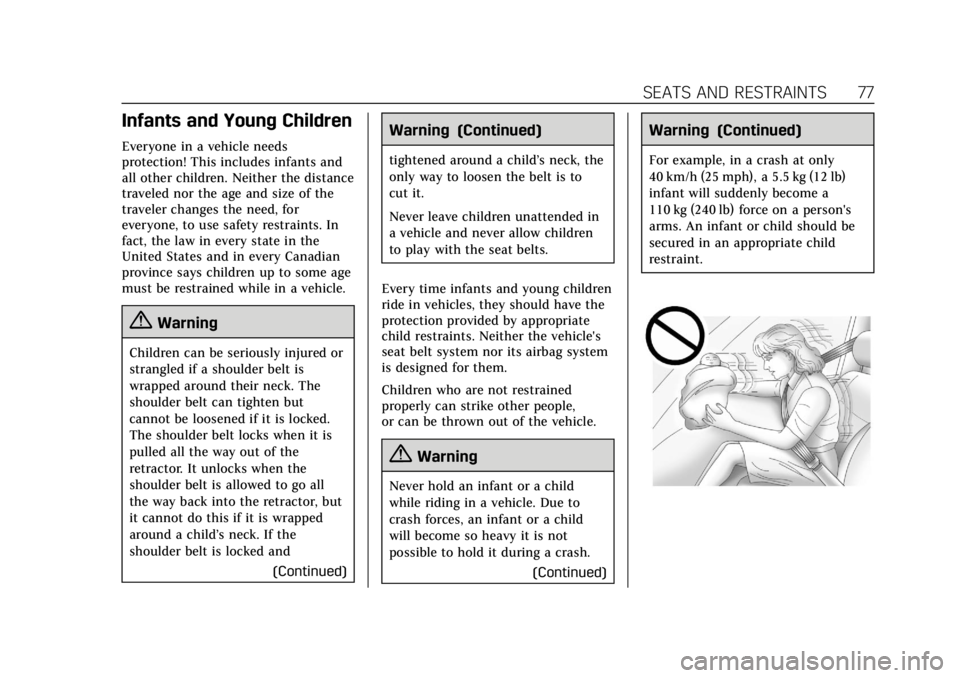
Never hold an infant or a child
while riding in a vehicle. Due to
crash forces, an infant or a child
will become so heavy it is not
possible to hold it during a crash. (Continued)
Warning (Continued)
For example, in a crash at only
40 km/h (25 mph), a 5.5 kg (12 lb)
infant will suddenly become a
110 kg (240 lb) force on a person's
arms. An infant or child should be
secured in an appropriate child
restraint.
Page 130 of 385
Cadillac XT6 Owner Manual (GMNA-Localizing-U.S./Canada-12984300) -
2020 - CRC - 3/19/19
INSTRUMENTS AND CONTROLS 129
yorz:Use the thumbwheel to
scroll to the previous or next
selection.
V: Press the thumbwheel to open a
menu or select a menu item. Press
and hold to reset values on certain
screens.
Info Page Options
The info displays on the DIC can be
turned on or off through the
Options menu.
1. Press
Tto scroll to the Options
menu. Use the thumbwheel to
scroll to Info Pages and press the
thumbwheel to select.
2. Scroll
yorzto move through
the list of possible info displays.
3. Press the thumbwheel while an item is highlighted to select or
deselect that item.
The info pages can also be turned on
or off through the DIC page Info Page
Options.
DIC Information Displays
The following is the list of all possible
DIC information displays. Some of the
information displays may not be
available for your particular vehicle.
While in the Info Page Options menu,
the info pages can be restored to the
default factory settings by pressing
and holding
Ron the left steering
wheel controls and the thumbwheel
on the right steering wheel controls at
the same time.
Speed : Shows the vehicle speed in
either kilometers per hour (km/h) or
miles per hour (mph).
Trip 1 or Trip 2 and Average Fuel
Economy : The Trip display shows the
current distance traveled, in either
kilometers (km) or miles (mi), since
the trip odometer was last reset. The
trip odometer can be reset by pressing
Vand selecting yes or no while this
display is active.
Shows the approximate average liters
per 100 kilometers (L/100 km) or
miles per gallon (mpg). This number
is calculated based on the number of L/100 km (mpg) recorded since the
last time this menu item was reset.
This number reflects only the
approximate average fuel economy
that the vehicle has right now, and
will change as driving conditions
change. The Average Fuel Economy
can be reset by pressing
Vand
selecting yes or no while this display
is active.
Fuel Range : Shows the approximate
distance the vehicle can be driven
without refueling. LOW will be
displayed when the vehicle is low on
fuel. The fuel range estimate is based
on an average of the vehicle's fuel
economy over recent driving history
and the amount of fuel remaining in
the fuel tank.
Oil Life : Shows an estimate of the
oil's remaining useful life.
If REMAINING OIL LIFE 99% is
displayed, that means 99% of the
current oil life remains.
When the remaining oil life is low, the
CHANGE ENGINE OIL SOON message
will appear on the display. The oil
should be changed as soon as
Page 131 of 385
Cadillac XT6 Owner Manual (GMNA-Localizing-U.S./Canada-12984300) -
2020 - CRC - 3/19/19
130 INSTRUMENTS AND CONTROLS
possible. SeeEngine Oil0264. In
addition to the engine oil life system
monitoring the oil life, additional
maintenance is recommended. See
Maintenance Schedule 0333.
The Oil Life display must be reset
after each oil change. It will not reset
itself. Do not reset the Oil Life display
accidentally at any time other than
when the oil has just been changed.
It cannot be reset accurately until the
next oil change. To reset the engine
oil life system, press
Vand then
select yes or no. See Engine Oil Life
System 0266.
Tire Pressure : Shows the
approximate pressures of all four tires.
Tire pressure is displayed in either
kilopascal (kPa) or in pounds per
square inch (psi). If the pressure is
low, the value for that tire is shown in
amber. See Tire Pressure Monitor
System 0298 and
Tire Pressure Monitor Operation 0299.
Air Filter Life : Shows an estimate of
the engine air filter’s remaining useful
life and the state of the system.
Engine Air Filter Life 95% means 95% of the current air filter life remains.
Messages will display based on the
engine air filter life and the state of
the system. When the REPLACE AT
NEXT OIL CHANGE message displays,
the engine air filter should be replaced
at the time of the next oil change.
When the REPLACE NOW message
displays, the engine air filter should
be replaced as soon as possible.
The Air Filter Life display must be
reset after the engine air filter
replacement. To reset, see
Engine Air
Filter Life System 0267.
Fuel Economy : Displays average fuel
economy, the best fuel economy over
the selected distance, and a bar graph
showing instantaneous fuel economy.
Average Speed : Displays the average
vehicle speed of the vehicle in
kilometers per hour (km/h) or miles
per hour (mph). This average is based
on the various vehicle speeds recorded
since the last reset. Reset the average
speed by pressing the thumbwheel
while this display is active to show a
confirmation window to select yes
or no. Timer :
This display can be used as a
timer. To start the timer, press the
thumbwheel while this display is
active. The display will show the
amount of time that has passed since
the timer was last reset. To stop the
timer, press the thumbwheel briefly
while this display is active and the
timer is running.
Press the thumbwheel while this
display is active to reset the timer.
Follow Distance/Gap Setting : When
Adaptive Cruise Control (ACC) is not
engaged, the current follow time to
the vehicle ahead is displayed as a
time value on this page. When ACC
has been engaged, the display
switches to the gap setting page. This
page shows the current gap setting
along with the vehicle ahead indicator.
Driver Assistance : If equipped,
shows information for Lane Keep
Assist (LKA) and Forward Collision
Alert (FCA).
Battery Voltage : Shows the current
battery voltage.
Page 132 of 385
Cadillac XT6 Owner Manual (GMNA-Localizing-U.S./Canada-12984300) -
2020 - CRC - 3/19/19
INSTRUMENTS AND CONTROLS 131
Coolant Temperature :Shows the
engine coolant temperature in either
degrees Celsius (°C) or degrees
Fahrenheit (°F).
Oil Temperature : Shows the engine
oil temperature in either degrees
Celsius (°C) or degrees Fahrenheit (°F).
Transmission Fluid Temperature :
Shows the temperature of the
automatic transmission fluid in either
degrees Celsius (°C) or degrees
Fahrenheit (°F).
Off Road : Displays vehicle pitch and
roll information, road wheel angle,
and four-wheel drive (4WD) status.
Economy Trend : Shows history of
the Average Fuel Economy from the
last 50 km (30 mi). Each bar
represents about 5 km (3 mi) of
driving. During driving the bars will
shift to always reflect the most recent
distance on the right side. Press the
thumbwheel to open the menu while
this display is active to clear the
graph. Info Page Options :
Scroll to choose
which info pages appear on the DIC.
Press the thumbwheel to select or
deselect.
Blank Page : Allows for no
information to be displayed in the
cluster info display areas.
Head-Up Display (HUD)
{Warning
If the HUD image is too bright or
too high in your field of view, it
may take you more time to see
things you need to see when it is
dark outside. Be sure to keep the
HUD image dim and placed low in
your field of view.
If equipped with HUD, some
information concerning the operation
of the vehicle is projected onto the
windshield. The image is projected
through the HUD lens on top of the
instrument panel. The information
appears as an image focused out
toward the front of the vehicle.
Caution
If you try to use the HUD image as
a parking aid, you may misjudge
the distance and damage your
vehicle. Do not use the HUD image
as a parking aid.
The HUD information can be
displayed in various languages. The
speedometer reading and other
numerical values can be displayed in
either English or metric units.
The language selection is changed
through the radio and the units of
measurement is changed through the
instrument cluster. See “Settings”in
the Infotainment Manual and
“Options” underInstrument Cluster
0 113.
Page 143 of 385
Cadillac XT6 Owner Manual (GMNA-Localizing-U.S./Canada-12984300) -
2020 - CRC - 3/19/19
142 INSTRUMENTS AND CONTROLS
2. At the same time, press and holdboth the hand-held transmitter
button and one of the three
Universal Remote system
buttons to be used to operate the
garage door. Do not release either
button until the indicator light
changes from a slow to a rapid
flash. Then release both buttons.
Some garage door openers may
require substitution of Step 2
with the procedure under “Radio
Signals for Some Gate Operators”
later in this section.
3. Press and hold the newly programmed Universal Remote
system button for five seconds
while watching the indicator
light and garage door activation.
.If the indicator light stays on
continuously or the garage
door moves when the button
is pressed, then programming
is complete. There is no need
to complete Steps 4–6.
. If the indicator light does not
come on or the garage door
does not move, a second button press may be
required. For a second time,
press and hold the newly
programmed button for
five seconds. If the light stays
on or the garage door moves,
programming is complete.
. If the indicator light blinks
rapidly for two seconds, then
changes to a solid light and
the garage door does not
move, continue with
programming Steps 4–6.
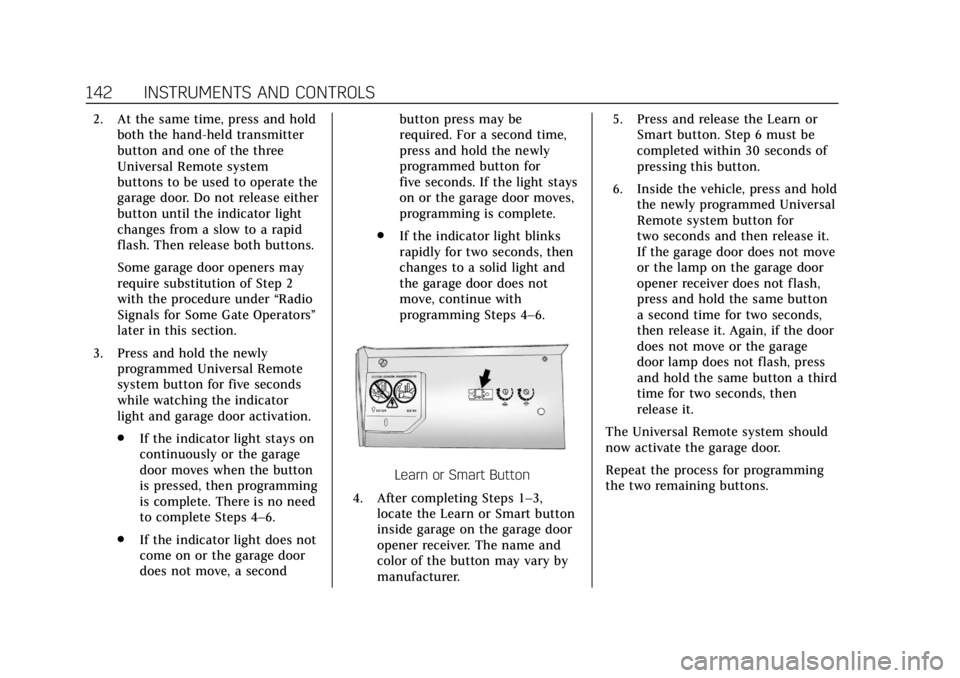
Learn or Smart Button
4. After completing Steps 1–3, locate the Learn or Smart button
inside garage on the garage door
opener receiver. The name and
color of the button may vary by
manufacturer. 5. Press and release the Learn or
Smart button. Step 6 must be
completed within 30 seconds of
pressing this button.
6. Inside the vehicle, press and hold the newly programmed Universal
Remote system button for
two seconds and then release it.
If the garage door does not move
or the lamp on the garage door
opener receiver does not flash,
press and hold the same button
a second time for two seconds,
then release it. Again, if the door
does not move or the garage
door lamp does not flash, press
and hold the same button a third
time for two seconds, then
release it.
The Universal Remote system should
now activate the garage door.
Repeat the process for programming
the two remaining buttons.
Page 145 of 385
Cadillac XT6 Owner Manual (GMNA-Localizing-U.S./Canada-12984300) -
2020 - CRC - 3/19/19
144 LIGHTING
Lighting
Exterior Lighting
Exterior Lamp Controls . . . . . . . . . . 144
Exterior Lamps Off Reminder . . . 147
Headlamp High/Low-BeamChanger . . . . . . . . . . . . . . . . . . . . . . . . . . 147
Flash-to-Pass . . . . . . . . . . . . . . . . . . . . . 147
Daytime Running Lamps (DRL) . . . . . . . . . . . . . . . . . . . . 147
Automatic Headlamp System . . . 147
Hazard Warning Flashers . . . . . . . . 148
Turn and Lane-Change Signals . . . . . . . . . . . . . . . . . . . . . . . . . . . 148
Cornering Lamps . . . . . . . . . . . . . . . . . 149
Interior Lighting
Instrument Panel Illumination Control . . . . . . . . . . . . . . . . . . . . . . . . . . 149
Courtesy Lamps . . . . . . . . . . . . . . . . . . 149
Dome Lamps . . . . . . . . . . . . . . . . . . . . . 149
Reading Lamps . . . . . . . . . . . . . . . . . . . 150
Lighting Features
Entry Lighting . . . . . . . . . . . . . . . . . . . . 151
Exit Lighting . . . . . . . . . . . . . . . . . . . . . . 151
Battery Power Protection . . . . . . . . 151
Exterior Lighting Battery Saver . . . . . . . . . . . . . . . . . . . . . . . . . . . . . 151
Exterior Lighting
Exterior Lamp Controls
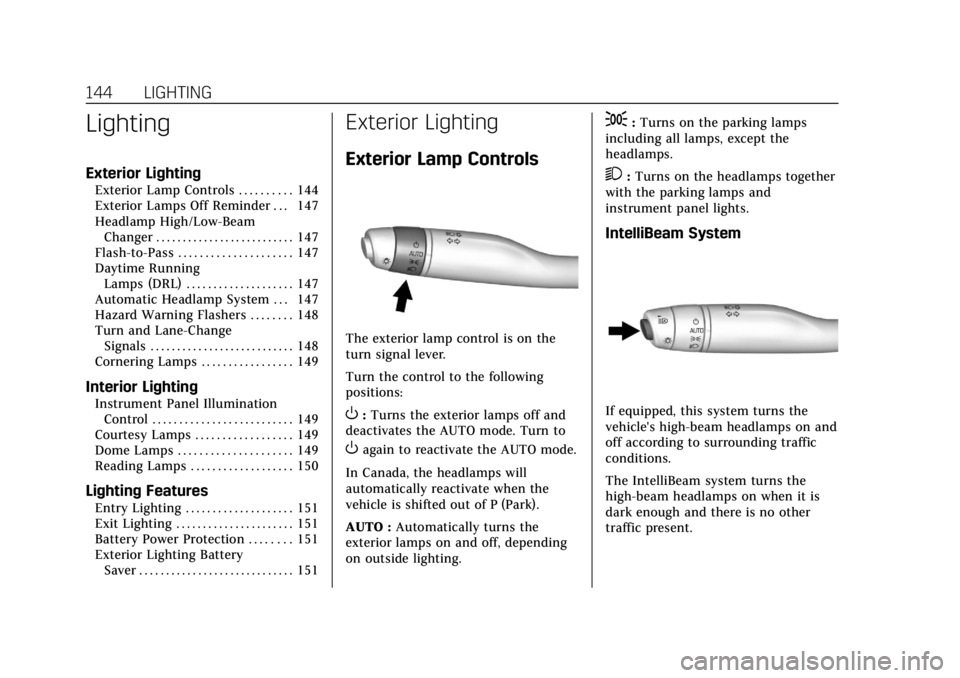
The exterior lamp control is on the
turn signal lever.
Turn the control to the following
positions:
O:Turns the exterior lamps off and
deactivates the AUTO mode. Turn to
Oagain to reactivate the AUTO mode.
In Canada, the headlamps will
automatically reactivate when the
vehicle is shifted out of P (Park).
AUTO : Automatically turns the
exterior lamps on and off, depending
on outside lighting.
;: Turns on the parking lamps
including all lamps, except the
headlamps.
2: Turns on the headlamps together
with the parking lamps and
instrument panel lights.
IntelliBeam System
If equipped, this system turns the
vehicle's high-beam headlamps on and
off according to surrounding traffic
conditions.
The IntelliBeam system turns the
high-beam headlamps on when it is
dark enough and there is no other
traffic present.