hood open CADILLAC XT6 2020 Owner's Manual
[x] Cancel search | Manufacturer: CADILLAC, Model Year: 2020, Model line: XT6, Model: CADILLAC XT6 2020Pages: 385, PDF Size: 6.63 MB
Page 17 of 385
Cadillac XT6 Owner Manual (GMNA-Localizing-U.S./Canada-12984300) -
2020 - CRC - 3/19/19
16 KEYS, DOORS, AND WINDOWS
Steps 1 and 2 are repeated while the
engine is still running. An extension
can be requested 30 seconds after
starting. This provides a total of
30 minutes.
The remote start can only be
extended once.
When the remote start is extended,
the second 15-minute period is added
on to the first 15 minutes for a total
of 30 minutes.
A maximum of two remote starts, or a
remote start with an extension, are
allowed between ignition cycles.
The ignition must be turned on and
then off before the remote start
procedure can be used again.
Canceling a Remote Start
To cancel a remote start, do any of
the following:
.Press and hold
/until the
parking lamps turn off.
. Turn on the hazard warning
flashers.
. Turn the vehicle on and then off. Conditions in Which Remote Start
Will Not Work
The remote start will not operate if
any of the following occur:
.
The RKE transmitter is in the
vehicle.
. The ignition is on.
. The hood is not closed.
. The hazard warning flashers
are on.
. There is an emission control
system malfunction.
. The engine coolant temperature is
too high.
. The oil pressure is low.
. Two remote vehicle starts or a
start with an extension have
already been used.
. The vehicle is not in P (Park).
Door Locks
{Warning
Unlocked doors can be dangerous.
. Passengers, especially
children, can easily open the
doors and fall out of a moving
vehicle. The doors can be
unlocked and opened while
the vehicle is moving. The
chance of being thrown out of
the vehicle in a crash is
increased if the doors are not
locked. So, all passengers
should wear seat belts
properly and the doors should
be locked whenever the
vehicle is driven.
. Young children who get into
unlocked vehicles may be
unable to get out. A child can
be overcome by extreme heat
and can suffer permanent
injuries or even death from
heat stroke. Always lock the
vehicle whenever leaving it.
(Continued)
Page 30 of 385
Cadillac XT6 Owner Manual (GMNA-Localizing-U.S./Canada-12984300) -
2020 - CRC - 3/19/19
KEYS, DOORS, AND WINDOWS 29
Vehicle Security
This vehicle has theft-deterrent
features; however, they do not make
the vehicle impossible to steal.
Vehicle Alarm System
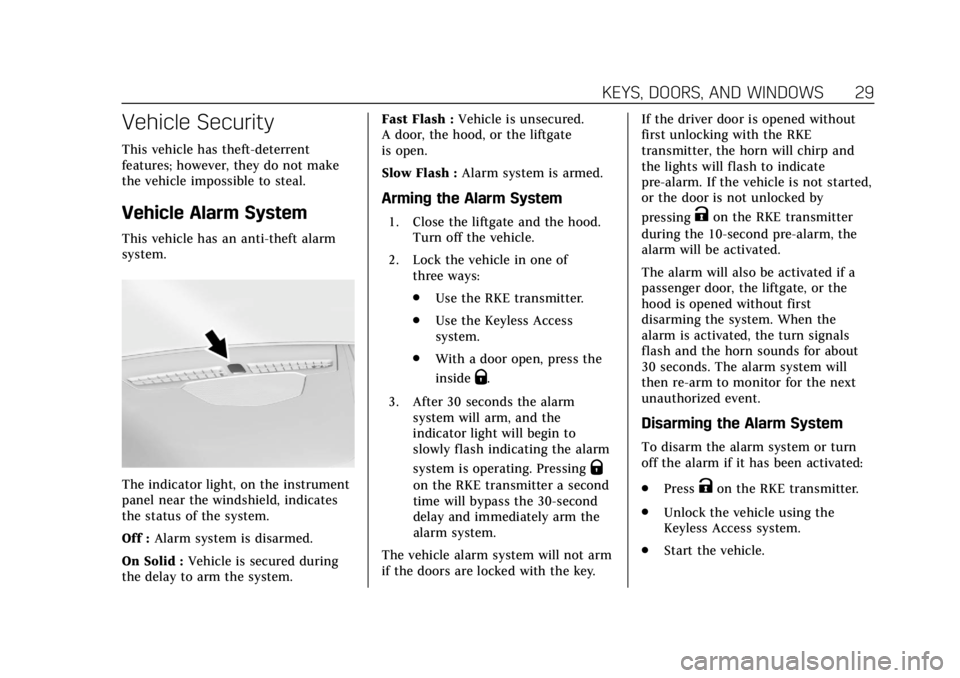
This vehicle has an anti-theft alarm
system.
The indicator light, on the instrument
panel near the windshield, indicates
the status of the system.
Off :Alarm system is disarmed.
On Solid : Vehicle is secured during
the delay to arm the system. Fast Flash :
Vehicle is unsecured.
A door, the hood, or the liftgate
is open.
Slow Flash : Alarm system is armed.
Arming the Alarm System
1. Close the liftgate and the hood.
Turn off the vehicle.
2. Lock the vehicle in one of three ways:
.Use the RKE transmitter.
. Use the Keyless Access
system.
. With a door open, press the
inside
Q.
3. After 30 seconds the alarm system will arm, and the
indicator light will begin to
slowly flash indicating the alarm
system is operating. Pressing
Q
on the RKE transmitter a second
time will bypass the 30-second
delay and immediately arm the
alarm system.
The vehicle alarm system will not arm
if the doors are locked with the key. If the driver door is opened without
first unlocking with the RKE
transmitter, the horn will chirp and
the lights will flash to indicate
pre-alarm. If the vehicle is not started,
or the door is not unlocked by
pressing
Kon the RKE transmitter
during the 10-second pre-alarm, the
alarm will be activated.
The alarm will also be activated if a
passenger door, the liftgate, or the
hood is opened without first
disarming the system. When the
alarm is activated, the turn signals
flash and the horn sounds for about
30 seconds. The alarm system will
then re-arm to monitor for the next
unauthorized event.
Disarming the Alarm System
To disarm the alarm system or turn
off the alarm if it has been activated:
. Press
Kon the RKE transmitter.
. Unlock the vehicle using the
Keyless Access system.
. Start the vehicle.
Page 163 of 385

Cadillac XT6 Owner Manual (GMNA-Localizing-U.S./Canada-12984300) -
2020 - CRC - 3/19/19
162 CLIMATE CONTROLS
If the rear floor air delivery mode is
selected, the rear fan speed indicator
will change when adjusted, but the
airf low amount directed to the floor
will not. This is normal operation for
the system.
To activate the rear floor air delivery
mode, touch
[on the rear climate
display.
Air Vents
Use the slider switch on the air outlets
to change the direction of the airf low,
or to open and close off the airf low.
There are also outlets overhead in the
rear passenger area; adjust as needed.
Keep all outlets open whenever
possible for best system performance.
Operation Tips
. Clear away any ice, snow, or leaves
from the air inlets at the base of
the windshield that can block the
flow of air into the vehicle.
. Clear snow off the hood to
improve visibility and help
decrease moisture drawn into the
vehicle. .
Use of non-GM approved hood
deflectors can adversely affect the
performance of the system.
. Keep the path under all seats clear
of objects to help circulate the air
inside the vehicle more effectively.
. If fogging reoccurs while in vent or
bi-level modes with mild
temperature throughout the
vehicle, turn on the air conditioner
to reduce windshield fogging.
Page 184 of 385

Cadillac XT6 Owner Manual (GMNA-Localizing-U.S./Canada-12984300) -
2020 - CRC - 3/19/19
DRIVING AND OPERATING 183
{Warning
The automatic engine Stop/Start
feature causes the engine to shut
off while the vehicle is still on. Do
not exit the vehicle before shifting
to P (Park). The vehicle may restart
and move unexpectedly. Always
shift to P (Park), and then turn the
ignition off before exiting the
vehicle.
Auto Engine Stop/Start
When the brakes are applied and the
vehicle is at a complete stop, the
engine may turn off. When stopped,
the tachometer displays AUTO STOP.
See Tachometer 0116. When the brake
pedal is released or the accelerator
pedal is pressed, the engine will
restart.
To maintain vehicle performance,
other conditions may cause the engine
to automatically restart before the
brake pedal is released. Auto Stops may not occur and/or auto
restarts may occur because:
.
The climate control settings
require the engine to be running
to cool or heat the vehicle interior.
. The vehicle battery charge is low.
. The vehicle battery has recently
been disconnected.
. Minimum vehicle speed has not
been reached since the last
Auto Stop.
. The accelerator pedal is pressed.
. The engine or transmission is not
at the required operating
temperature.
. The outside temperature is not in
the required operating range.
. The vehicle is in any gear other
than D (Drive).
. Tow/Haul Mode or other driver
modes have been selected.
. The vehicle is on a steep hill or
grade. .
The driver door has been opened
or the driver seat belt has been
unbuckled.
. The hood has been opened.
. The Auto Stop has reached the
maximum allowed time.
Auto Stop Disable Switch
The automatic engine Stop/Start
feature can be disabled and enabled
by touching the
hsymbol. Auto Stop
is enabled each time you start the
vehicle.
When the light next to the
his
illuminated, the system is enabled.
Page 262 of 385
Cadillac XT6 Owner Manual (GMNA-Localizing-U.S./Canada-12984300) -
2020 - CRC - 3/19/19
VEHICLE CARE 261
If equipped with remote vehicle start,
open the hood before performing any
service work to prevent remote
starting the vehicle accidentally. See
Remote Vehicle Start015.
Keep a record with all parts receipts
and list the mileage and the date of
any service work performed. See
Maintenance Records 0345.
Caution
Even small amounts of
contamination can cause damage to
vehicle systems. Do not allow
contaminants to contact the fluids,
reservoir caps, or dipsticks.
Hood
{Warning
For vehicles with auto engine stop/
start, turn the vehicle off before
opening the hood. If the vehicle is
on, the engine will start when the
hood is opened. You or others could
be injured.
{Warning
Components under the hood can
get hot from running the engine. To
help avoid the risk of burning
unprotected skin, never touch these
components until they have cooled,
and always use a glove or towel to
avoid direct skin contact.
Clear any snow from the hood before
opening.
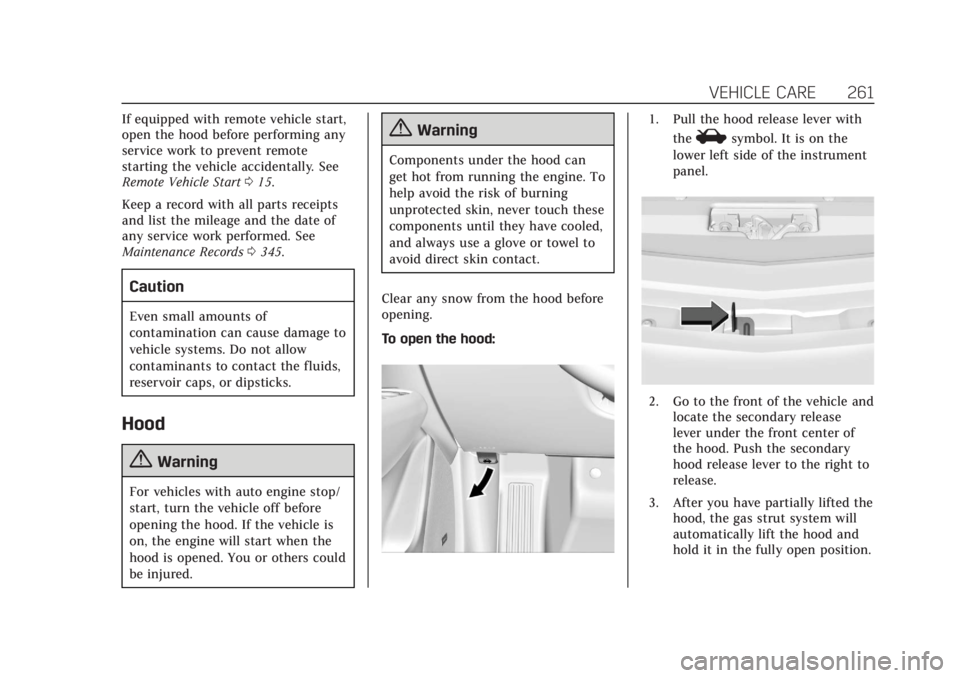
To open the hood:
1. Pull the hood release lever with the
isymbol. It is on the
lower left side of the instrument
panel.
2. Go to the front of the vehicle and locate the secondary release
lever under the front center of
the hood. Push the secondary
hood release lever to the right to
release.
3. After you have partially lifted the hood, the gas strut system will
automatically lift the hood and
hold it in the fully open position.
Page 263 of 385
Cadillac XT6 Owner Manual (GMNA-Localizing-U.S./Canada-12984300) -
2020 - CRC - 3/19/19
262 VEHICLE CARE
To close the hood:1. Before closing the hood, be sure all filler caps are on properly,
and all tools are removed.
2. Pull the hood down until the strut system is no longer holding
up the hood.
3. Allow the hood to fall. Check to make sure the hood is latched
completely. Repeat this process
with additional force if necessary.
{Warning
Do not drive the vehicle if the hood
is not latched completely. The hood
could open fully, block your vision,
and cause a crash. You or others
could be injured. Always close the
hood completely before driving.
Page 280 of 385
Cadillac XT6 Owner Manual (GMNA-Localizing-U.S./Canada-12984300) -
2020 - CRC - 3/19/19
VEHICLE CARE 279
may display messages, or they may
not work at all. See your dealer for
proper windshield replacement.
Acoustic Windshield
The vehicle is equipped with an
acoustic windshield. If the windshield
needs to be replaced be sure to get an
acoustic windshield so you will
continue to have the benefits an
acoustic windshield can provide.
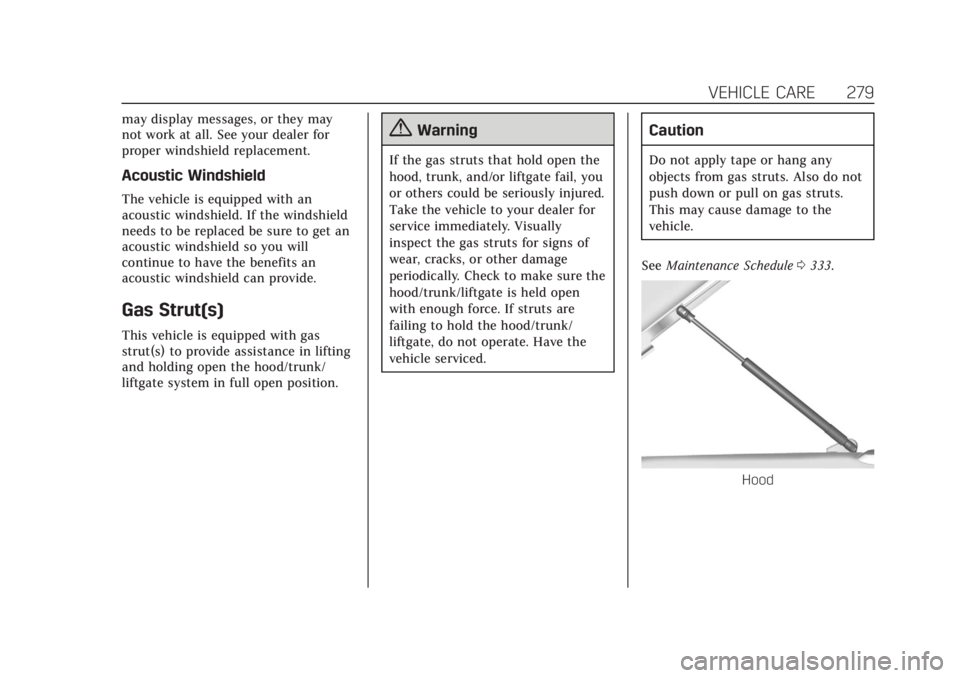
Gas Strut(s)
This vehicle is equipped with gas
strut(s) to provide assistance in lifting
and holding open the hood/trunk/
liftgate system in full open position.
{Warning
If the gas struts that hold open the
hood, trunk, and/or liftgate fail, you
or others could be seriously injured.
Take the vehicle to your dealer for
service immediately. Visually
inspect the gas struts for signs of
wear, cracks, or other damage
periodically. Check to make sure the
hood/trunk/liftgate is held open
with enough force. If struts are
failing to hold the hood/trunk/
liftgate, do not operate. Have the
vehicle serviced.
Caution
Do not apply tape or hang any
objects from gas struts. Also do not
push down or pull on gas struts.
This may cause damage to the
vehicle.
See Maintenance Schedule 0333.
Hood
Page 323 of 385

Cadillac XT6 Owner Manual (GMNA-Localizing-U.S./Canada-12984300) -
2020 - CRC - 3/19/19
322 VEHICLE CARE
Dinghy Towing
Caution
If the vehicle is towed with all four
wheels on the ground, the
drivetrain components could be
damaged. The repairs would not be
covered by the vehicle warranty. Do
not tow the vehicle with all four
wheels on the ground.The vehicle is not designed to be
towed with all four wheels on the
ground. If the vehicle must be towed,
a dolly should be used. See the
following information on dolly towing.
Dolly Towing
Driving onto a Dolly
1. Park the vehicle on level ground in front of the dolly and turn the
vehicle off.
2. Make sure the parking brake is released.
3. Press and hold ENGINE START/ STOP with your foot off the
brake for five seconds. 4. Hold the brake pedal and press
the parking brake switch for
15 seconds until the service
parking brake light flashes.
5. While the service parking brake light is still flashing, remove
your foot from the brake pedal
and release the parking brake
switch.
6. Immediately press and release the parking brake switch again
while the service park brake light
is still flashing.
7. Start the vehicle and drive onto the dolly.
8. Place the vehicle in P (Park).
9. Turn off the vehicle.
10. Open the hood.
11. Exit the vehicle and secure the vehicle onto the dolly.
12. Disconnect the negative (–) terminal connector from the
12-volt battery.
13. Close the hood of the vehicle.
Page 324 of 385

Cadillac XT6 Owner Manual (GMNA-Localizing-U.S./Canada-12984300) -
2020 - CRC - 3/19/19
VEHICLE CARE 323
Removing the Vehicle from a Dolly1. Make sure the vehicle is secured to the dolly.
2. Open the door and open the hood of the vehicle.
3. Connect the negative (–) terminal connector from the
12-volt battery.
4. Press and hold ENGINE START/ STOP with your foot off the
brake for five seconds.
5. Hold the brake pedal and press the parking brake switch for
five seconds until the parking
brake light flashes.
6. Turn the vehicle off.
7. Unsecure the vehicle and remove it from the dolly.
8. Do not drive in Service Mode with the parking brake setTowing the Vehicle from
the RearCaution
Towing the vehicle from the rear
could damage it. Also, repairs would
not be covered by the vehicle
warranty. Never have the vehicle
towed from the rear.
Do not tow the vehicle from the rear.
Page 378 of 385

Cadillac XT6 Owner Manual (GMNA-Localizing-U.S./Canada-12984300) -
2020 - CRC - 3/19/19
INDEX 377
G
Garage Door Opener . . . . . . . . . . . . . . . . 141Programming . . . . . . . . . . . . . . . . . . . . . . 141
Gas Strut(s) . . . . . . . . . . . . . . . . . . . . . . . . . 279
Gauges Engine Coolant Temperature . . . . 117
Fuel . . . . . . . . . . . . . . . . . . . . . . . . . . . . . . . . 117
Odometer . . . . . . . . . . . . . . . . . . . . . . . . . . 116
Speedometer . . . . . . . . . . . . . . . . . . . . . . 116
Tachometer . . . . . . . . . . . . . . . . . . . . . . . 116
Trip Odometer . . . . . . . . . . . . . . . . . . . . 116
Warning Lights andIndicators . . . . . . . . . . . . . . . . . . . . . . . . 112
General Information
Service and Maintenance . . . . . . . . 332
Towing . . . . . . . . . . . . . . . . . . . . . . . . . . . . 244
Vehicle Care . . . . . . . . . . . . . . . . . . . . . . . 259
Glove Box . . . . . . . . . . . . . . . . . . . . . . . . . . . . 96
GM Mobility Reimbursement Program . . . . . . . . . . . . . . . . . . . . . . . . . . . . 352
H
Hazard Warning Flashers . . . . . . . . . . 148
Head Restraints . . . . . . . . . . . . . . . . . . . . . . 42
Head-up Display . . . . . . . . . . . . . . . . . . . . 131
HeadlampsAiming . . . . . . . . . . . . . . . . . . . . . . . . . . . . . 280
Automatic . . . . . . . . . . . . . . . . . . . . . . . . . 147 Headlamps (cont'd)
Daytime Running
Lamps (DRL) . . . . . . . . . . . . . . . . . . . . 147
Flash-to-Pass . . . . . . . . . . . . . . . . . . . . . . 147
High-Beam On Light . . . . . . . . . . . . . . 127
High/Low Beam Changer . . . . . . . . . 147
Lamps On Reminder . . . . . . . . . . . . . . 128
Heated Rear Seats . . . . . . . . . . . . . . . . . . . . . . . . . . . 52
Steering Wheel . . . . . . . . . . . . . . . . . . . . 105
Heated and Ventilated Front Seats . . . . . . . . . . . . . . . . . . . . . . . . . . . . . . . . 48
Heated Mirrors . . . . . . . . . . . . . . . . . . . . . . . 34
Heater Engine . . . . . . . . . . . . . . . . . . . . . . . . . . . . . 184
Heating . . . . . . . . . . . . . . . . . . . . . . . . .153, 158
High-Beam On Light . . . . . . . . . . . . . . . . 127
High-Speed Operation . . . . . . . . . . . . . . 298
Hill and Mountain Roads . . . . . . . . . . 174
Hill Start Assist (HSA) . . . . . . . . . . . . . 199
Hood . . . . . . . . . . . . . . . . . . . . . . . . . . . . . . . . . 261
Horn . . . . . . . . . . . . . . . . . . . . . . . . . . . . . . . . . 105
How to Wear Seat Belts Properly . . . 56
HVAC . . . . . . . . . . . . . . . . . . . . . . . . . . .153, 158
I
Ignition Positions . . . . . . . . . . . . . . . . . . . 180
Immobilizer . . . . . . . . . . . . . . . . . . . . . . . . . . 31 Indicator
Pedestrian Ahead . . . . . . . . . . . . . . . . . 124
Vehicle Ahead . . . . . . . . . . . . . . . . . . . . . 124
Infants and Young Children, Restraints . . . . . . . . . . . . . . . . . . . . . . . . . . . 77
Information Publication Ordering . . . . . . . . . . . . . 358
Infotainment . . . . . . . . . . . . . . . . . . . . . . . . 152
Infotainment System . . . . . . . . . . . . . . . 362
Instrument Cluster . . . . . . . . . . . . . . . . . 113
Instrument Panel Overview . . . . . . . . . . . 5
Interior Rearview Mirrors . . . . . . . . . . . 34
Introduction . . . . . . . . . . . . . . . . . . . . . . . . . . . . 2
J
Jump Starting - North America . . . . 318
K
Keyless Entry Remote (RKE) System . . . . . . . . . . . . . . . 8
Keys . . . . . . . . . . . . . . . . . . . . . . . . . . . . . . . . . . . . 7
L
Labeling, Tire Sidewall . . . . . . . . . . . . . 291
Lamps Cornering . . . . . . . . . . . . . . . . . . . . . . . . . . 149
Courtesy . . . . . . . . . . . . . . . . . . . . . . . . . . . 149
Daytime Running (DRL) . . . . . . . . . . 147
Dome . . . . . . . . . . . . . . . . . . . . . . . . . . . . . . 149