tow CHEVROLET ASTRO 1998 2.G Workshop Manual
[x] Cancel search | Manufacturer: CHEVROLET, Model Year: 1998, Model line: ASTRO, Model: CHEVROLET ASTRO 1998 2.GPages: 414, PDF Size: 21.46 MB
Page 246 of 414
Downloaded from www.Manualslib.com manuals search engine Removing the Spare Tire and Tools
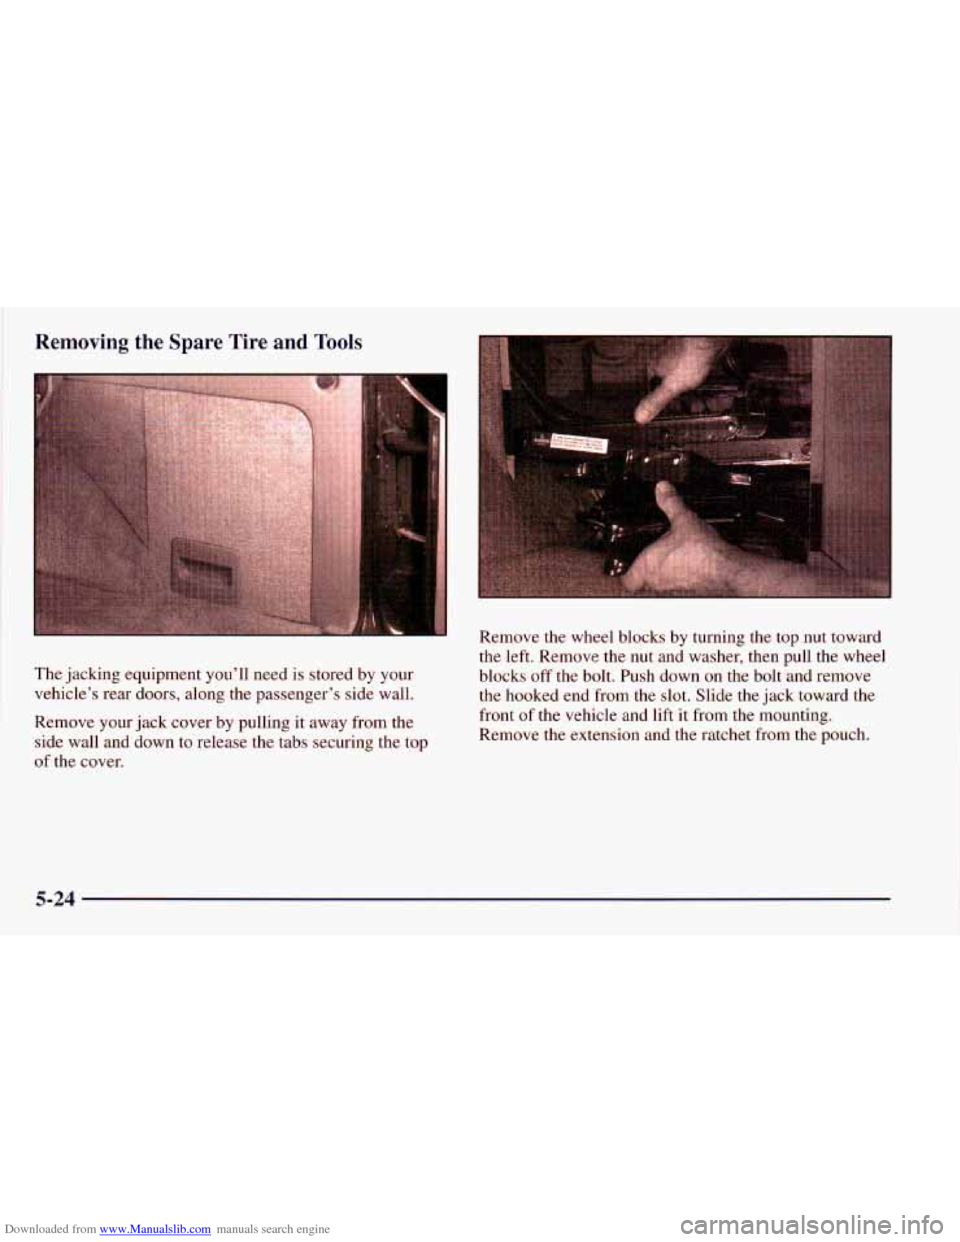
The jacking equipment you'll need is stored by your
vehicle's rear doors, along the passenger's side wall.
Remove your jack cover by pulling it away from the
side wall and down to release the tabs securing the top
of the cover. Remove
the wheel blocks by turning the top nut toward
the left. Remove the nut and washer, then pull the wheel
blocks off the bolt. Push down on the bolt and remove
the hooked end from the slot. Slide the jack toward the
front of the vehicle and lift it from the mounting.
Remove the extension and the ratchet from the pouch.
5-24
Page 248 of 414
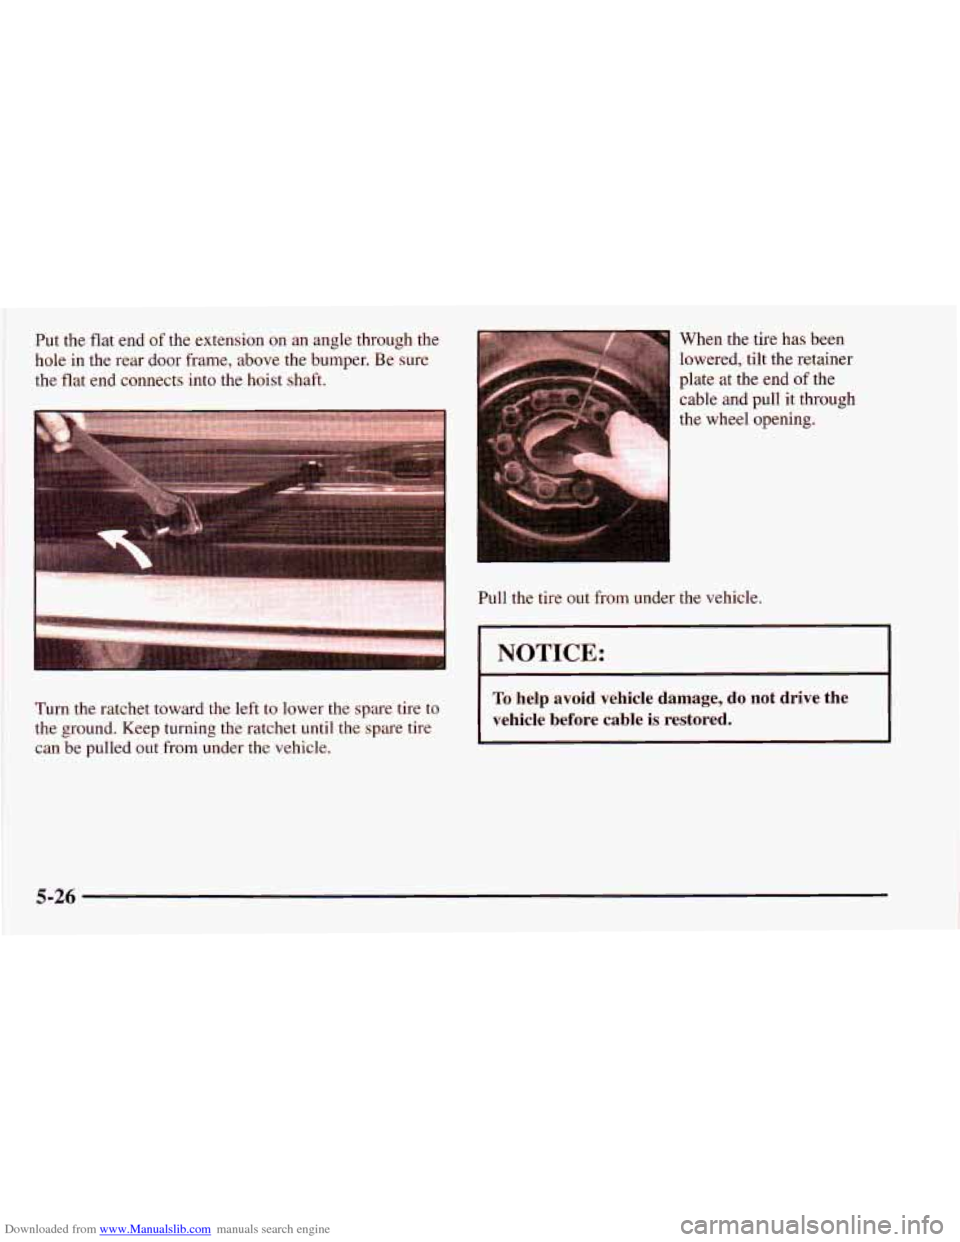
Downloaded from www.Manualslib.com manuals search engine Put the flat end of the extension on an angle through the
hole in the rear door frame, above the bumper. Be sure
the flat end connects into the hoist shaft. When the
tire has been
lowered, tilt the retainer
plate at the end
of the
cable and pull it through
the wheel opening.
Turn the ratchet toward the left to lower the spare tire to
can be pulled
out from under the vehicle.
i the ground. Keep turning the ratchet until the spare tire Pull the
tire out from under the vehicle.
I NOTICE:
To help avoid vehicle damage, do not drive the
vehicle before cable is restored.
I
5-26
Page 253 of 414
Downloaded from www.Manualslib.com manuals search engine /II CAUTION:
Getting under a vehicle when it is :ked up is
dangerous.
If the vehicle slips off the jack, you
could be badly injured or killed. Never get under
a vehicle when it is supported only by a jack.
A CAUTION:
-
Raising yUdr vehicle with the jack improperly
positioned can damage the vehicle and even
make the vehicle fall.
To help avoid personal
injury and vehicle damage, be sure to fit the jack
lift head into the proper location before raising
the vehicle.
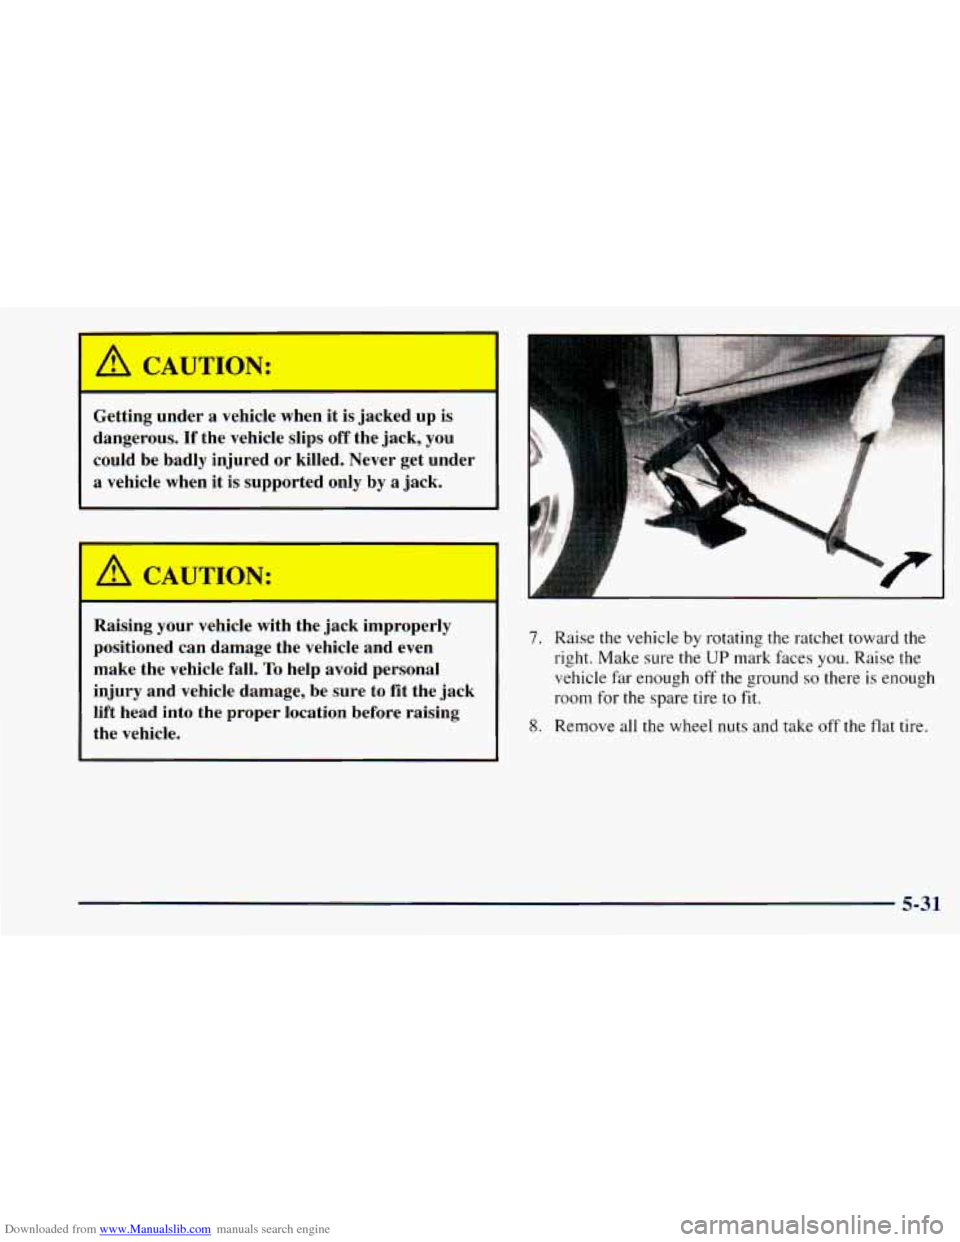
7. Raise the vehicle by rotating the ratchet toward the
right. Make sure the
UP mark faces you. Raise the
vehicle far enough off the ground
so there is enough
room for
the spare tire to fit.
8. Remove all the wheel nuts and take off the flat tire.
5-31
Page 254 of 414
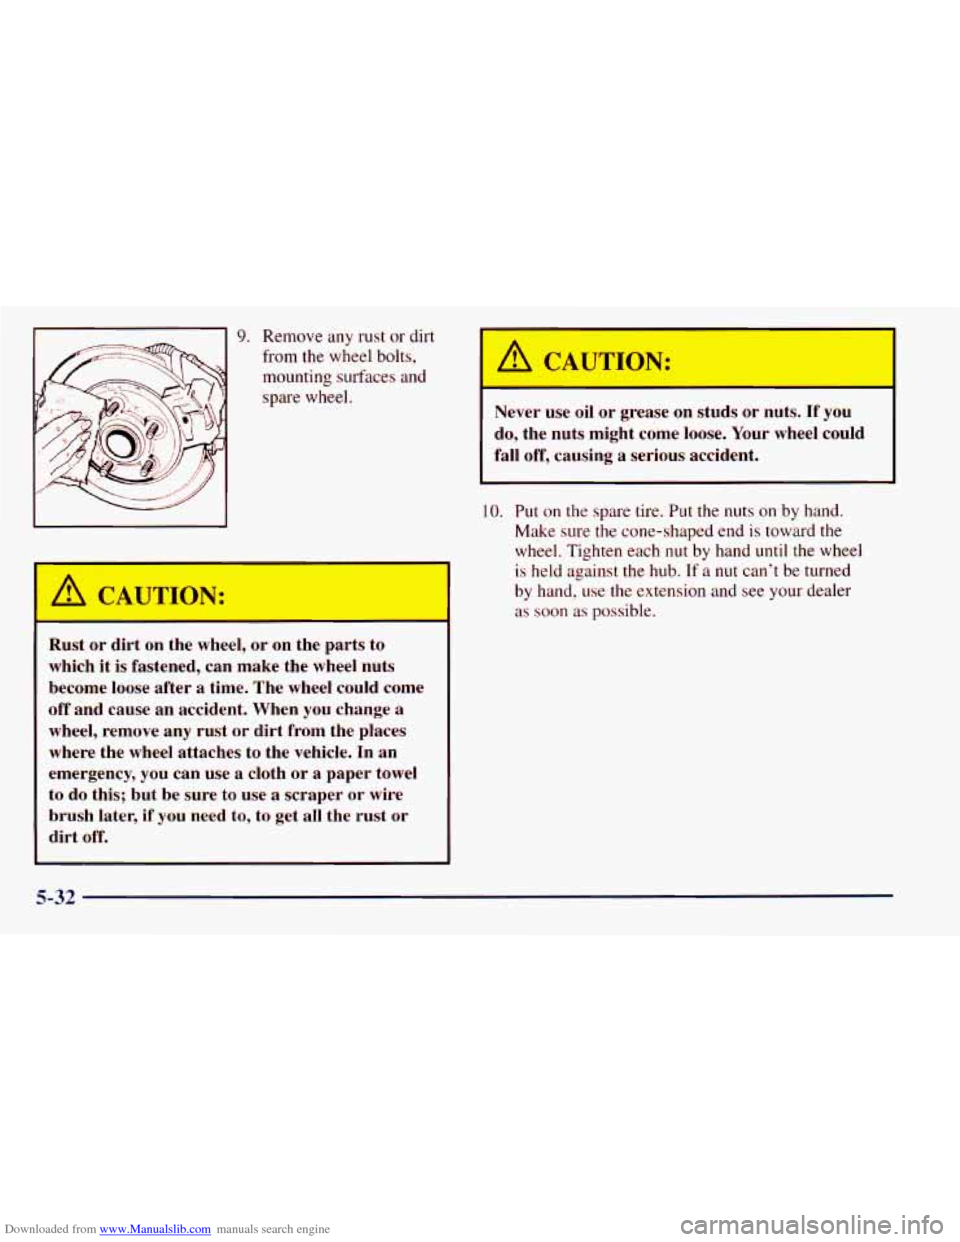
Downloaded from www.Manualslib.com manuals search engine 9. Remove any rust or dirt
from the wheel bolts,
mounting surfaces and
spare wheel. I A CAUTION:
L
Rust or dirt on the wheel, or on the parts to
which it is fastened, can make the wheel nuts
become loose after
a time. The wheel could come
off and cause
an accident. When you change a
wheel, remove any rust or dirt from the places
where the wheel attaches to the vehicle. In an
emergency, you can use a cloth or
a paper towel
to
do this; but be sure to use a scraper or wire
brush later,
if you need to, to get all the rust or
dirt off.
I1
Never use oil or grease on studs or nuts. If you
do, the nuts might come loose. Your wheel could
fall off, causing
a serious accident.
10. Put on the spare tire. Put the nuts on by hand.
Make sure the cone-shaped end is toward
the
wheel. Tighten each nut by hand until the wheel
is held against the hub. If a nut can’t be turned
by hand, use the extension and see your dealer
as
soon as possible.
5-32
Page 255 of 414
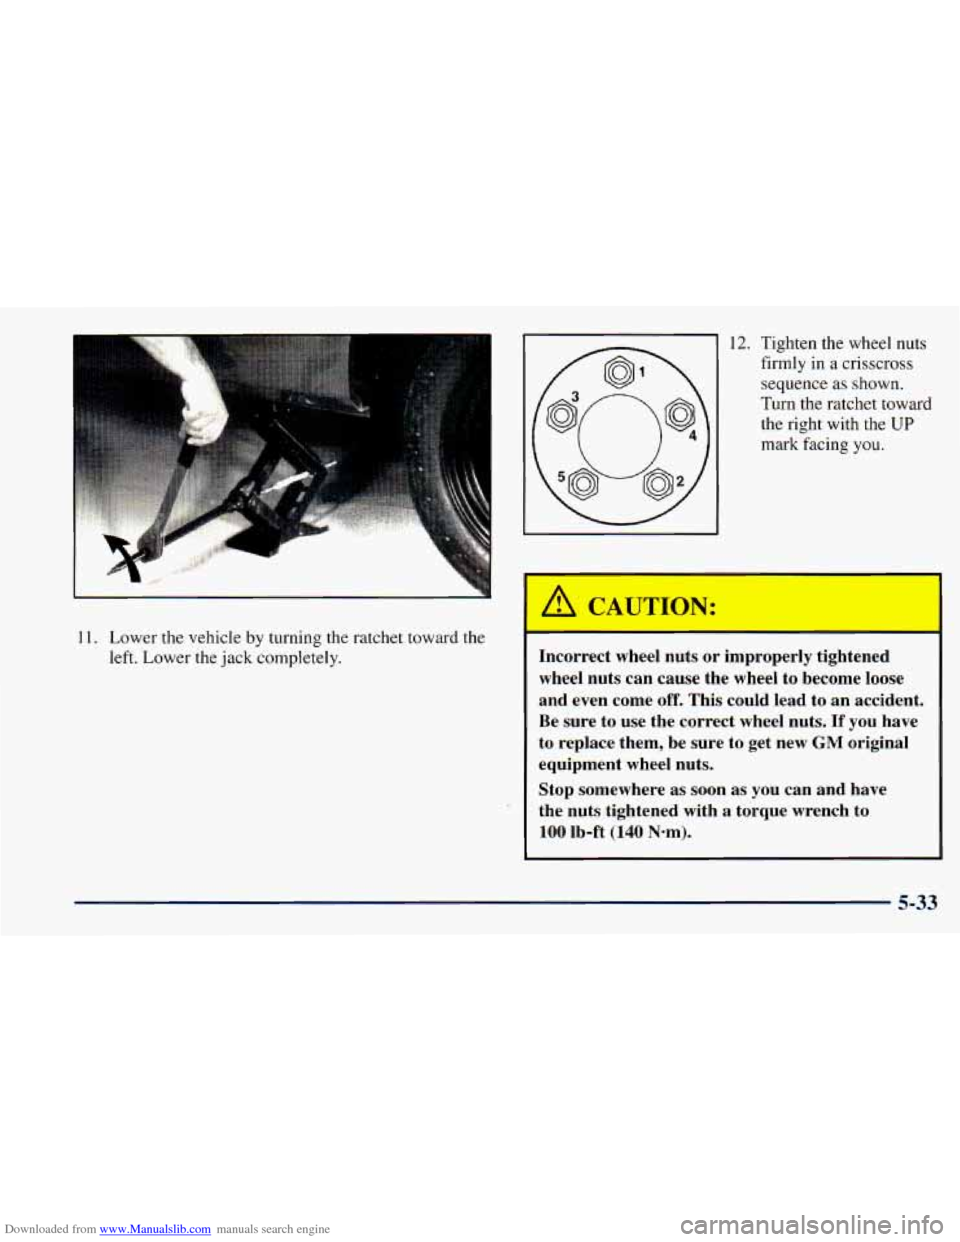
Downloaded from www.Manualslib.com manuals search engine 11. Lower the vehicle by turning the ratchet toward the
left. Lower the jack completely.
12. Tighten the wheel nuts
firmly in a crisscross
sequence as shown.
Turn the ratchet toward the right with the
UP
mark facing you.
A CAUTION:
___ -- I
In1 *rect lee1 nuts or improperly tightened
wheel nuts can cause the wheel to become loose
and even come
off. This could lead to an accident.
Be sure to use the correct wheel nuts. If you have
to replace them, be
sure to get new GM original
equipment wheel nuts.
Stop somewhere
as soon as you can and have
the nuts tightened with
a torque wrench to
100 lb-ft (140 N-m).
5-33
Page 257 of 414
Downloaded from www.Manualslib.com manuals search engine 3. Put the flat end of the extension on an angle through
the hole in the rear door frame, above the bumper.
Turn the ratchet toward the right until the tire is
against the underside of the vehicle.
Keep turning the ratchet until you feel at least two
“clicks” when the tire is up all the way. Try to move
the tire with your hands to make sure it is securely
in place.
The compact spare is for temporary use only. Replace
the compact spare tire with a full-size tire as soon as
you can. See “Compact Spare Tire” in the Index. See
the storage instructions label to restore your compact
spare properly.
Return the jacking equipment to its proper location.
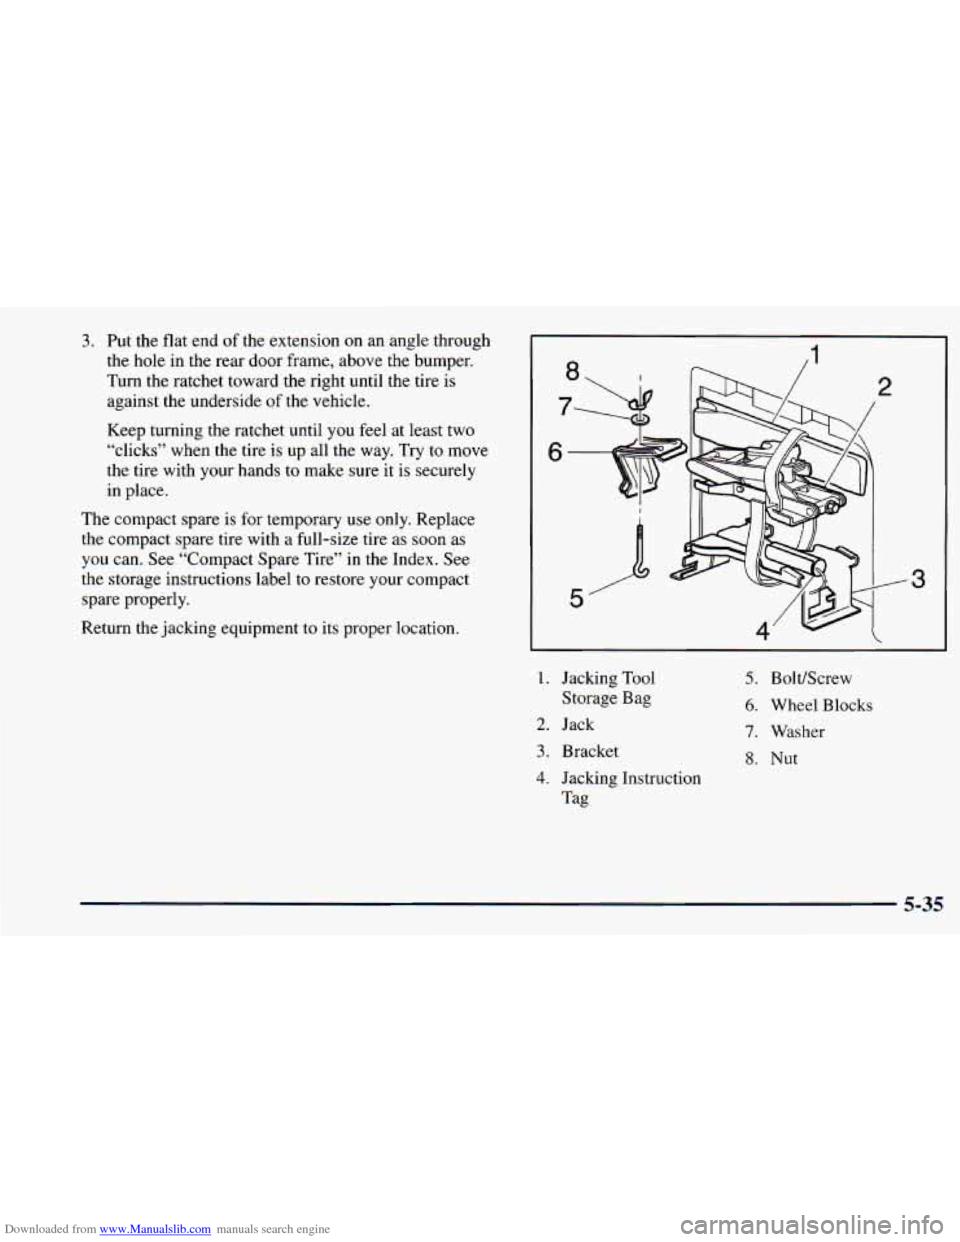
1. Jacking Tool
Storage Bag
2. Jack
3. Bracket
3
5. Bolt/Screw
6. Wheel Blocks
7. Washer
8. Nut
4. Jacking Instruction
Tag
5-35
Page 259 of 414
Downloaded from www.Manualslib.com manuals search engine If You’re Stuck: In Sand, Mud,
Ice
or Snow
What you don’t want to do when your vehicle is stuck is
to spin your wheels too fast. The method known
as
“rocking” can help you get out when you’re stuck, but
you must use caution.
L
A CAUTION: I I
If you let your tires spin at high speed, they can
explode, and you or others could be injured. And,
the transmission or other parts
of the vehicle can
overheat. That could cause an engine
compartment fire or other damage. When you’re
stuck, spin the wheels as little
as possible. Don’t
spin the wheels above
35 mph (55 km/h) as shown
on the speedometer.
NOTICE:
Spinning your wheels can destroy parts of your
vehicle as well as the tires.
If you spin the wheels
too fast while shifting your transmission back
and forth, you can destroy your transmission.
For information about using tire chains on your vehicle,
see “Tire Chains” in the Index.
Rocking Your Vehicle To Get It Out
First, turn your steering wheel left and right. That will
clear the area around your front wheels. Then shift back
and forth between
REVERSE (R) and a forward gear,
spinning the wheels as little as possible. Release the
accelerator pedal while you shift, and press lightly on
the accelerator pedal when the transmission is in gear. If
that doesn’t get you out after a few tries, you may need
to be towed out. If you do need to be towed out, see
“Towing Your Vehicle” in the Index.
5-37
Page 276 of 414
Downloaded from www.Manualslib.com manuals search engine Engine Oil Additives
Don't add anything to your oil, Your dealer is ready to
advise if you think something should be added.
When to Change Engine Oil
If any one of these is true for you, use the short trip/city
maintenance schedule:
0
0
0
e
0
Most trips are less than 5 to 10 miles (8 to 16 km).
This
is particularly important when outside
temperatures are below freezing.
Most trips include extensive idling (such as frequent
driving in stop-and-go traffic).
Most trips are through dusty areas.
You frequently tow a trailer or use a carrier on top of
your vehicle.
The vehicle is used for delivery service, police, taxi
or other commercial apl :ation.
Driving under these conc'"ions c
Ses engine oil to
break down sooner. If any one oi rnese is true for your
vehicle, then you need to change your oil and filter
every
3,000 miles (5 000 km) or 3 months -- whichever
occurs first. If
none
of them is true, use the long trip/highway
maintenance schedule. Change the oil and filter every
7,500 miles (12 500 km) or 12 months -- whichever
occurs first. Driving a vehicle with a fully warmed
engine under highway conditions causes engine oil
to
break down slower.
What to Do with Used Oil
Did you know that used engine oil contains certain
elements that may be unhealthy for your skin and could
even cause cancer? Don't
let used oil stay on your skin
for very long. Clean your skin and nails with soap and
water, or a good hand cleaner. Wash or properly throw
away clothing or rags containing used engine oil. (See
the manufacturer's warnings about the use and disposal
of oil products.)
Used oil can be a real threat to the environment. If you
change your own oil, be sure
to drain all free-flowing oil
from the filter before disposal. Don't ever dispose
of oil
by putting it
in the trash, pouring it on the ground, into
sewers,
or into streams or bodies of water. Instead,
recycle
it by taking it to a place that collects used oil. If
you have a problem properly disposing of your used
oil,
ask your dealer, a service station or a local recycling
center for help.
6-14
Page 282 of 414
Downloaded from www.Manualslib.com manuals search engine Automatic Transmission Fluid
When to Check and Change
How to Check
Because this operation can be a little difficult, you may
choose
to have this done at your GM dealership ~
A good time to check your automatic transmission fluid Service Department.
level is when the engine oil
is changed.
Change both the fluid and filter every
15,000 miles here, or you could get a false reading on the dipstick.\
(25 000 km) if the vehicle is mainly driven under one or If
you do
it yourself, be sure to follow all the instructions
more of these conditions:
0 In heavy city traffic where the outside temperature
0 In hilly or mountainous terrain.
0 When doing frequent trailer towing.
regularly reaches
90°F (32 “C) or
higher.
NOTICE:
Too much or too little fluid can damage your
transmission.
Too much can mean that some of
the fluid could come out and fall on hot engine
Uses such as found in taxi, police or delivery service.
If you do not
use your vehicle under any of
these conditions, change the fluid and filter every
50,000 miles (83 000 km).
parts or exhaust system parts, starting a fire. Be
sure to get an accurate reading if you check your
transmission fluid.
See “Scheduled Maintenance Services’’ in the Index.
6-20
Page 284 of 414
Downloaded from www.Manualslib.com manuals search engine I
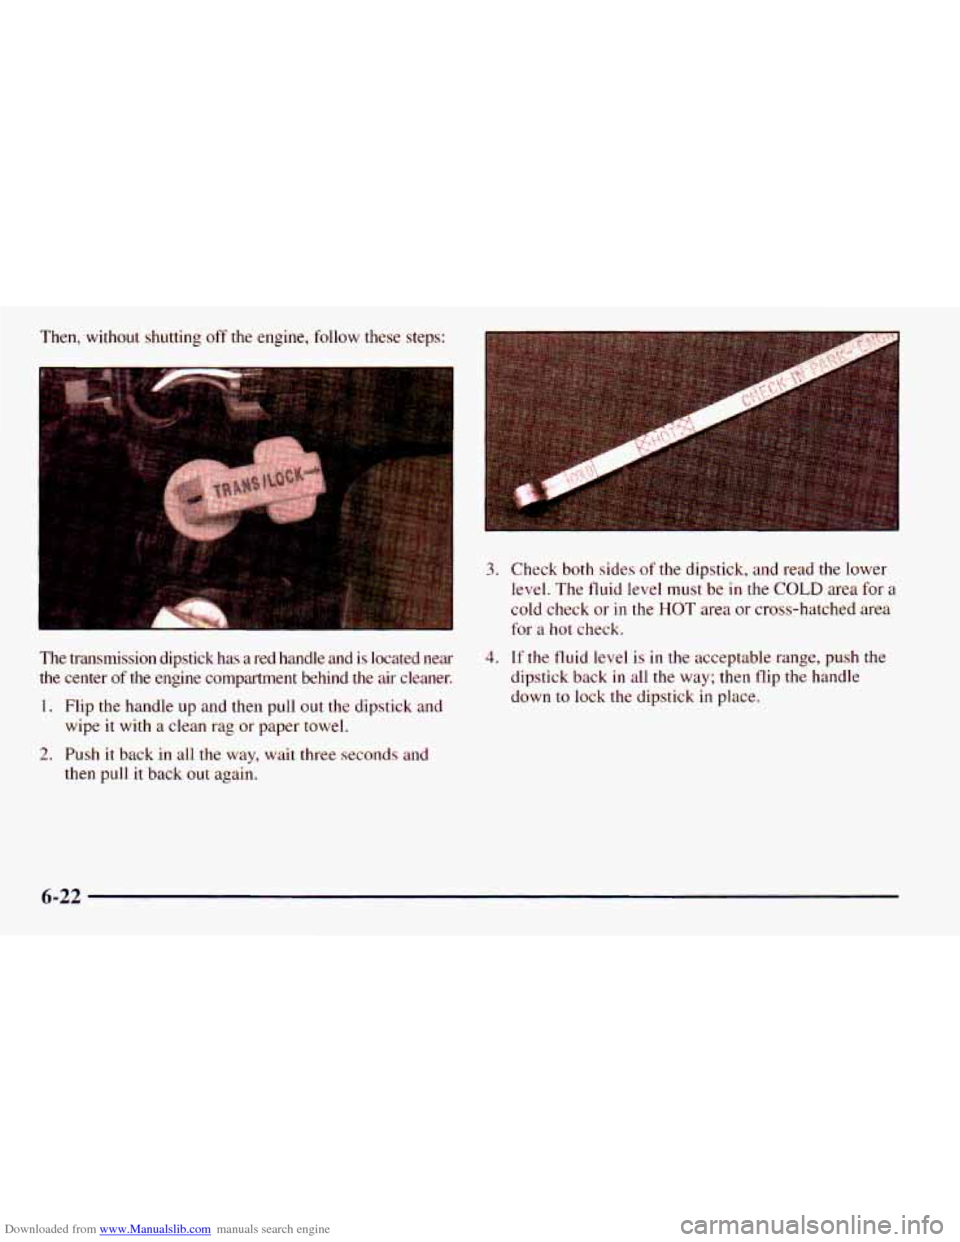
Then, without shutting off the engine, follow these steps:
The transmission dipstick has a red handle and
is located near
the center of the engine compartment behind the air cleaner.
1. Flip the handle up and then pull out the dipstick and
wipe it with a clean rag or paper towel.
then pull it back out again.
2. Push it back in all the way, wait three seconds and
3. Check both sides of the dipstick, and read the lower
level. The fluid level must be in the
COLD area for a
cold check or in the
HOT area or cross-hatched area
for a hot check.
4. If the fluid level is in the acceptable range, push the
dipstick back
in all the way; then flip the handle
down to lock the dipstick in place.
6-22