wiring CHEVROLET ASTRO 1998 2.G Owners Manual
[x] Cancel search | Manufacturer: CHEVROLET, Model Year: 1998, Model line: ASTRO, Model: CHEVROLET ASTRO 1998 2.GPages: 414, PDF Size: 21.46 MB
Page 97 of 414
Downloaded from www.Manualslib.com manuals search engine Hatch
I
It can be dangerous to drive with the rear
swing-out windows, rear hatch or rear doors
open because carbon monoxide (CO) gas can
come into your vehicle. You can’t see or smell
CO. It can cause unconsciousness and even death.
If you must drive with the rear swing-out windows,
rear hatch or rear doors open or if electrical wiring
or other cable connections must pass through the
seal between the body and the rear swing-out
windows, rear hatch or rear doors:
Make sure all windows are shut.
Turn the fan on your heating or cooling
system to its highest speed with the setting
on anything but MAX A/C. That will force
outside air into your vehicle. See “Comfort
Controls” in the Index.
instrument panel, open them
all the way.
If you have air outlets on or under the
See “Engine Exhaust’’ in the Index.
Hatch Release (Option)
You can use your key to unlock the hatch and all the
other doors from the outside. Insert the key into the
hatch release button and turn it to the left. All doors
will unlock.
You may also use the Keyless Entry System
described earlier.
The hatch can be opened or closed without a key
if the
door lock system is unlocked.
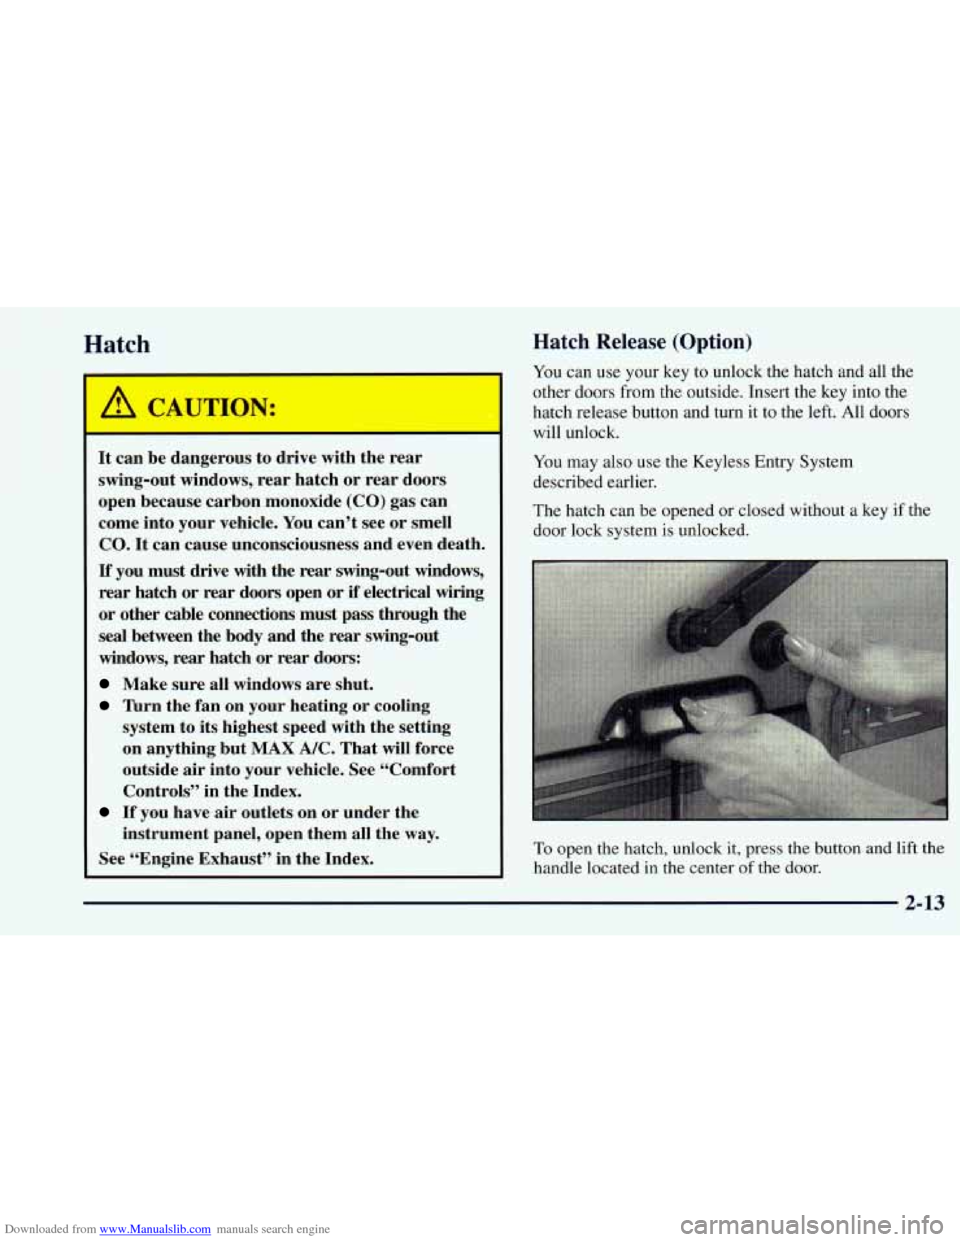
To open the hatch, unlock it, press the button and lift the
handle located in the center of the door.
2-13
Page 114 of 414
Downloaded from www.Manualslib.com manuals search engine ~r-
It can be dangerous to drive with the rear
swing-out windows, rear hatch or rear doors
open because carbon monoxide (CO) gas can come into your vehicle. You can’t see or smell
CO. It can cause unconsciousness and even death.
If you must drive with the rear swing-out
windows, rear hatch or rear doors open or if
electrical wiring or other cable connections must
pass through the
seal between the body and the
rear swing-out windows, rear hatch or
rear doors:
Make sure all windows are shut.
lbrn the fan on your heating or cooling
system to its highest speed with the setting
on anything but
MAX A/C. That will force
outside
air into your vehicle. See “Comfort
Controls” in the Index.
instrument panel, open them all the way.
If you have air outlets on or under the
See “Engine Exhaust” in the Index.
Horn
To sound the horn, press the horn symbols on the
steering wheel.
Tilt Wheel (If Fqllipped]
A tilt steering wheel allows you to adjust the steering
wheel before
you drive.
You can also raise it to the highest level to give your
legs more room when you exit and enter the vehicle.
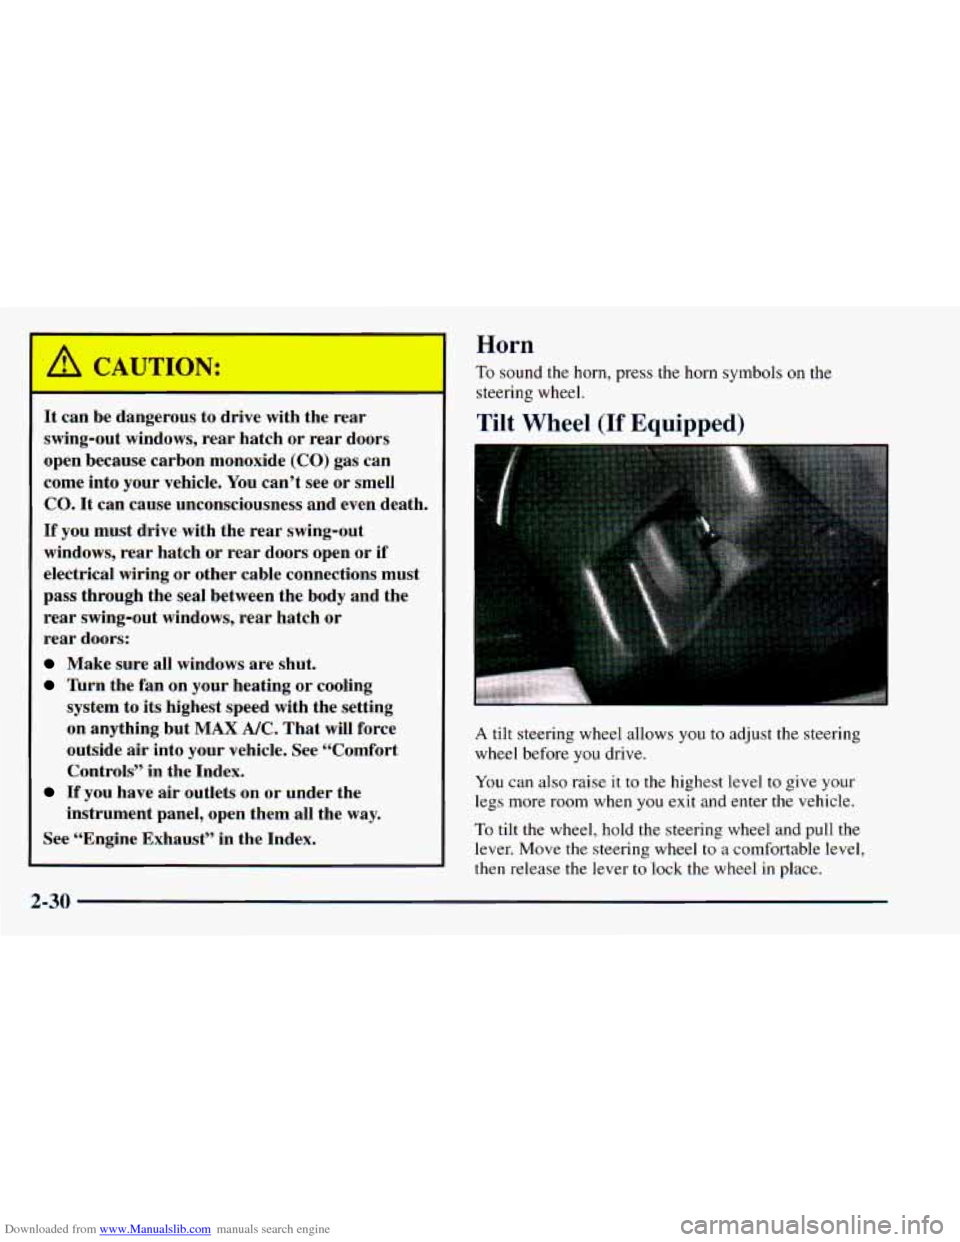
To tilt the wheel, hold the steering wheel and pull the
lever. Move
the steering wheel to a comfortable level,
then release the lever
to lock the wheel in place.
2-30
Page 116 of 414
Downloaded from www.Manualslib.com manuals search engine As you signal a turn or a lane change, if the arrows don’t
flash but just stay on, a signal bulb may be burned out
and other drivers won’t see your turn signal.
If a bulb is burned
out, replace it to help avoid an
accident. If the arrows don’t go
on at all when you
signal a turn, check the fuse (see “Fuses and Circuit
Breakers” in the Index) and for burned-out bulbs.
Windshield Wipers
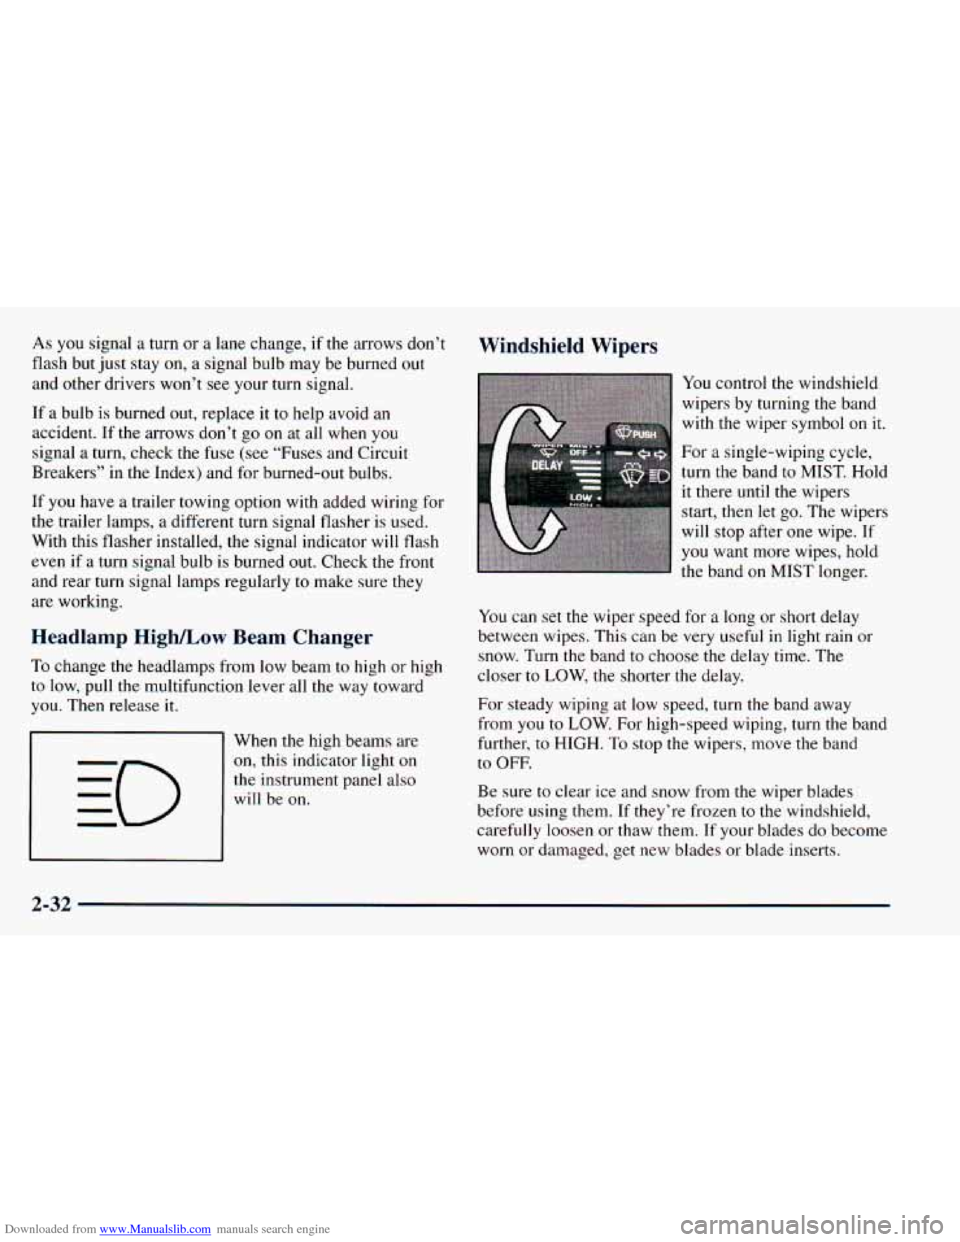
You control the windshield
wipers by turning
the band
with the wiper symbol on it.
- .- .. For a single-wiping cycle,
a turn the band to MIST. Hold m
If you have a trailer towing option with added wiring for
the trailer lamps, a different turn signal flasher is used.
With this flasher installed, the signal indicator
will flash
even if
a turn signal bulb is burned out. Check the front
and rear turn signal lamps regularly
to make sure they it there
until the wipers
start, then let go. The wipers
will stop after
one wipe. If
you want more wipes, hold
the band on MIST longer.
are working.
Headlamp HighLow Beam Changer between wipes. This can be very useful in light rain or
To change the headlamps from low beam to high or high closer to Low, the shorter the delay,
to low,
pull the multifunction lever all the way toward You
can set the wiper speed for a long or short delay
snow. Turn the band
to choose the delay time. The
you. Then release it.
When the high beams are
on, this indicator light on
the instrument panel also
will be
on.
For steady wiping at low speed, turn the band away
from
you to LOW. For high-speed wiping, turn the band
further, to HIGH.
To stop the wipers, move the band
to OFF.
Be sure to clear ice and snow from the wiper blades
before using them. If they’re frozen
to the windshield,
carefully loosen or thaw them. If your blades do become
worn or damaged, get new blades or blade inserts.
2-32
Page 121 of 414
Downloaded from www.Manualslib.com manuals search engine Exterior Lamps
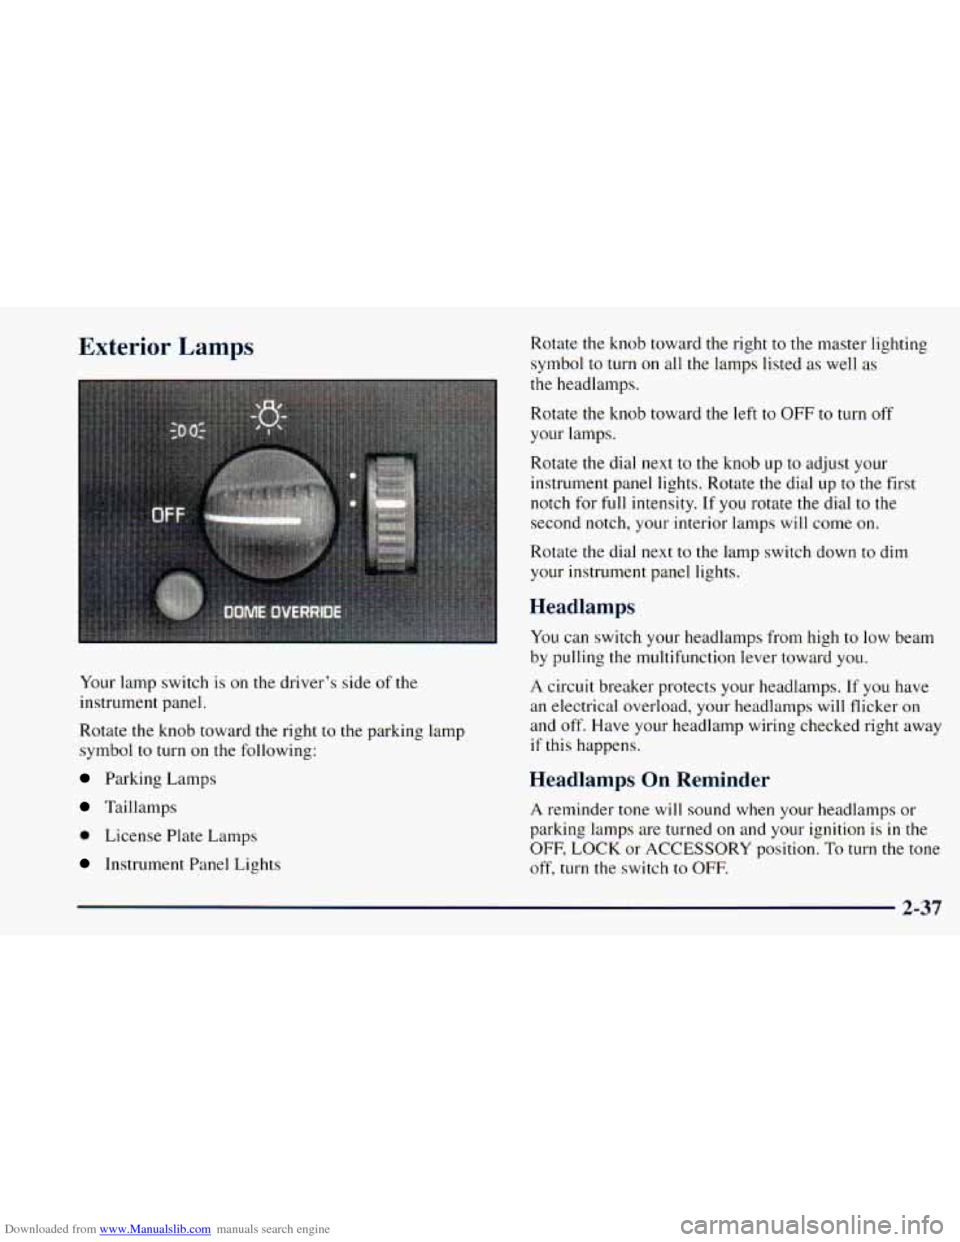
Your lamp switch is on the driver’s side of the
instrument panel.
Rotate the knob toward the right to
the parking lamp
symbol
to turn on the following:
Parking Lamps
Taillamps
0 License Plate Lamps
Instrument Panel Lights Rotate
the knob toward the right to the master lighting
symbol to turn on all
the lamps listed as well as
the headlamps.
Rotate the knob toward the left to
OFF to turn off
your lamps.
Rotate the dial next
to the knob up to adjust your
instrument panel lights. Rotate the dial up to
the first
notch for
full intensity. If you rotate the dial to the
second notch,
your interior lamps will come on.
Rotate
the dial next to the lamp switch down to dim
your instrument panel lights.
Headlamps
You can switch your headlamps from high to low beam
by pulling
the multifunction lever toward you.
A circuit breaker protects your headlamps. If you have
an electrical overload, your headlamps
will flicker on
and off. Have your headlamp wiring checked right away
if this happens.
Headlamps On Reminder
A reminder tone will sound when your headlamps or
parking lamps are turned
on and your ignition is in the
OFF, LOCK or ACCESSORY position. To turn the tone
off, turn
the switch to OFF.
2-37
Page 142 of 414
Downloaded from www.Manualslib.com manuals search engine Gages can indicate when there may be or is a problem
with one
of your vehicle’s functions. Often gages and
warning lights work together to
let you know when
there’s
a problem with your vehicle.
When
one of the warning lights comes on and stays on
when you are driving, or when one
of the gages shows
there may be
a problem, check the section that tells you
what
to do about it. Please follow this manual’s advice.
Waiting to do repairs
can be costly -- and even
dangerous. So please get to know your warning lights
and gages. They’re a big help.
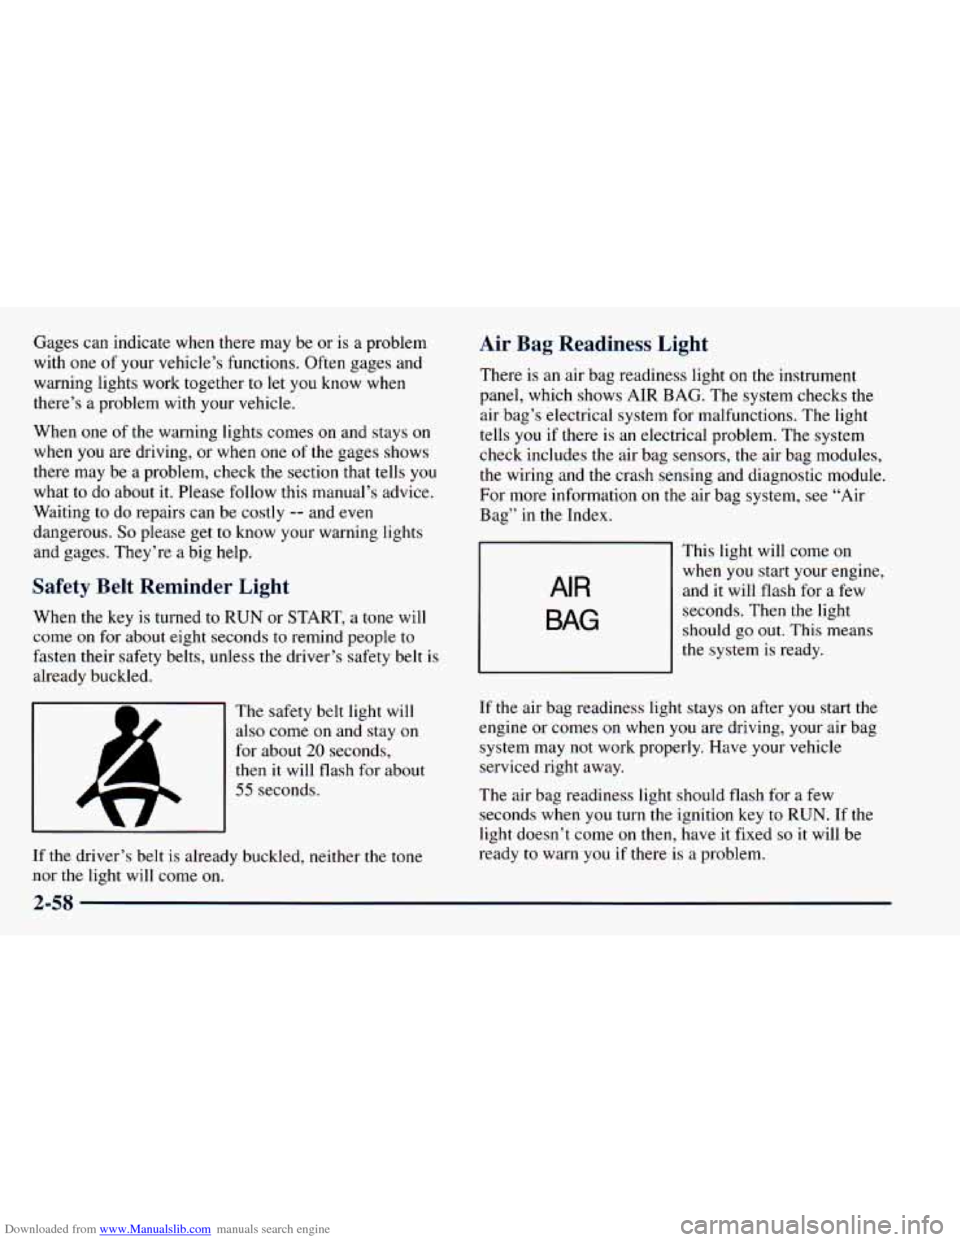
Safety Belt Reminder Light
When the key is turned to RUN or START, a tone will
come
on for about eight seconds to remind people to
fasten their
safety belts, unless the driver’s safety belt is
already buckled.
The safety belt light
will
also come on and stay on
for about 20 seconds,
then it will flash for about
55 seconds.
Air Bag Readiness Light
There is an air bag readiness light on the instrument
panel, which shows AIR BAG. The system checks the
air bag’s electrical system for malfunctions. The light
tells
you if there is an electrical problem. The system
check includes
the air bag sensors, the air bag modules,
the wiring and the crash sensing and diagnostic module.
For more information on the air bag system, see “Air
Bag”
in the Index.
AIR
This light will come on
when you start your engine,
and
it will flash for a few
seconds. Then the light
should go
out. This means
the system is ready.
If the air bag readiness light stays on after you start the
engine or comes
on when you are driving, your air bag
system may
not work properly. Have your vehicle
serviced right away.
The air bag readiness light should flash for a few
seconds when
you turn the ignition key to RUN. If the
light doesn’t come on then, have it fixed
so it will be
ready
to warn you if there is a problem. If the driver’s belt is already buckled, neither the tone
nor the light will come on.
2-58
Page 219 of 414
Downloaded from www.Manualslib.com manuals search engine Making Turns
NOTICE:
Making very sharp turns while trailering could cause the trailer
to come in contact with the
vehicle.
Your vehicle could be damaged. Avoid
making very sharp turns while trailering.
When you’re turning with a trailer, make wider turns than
normal. Do this so your trailer won’t strike soft shoulders,
curbs, road signs, trees or other objects. Avoid jerky or
sudden maneuvers. Signal well
in advance.
Turn Signals When Towing a Trailer
When you tow a trailer, your vehicle has to have extra
wiring (included in the optional trailering package).
The arrows on your instrument panel will flash
whenever you signal a turn or lane change. Properly
hooked
up, the trailer lamps
drivers you’re about to turn, will
also flash, telling other
change lanes or stop. When
towing a trailer, the arrows on your instrument
panel will flash
for turns even if the bulbs on the trailer
are burned out. Thus, you may think drivers behind you
are seeing your signal when they are not. It’s important
to check occasionally to be sure the trailer bulbs are
still working.
Driving On Grades
Reduce speed and shift to a lower gear before you start
down a long or steep downgrade. If you don’t shift
down, you might have to use your brakes
so much that
they would get hot and no longer work well.
On a long uphill grade, shift down and reduce your
speed
to around 45 mph (70 kdh) to reduce the
possibility of engine and transmission overheating.
When towing
at high altitude on steep uphill grades,
consider the following: Engine coolant will boil at a
lower temperature than at normal altitudes. If you turn
your engine off immediately after towing at high altitude
on steep uphill grades, your vehicle may show signs
similar to engine overheating.
To avoid this, let the
engine
run while parked (preferably on level ground)
with the automatic transmission in
PARK (P) for a few
minutes before turning the engine off. If you do get the
overheat warning, see “Engine Overheating” in
the Index.
4-35
Page 221 of 414
Downloaded from www.Manualslib.com manuals search engine Trailer Wiring Harness
If you have the optional trailering package, your vehicle
will have an eight-wire
harness, including the center
high-mounted stoplamp battery feed wire. The harness
is stored
on the passenger’s side of the vehicle near the
rear wheel well. This harness has
a 30 amp battery feed
wire and
no connector, and should be wired by a
qualified electrical technician. After choosing an
aftermarket trailer mating connector pair, have the
technician attach one connector to
the eight-wire trailer
harness and the other connector to the wiring harness on
the trailer. Be sure the wiring harness on the trailer is
taped or strapped to the trailer’s frame rail and leave
it
loose enough so the wiring doesn’t bend or break, but
not
so loose that it drags on the ground. The eight-wire
harness must be routed out of your vehicle between the
rear door and the floor, with enough of the harness left
on both sides so that the trailer or the body won’t pull it. If
you do
not have the optional trailering package, your
vehicle will
still have a trailering harness. The harness is
located near the passenger’s side rear wheel well. It
consists
of six wires that may be used by after-market
trailer hitch installers.
The technician can use the
following color code chart when connecting
the wiring
harness
to your trailer.
Brown: Rear lamps.
0 Yellow: Left stoplamp and turn signal.
Dark Green: Right stoplamp and turn signal.
White (Heavy Gage): Ground.
0 Light Green: Back-up lamps.
0 White (Light Gage): Center High-Mounted
Stoplamp.
Blue: Auxiliary circuit (eight-wire harness only).
0 Orange: Fused auxiliary (eight-wire harness only).
Store the harness
in its original place. Wrap the harness
together and tie
it neatly so it won’t be damaged.
4-37
Page 322 of 414
Downloaded from www.Manualslib.com manuals search engine Electrical System
Add-on Electrical Equipment
I NOTICE:
Don’t add anything electrical to your vehicle
unless you check with your dealer first. Some
electrical equipment can damage your vehicle
and the damage wouldn’t be covered by your warranty. Some add-on electrical equipment can
keep other components from working as
they should.
Your vehicle has an air bag system. Before attempting to
add anything electrical to your vehicle, see “Servicing
Your Air Bag-Equipped Vehicle” in the Index.
Headlamp Wiring
The headlamp wiring is protected by a circuit breaker in
the lamp switch. An electrical overload will cause the
lamps to go on and off, or in some cases to remain off. If
this happens, have your headlamp wiring checked
right away.
Windshield Wiper Fuses
The windshield wiper motor is protected by a circuit
breaker and a fuse. If the motor overheats due to heavy
snow, etc., the wiper will stop until the motor cools. If
the overload is caused by some electrical problem and
not snow, etc., be sure to get it fixed.
Power Windows and Other Power Options
Circuit breakers in the fuse panel protect the power
windows and other power accessories. When the current
load is
too heavy, the circuit breaker opens and closes,
protecting the circuit until the problem is fixed or
goes away.
6-60
Page 323 of 414
Downloaded from www.Manualslib.com manuals search engine 11
Fuses and Circuit Breakers
The wiring circuits in your vehicle are protected from
short circuits by a combination of fuses, circuit breakers
and fusible thermal links. This greatly reduces the
chance of fires caused by electrical problems.
Look at the silver-colored band inside the fuse. If the
band is broken or melted, replace the fuse. Be sure you
replace a bad fuse with a new one of the identical size
and rating.
Spare fuses and a fuse puller are located in the
underhood electrical center.
You can remove fuses with
the fuse puller. Remember to replace any of the spare
fuses you use,
so you will have some if you ever need
them again.
If you ever have a problem on the road and don’t have a
spare fuse, you can borrow one that has the same
amperage. Just pick some feature of your vehicle that
you can get along without
-- like the radio or cigarette
lighter
-- and use its fuse, if it is the correct amperage.
Replace
it as soon as you can.
There are two fuse blocks in your vehicle: one is inside
the vehicle and one is in the engine compartment.
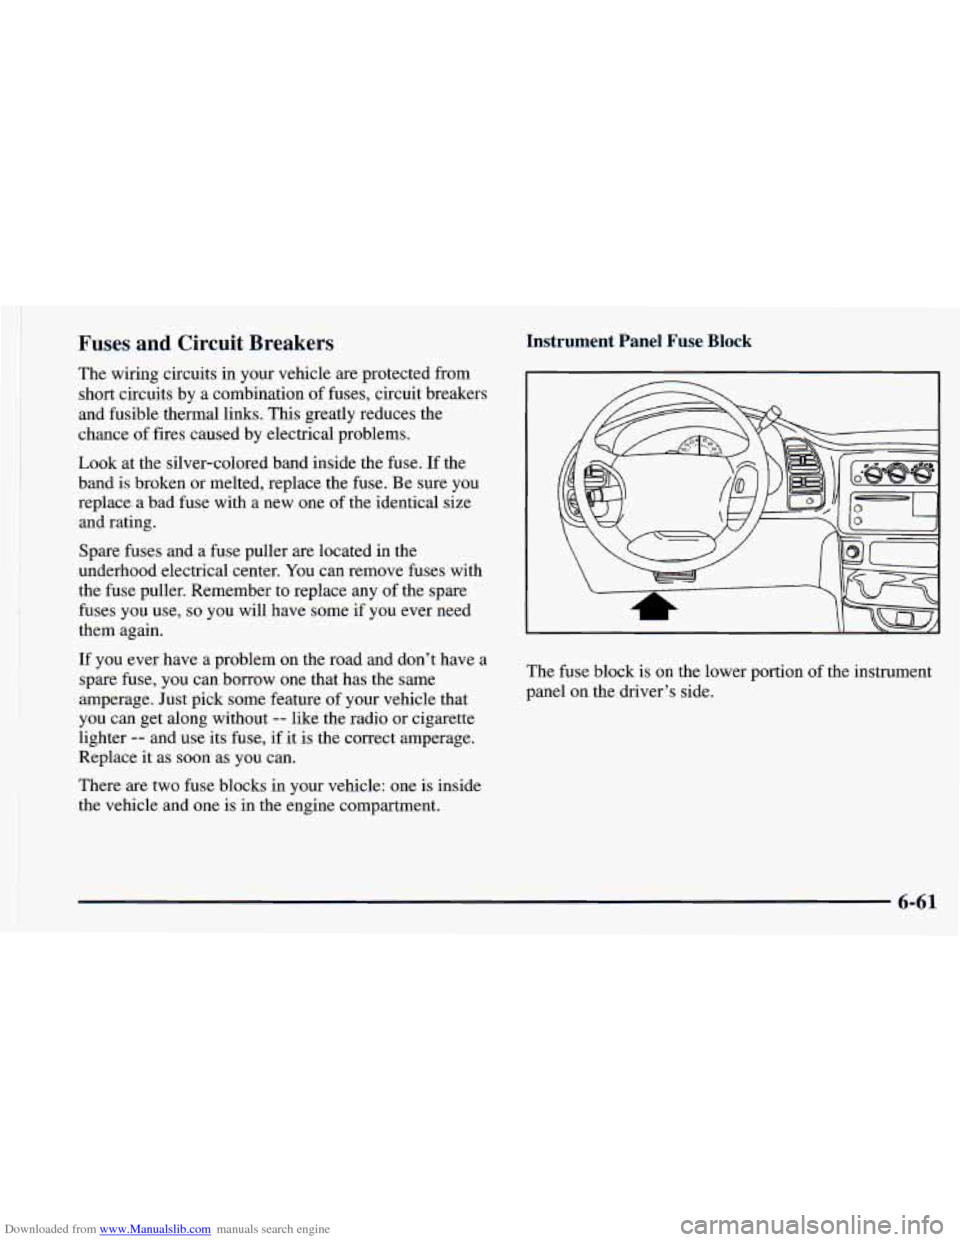
Instrument Panel Fuse Block
The fuse block is on the lower portion of the instrument
panel on the driver’s side.
6-61
Page 327 of 414
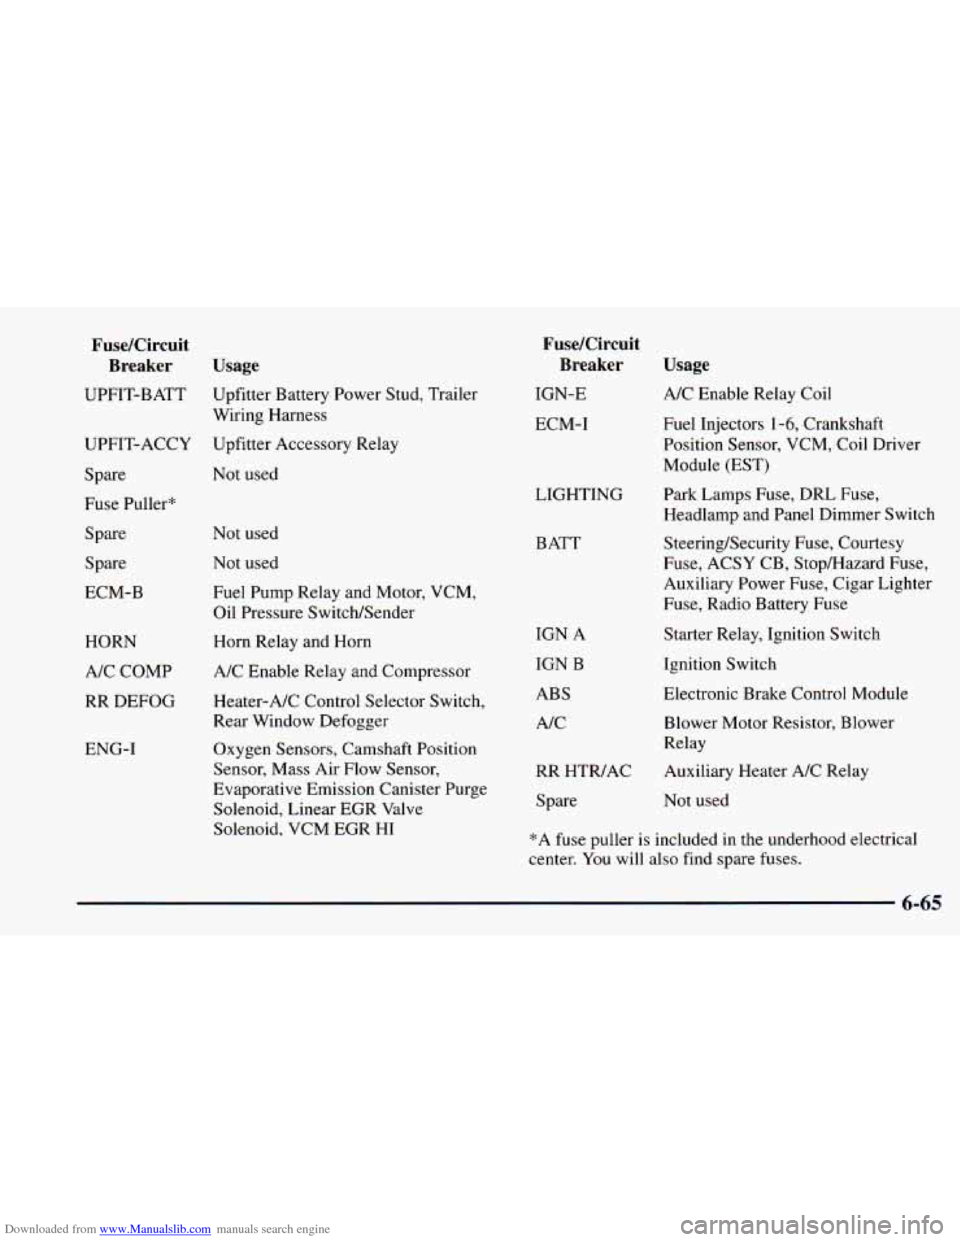
Downloaded from www.Manualslib.com manuals search engine Fuse/Circuit Breaker Usage
UPFIT-BATT Upfitter Battery Power Stud, Trailer
UPFIT-ACCY Upfitter Accessory Relay
Wiring
Harness
Spare
Fuse Puller*
Spare
Spare
ECM-B
HORN
A/C COMP
RR DEFOG
ENG-I
Fuse/Circuit Breaker Usage
IGN-E
ECM-I
Not used
LIGHTING
Not used
Not used Fuel Pump Relay and Motor, VCM,
Oil Pressure Switch/Sender
Horn Relay and Horn
A/C Enable Relay and Compressor
Heater-A/C Control Selector Switch,
Rear Window Defogger
Oxygen Sensors, Camshaft Position
Sensor, Mass Air Flow Sensor,
Evaporative Emission Canister Purge
Solenoid, Linear EGR Valve
Solenoid, VCM EGR HI BATT
IGN A
IGN B
ABS
NC
RR HTRIAC
Spare A/C
Enable Relay Coil
Fuel Injectors
1-6, Crankshaft
Position Sensor, VCM, Coil Driver
Module (EST)
Park Lamps Fuse, DRL Fuse,
Headlamp and Panel Dimmer Switch
SteeringBecurity Fuse, Courtesy
Fuse, ACSY CB, Stop/Hazard Fuse,
Auxiliary Power Fuse, Cigar Lighter
Fuse, Radio Battery Fuse
Starter Relay, Ignition Switch
Ignition Switch
Electronic Brake Control Module Blower Motor Resistor, Blower
Relay
Auxiliary Heater NC Relay
Not used
*A fuse puller is included
in the underhood electrical
center. You will also find spare fuses.
6-65