checking oil CHEVROLET ASTRO 2004 Owners Manual
[x] Cancel search | Manufacturer: CHEVROLET, Model Year: 2004, Model line: ASTRO, Model: CHEVROLET ASTRO 2004Pages: 382, PDF Size: 2.73 MB
Page 215 of 382
Service............................................................5-3
Doing Your Own Service Work.........................5-3
Adding Equipment to the Outside of Your
Vehicle......................................................5-4
Fuel................................................................5-4
Gasoline Octane............................................5-4
Gasoline Speci®cations....................................5-5
California Fuel...............................................5-5
Additives.......................................................5-6
Fuels in Foreign Countries...............................5-6
Filling Your Tank............................................5-7
Filling a Portable Fuel Container.......................5-9
Checking Things Under the Hood.....................5-9
Hood Release..............................................5-10
Engine Compartment Overview.......................5-12
Engine Oil...................................................5-13
Engine Cover...............................................5-17
Engine Air Cleaner/Filter................................5-21
Automatic Transmission Fluid.........................5-22
Engine Coolant.............................................5-25
Radiator Pressure Cap..................................5-27
Engine Overheating.......................................5-28
Cooling System............................................5-30
Engine Fan Noise.........................................5-36
Power Steering Fluid.....................................5-37
Windshield Washer Fluid................................5-38Brakes........................................................5-39
Battery........................................................5-42
Jump Starting...............................................5-43
All-Wheel Drive..............................................5-47
Rear Axle.......................................................5-48
Front Axle......................................................5-48
Bulb Replacement..........................................5-49
Halogen Bulbs..............................................5-49
Headlamps..................................................5-50
Front Turn Signal Lamps...............................5-53
Taillamps.....................................................5-54
Replacement Bulbs.......................................5-55
Windshield Wiper Blade Replacement..............5-56
Tires..............................................................5-56
In¯ation - Tire Pressure.................................5-66
Tire Inspection and Rotation...........................5-68
When It Is Time for New Tires.......................5-69
Buying New Tires.........................................5-70
Uniform Tire Quality Grading..........................5-71
Wheel Alignment and Tire Balance..................5-72
Wheel Replacement......................................5-72
Tire Chains..................................................5-74
If a Tire Goes Flat........................................5-74
Changing a Flat Tire.....................................5-75
Compact Spare Tire......................................5-86
Section 5 Service and Appearance Care
5-1
Page 223 of 382
Filling a Portable Fuel Container
{CAUTION:
Never ®ll a portable fuel container while it is in
your vehicle. Static electricity discharge from
the container can ignite the gasoline vapor.
You can be badly burned and your vehicle
damaged if this occurs. To help avoid injury to
you and others:
·Dispense gasoline only into approved
containers.
·Do not ®ll a container while it is inside a
vehicle, in a vehicle's trunk, pickup bed or
on any surface other than the ground.
·Bring the ®ll nozzle in contact with the
inside of the ®ll opening before operating
the nozzle. Contact should be maintained
until the ®lling is complete.
·Do not smoke while pumping gasoline.
Checking Things Under
the Hood
{CAUTION:
Things that burn can get on hot engine parts
and start a ®re. These include liquids like fuel,
oil, coolant, brake ¯uid, windshield washer and
other ¯uids, and plastic or rubber. You or
others could be burned. Be careful not to drop
or spill things that will burn onto a hot engine.
5-9
Page 227 of 382
A. Windshield Washer Fluid. SeeWindshield Washer
Fluid on page 5-38.
B. Engine Coolant. See
Engine Coolant on page 5-25.
C. Engine Oil Dipstick. See
Engine Oil on page 5-13.
D. Transmission Dipstick. See
Automatic Transmission
Fluid on page 5-22.
E. Engine Air Cleaner/Filter. See
Engine Air
Cleaner/Filter on page 5-21.
F. Engine Oil Fill. See
Engine Oil on page 5-13.
G. Brake Master Cylinder Reservoir. See
Brakes on
page 5-39.
H. Power Steering Fluid Reservoir. See
Power Steering
Fluid on page 5-37.
I. Battery. See
Battery on page 5-42.
Engine Oil
Checking Engine Oil
It is a good idea to check your engine oil every time you
get fuel. In order to get an accurate reading, the oil
must be warm and the vehicle must be on level ground.
The engine oil dipstick handle is a yellow loop. See
Engine Compartment Overview on page 5-12for
the location of the engine oil dipstick.
Turn off the engine and give the oil several minutes to
drain back into the oil pan. If you don't, the oil
dipstick might not show the actual level.
Pull out the dipstick and clean it with a paper towel or
cloth, then push it back in all the way. Remove it again,
keeping the tip down, and check the level.
5-13
Page 239 of 382
How to Add Fluid
Refer to the Maintenance Schedule to determine what
kind of transmission ¯uid to use. SeePart D:
Recommended Fluids and Lubricants on page 6-30.
Using a funnel, add ¯uid down the transmission dipstick
tube only after checking the transmission ¯uid while it
is hot. (A cold check is used only as a reference.) If the
¯uid level is low, add only enough of the proper ¯uid
to bring the level up to the HOT area for a hot check. It
doesn't take much ¯uid, generally less than one pint
(0.5 L).
Don't over®ll.
Notice:We recommend you use only ¯uid labeled
DEXRONž-III, because ¯uid with that label is
made especially for your automatic transmission.
Damage caused by ¯uid other than DEXRON
ž-III is
not covered by your new vehicle warranty.
·After adding ¯uid, recheck the ¯uid level as
described under²How to Check.²
·When the correct ¯uid level is obtained, push the
dipstick back in all the way; then ¯ip the handle
down to lock the dipstick in place.
Engine Coolant
The cooling system in your vehicle is ®lled with
DEX-COOLžengine coolant. This coolant is designed
to remain in your vehicle for 5 years or 150,000 miles
(240 000 km), whichever occurs ®rst, if you add
only DEX-COOL
žextended life coolant.
The following explains your cooling system and how to
add coolant when it is low. If you have a problem
with engine overheating, see
Engine Overheating on
page 5-28.
A 50/50 mixture of clean, drinkable water and
DEX-COOL
žcoolant will:
·Give freezing protection down to-34ÉF (-37ÉC).
·Give boiling protection up to 265ÉF (129ÉC).
·Protect against rust and corrosion.
·Help keep the proper engine temperature.
·Let the warning lights and gages work as they
should.
Notice:Using coolant other than DEX-COOLžmay
cause premature engine, heater core or radiator
corrosion. In addition, the engine coolant may
require changing sooner, at 30,000 miles (50 000 km)
or 24 months, whichever occurs ®rst. Any repairs
would not be covered by your warranty. Always use
DEX-COOL
ž(silicate-free) coolant in your vehicle.
5-25
Page 240 of 382
What to Use
Use a mixture of one-halfclean, drinkable waterand
one-half DEX-COOLžcoolant which won't damage
aluminum parts. If you use this coolant mixture,
you don't need to add anything else.
{CAUTION:
Adding only plain water to your cooling
system can be dangerous. Plain water, or
some other liquid such as alcohol, can boil
before the proper coolant mixture will. Your
vehicle's coolant warning system is set for the
proper coolant mixture. With plain water or the
wrong mixture, your engine could get too hot
but you would not get the overheat warning.
Your engine could catch ®re and you or others
could be burned. Use a 50/50 mixture of clean,
drinkable water and the proper coolant.
Notice:If you use an improper coolant mixture,
your engine could overheat and be badly damaged.
The repair cost would not be covered by your
warranty. Too much water in the mixture can freeze
and crack the engine, radiator, heater core and
other parts.If you have to add coolant more than four times a year,
have your dealer check your cooling system.
Notice:If you use the proper coolant, you do not
have to add extra inhibitors or additives which claim
to improve the system. These can be harmful.
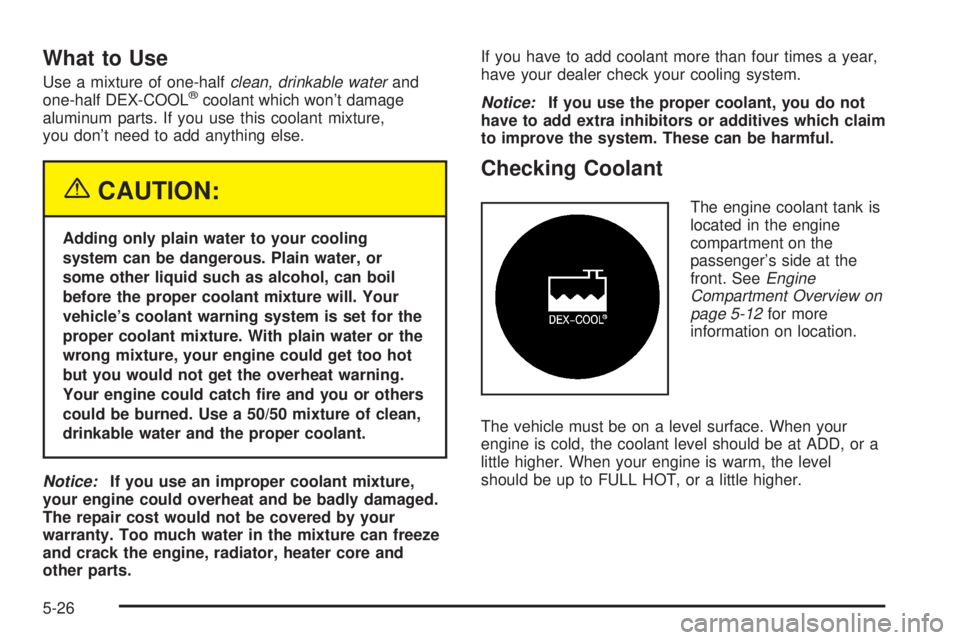
Checking Coolant
The engine coolant tank is
located in the engine
compartment on the
passenger's side at the
front. See
Engine
Compartment Overview on
page 5-12
for more
information on location.
The vehicle must be on a level surface. When your
engine is cold, the coolant level should be at ADD, or a
little higher. When your engine is warm, the level
should be up to FULL HOT, or a little higher.
5-26
Page 254 of 382
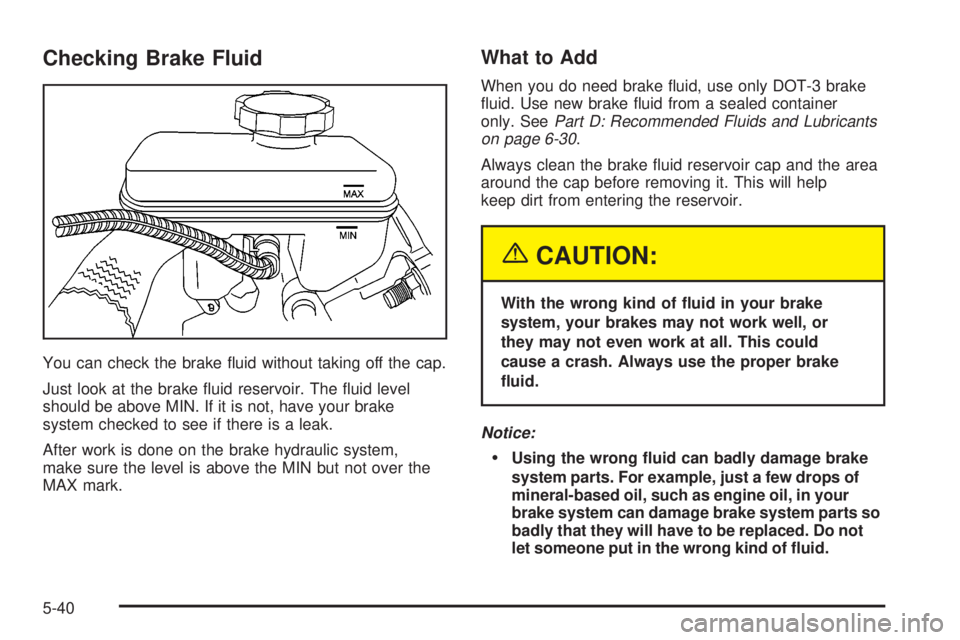
Checking Brake Fluid
You can check the brake ¯uid without taking off the cap.
Just look at the brake ¯uid reservoir. The ¯uid level
should be above MIN. If it is not, have your brake
system checked to see if there is a leak.
After work is done on the brake hydraulic system,
make sure the level is above the MIN but not over the
MAX mark.
What to Add
When you do need brake ¯uid, use only DOT-3 brake
¯uid. Use new brake ¯uid from a sealed container
only. See
Part D: Recommended Fluids and Lubricants
on page 6-30.
Always clean the brake ¯uid reservoir cap and the area
around the cap before removing it. This will help
keep dirt from entering the reservoir.
{CAUTION:
With the wrong kind of ¯uid in your brake
system, your brakes may not work well, or
they may not even work at all. This could
cause a crash. Always use the proper brake
¯uid.
Notice:
·Using the wrong ¯uid can badly damage brake
system parts. For example, just a few drops of
mineral-based oil, such as engine oil, in your
brake system can damage brake system parts so
badly that they will have to be replaced. Do not
let someone put in the wrong kind of ¯uid.
5-40
Page 369 of 382
Canceling the Sliding Door
Security Lock..............................................2-10
Capacities and Speci®cations..........................5-102
Carbon Monoxide...........................4-24, 4-35, 2-28
Care of
Safety Belts................................................5-89
Your CD Player...........................................3-50
Your CDs ...................................................3-50
Cargo Van Models..........................................1-50
Cargo Vans...........................................1-41, 1-48
CD Messages................................................3-45
Center Passenger Position, Safety Belts.............1-27
Chains, Tires..................................................5-74
Charging System Light....................................3-27
Check
Engine Light...............................................3-30
Gages Warning Light...................................3-36
Checking Brake Fluid......................................5-40
Checking Coolant............................................5-26
Checking Engine Oil........................................5-13
Checking Things Under the Hood....................... 5-9
Checking Your Restraint Systems......................1-70
Chemical Paint Spotting...................................5-93
Child Restraints
Child Restraint Systems...............................1-44
Infants and Young Children...........................1-38Child Restraints (cont.)
Lower Anchorages and Top Tethers for
Children (LATCH System)..........................1-52
Older Children.............................................1-35
Securing a Child Restraint Designed for
the LATCH System...................................1-55
Securing a Child Restraint in a Center
Seat Position...........................................1-58
Securing a Child Restraint in a Rear
Outside Seat Position...............................1-55
Securing a Child Restraint in the Right
Front Seat Position...................................1-60
Top Strap...................................................1-48
Top Strap Anchor Location............................1-50
Where to Put the Restraint...........................1-47
Cigarette Lighter.............................................3-17
Cleaning
Inside of Your Vehicle..................................5-87
Outside of Your Vehicle................................5-90
Underbody Maintenance...............................5-93
Weatherstrips..............................................5-89
Cleaning Aluminum Wheels..............................5-92
Cleaning Exterior Lamps/Lenses.......................5-90
Cleaning Fabric/Carpet....................................5-87
Cleaning Glass Surfaces..................................5-89
Cleaning Interior Plastic Components.................5-89
3