instrument panel CHEVROLET ASTRO 2005 Owner's Manual
[x] Cancel search | Manufacturer: CHEVROLET, Model Year: 2005, Model line: ASTRO, Model: CHEVROLET ASTRO 2005Pages: 376, PDF Size: 2.45 MB
Page 140 of 376
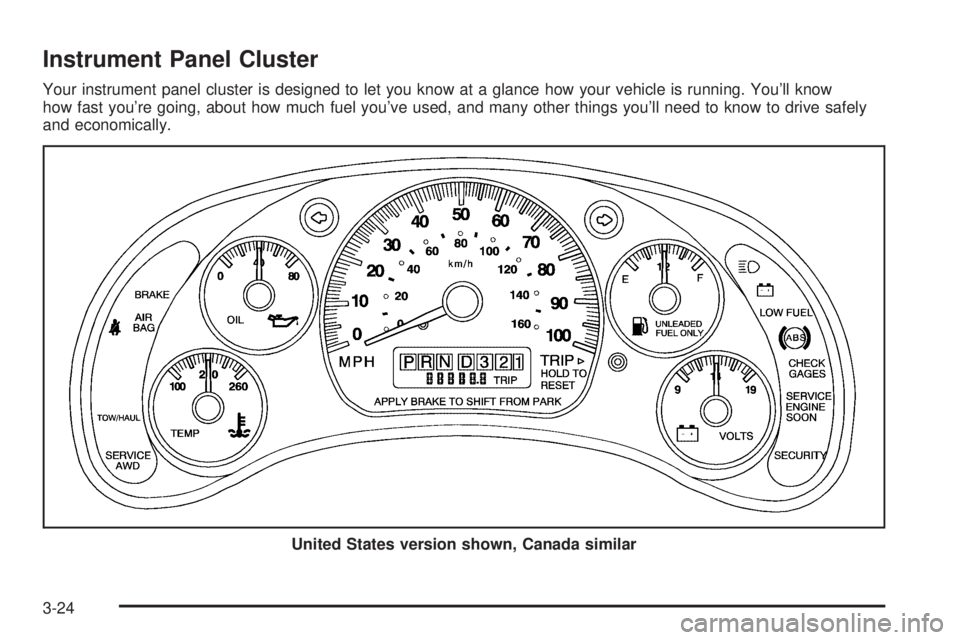
Instrument Panel Cluster
Your instrument panel cluster is designed to let you know at a glance how your vehicle is running. You’ll know
how fast you’re going, about how much fuel you’ve used, and many other things you’ll need to know to drive safely
and economically.
United States version shown, Canada similar
3-24
Page 142 of 376
Airbag Readiness Light
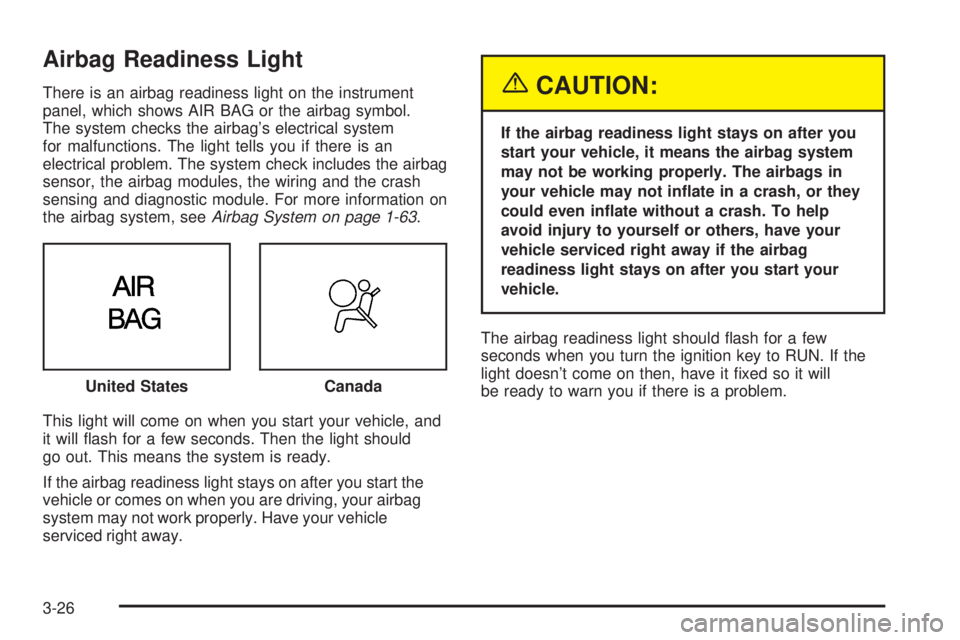
There is an airbag readiness light on the instrument
panel, which shows AIR BAG or the airbag symbol.
The system checks the airbag’s electrical system
for malfunctions. The light tells you if there is an
electrical problem. The system check includes the airbag
sensor, the airbag modules, the wiring and the crash
sensing and diagnostic module. For more information on
the airbag system, seeAirbag System on page 1-63.
This light will come on when you start your vehicle, and
it will �ash for a few seconds. Then the light should
go out. This means the system is ready.
If the airbag readiness light stays on after you start the
vehicle or comes on when you are driving, your airbag
system may not work properly. Have your vehicle
serviced right away.{CAUTION:
If the airbag readiness light stays on after you
start your vehicle, it means the airbag system
may not be working properly. The airbags in
your vehicle may not in�ate in a crash, or they
could even in�ate without a crash. To help
avoid injury to yourself or others, have your
vehicle serviced right away if the airbag
readiness light stays on after you start your
vehicle.
The airbag readiness light should �ash for a few
seconds when you turn the ignition key to RUN. If the
light doesn’t come on then, have it �xed so it will
be ready to warn you if there is a problem. United States
Canada
3-26
Page 202 of 376
Tow/Haul Mode
Tow/haul is designed to assist while your vehicle is
pulling a large or heavy load or trailer. Tow/haul is most
useful while pulling such a load in rolling terrain, in
stop-and-go traffic, or when you need improved
low-speed control, such as when parking. The purpose
of the tow/haul mode is to:
Reduce the frequency and improve the predictability
of transmission shifts,
provide the same solid shift feel when pulling a
heavy load as when the vehicle is unloaded, and
improve control of vehicle speed while requiring
less throttle pedal activity.
Press the button on the end of the shift lever to turn
tow/haul mode on and off. While activated, the indicator
light on the instrument panel will be on. Tow/haul
mode will turn off automatically when the ignition is
turned off. SeeTow/Haul Mode Light on page 3-35.Tow/haul is most effective when the vehicle and trailer
combined weight is at least 75 percent of the vehicle’s
Gross Combined Weight Rating (GCWR). See “Weight
of the Trailer” later in this section.
Driving with tow/haul activated without a heavy load will
cause reduced fuel economy and unpleasant engine
and transmission driving characteristics, but will
not cause damage.
Weight of the Trailer
How heavy can a trailer safely be?
It depends on how you plan to use your rig. For
example, speed, altitude, road grades, outside
temperature and how much your vehicle is used to pull
a trailer are all important. And, it can also depend
on any special equipment that you have on your vehicle.
The following chart shows how much your trailer can
weigh, based upon your vehicle model and options.
4-36
Page 208 of 376
Following Distance
Stay at least twice as far behind the vehicle ahead as
you would when driving your vehicle without a trailer.
This can help you avoid situations that require
heavy braking and sudden turns.
Passing
You’ll need more passing distance up ahead when
you’re towing a trailer. And, because you’re a good
deal longer, you’ll need to go much farther beyond the
passed vehicle before you can return to your lane.
Backing Up
Hold the bottom of the steering wheel with one hand.
Then, to move the trailer to the left, just move that hand
to the left. To move the trailer to the right, move your
hand to the right. Always back up slowly and, if possible,
have someone guide you.
Making Turns
Notice:Making very sharp turns while trailering
could cause the trailer to come in contact with the
vehicle. Your vehicle could be damaged. Avoid
making very sharp turns while trailering.
When you’re turning with a trailer, make wider turns than
normal. Do this so your trailer won’t strike soft shoulders,
curbs, road signs, trees or other objects. Avoid jerky or
sudden maneuvers. Signal well in advance.
Turn Signals When Towing a Trailer
When you tow a trailer, your vehicle has to have extra
wiring (included in the optional trailering package).
The arrows on your instrument panel will �ash whenever
you signal a turn or lane change. Properly hooked up,
the trailer lamps will also �ash, telling other drivers
you’re about to turn, change lanes or stop.
When towing a trailer, the arrows on your instrument
panel will �ash for turns even if the bulbs on the trailer
are burned out. Thus, you may think drivers behind
you are seeing your signal when they are not. It’s
important to check occasionally to be sure the trailer
bulbs are still working.
4-42
Page 214 of 376
Wheel Replacement......................................5-70
Tire Chains..................................................5-71
If a Tire Goes Flat........................................5-71
Changing a Flat Tire.....................................5-72
Removing the Spare Tire and Tools................5-73
Removing the Flat Tire and Installing
the Spare Tire..........................................5-76
Storing a Flat or Spare Tire and Tools............5-82
Compact Spare Tire......................................5-84
Appearance Care............................................5-84
Fabric/Carpet...............................................5-85
Vinyl...........................................................5-86
Leather.......................................................5-87
Instrument Panel..........................................5-87
Interior Plastic Components............................5-87
Glass Surfaces.............................................5-87
Care of Safety Belts......................................5-87
Weatherstrips...............................................5-88
Washing Your Vehicle...................................5-88
Cleaning Exterior Lamps/Lenses.....................5-88
Finish Care..................................................5-88
Windshield and Wiper Blades.........................5-89Aluminum Wheels.........................................5-90
Tires...........................................................5-90
Sheet Metal Damage.....................................5-91
Finish Damage.............................................5-91
Underbody Maintenance................................5-91
Chemical Paint Spotting.................................5-91
Vehicle Care/Appearance Materials..................5-92
Vehicle Identi�cation......................................5-93
Vehicle Identi�cation Number (VIN).................5-93
Service Parts Identi�cation Label.....................5-93
Electrical System............................................5-94
Add-On Electrical Equipment..........................5-94
Headlamp Wiring..........................................5-94
Windshield Wiper Fuses................................5-94
Power Windows and Other Power Options.......5-94
Fuses and Circuit Breakers............................5-95
Instrument Panel Fuse Block..........................5-96
Underhood Fuse Block..................................5-98
Capacities and Speci�cations........................5-101
Normal Maintenance Replacement Parts.........5-102
Section 5 Service and Appearance Care
5-2
Page 223 of 376
Hood Release
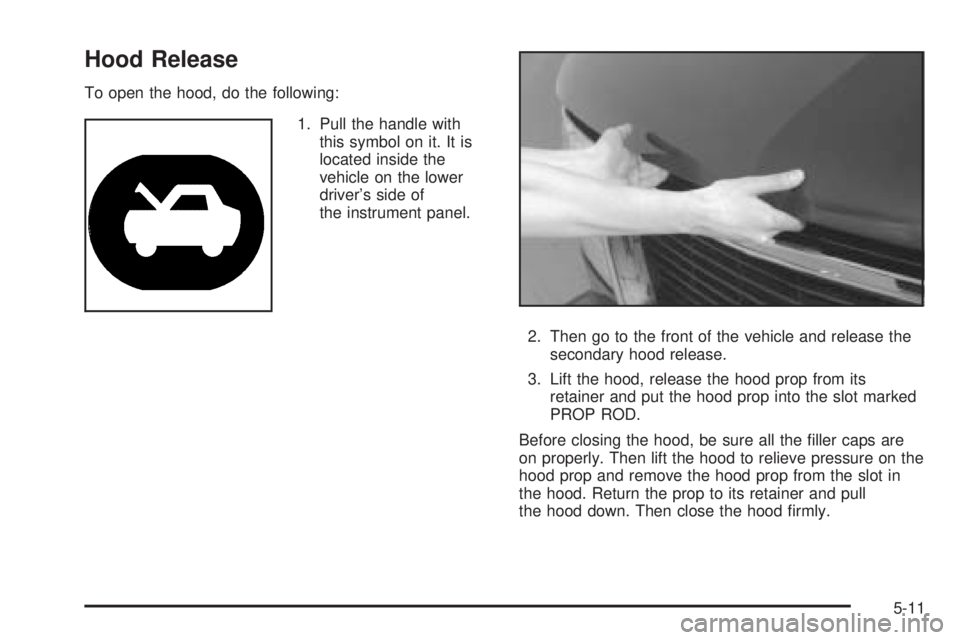
To open the hood, do the following:
1. Pull the handle with
this symbol on it. It is
located inside the
vehicle on the lower
driver’s side of
the instrument panel.
2. Then go to the front of the vehicle and release the
secondary hood release.
3. Lift the hood, release the hood prop from its
retainer and put the hood prop into the slot marked
PROP ROD.
Before closing the hood, be sure all the �ller caps are
on properly. Then lift the hood to relieve pressure on the
hood prop and remove the hood prop from the slot in
the hood. Return the prop to its retainer and pull
the hood down. Then close the hood �rmly.
5-11
Page 229 of 376
Engine Cover
Removing the Engine Cover
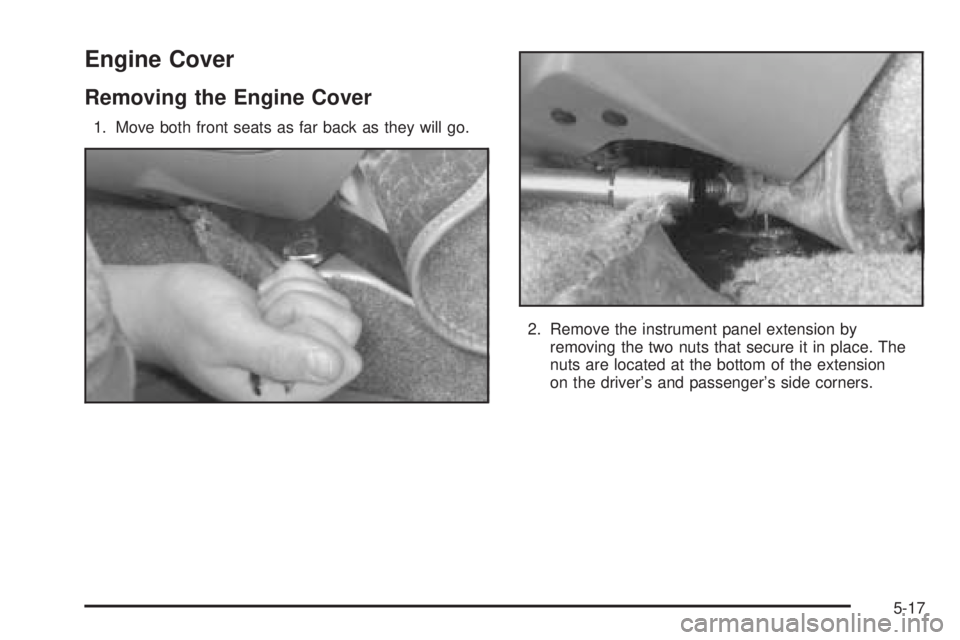
1. Move both front seats as far back as they will go.
2. Remove the instrument panel extension by
removing the two nuts that secure it in place. The
nuts are located at the bottom of the extension
on the driver’s and passenger’s side corners.
5-17
Page 231 of 376
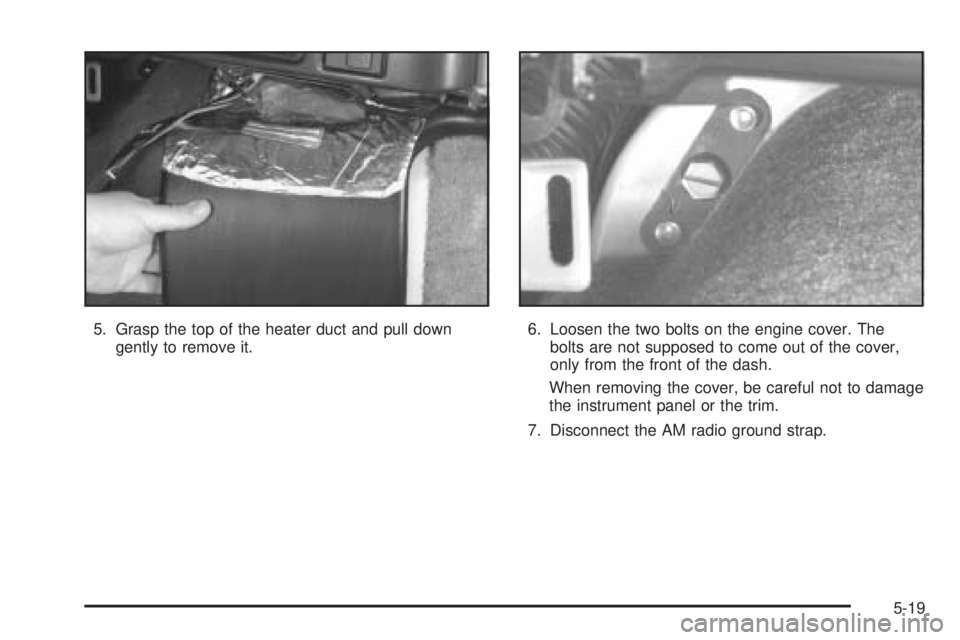
5. Grasp the top of the heater duct and pull down
gently to remove it.6. Loosen the two bolts on the engine cover. The
bolts are not supposed to come out of the cover,
only from the front of the dash.
When removing the cover, be careful not to damage
the instrument panel or the trim.
7. Disconnect the AM radio ground strap.
5-19
Page 240 of 376
Adding Coolant
If you need more coolant, add the proper DEX-COOL®
coolant mixtureat the coolant recovery tank,but be
careful not to spill it.
{CAUTION:
Turning the radiator pressure cap when the
engine and radiator are hot can allow steam
and scalding liquids to blow out and burn you
badly. With the coolant recovery tank, you will
almost never have to add coolant at the
radiator. Never turn the radiator pressure
cap — even a little — when the engine and
radiator are hot.
{CAUTION:
You can be burned if you spill coolant on hot
engine parts. Coolant contains ethylene glycol,
and it will burn if the engine parts are hot
enough. Do not spill coolant on a hot engine.Occasionally check the coolant level in the radiator.
For information on how to add coolant to the radiator,
seeCooling System on page 5-30.
Radiator Pressure Cap
Notice:If the pressure cap is not tightly installed,
coolant loss and possible engine damage may occur.
Be sure the cap is properly and tightly secured.
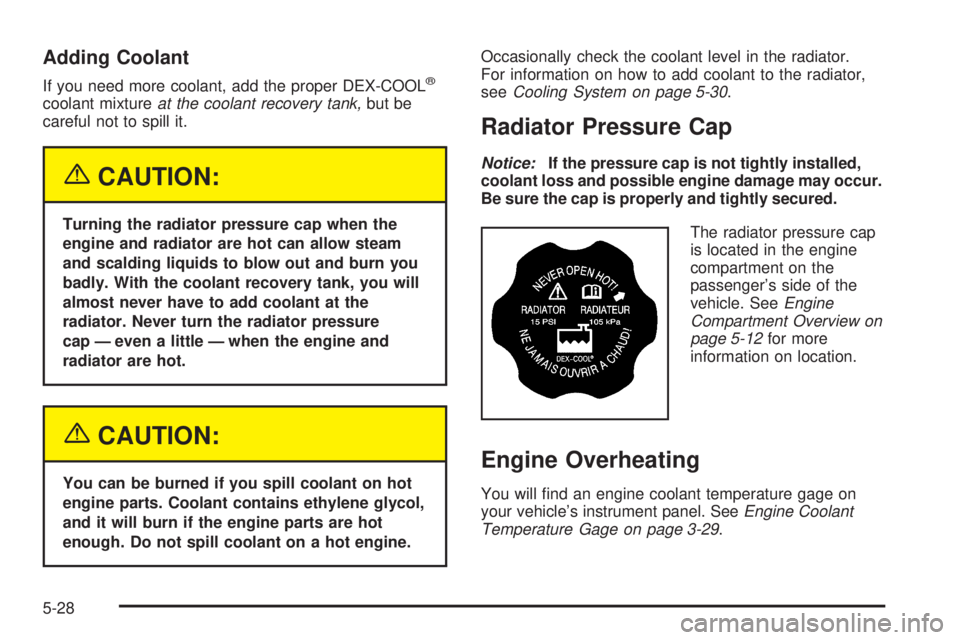
The radiator pressure cap
is located in the engine
compartment on the
passenger’s side of the
vehicle. SeeEngine
Compartment Overview on
page 5-12for more
information on location.
Engine Overheating
You will �nd an engine coolant temperature gage on
your vehicle’s instrument panel. SeeEngine Coolant
Temperature Gage on page 3-29.
5-28
Page 299 of 376
Leather
Use a soft cloth with lukewarm water and a mild soap or
saddle soap and wipe dry with a soft cloth. Then, let
the leather dry naturally. Do not use heat to dry.
For stubborn stains, use a leather cleaner.
Never use oils, varnishes, solvent-based or abrasive
cleaners, furniture polish, or shoe polish on leather.
Soiled or stained leather should be cleaned
immediately. If dirt is allowed to work into the �nish,
it can harm the leather.
Instrument Panel
Use only mild soap and water to clean the top surfaces
of the instrument panel. Sprays containing silicones
or waxes may cause annoying re�ections in the
windshield and even make it difficult to see through
the windshield under certain conditions.
Interior Plastic Components
Use only a mild soap and water solution on a soft
cloth or sponge. Commercial cleaners may affect
the surface �nish.
Glass Surfaces
Glass should be cleaned often. GM Glass Cleaner or
a liquid household glass cleaner will remove normal
tobacco smoke and dust �lms on interior glass.
SeeVehicle Care/Appearance Materials on page 5-92.
Notice:If you use abrasive cleaners when
cleaning glass surfaces on your vehicle, you could
scratch the glass and/or cause damage to the
rear window defogger and the integrated radio
antenna. When cleaning the glass on your vehicle,
use only a soft cloth and glass cleaner.
Care of Safety Belts
Keep belts clean and dry.
{CAUTION:
Do not bleach or dye safety belts. If you do,
it may severely weaken them. In a crash,
they might not be able to provide adequate
protection. Clean safety belts only with mild
soap and lukewarm water.
5-87