seat adjustment CHEVROLET ASTRO 2005 Owners Manual
[x] Cancel search | Manufacturer: CHEVROLET, Model Year: 2005, Model line: ASTRO, Model: CHEVROLET ASTRO 2005Pages: 376, PDF Size: 2.45 MB
Page 7 of 376
Front Seats......................................................1-3
Manual Seats................................................1-3
Power Seat...................................................1-3
Manual Lumbar..............................................1-4
Reclining Seatbacks........................................1-4
Head Restraints.............................................1-6
Seatback Latches...........................................1-6
Rear Seats.......................................................1-7
Rear Seat Operation.......................................1-7
Bench Seat..................................................1-11
Bucket Seats...............................................1-17
Safety Belts...................................................1-18
Safety Belts: They Are for Everyone................1-18
Questions and Answers About Safety Belts......1-22
How to Wear Safety Belts Properly.................1-23
Driver Position..............................................1-23
Shoulder Belt Height Adjustment.....................1-30
Safety Belt Use During Pregnancy..................1-31
Right Front Passenger Position.......................1-31
Rear Seat Passengers..................................1-31
Center Rear Passenger Position.....................1-34Rear Safety Belt Comfort Guides for
Children and Small Adults..........................1-35
Safety Belt Extender.....................................1-37
Child Restraints.............................................1-38
Older Children..............................................1-38
Infants and Young Children............................1-40
Child Restraint Systems.................................1-46
Where to Put the Restraint.............................1-49
Top Strap....................................................1-50
Top Strap Anchor Location.............................1-52
Lower Anchorages and Top Tethers for
Children (LATCH System)...........................1-54
Securing a Child Restraint Designed for
the LATCH System....................................1-56
Securing a Child Restraint in a
Rear Outside Seat Position.........................1-57
Securing a Child Restraint in a Center Rear
Seat Position (Bench Seat).........................1-58
Securing a Child Restraint in the Right Front
Seat Position............................................1-60
Section 1 Seats and Restraint Systems
1-1
Page 9 of 376
Front Seats
Manual Seats
{CAUTION:
You can lose control of the vehicle if you try to
adjust a manual driver’s seat while the vehicle
is moving. The sudden movement could startle
and confuse you, or make you push a pedal
when you do not want to. Adjust the driver’s
seat only when the vehicle is not moving.
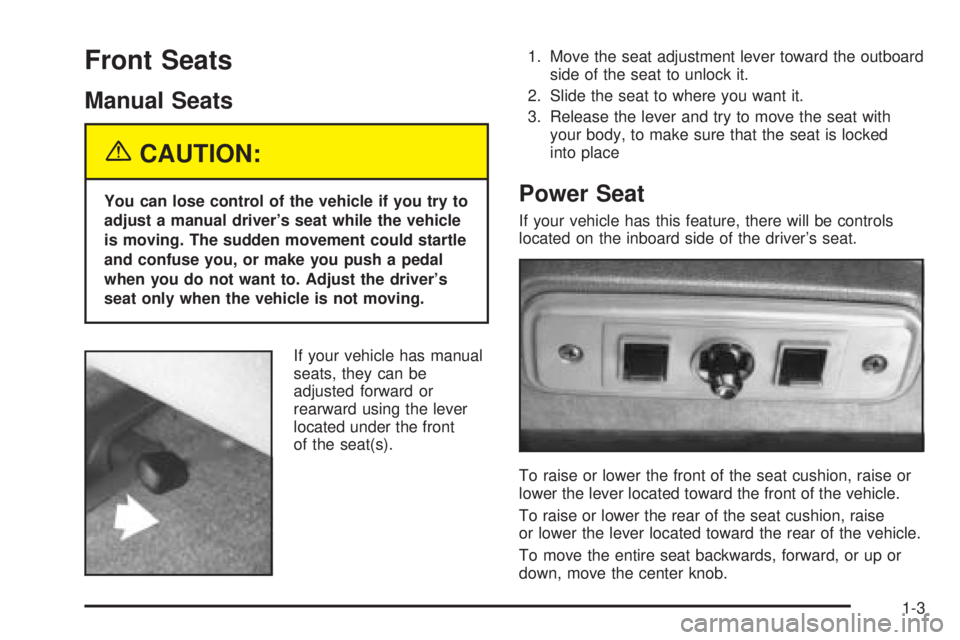
If your vehicle has manual
seats, they can be
adjusted forward or
rearward using the lever
located under the front
of the seat(s).1. Move the seat adjustment lever toward the outboard
side of the seat to unlock it.
2. Slide the seat to where you want it.
3. Release the lever and try to move the seat with
your body, to make sure that the seat is locked
into placePower Seat
If your vehicle has this feature, there will be controls
located on the inboard side of the driver’s seat.
To raise or lower the front of the seat cushion, raise or
lower the lever located toward the front of the vehicle.
To raise or lower the rear of the seat cushion, raise
or lower the lever located toward the rear of the vehicle.
To move the entire seat backwards, forward, or up or
down, move the center knob.
1-3
Page 17 of 376
If you installed the safety belt with the release hole facing
inward (toward the seat), slide the plastic cover up so you
can see the buckle. Disconnect the seat belt. Slide the
cover back down and reinstall the belt correctly.
{CAUTION:
A safety belt that is improperly routed, not
properly attached, or twisted will not provide
the protection needed in a crash. The person
wearing the belt could be seriously injured.
After raising the rear seatback, always check
to be sure that the safety belts are properly
routed and attached, and are not twisted.
Bench Seat
Each bench seat can carry up to three passengers.
They can also be removed to increase storage space.
See “Removing the Rear Seats” following.
Only the third row bench seat can be adjusted forward
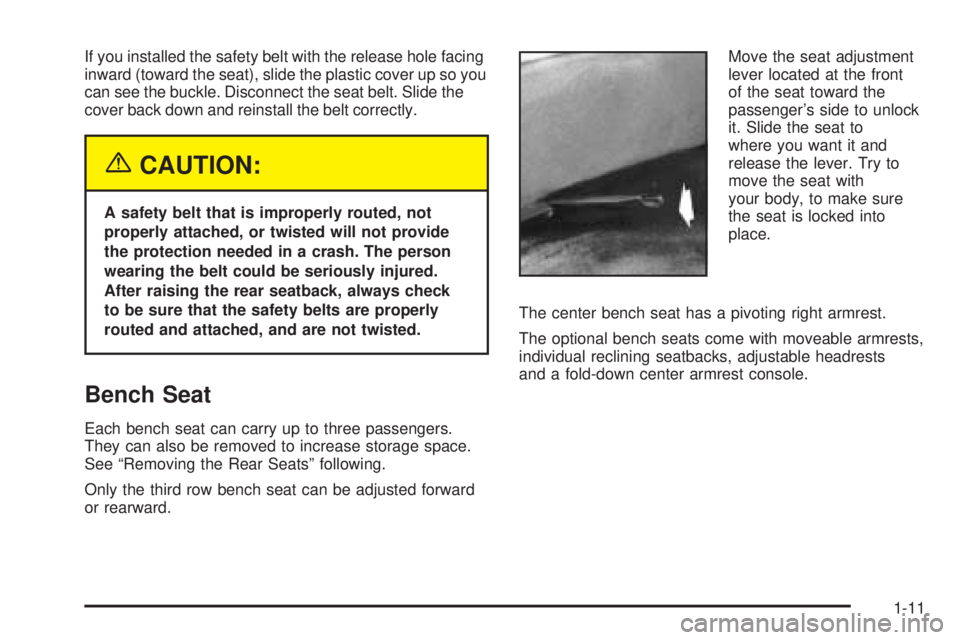
or rearward.Move the seat adjustment
lever located at the front
of the seat toward the
passenger’s side to unlock
it. Slide the seat to
where you want it and
release the lever. Try to
move the seat with
your body, to make sure
the seat is locked into
place.
The center bench seat has a pivoting right armrest.
The optional bench seats come with moveable armrests,
individual reclining seatbacks, adjustable headrests
and a fold-down center armrest console.
1-11
Page 23 of 376
5. If you installed the safety belt with the release hole
facing inward (toward the seat), slide the plastic
cover up so you can see the buckle. Disconnect the
seat belt. Slide the cover back down and reinstall
the belt correctly.
{CAUTION:
A safety belt that is improperly routed, not
properly attached, or twisted will not provide
the protection needed in a crash. The person
wearing the belt could be seriously injured.
After raising the rear seatback, always check
to be sure that the safety belts are properly
routed and attached, and are not twisted.
Bucket Seats
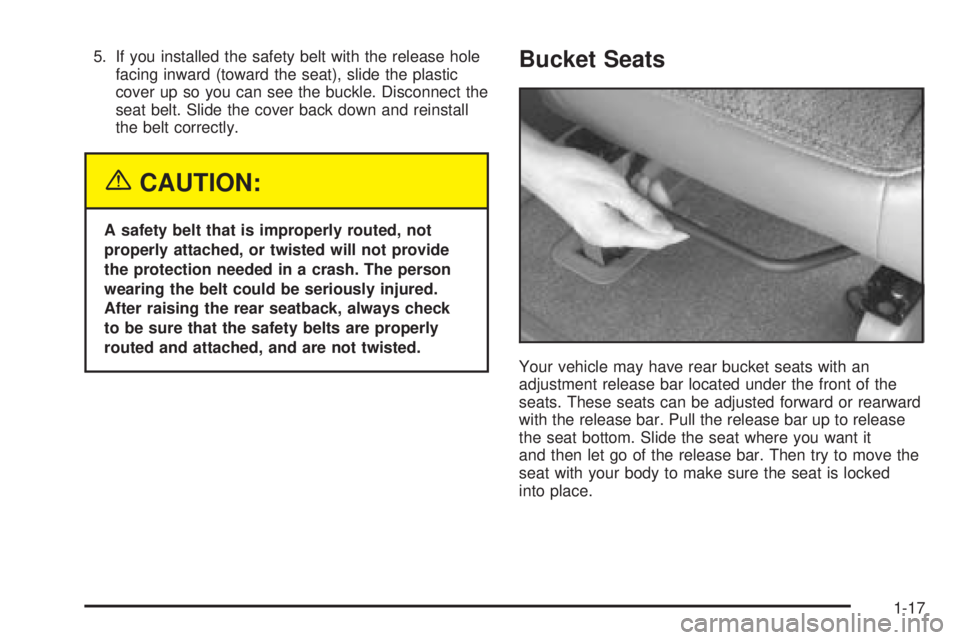
Your vehicle may have rear bucket seats with an
adjustment release bar located under the front of the
seats. These seats can be adjusted forward or rearward
with the release bar. Pull the release bar up to release
the seat bottom. Slide the seat where you want it
and then let go of the release bar. Then try to move the
seat with your body to make sure the seat is locked
into place.
1-17
Page 137 of 376
Notice:Using a razor blade or sharp object to
clear the inside rear window may damage the rear
window defogger. Repairs would not be covered
by your warranty. Do not clear the inside of the rear
window with sharp objects.
Outlet Adjustment
Move the thumbwheel in the center of the outlets up or
down to change the direction of air�ow.
Operation Tips
Clear away any ice, snow or leaves from the air
inlets at the base of the windshield that may
block the �ow of air into your vehicle.
Use of non-GM approved hood de�ectors may
adversely affect the performance of the system.
Keep the path under the front seats clear of objects
to help circulate the air inside of your vehicle more
effectively.
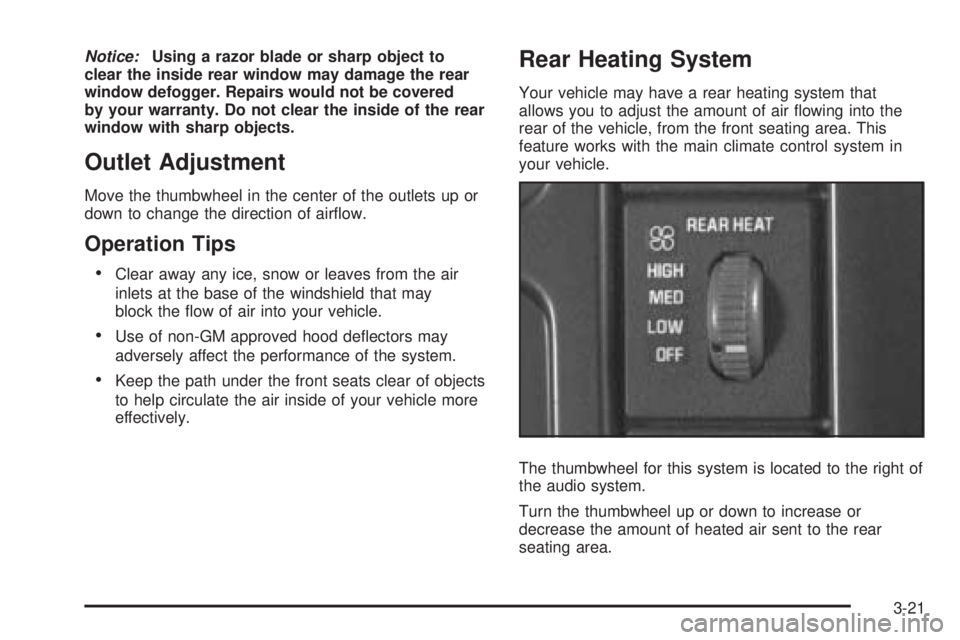
Rear Heating System
Your vehicle may have a rear heating system that
allows you to adjust the amount of air �owing into the
rear of the vehicle, from the front seating area. This
feature works with the main climate control system in
your vehicle.
The thumbwheel for this system is located to the right of
the audio system.
Turn the thumbwheel up or down to increase or
decrease the amount of heated air sent to the rear
seating area.
3-21
Page 139 of 376
To increase or decrease the temperature for the entire
vehicle, use the center knob located on the main
climate control panel.
The air conditioning system on the main climate control
panel must be turned on to direct cooled air to the
rear of the vehicle. If it is not on, then the temperature
in the rear of the vehicle will remain at cabin
temperature.
Be sure to keep the area under the front seats clear of
any objects so that the air inside of your vehicle can
circulate effectively.
For information on how to use the main climate control
system, seeClimate Control System on page 3-19.
For information on ventilation, seeOutlet Adjustment
on page 3-21.
Warning Lights, Gages, and
Indicators
This part describes the warning lights and gages that
may be on your vehicle. The pictures will help you
locate them.Warning lights and gages can signal that something is
wrong before it becomes serious enough to cause
an expensive repair or replacement. Paying attention
to your warning lights and gages could also save you or
others from injury.
Warning lights come on when there may be or is a
problem with one of your vehicle’s functions. As you
will see in the details on the next few pages, some
warning lights come on brie�y when you start the engine
just to let you know they’re working. If you are familiar
with this section, you should not be alarmed when
this happens.
Gages can indicate when there may be or is a problem
with one of your vehicle’s functions. Often gages
and warning lights work together to let you know when
there’s a problem with your vehicle.
When one of the warning lights comes on and stays on
when you are driving, or when one of the gages shows
there may be a problem, check the section that tells
you what to do about it. Please follow this manual’s
advice. Waiting to do repairs can be costly – and even
dangerous. So please get to know your warning lights
and gages. They’re a big help.
3-23
Page 365 of 376
Child Restraints (cont.)
Lower Anchorages and Top Tethers for
Children (LATCH System)..........................1-54
Older Children.............................................1-38
Securing a Child Restraint Designed for
the LATCH System...................................1-56
Securing a Child Restraint in a
Center Rear Seat Position.........................1-58
Securing a Child Restraint in a
Rear Outside Seat Position........................1-57
Securing a Child Restraint in the
Right Front Seat Position..........................1-60
Top Strap...................................................1-50
Top Strap Anchor Location............................1-52
Where to Put the Restraint...........................1-49
Cigarette Lighter.............................................3-18
Cleaning
Aluminum Wheels........................................5-90
Exterior Lamps/Lenses.................................5-88
Fabric/Carpet..............................................5-85
Finish Care.................................................5-88
Glass Surfaces............................................5-87
Instrument Panel.........................................5-87
Interior Plastic Components...........................5-87
Leather......................................................5-87
Tires..........................................................5-90
Underbody Maintenance...............................5-91
Vinyl..........................................................5-86
Washing Your Vehicle...................................5-88Cleaning (cont.)
Weatherstrips..............................................5-88
Windshield and Wiper Blades........................5-89
Climate Control System...................................3-19
Outlet Adjustment........................................3-21
Rear Air Conditioning System........................3-22
Rear Heating System...................................3-21
Comfort Guides, Rear Safety Belt.....................1-35
Compact Spare Tire........................................5-84
Control of a Vehicle.......................................... 4-5
Convenience Net............................................2-38
Coolant
Engine Temperature Gage............................3-29
Heater, Engine............................................2-19
Cooling System..............................................5-30
Cruise Control Lever.......................................3-11
Customer Assistance Information
Courtesy Transportation.................................. 7-8
Customer Assistance for Text
Telephone (TTY) Users............................... 7-4
Customer Assistance Offices........................... 7-4
Customer Satisfaction Procedure..................... 7-2
GM Mobility Reimbursement Program............... 7-6
Reporting Safety Defects to
General Motors........................................7-12
Reporting Safety Defects to the
Canadian Government..............................7-11
Reporting Safety Defects to the
United States Government.........................7-11
3
Page 371 of 376
N
New Vehicle Break-In......................................2-16
Normal Maintenance Replacement Parts...........5-102
O
Odometer......................................................3-25
Odometer, Trip...............................................3-25
Off-Road Recovery..........................................4-11
Oil
Engine.......................................................5-13
Pressure Gage............................................3-33
Older Children, Restraints................................1-38
Online Owner Center........................................ 7-4
Other Warning Devices...................................... 3-6
Outlet Adjustment............................................3-21
Outside
Convex Mirror.............................................2-29
Manual Mirror.............................................2-28
Power Mirrors.............................................2-28
Overhead Console..........................................2-35
Owners, Canadian............................................... ii
P
Park (P)
Shifting Into................................................2-24
Shifting Out of............................................2-25
Parking
Brake........................................................2-23
Over Things That Burn.................................2-26
Part A - Scheduled Maintenance Services............ 6-4
Part B - Owner Checks and Services................6-24
Part C - Periodic Maintenance Inspections..........6-28
Part D - Recommended Fluids and Lubricants....6-29
Part E - Maintenance Record...........................6-31
Passing.........................................................4-11
Passlock
®......................................................2-16
Power
Accessory Outlets........................................3-17
Door Locks.................................................. 2-7
Electrical System.........................................5-94
Retained Accessory (RAP)............................2-18
Seat............................................................ 1-3
Steering Fluid.............................................5-36
Windows....................................................2-15
Programmable Automatic Door Locks.................. 2-7
Programming the HomeLink
®Transmitter...........2-30
9