Flat CHEVROLET ASTRO CARGO VAN 1995 2.G User Guide
[x] Cancel search | Manufacturer: CHEVROLET, Model Year: 1995, Model line: ASTRO CARGO VAN, Model: CHEVROLET ASTRO CARGO VAN 1995 2.GPages: 342, PDF Size: 17.57 MB
Page 193 of 342
Downloaded from www.Manualslib.com manuals search engine A rear blowout, particularly on a curve, acts much like a skid and may
require the same correction you’d use in
a skid. In any rear blowout, remove
your foot from the accelerator pedal. Get the vehicle under control by
steering the way you want the vehicle
to go. It may be very bumpy and
noisy, but
you can still steer. Gently brake to a stop, well off the road if
possible.
If a tire goes flat, the next part shows how to use your jacking equipment
to
change a flat tire safely.
Changing a Flat Tire
If a tire goes flat, avoid further tire and wheel damage by driving slowly to a
level place.
Turn on your hazard warning flashers.
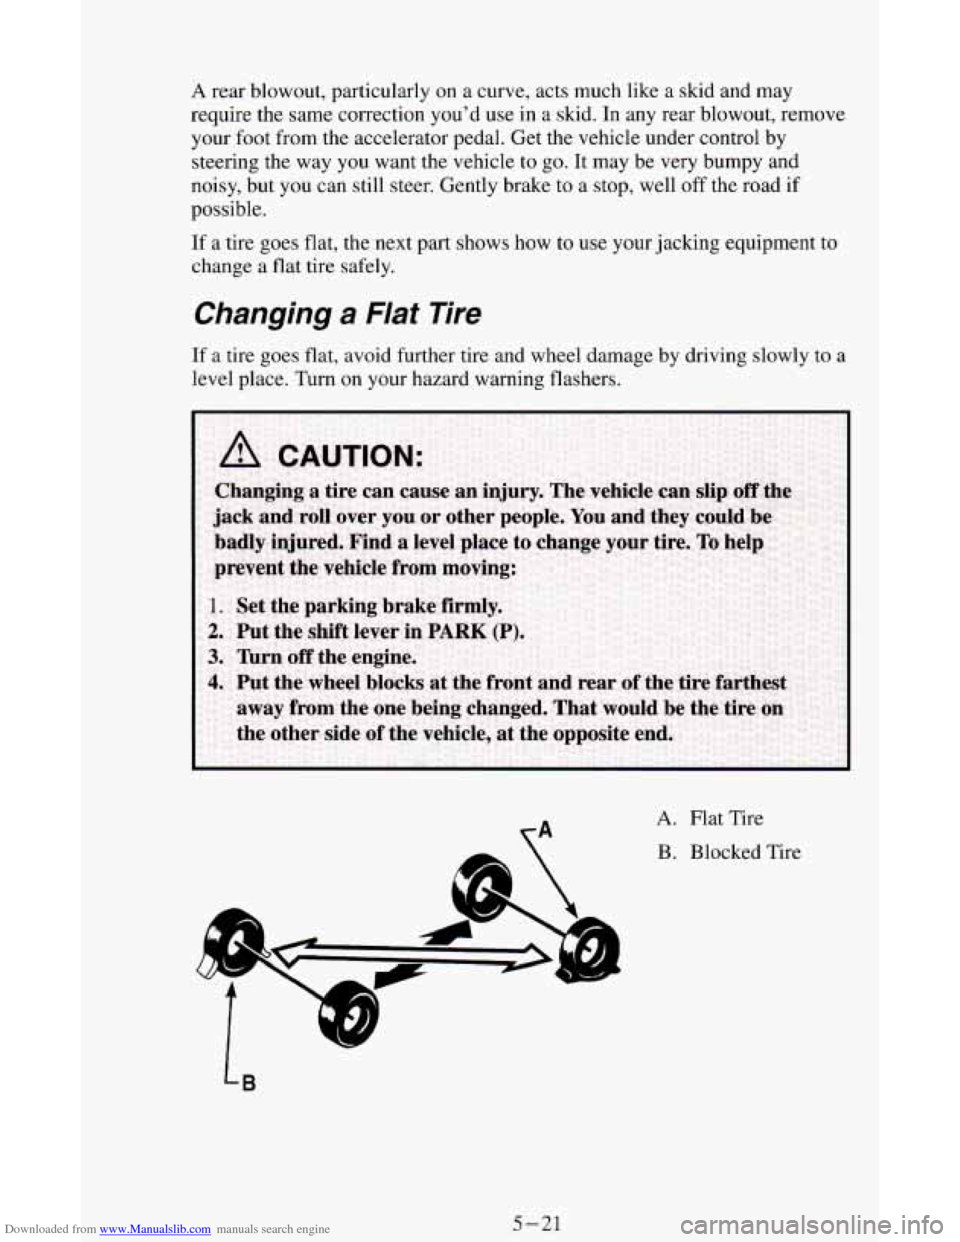
A. Flat Tire
B. Blocked Tire
5-21
Page 197 of 342
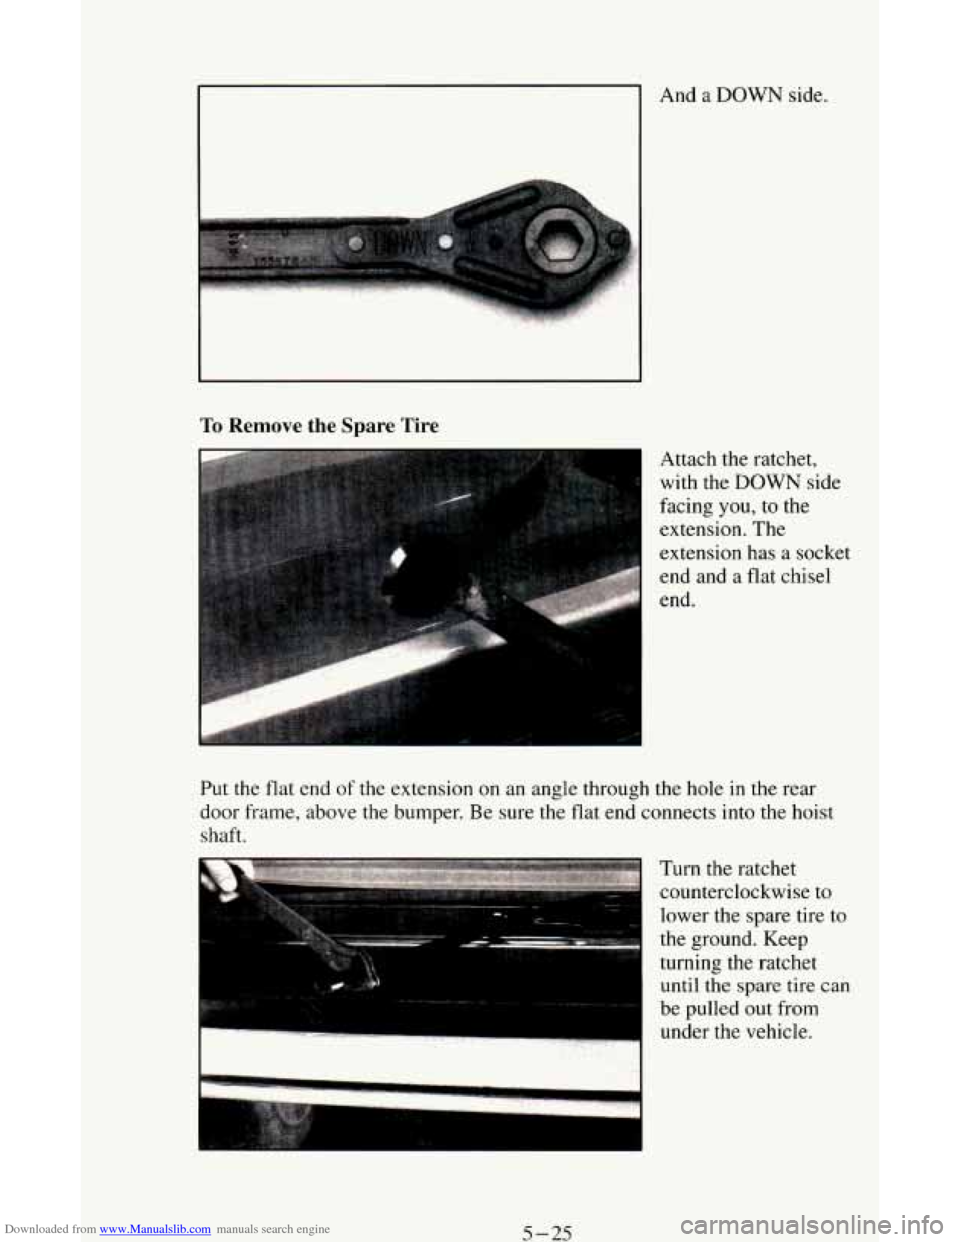
Downloaded from www.Manualslib.com manuals search engine And a DOWN side.
To Remove the Spare Tire
Attach the ratchet,
with the
DOWN side
facing you,
to the
extension. The
extension has a socket
3
Put the flat end of the extension on an angle through the hole in the rear
door frame, above the bumper. Be sure the flat end connects into the hoist
shaft.
Turn the ratchet
counterclockwise to
- lower the spare tire to
the ground, Keep
turning the ratchet
until the spare tire can
be pulled out from
under the vehicle.
5-25
Page 199 of 342
Downloaded from www.Manualslib.com manuals search engine The jack has a bolt on
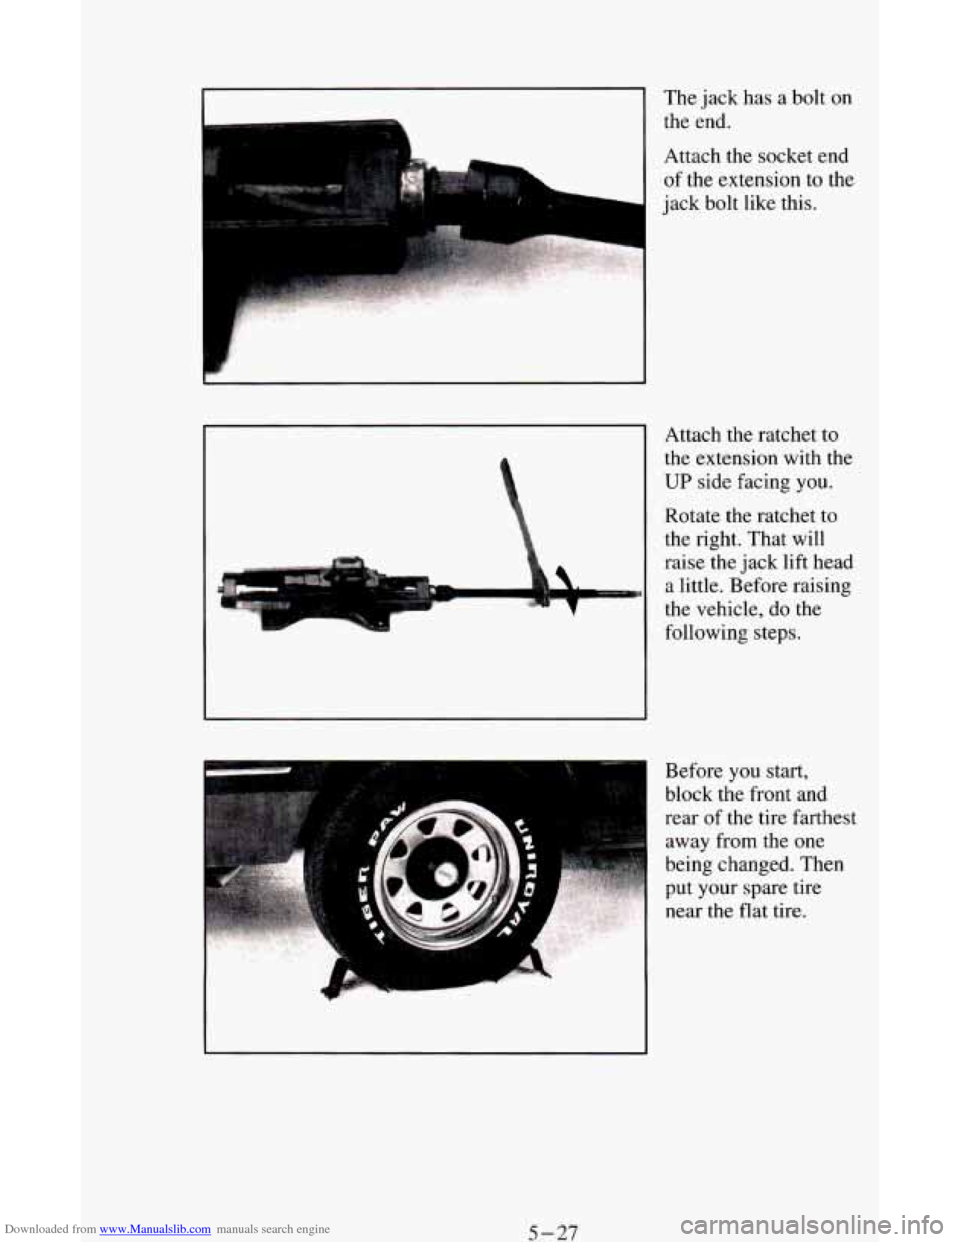
the end.
Attach the socket end
of the extension to the
jack bolt like this.
Attach the ratchet to
the extension with the
UP side facing you.
Rotate the ratchet to
the right. That will
raise the jack lift head
a little. Before raising
the vehicle, do the
following steps.
Before
you start,
block the front and
rear of the tire farthest
away from the one
being changed.
Then
put your spare tire
near the flat tire.
5-27
Page 200 of 342
Downloaded from www.Manualslib.com manuals search engine Hub Caps and Wheel Nut Caps
You will have to take off hub caps or wheel nut caps to reach your wheel
nuts.
i
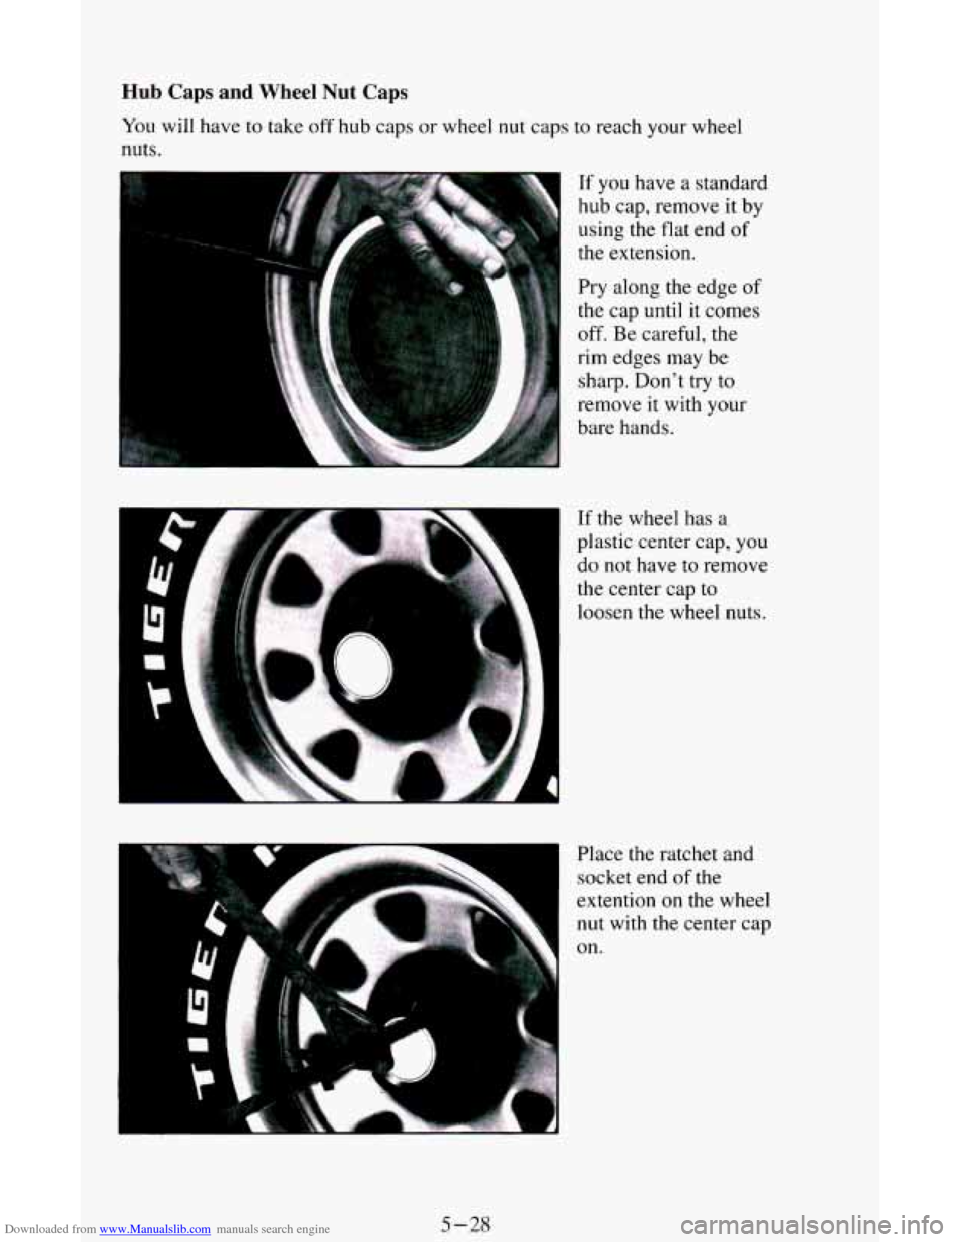
If you have a standard
hub cap, remove it by
using the flat end
of
the extension.
Pry along the edge
of
the cap until it comes
off. Be careful, the
rim edges may be
sharp. Don’t try
to
remove it with your
bare hands.
If the wheel has a
plastic center cap, you
do not have to remove
the center cap to
loosen
the wheel nuts.
Place the ratchet and
socket end
of the
extention on the wheel nut with the center cap
on.
5-28
Page 201 of 342
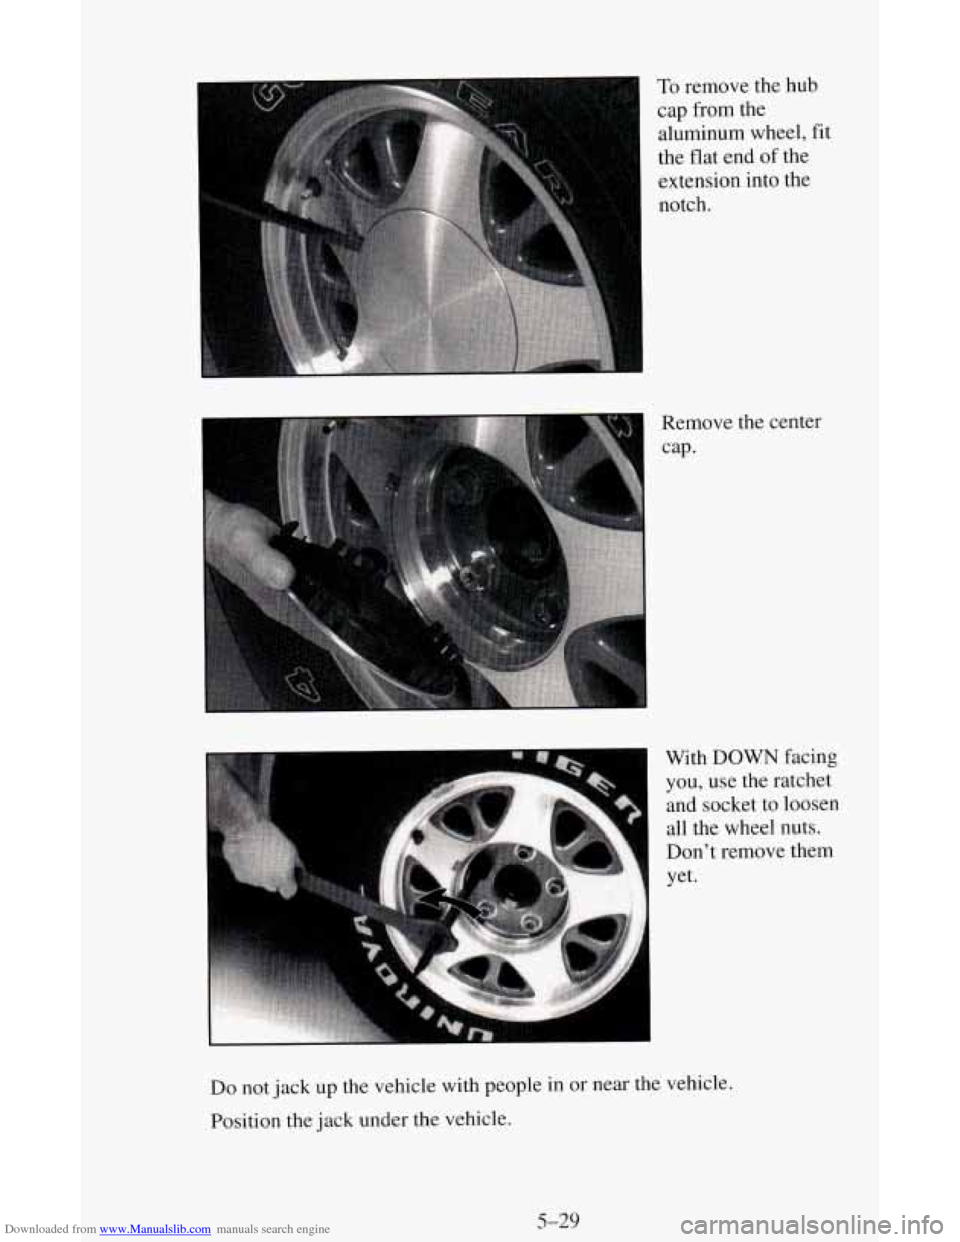
Downloaded from www.Manualslib.com manuals search engine To remove the hub
cap from the
aluminum wheel, fit
the flat end
of the
extension into the
notch.
I cap-
Remove the center
With DOWN facing
you, use the ratchet
and socket to loosen
all the wheel nuts.
Don’t remove them
yet.
Do not jack up the vehicle with people in or near the vehicle.
Position the jack under the vehicle.
5-29
Page 203 of 342
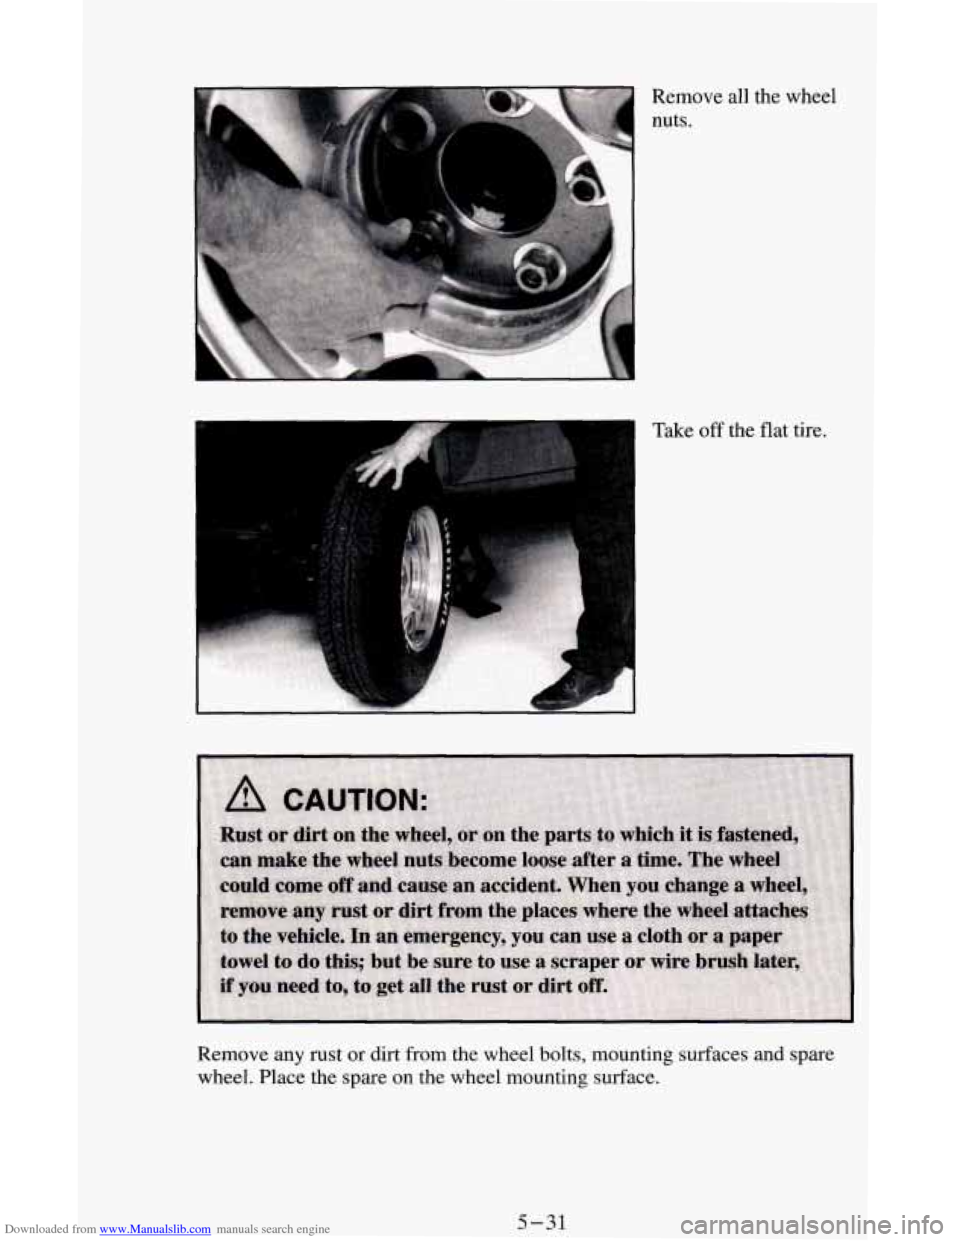
Downloaded from www.Manualslib.com manuals search engine Take off the flat tire.
Remove any rust
or dirt from the wheel bolts, mounting surfaces and spare
wheel. Place the spare on the wheel mounting surface.
5-31
Page 206 of 342
Downloaded from www.Manualslib.com manuals search engine Storing The Jack and Spare Tire
1. Put the tire on the ground at the rear of the vehicle, with the valve stem
pointed down.
2. Pull the retaining bar through the center of the wheel, making sure it is
properly attached. Attach the ratchet, with the UP side facing you, to
the extension.
3. Put the flat end of the extension on an angle through the hole in the rear
door frame, above the bumper. Turn the ratchet clockwise until the tire
is against the underside
of the vehicle.
You will hear two“c1icks” when the tire is up all the way. Try to move
the tire with your hands to make sure it is securely in place.
Return the jacking equipment to the proper location. Secure the items and
replace the jack cover.
Compact Spare Tire
Although the compact spare was fully inflated when your vehicle was new,
it can lose air after
a time. Check the inflation pressure regularly. It should
be
60 psi (420 kPa). After installing the compact spare on your vehicle, you
should stop as soon as possible and make sure your spare tire is correctly
inflated. The compact spare is made to perform well at posted speed limits
for distances up to
3,000 miles (5 000 km), so you can finish your trip and
have your full-size tire repaired or replaced where you want. Of course, it’s
best to replace your spare with a full-size tire as soon as you can. Your
spare will last longer and be in good shape in case you need
it again.
I NOTICE:
Don’t take your compact spare through an automatic car wash \
with guide rails. The compact spare can get caught
on the rails.
That can damage the tire and wheel, and maybe other parts
of
your vehicle.
Don’t use your compact spare on some other vehicle.
5-34
Page 250 of 342
Downloaded from www.Manualslib.com manuals search engine lnflation - Tire Pressure
The CertificatiodTire label which is on the rear edge of the driver’s door,
shows the correct inflation pressures for your tires, when they’re cold.
“Cold” means your vehicle has been sitting for at least three hours or driven
no more than a mile.
NOTICE:
Don’t let anyone tell you that underinflation or overinflation is
all right. It’s not. If your tires don’t have enough air
(underinflation) you can get:
Too much flexing
Too much heat
Tire overloading
Bad wear
Bad handling
Bad fuel economy.
If your tires have too much air (overinflation), you can get:
Unusual wear
Bad handling
Rough ride
Needless damage from road hazards.
When to Check
Check your tires once a month or more.
Don’t forget your compact spare tire. It should be at
60 psi (420 kPa).
How to Check
Use a good quality pocket-type gage to check tire pressure. Simply looking
at the tires will not tell you the pressure, especially if you have radial tires
- which may look properly inflated even if they’re underinflated.
If your tires
have valve caps, be sure to put them back on. They help prevent
leaks by keeping
out dirt and moisture.
6-42
Page 251 of 342
Downloaded from www.Manualslib.com manuals search engine Tire lnspection and Rotation
Tires should be inspected every 6,000 to 8,000 miles ( 10 000 to 13 000 km)
for any signs of unusual wear. If unusual wear
is present, rotate your tires as
soon
as possible and check wheel alignment. Also check for damaged tires
or wheels. See “When It’s Time for New Tires” and “Wheel Replacement”
later
in this section for more information.
The purpose
of regular rotation is to achieve more uniform wear for all tires
on the vehicle. The first rotation is the most important. See “Scheduled
Maintenance Services”
in the Index for scheduled rotation intervals.
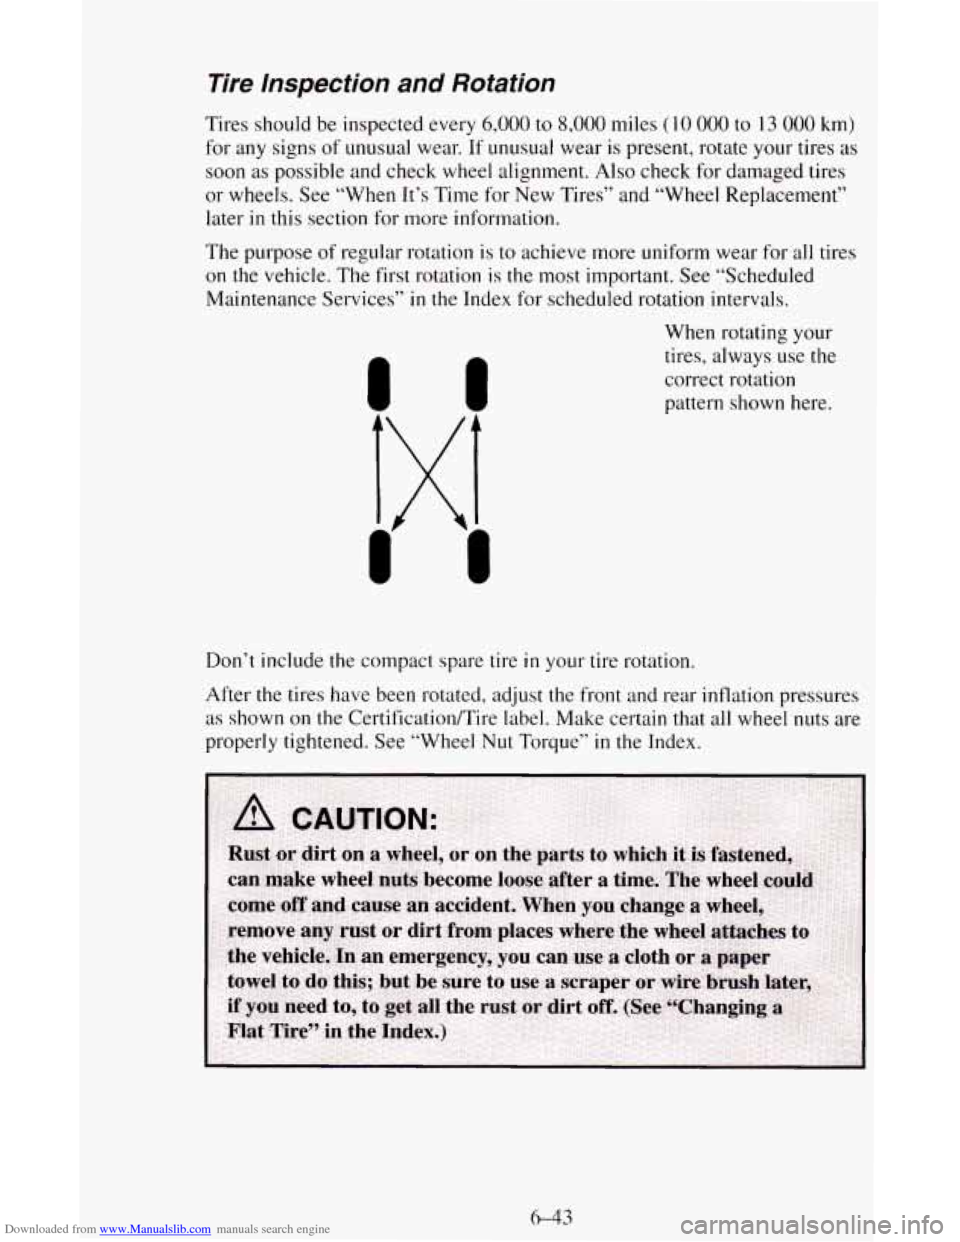
When rotating your tires, always use
the
correct rotation
pattern shown here.
Don’t include the compact spare tire
in your tire rotation.
After the tires have been rotated, adjust the front and rear inflation pressures
as shown on
the Certification/Tire label. Make certain that all wheel nuts are
properly tightened. See “Wheel
Nut Torque” in the Index.
6-43
Page 254 of 342
Downloaded from www.Manualslib.com manuals search engine sudden tire failure. The grade C corresponds to a level of performance
which all passenger car tires must meet under the Federal Motor Vehicle
Safety Standard
No. 109. Grades B and A represent higher levels of
performance on the laboratory test wheel than the minimum required by
law.
Warning:
The temperature grade for this tire is established for a tire that is
properly inflated and not overloaded. Excessive speed, underinflation, or
excessive loading, either separately or in combination, can cause heat
buildup and possible tire failure.
These grades are molded on the sidewalls of passenger car tires.
While the tires available as standard or optional equipment
on General
Motors vehicles may vary with respect to these grades, all such tires meet
General Motors performance standards and have been approved for use on
General Motors vehicles. All passenger type
(P Metric) tires must conform
to Federal safety requirements in addition
to these grades.
Wheel Alignment and Tire Balance
The wheels on your vehicle were aligned and balanced carefully at the
factory
to give you the longest tire life and best overall performance.
In most cases, you will
not need to have your wheels aligned again.
However, if
you notice unusual tire wear or your vehicle pulling one way or
the other, the alignment may need to be reset.
If you notice your vehicle
vibrating when driving on a smooth road, your wheels may need
to be
rebalanced.
Wheel Replacement
Replace any wheel that is bent, cracked, or badly rusted or corroded. If
wheel nuts keep coming loose, the wheel, wheel bolts, and wheel nuts
should be replaced. If the wheel leaks air, replace it (except some aluminum
wheels, which can sometimes be repaired). See your GM dealer if any of
these conditions exist.
Your dealer will know the kind
of wheel you need.
Each new wheel should have the same load carrying capacity, diameter,
width, offset, and
be mounted the same way as the one it replaces.
6-46