oil pressure CHEVROLET ASTRO CARGO VAN 2005 2.G Owners Manual
[x] Cancel search | Manufacturer: CHEVROLET, Model Year: 2005, Model line: ASTRO CARGO VAN, Model: CHEVROLET ASTRO CARGO VAN 2005 2.GPages: 370, PDF Size: 2.33 MB
Page 113 of 370
Instrument Panel Overview...............................3-4
Hazard Warning Flashers................................3-6
Other Warning Devices...................................3-6
Horn.............................................................3-6
Tilt Wheel.....................................................3-6
Turn Signal/Multifunction Lever.........................3-7
Turn and Lane-Change Signals........................3-8
Headlamp High/Low-Beam Changer..................3-9
Flash-to-Pass.................................................3-9
Windshield Wipers..........................................3-9
Windshield Washer.......................................3-10
Cruise Control..............................................3-11
Exterior Lamps.............................................3-14
Headlamps on Reminder................................3-15
Daytime Running Lamps (DRL).......................3-15
Automatic Headlamp System..........................3-16
Instrument Panel Brightness...........................3-17
Dome Lamps...............................................3-17
Entry Lighting...............................................3-17
Exit Lighting.................................................3-17
Battery Run-Down Protection..........................3-18
Accessory Power Outlets...............................3-18
Ashtrays and Cigarette Lighter........................3-18Climate Controls............................................3-19
Climate Control System.................................3-19
Outlet Adjustment.........................................3-21
Rear Heating System....................................3-22
Rear Air Conditioning System.........................3-22
Warning Lights, Gages, and Indicators............3-24
Instrument Panel Cluster................................3-25
Speedometer and Odometer...........................3-26
Trip Odometer..............................................3-26
Safety Belt Reminder Light.............................3-26
Airbag Readiness Light..................................3-27
Charging System Light..................................3-28
Voltmeter Gage............................................3-28
Brake System Warning Light..........................3-29
Anti-Lock Brake System Warning Light.............3-30
Engine Coolant Temperature Gage..................3-30
Malfunction Indicator Lamp.............................3-31
Oil Pressure Gage........................................3-34
Security Light...............................................3-35
Highbeam On Light.......................................3-35
Service All-Wheel Drive Light.........................3-35
Tow/Haul Mode Light....................................3-36
Check Gages Warning Light...........................3-36
Fuel Gage...................................................3-37
Low Fuel Warning Light.................................3-37
Section 3 Instrument Panel
3-1
Page 146 of 370
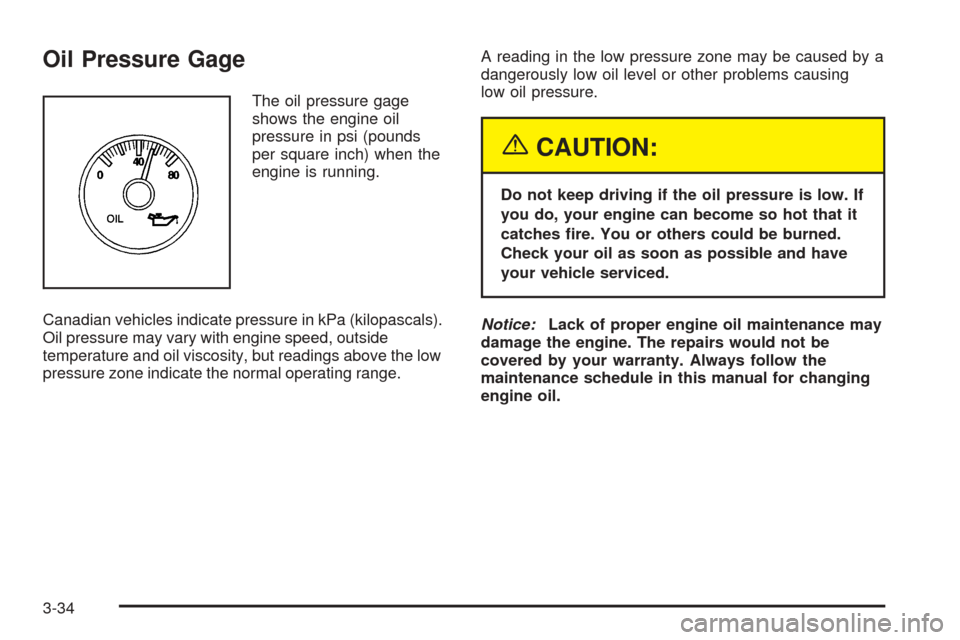
Oil Pressure Gage
The oil pressure gage
shows the engine oil
pressure in psi (pounds
per square inch) when the
engine is running.
Canadian vehicles indicate pressure in kPa (kilopascals).
Oil pressure may vary with engine speed, outside
temperature and oil viscosity, but readings above the low
pressure zone indicate the normal operating range.A reading in the low pressure zone may be caused by a
dangerously low oil level or other problems causing
low oil pressure.
{CAUTION:
Do not keep driving if the oil pressure is low. If
you do, your engine can become so hot that it
catches �re. You or others could be burned.
Check your oil as soon as possible and have
your vehicle serviced.
Notice:Lack of proper engine oil maintenance may
damage the engine. The repairs would not be
covered by your warranty. Always follow the
maintenance schedule in this manual for changing
engine oil.
3-34
Page 148 of 370
The SERVICE AWD light comes on to indicate that
there may be a problem with the drive system and
service is required. Malfunctions can be indicated by the
system before any problem is apparent, which may
prevent serious damage to the vehicle. This system is
also designed to assist your service technician in
correctly diagnosing a malfunction.
Tow/Haul Mode Light
This light should come on
when the tow/haul mode
has been selected.
For more information, see “Tow/Haul Mode” inTowing a
Trailer on page 4-34.
Check Gages Warning Light
The CHECK GAGES light
will come on brie�y when
you are starting the engine.
If the light comes on and stays on while you are driving,
check your coolant temperature and engine oil
pressure gages to see if they are in the warning zones.
3-36
Page 184 of 370
Reduce your speed according to your speedometer, not
to your sense of motion. After driving for any distance
at higher speeds, you may tend to think you are
going slower than you actually are.
Before Leaving on a Long Trip
Make sure you are ready. Try to be well rested. If you
must start when you are not fresh — such as after
a day’s work — do not plan to make too many miles that
�rst part of the journey. Wear comfortable clothing
and shoes you can easily drive in.
Is your vehicle ready for a long trip? If you keep it
serviced and maintained, it is ready to go. If it needs
service, have it done before starting out. Of course, you
will �nd experienced and able service experts in GM
dealerships all across North America. They will be ready
and willing to help if you need it.Here are some things you can check before a trip:
Windshield Washer Fluid:Is the reservoir full?
Are all windows clean inside and outside?
Wiper Blades:Are they in good shape?
Fuel, Engine Oil, Other Fluids:Have you checked
all levels?
Lamps:Are they all working? Are the lenses clean?
Tires:They are vitally important to a safe,
trouble-free trip. Is the tread good enough for
long-distance driving? Are the tires all in�ated to the
recommended pressure?
Weather Forecasts:What is the weather outlook
along your route? Should you delay your trip a
short time to avoid a major storm system?
Maps:Do you have up-to-date maps?
4-20
Page 209 of 370
Service............................................................5-3
Doing Your Own Service Work.........................5-4
Adding Equipment to the Outside of Your
Vehicle......................................................5-5
Fuel................................................................5-5
Gasoline Octane............................................5-5
Gasoline Speci�cations....................................5-5
California Fuel...............................................5-5
Additives.......................................................5-6
Fuels in Foreign Countries...............................5-6
Filling the Tank..............................................5-7
Filling a Portable Fuel Container.......................5-9
Checking Things Under the Hood....................5-10
Hood Release..............................................5-10
Engine Compartment Overview.......................5-12
Engine Oil...................................................5-13
Engine Cover...............................................5-17
Engine Air Cleaner/Filter................................5-21
Automatic Transmission Fluid.........................5-23
Engine Coolant.............................................5-25
Radiator Pressure Cap..................................5-28
Engine Overheating.......................................5-28
Cooling System............................................5-30
Engine Fan Noise.........................................5-34Power Steering Fluid.....................................5-35
Windshield Washer Fluid................................5-36
Brakes........................................................5-37
Battery........................................................5-40
Jump Starting...............................................5-41
All-Wheel Drive..............................................5-45
Rear Axle.......................................................5-46
Front Axle......................................................5-47
Bulb Replacement..........................................5-48
Halogen Bulbs..............................................5-48
Headlamps and Sidemarker Lamps.................5-48
Front Turn Signal and Parking Lamps..............5-52
Taillamps, Turn Signal, Stoplamps and
Back-up Lamps.........................................5-52
Replacement Bulbs.......................................5-54
Windshield Wiper Blade Replacement..............5-54
Tires..............................................................5-55
Tire Sidewall Labelling...................................5-56
Tire Terminology and De�nitions.....................5-59
In�ation - Tire Pressure.................................5-61
Tire Inspection and Rotation...........................5-63
When It Is Time for New Tires.......................5-64
Buying New Tires.........................................5-65
Section 5 Service and Appearance Care
5-1
Page 238 of 370
Cooling System
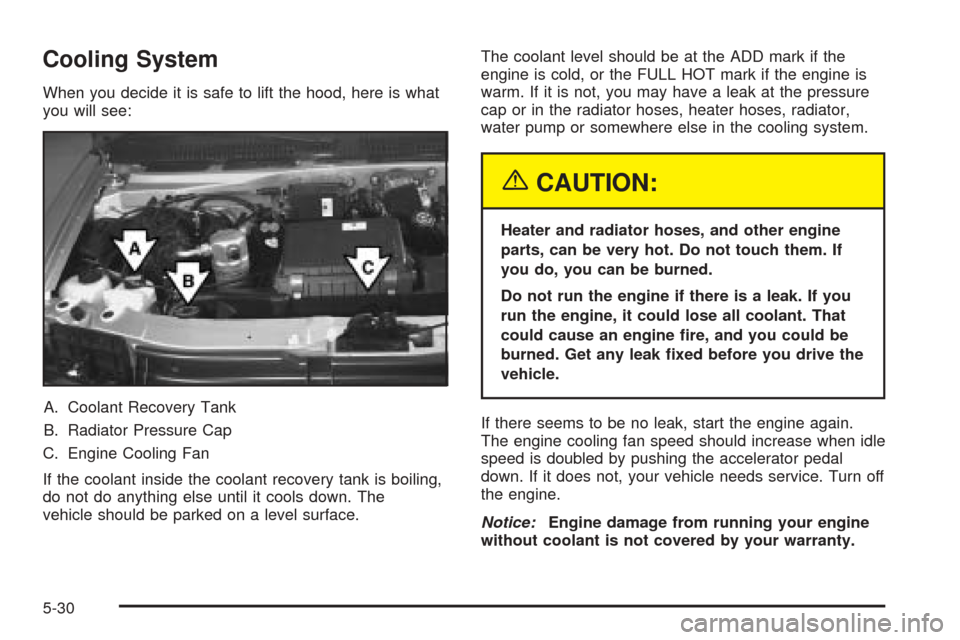
When you decide it is safe to lift the hood, here is what
you will see:
A. Coolant Recovery Tank
B. Radiator Pressure Cap
C. Engine Cooling Fan
If the coolant inside the coolant recovery tank is boiling,
do not do anything else until it cools down. The
vehicle should be parked on a level surface.The coolant level should be at the ADD mark if the
engine is cold, or the FULL HOT mark if the engine is
warm. If it is not, you may have a leak at the pressure
cap or in the radiator hoses, heater hoses, radiator,
water pump or somewhere else in the cooling system.
{CAUTION:
Heater and radiator hoses, and other engine
parts, can be very hot. Do not touch them. If
you do, you can be burned.
Do not run the engine if there is a leak. If you
run the engine, it could lose all coolant. That
could cause an engine �re, and you could be
burned. Get any leak �xed before you drive the
vehicle.
If there seems to be no leak, start the engine again.
The engine cooling fan speed should increase when idle
speed is doubled by pushing the accelerator pedal
down. If it does not, your vehicle needs service. Turn off
the engine.
Notice:Engine damage from running your engine
without coolant is not covered by your warranty.
5-30
Page 267 of 370
(D) Construction Code:A letter code is used to
indicate the type of ply construction in the tire. The letter
R means radial ply construction; the letter D means
diagonal or bias ply construction; and the letter B means
belted-bias ply construction.
(E) Rim Diameter:Diameter of the wheel in inches.
(F) Service Description:These characters represent
the load range and speed rating of the tire. The load
index represents the load carry capacity a tire is certi�ed
to carry. The load index can range from 1 to 279. The
speed rating is the maximum speed a tire is certi�ed
to carry a load. Speed ratings range from A to Z.
Tire Terminology and De�nitions
Air Pressure:The amount of air inside the tire pressing
outward on each square inch of the tire. Air pressure
is expressed in pounds per square inch (psi) or
kilopascal (kPa).
Accessory Weight:This means the combined weight
of optional accessories. Some examples of optional
accessories are, automatic transmission, power steering,
power brakes, power windows, power seats, and air
conditioning.
Aspect Ratio:The relationship of a tire’s height
to its width.Belt:A rubber coated layer of cords that is located
between the plies and the tread. Cords may be made
from steel or other reinforcing materials.
Bead:The tire bead contains steel wires wrapped by
steel cords that hold the tire onto the rim.
Bias Ply Tire:A pneumatic tire in which the plies are
laid at alternate angles less than 90 degrees to the
centerline of the tread.
Cold In�ation Pressure:The amount of air pressure in
a tire, measured in pounds per square inch (psi) or
kilopascals (kPa) before a tire has built up heat
from driving. SeeIn�ation - Tire Pressure on page 5-61.
Curb Weight:This means the weight of a motor
vehicle with standard and optional equipment including
the maximum capacity of fuel, oil and coolant, but
without passengers and cargo.
DOT Markings:A code molded into the sidewall of a
tire signifying that the tire is in compliance with the U.S.
Department of Transportation (DOT) motor vehicle
safety standards. The DOT code includes the Tire
Identi�cation Number (TIN), an alphanumeric designator
which can also identify the tire manufacturer, production
plant, brand and date of production.
GVWR:Gross Vehicle Weight Rating, seeLoading
Your Vehicle on page 4-28.
5-59
Page 292 of 370
Do not clean your vehicle using the following cleaners
or techniques:
Never use a knife or any other sharp object to
remove a soil from any interior surface.
Never use a stiff brush. It can cause damage to
your vehicle’s interior surfaces.
Never apply heavy pressure or rub aggressively
with a cleaning cloth. Use of heavy pressure
can damage your interior and does not improve the
effectiveness of soil removal.
Use only mild, neutral-pH soaps. Avoid laundry
detergents or dishwashing soaps with degreasers.
Using too much soap will leave a residue that
leaves streaks and attracts dirt. For liquid cleaners,
about 20 drops per gallon (3.78 L) of water is a
good guide.
Do not heavily saturate your upholstery while
cleaning.
Damage to your vehicle’s interior may result from
the use of many organic solvents such as naptha,
alcohol, etc.
Fabric/Carpet
Use a vacuum cleaner with a soft brush attachment
frequently to remove dust and loose dirt. A canister
vacuum with a beater bar in the nozzle may only be used
on �oor carpet and carpeted �oor mats. For soils, always
try to remove them �rst with plain water or club soda.
Before cleaning, gently remove as much of the soil as
possible using one of the following techniques:
For liquids: gently blot the remaining soil with a paper
towel. Allow the soil to absorb into the paper towel
until no more can be removed.
For solid dry soils: remove as much as possible and
then vacuum.
To clean, use the following instructions:
1. Saturate a lint-free, clean white cloth with water or
club soda.
2. Wring the cloth to remove excess moisture.
3. Start on the outside edge of the soil and gently rub
toward the center. Continue cleaning, using a clean
area of the cloth each time it becomes soiled.
4. Continue to gently rub the soiled area until the
cleaning cloth remains clean.
5. If the soil is not completely removed, use a mild
soap solution and repeat the cleaning process
that was used with plain water.
5-84
Page 305 of 370
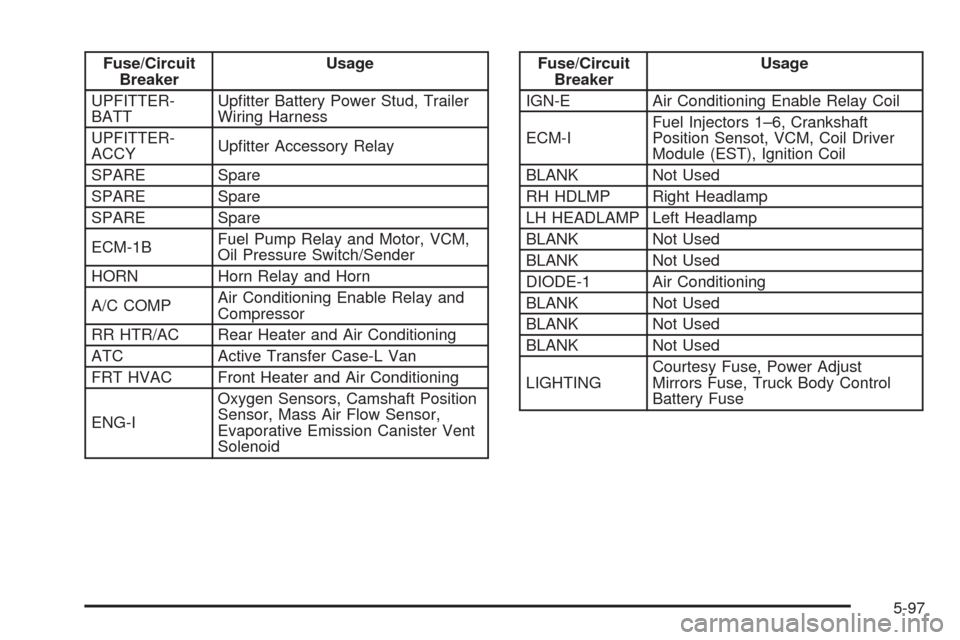
Fuse/Circuit
BreakerUsage
UPFITTER-
BATTUp�tter Battery Power Stud, Trailer
Wiring Harness
UPFITTER-
ACCYUp�tter Accessory Relay
SPARE Spare
SPARE Spare
SPARE Spare
ECM-1BFuel Pump Relay and Motor, VCM,
Oil Pressure Switch/Sender
HORN Horn Relay and Horn
A/C COMPAir Conditioning Enable Relay and
Compressor
RR HTR/AC Rear Heater and Air Conditioning
ATC Active Transfer Case-L Van
FRT HVAC Front Heater and Air Conditioning
ENG-IOxygen Sensors, Camshaft Position
Sensor, Mass Air Flow Sensor,
Evaporative Emission Canister Vent
SolenoidFuse/Circuit
BreakerUsage
IGN-E Air Conditioning Enable Relay Coil
ECM-IFuel Injectors 1–6, Crankshaft
Position Sensot, VCM, Coil Driver
Module (EST), Ignition Coil
BLANK Not Used
RH HDLMP Right Headlamp
LH HEADLAMP Left Headlamp
BLANK Not Used
BLANK Not Used
DIODE-1 Air Conditioning
BLANK Not Used
BLANK Not Used
BLANK Not Used
LIGHTINGCourtesy Fuse, Power Adjust
Mirrors Fuse, Truck Body Control
Battery Fuse
5-97
Page 325 of 370
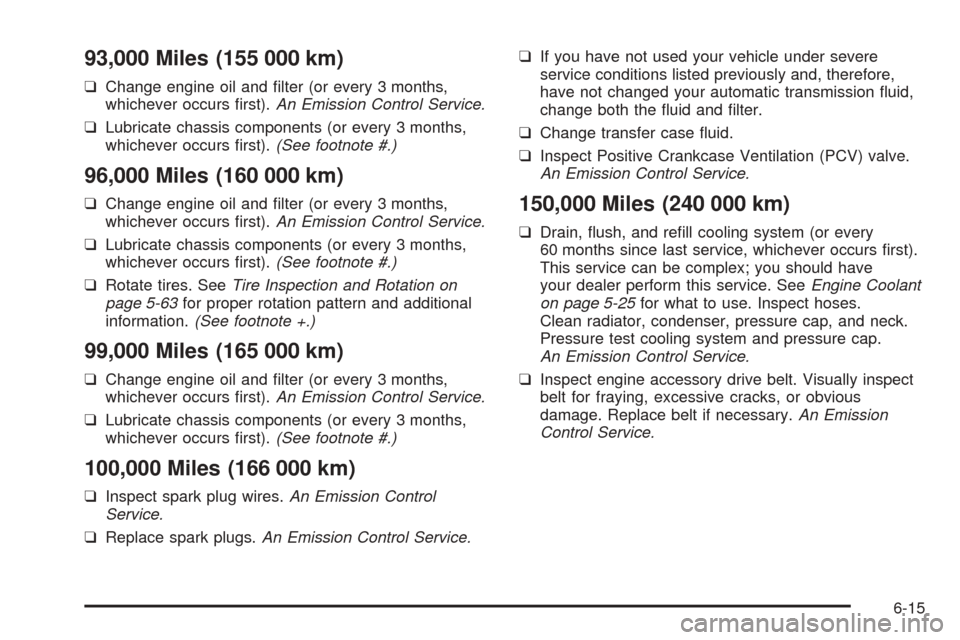
93,000 Miles (155 000 km)
❑Change engine oil and �lter (or every 3 months,
whichever occurs �rst).An Emission Control Service.
❑Lubricate chassis components (or every 3 months,
whichever occurs �rst).(See footnote #.)
96,000 Miles (160 000 km)
❑Change engine oil and �lter (or every 3 months,
whichever occurs �rst).An Emission Control Service.
❑Lubricate chassis components (or every 3 months,
whichever occurs �rst).(See footnote #.)
❑Rotate tires. SeeTire Inspection and Rotation on
page 5-63for proper rotation pattern and additional
information.(See footnote +.)
99,000 Miles (165 000 km)
❑Change engine oil and �lter (or every 3 months,
whichever occurs �rst).An Emission Control Service.
❑Lubricate chassis components (or every 3 months,
whichever occurs �rst).(See footnote #.)
100,000 Miles (166 000 km)
❑Inspect spark plug wires.An Emission Control
Service.
❑Replace spark plugs.An Emission Control Service.❑If you have not used your vehicle under severe
service conditions listed previously and, therefore,
have not changed your automatic transmission �uid,
change both the �uid and �lter.
❑Change transfer case �uid.
❑Inspect Positive Crankcase Ventilation (PCV) valve.
An Emission Control Service.
150,000 Miles (240 000 km)
❑Drain, �ush, and re�ll cooling system (or every
60 months since last service, whichever occurs �rst).
This service can be complex; you should have
your dealer perform this service. SeeEngine Coolant
on page 5-25for what to use. Inspect hoses.
Clean radiator, condenser, pressure cap, and neck.
Pressure test cooling system and pressure cap.
An Emission Control Service.
❑Inspect engine accessory drive belt. Visually inspect
belt for fraying, excessive cracks, or obvious
damage. Replace belt if necessary.An Emission
Control Service.
6-15