transmission CHEVROLET AVALANCHE 2007 2.G User Guide
[x] Cancel search | Manufacturer: CHEVROLET, Model Year: 2007, Model line: AVALANCHE, Model: CHEVROLET AVALANCHE 2007 2.GPages: 618, PDF Size: 3.25 MB
Page 135 of 618
Shifting Into Four-Wheel Drive Low
When Four-Wheel Low is engaged, vehicle
speed should be kept below 45 mph. Extended
high-speed operation in 4L may damage or
shorten the life of the drivetrain.
To shift to the Four-Wheel Drive Low position, the
ignition must be in RUN and the vehicle must
be stopped or moving less than 3 mph (5 km/h)
with the transmission in NEUTRAL (N). The
preferred method for shifting into Four-Wheel Drive
Low is to have your vehicle moving 1 to 2 mph
(1.6 to 3.2 km/h). Turn the knob to the Four-Wheel
Drive Low position. You must wait for the
Four-Wheel Drive Low indicator light to stop
�ashing and remain on before shifting your
transmission in gear.Notice:Shifting the transmission into gear
before the Four-Wheel Drive Low indicator light
has stopped �ashing could damage the
transfer case. To help avoid damaging your
vehicle, always wait for the Four-Wheel
Drive Low indicator light to stop �ashing
before shifting the transmission into gear.
The vehicle may have signi�cant engagement noise
and bump when shifting between Four-Wheel Drive
Low and Four-Wheel Drive High ranges or from
NEUTRAL while the engine is running.
If the knob is turned to the Four-Wheel Drive Low
position when your vehicle is in gear and/or
moving, the Four-Wheel Drive Low indicator light
will �ash for 30 seconds and not complete the
shift unless your vehicle is moving less than 3 mph
(5 km/h) and the transmission is in NEUTRAL (N).
After 30 seconds the transfer case will shift to
Four-Wheel Drive High mode.
135
Page 136 of 618
Shifting Out of Four-Wheel Drive Low
To shift from Four-Wheel Drive Low to Four-Wheel
Drive High, AUTO, or Two-Wheel Drive High, your
vehicle must be stopped or moving less than 3 mph
(5 km/h) with the transmission in NEUTRAL (N) and
the ignition in RUN. The preferred method for
shifting out of Four-Wheel Drive Low is to have your
vehicle moving 1 to 2 mph (1.6 to 3.2 km/h). Turn
the knob to the Four-Wheel Drive High, AUTO, or
Two-Wheel Drive High position. You must wait for
the Four-Wheel Drive High, AUTO, or Two-Wheel
Drive High indicator light to stop �ashing and
remain on before shifting your transmission
into gear.
Notice:Shifting the transmission into gear
before the Four-Wheel Drive Low indicator light
has stopped �ashing could damage the
transfer case. To help avoid damaging your
vehicle, always wait for the Four-Wheel
Drive Low indicator light to stop �ashing
before shifting the transmission into gear.
The vehicle may have signi�cant engagement noise
and bump when shifting between Four-Wheel Drive
Low and Four-Wheel Drive High ranges or from
NEUTRAL while the engine is running.If the knob is turned to the Four-Wheel Drive High,
AUTO, or Two-Wheel Drive High switch position
when your vehicle is in gear and/or moving,
the Four-Wheel Drive High, AUTO or Two-Wheel
Drive High indicator light will �ash for 30 seconds
but will not complete the shift unless your
vehicle is moving less than 3 mph (5 km/h) and
the transmission is in NEUTRAL (N).
Shifting into NEUTRAL
To shift the transfer case to NEUTRAL do the
following:
1. Make sure the vehicle is parked so that it will
not roll.
2. Set the parking brake and apply the regular
brake pedal. SeeParking Brake on page 138
for more information.
3. Start the vehicle or turn the ignition to RUN.
4. Put the transmission in NEUTRAL (N).
5. Shift the transfer case to Two-Wheel
Drive High.
136
Page 137 of 618
6. Turn the transfer case dial clockwise to
NEUTRAL till it stops and hold it for
10 seconds. Then slowly release the dial to
the four low position. The NEUTRAL light will
come on when the transfer case shift to
NEUTRAL is complete.
7. If the engine is running, verify that the
transmission is in NEUTRAL (N) by shifting
the transmission to REVERSE (R) for
one second, then shift the transmission to
DRIVE (D) for one second.
8. Turn the ignition to ACCESSORY, which will
turn the engine off.
9. Place the transmission shift lever in PARK (P).
10. Release the parking brake prior to moving
the vehicle.
11. Turn the ignition to LOCK.
Shifting Out of NEUTRAL
To shift out of NEUTRAL do the following:
1. Set the parking brake and apply the regular
brake pedal.
2. Shift the transmission to NEUTRAL (N) and
turn the ignition to RUN with the engine off.3. Turn the transfer case dial to the desired
transfer case shift position (Two-Wheel
Drive High, Four-Wheel Drive High, AUTO).
After the transfer case has shifted out of
NEUTRAL the NEUTRAL light will go out.
4. Release the parking brake prior to moving
the vehicle.
Notice:Shifting the transmission into gear
before the Four-Wheel Drive Low indicator
light has stopped �ashing could damage the
transfer case. To help avoid damaging
your vehicle, always wait for the Four-Wheel
Drive Low indicator light to stop �ashing
before shifting the transmission into gear.
5. Start the engine and shift the transmission to
the desired position.
Excessively shifting the transfer case into or out
of the different modes may cause the transfer
case to enter the shift protection mode. This will
protect the transfer case from possible damage
and will only allow the transfer case to respond
to one shift per 10 seconds. The transfer case
may stay in this mode for up to three minutes.
137
Page 141 of 618
Torque Lock
If you are parking on a hill and you do not shift your
transmission into PARK (P) properly, the weight of
the vehicle may put too much force on the parking
pawl in the transmission. You may �nd it difficult to
pull the shift lever out of PARK (P). This is called
torque lock. To prevent torque lock, set the parking
brake and then shift into PARK (P) properly before
you leave the driver’s seat. To �nd out how, see
Shifting Into Park (P) on page 139.
When you are ready to drive, move the shift
lever out of PARK (P) before you release the
parking brake.
If torque lock does occur, you may need to have
another vehicle push yours a little uphill to
take some of the pressure from the parking pawl
in the transmission, then you will be able to
pull the shift lever out of PARK (P).
Shifting Out of Park (P)
Your vehicle has an automatic transmission shift
lock control system which locks the shift lever
in PARK (P) when the ignition is in the LOCK.
You have to fully apply your regular brakes
�rst and then press the shifter lever button before
you can shift from PARK (P) when the ignition
is in RUN. SeeAutomatic Transmission Operation
on page 128.
If you cannot shift out of PARK (P), ease pressure
on the shift lever and push the shift lever all the
way up into PARK (P) as you maintain brake
application. Then press the shift lever button and
move the shift lever into another gear.
141
Page 167 of 618
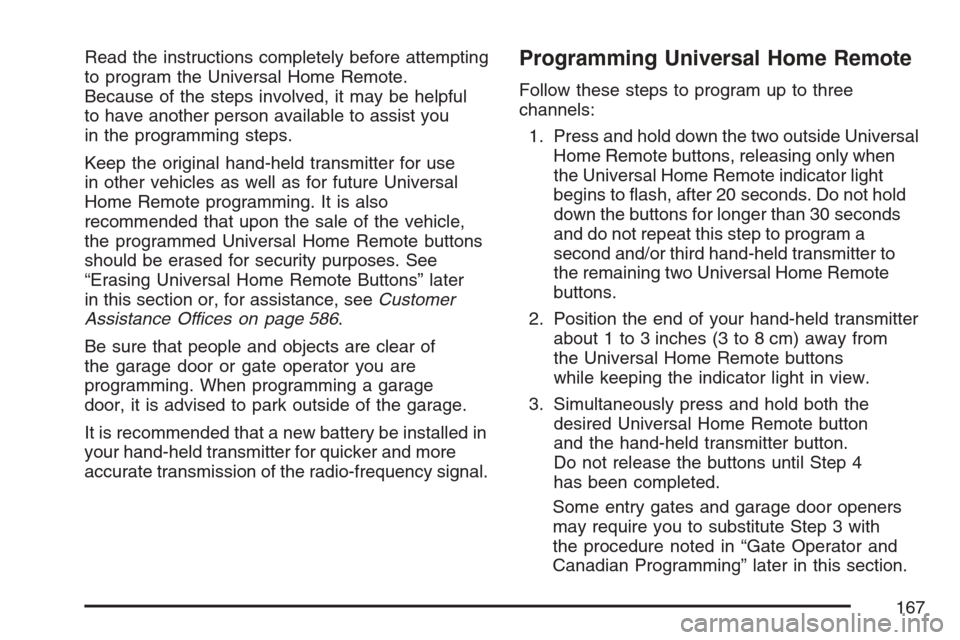
Read the instructions completely before attempting
to program the Universal Home Remote.
Because of the steps involved, it may be helpful
to have another person available to assist you
in the programming steps.
Keep the original hand-held transmitter for use
in other vehicles as well as for future Universal
Home Remote programming. It is also
recommended that upon the sale of the vehicle,
the programmed Universal Home Remote buttons
should be erased for security purposes. See
“Erasing Universal Home Remote Buttons” later
in this section or, for assistance, seeCustomer
Assistance Offices on page 586.
Be sure that people and objects are clear of
the garage door or gate operator you are
programming. When programming a garage
door, it is advised to park outside of the garage.
It is recommended that a new battery be installed in
your hand-held transmitter for quicker and more
accurate transmission of the radio-frequency signal.Programming Universal Home Remote
Follow these steps to program up to three
channels:
1. Press and hold down the two outside Universal
Home Remote buttons, releasing only when
the Universal Home Remote indicator light
begins to �ash, after 20 seconds. Do not hold
down the buttons for longer than 30 seconds
and do not repeat this step to program a
second and/or third hand-held transmitter to
the remaining two Universal Home Remote
buttons.
2. Position the end of your hand-held transmitter
about 1 to 3 inches (3 to 8 cm) away from
the Universal Home Remote buttons
while keeping the indicator light in view.
3. Simultaneously press and hold both the
desired Universal Home Remote button
and the hand-held transmitter button.
Do not release the buttons until Step 4
has been completed.
Some entry gates and garage door openers
may require you to substitute Step 3 with
the procedure noted in “Gate Operator and
Canadian Programming” later in this section.
167
Page 169 of 618
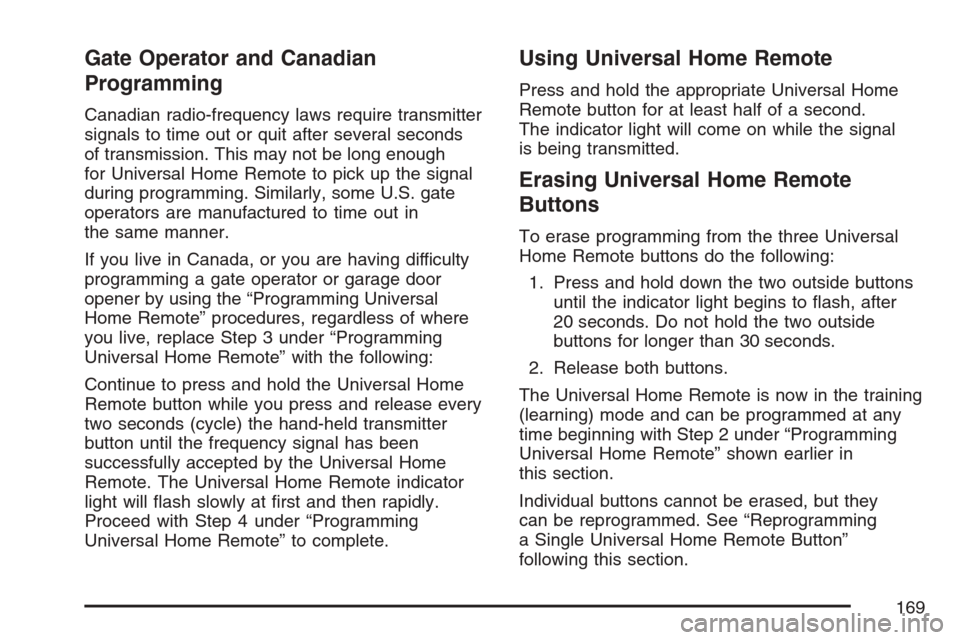
Gate Operator and Canadian
Programming
Canadian radio-frequency laws require transmitter
signals to time out or quit after several seconds
of transmission. This may not be long enough
for Universal Home Remote to pick up the signal
during programming. Similarly, some U.S. gate
operators are manufactured to time out in
the same manner.
If you live in Canada, or you are having difficulty
programming a gate operator or garage door
opener by using the “Programming Universal
Home Remote” procedures, regardless of where
you live, replace Step 3 under “Programming
Universal Home Remote” with the following:
Continue to press and hold the Universal Home
Remote button while you press and release every
two seconds (cycle) the hand-held transmitter
button until the frequency signal has been
successfully accepted by the Universal Home
Remote. The Universal Home Remote indicator
light will �ash slowly at �rst and then rapidly.
Proceed with Step 4 under “Programming
Universal Home Remote” to complete.
Using Universal Home Remote
Press and hold the appropriate Universal Home
Remote button for at least half of a second.
The indicator light will come on while the signal
is being transmitted.
Erasing Universal Home Remote
Buttons
To erase programming from the three Universal
Home Remote buttons do the following:
1. Press and hold down the two outside buttons
until the indicator light begins to �ash, after
20 seconds. Do not hold the two outside
buttons for longer than 30 seconds.
2. Release both buttons.
The Universal Home Remote is now in the training
(learning) mode and can be programmed at any
time beginning with Step 2 under “Programming
Universal Home Remote” shown earlier in
this section.
Individual buttons cannot be erased, but they
can be reprogrammed. See “Reprogramming
a Single Universal Home Remote Button”
following this section.
169
Page 205 of 618
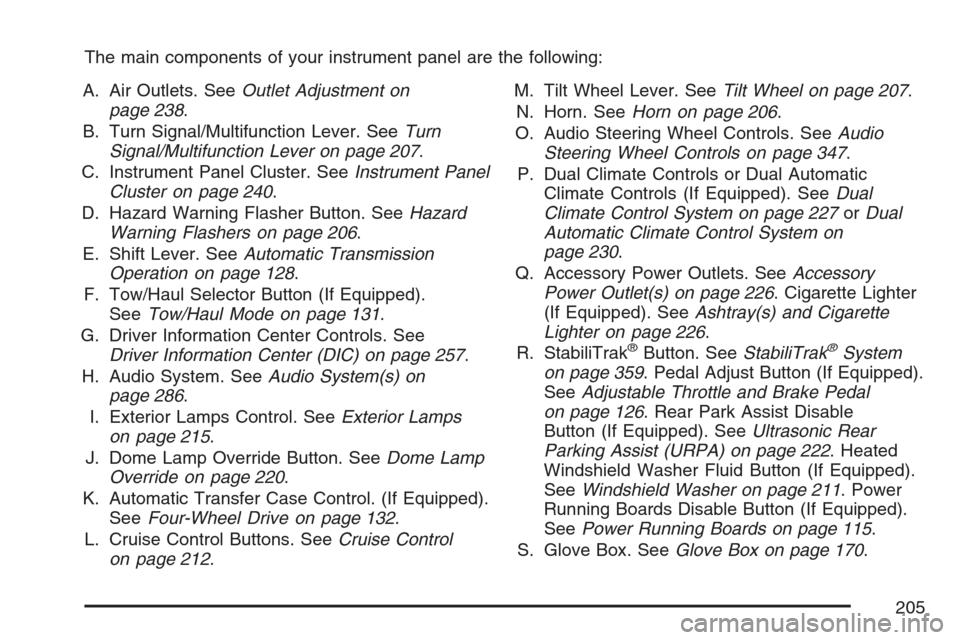
The main components of your instrument panel are the following:
A. Air Outlets. SeeOutlet Adjustment on
page 238.
B. Turn Signal/Multifunction Lever. SeeTurn
Signal/Multifunction Lever on page 207.
C. Instrument Panel Cluster. SeeInstrument Panel
Cluster on page 240.
D. Hazard Warning Flasher Button. SeeHazard
Warning Flashers on page 206.
E. Shift Lever. SeeAutomatic Transmission
Operation on page 128.
F. Tow/Haul Selector Button (If Equipped).
SeeTow/Haul Mode on page 131.
G. Driver Information Center Controls. See
Driver Information Center (DIC) on page 257.
H. Audio System. SeeAudio System(s) on
page 286.
I. Exterior Lamps Control. SeeExterior Lamps
on page 215.
J. Dome Lamp Override Button. SeeDome Lamp
Override on page 220.
K. Automatic Transfer Case Control. (If Equipped).
SeeFour-Wheel Drive on page 132.
L. Cruise Control Buttons. SeeCruise Control
on page 212.M. Tilt Wheel Lever. SeeTilt Wheel on page 207.
N. Horn. SeeHorn on page 206.
O. Audio Steering Wheel Controls. SeeAudio
Steering Wheel Controls on page 347.
P. Dual Climate Controls or Dual Automatic
Climate Controls (If Equipped). SeeDual
Climate Control System on page 227orDual
Automatic Climate Control System on
page 230.
Q. Accessory Power Outlets. SeeAccessory
Power Outlet(s) on page 226. Cigarette Lighter
(If Equipped). SeeAshtray(s) and Cigarette
Lighter on page 226.
R. StabiliTrak
®Button. SeeStabiliTrak®System
on page 359. Pedal Adjust Button (If Equipped).
SeeAdjustable Throttle and Brake Pedal
on page 126. Rear Park Assist Disable
Button (If Equipped). SeeUltrasonic Rear
Parking Assist (URPA) on page 222. Heated
Windshield Washer Fluid Button (If Equipped).
SeeWindshield Washer on page 211. Power
Running Boards Disable Button (If Equipped).
SeePower Running Boards on page 115.
S. Glove Box. SeeGlove Box on page 170.
205
Page 217 of 618

The DRL system will come on when the following
conditions are met:
The ignition is on.
The exterior lamps control is in AUTO.
The transmission is not in PARK (P).
The light sensor determines it is daytime.
When the DRL are on, only your DRL lamps will
be on. The taillamps, sidemarker, and other lamps
will not be on. The instrument panel will not be
lit up either.
When it begins to get dark, the automatic
headlamp system will switch from DRL to the
headlamps.
To turn off the DRL lamps, turn the exterior lamps
control to the OFF position and then release.
For vehicles �rst sold in Canada, the transaxle
must be in the PARK (P) position, before the
DRL lamps can be turned off.
As with any vehicle, you should turn on the
regular headlamp system when you need it.
Automatic Headlamp System
When it is dark enough outside and the headlamp
switch is in AUTO, your automatic headlamp
system will turn on your headlamps at the normal
brightness along with other lamps such as the
taillamps, sidemarker, parking lamps, roof marker
lamps, and the instrument panel lights. The
radio lights will also be dim.
To turn off the automatic headlamp system,
turn the exterior lamps switch to the off position
and then release. For vehicles �rst sold in Canada,
the transaxle must be in the PARK (P) position,
before the automatic headlamp system can
be turned off.
Your vehicle has a light sensor located on the
top of the instrument panel. Be sure it is not
covered, or the system will be on whenever the
ignition is on.
The system may also turn on your headlamps
when driving through a parking garage, heavy
overcast weather, or a tunnel. This is normal.
217
Page 251 of 618
This may prevent more serious damage to your
vehicle. This system is also designed to assist your
service technician in correctly diagnosing any
malfunction.
Notice:If you keep driving your vehicle with
this light on, after awhile, the emission controls
might not work as well, your vehicle’s fuel
economy might not be as good, and the engine
might not run as smoothly. This could lead
to costly repairs that might not be covered
by your warranty.
Notice:Modi�cations made to the engine,
transmission, exhaust, intake, or fuel system
of your vehicle or the replacement of the
original tires with other than those of the same
Tire Performance Criteria (TPC) can affect
your vehicle’s emission controls and can cause
this light to come on. Modi�cations to these
systems could lead to costly repairs not
covered by your warranty. This could also
result in a failure to pass a required Emission
Inspection/Maintenance test. SeeAccessories
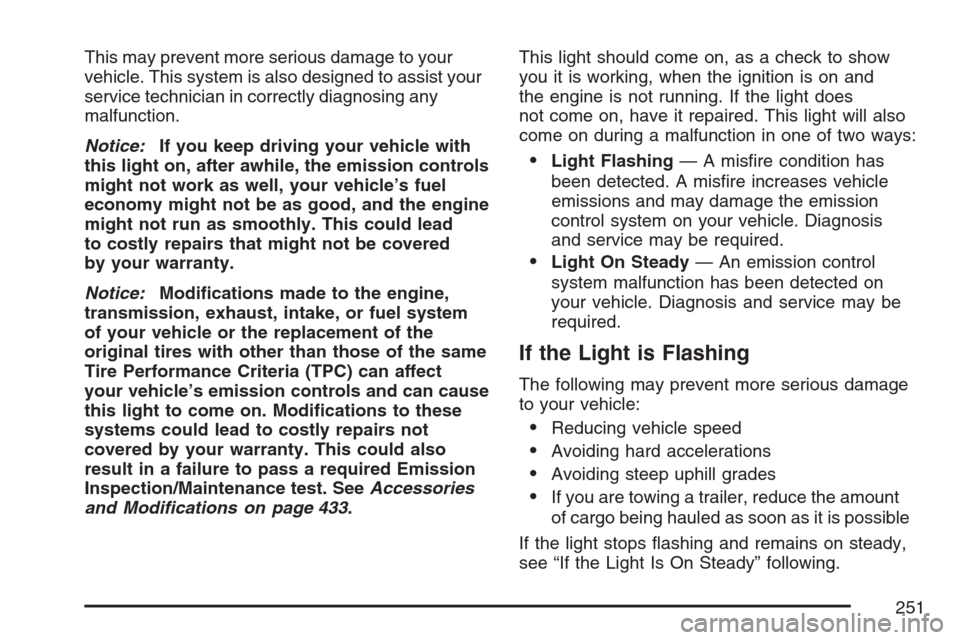
and Modifications on page 433.This light should come on, as a check to show
you it is working, when the ignition is on and
the engine is not running. If the light does
not come on, have it repaired. This light will also
come on during a malfunction in one of two ways:
Light Flashing— A mis�re condition has
been detected. A mis�re increases vehicle
emissions and may damage the emission
control system on your vehicle. Diagnosis
and service may be required.
Light On Steady— An emission control
system malfunction has been detected on
your vehicle. Diagnosis and service may be
required.
If the Light is Flashing
The following may prevent more serious damage
to your vehicle:
Reducing vehicle speed
Avoiding hard accelerations
Avoiding steep uphill grades
If you are towing a trailer, reduce the amount
of cargo being hauled as soon as it is possible
If the light stops �ashing and remains on steady,
see “If the Light Is On Steady” following.
251
Page 258 of 618
DIC Operation and Displays
(With DIC Buttons)
If your vehicle has DIC buttons, the information
below explains the operation of this system.
The DIC has different displays which can be
accessed by pressing the DIC buttons located
on the instrument panel, next to the steering
wheel.
The DIC displays trip, fuel, and vehicle system
information, and warning messages if a system
problem is detected.
The DIC also allows some features to be
customized. SeeDIC Vehicle Customization
(With DIC Buttons) on page 278for more
information.
If your vehicle has DIC buttons, you can also
use the trip odometer reset stem to view some
of the DIC displays. See “DIC Operation and
Displays (Without DIC Buttons)” later in this
section.
DIC Buttons
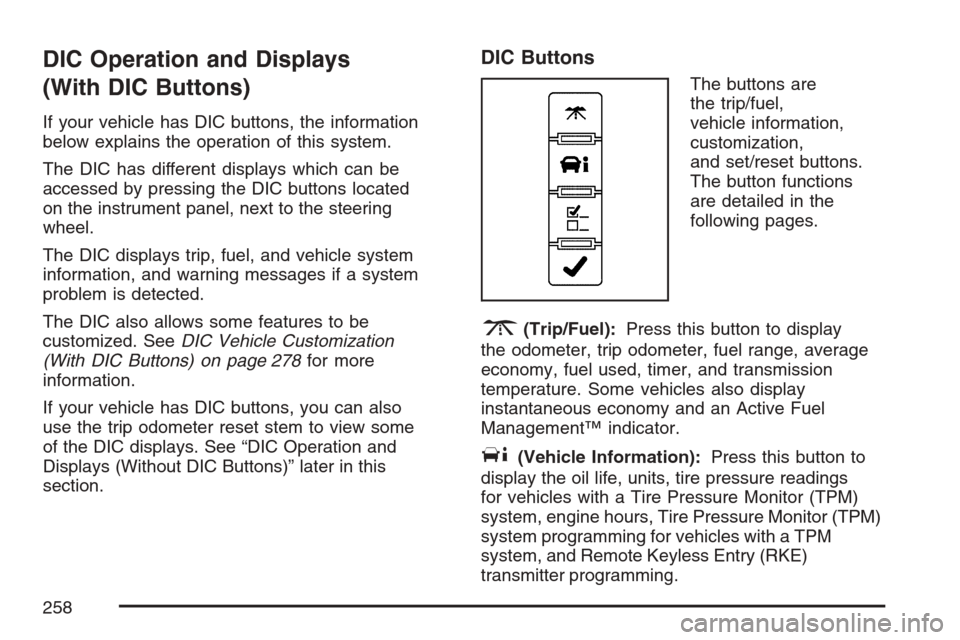
The buttons are
the trip/fuel,
vehicle information,
customization,
and set/reset buttons.
The button functions
are detailed in the
following pages.
3(Trip/Fuel):Press this button to display
the odometer, trip odometer, fuel range, average
economy, fuel used, timer, and transmission
temperature. Some vehicles also display
instantaneous economy and an Active Fuel
Management™ indicator.
T(Vehicle Information):Press this button to
display the oil life, units, tire pressure readings
for vehicles with a Tire Pressure Monitor (TPM)
system, engine hours, Tire Pressure Monitor (TPM)
system programming for vehicles with a TPM
system, and Remote Keyless Entry (RKE)
transmitter programming.
258