phone CHEVROLET AVALANCHE 2007 2.G Owners Manual
[x] Cancel search | Manufacturer: CHEVROLET, Model Year: 2007, Model line: AVALANCHE, Model: CHEVROLET AVALANCHE 2007 2.GPages: 618, PDF Size: 3.25 MB
Page 87 of 618

Adding Equipment to Your
Airbag-Equipped Vehicle
Q:Is there anything I might add to the front
or sides of the vehicle that could keep
the airbags from working properly?
A:Yes. If you add things that change your
vehicle’s frame, bumper system, height, front
end or side sheet metal, they may keep the
airbag system from working properly. Also,
the airbag system may not work properly if you
relocate any of the airbag sensors. If you have
any questions about this, you should contact
Customer Assistance before you modify your
vehicle. The phone numbers and addresses
for Customer Assistance are in Step Two of
the Customer Satisfaction Procedure in this
manual. SeeCustomer Satisfaction Procedure
on page 582.
Q:Because I have a disability, I have to get
my vehicle modi�ed. How can I �nd out
whether this will affect my airbag system?
A:Changing or moving any parts of the
front seats, safety belts, the airbag sensing
and diagnostic module, rollover sensor
module, steering wheel, instrument panel,
overhead console, ceiling headliner, ceiling
and pillar garnish trim, roof-mounted rollover
airbag modules, or airbag wiring can affect the
operation of the airbag system. If you have
questions, call Customer Assistance. The
phone numbers and addresses for Customer
Assistance are in Step Two of the Customer
Satisfaction Procedure in this manual.
SeeCustomer Satisfaction Procedure
on page 582.
87
Page 158 of 618
OnStar®Virtual Advisor
OnStar®Virtual Advisor is a feature of OnStar®
Hands-Free Calling that uses your minutes to
access location-based weather, local traffic reports,
and stock quotes. By pressing the phone button
and giving a few simple voice commands,
you can browse through the various topics.
See the OnStar
®Owners Guide for more
information (Only available in the continental U.S.).
OnStar®Steering Wheel Controls
Your vehicle may have a Talk/Mute button that
can be used to interact with OnStar®Hands-Free
Calling. SeeAudio Steering Wheel Controls on
page 347for more information.
On some vehicles, you may have to hold the
button for a few seconds and give the command
“ONSTAR” in order to activate the OnStar
®
Hands-Free Calling feature.
On some vehicles, the mute button can be used
to dial numbers into voicemail systems, or to
dial phone extensions. See the OnStar
®Owner’s
Guide for more information.
How OnStar®Service Works
In order to provide you with OnStar®services,
your vehicle’s OnStar®system has the capability
of recording and transmitting vehicle information.
This information is automatically sent to an
OnStar
®Call Center at the time of an OnStar®
button press, Emergency button press or if
your airbags or AACN system deploys. The vehicle
information usually includes your GPS location
and, in the event of a crash, additional information
regarding the accident that your vehicle has
been involved in (e.g. the direction from which
your vehicle was hit). When you use the Virtual
Advisor feature of OnStar
®Hands-Free Calling,
your vehicle also sends OnStar®your GPS
location so that we can provide you with
location-based services.
OnStar
®service cannot work unless your vehicle
is in a place where OnStar®has an agreement
with a wireless service provider for service in that
area. OnStar
®service also cannot work unless
you are in a place where the wireless service
provider OnStar
®has hired for that area
has coverage, network capacity and reception
when the service is needed, and technology
that is compatible with the OnStar
®service.
158
Page 159 of 618
Not all services are available everywhere,
particularly in remote or enclosed areas, or
at all times.
OnStar
®service that involves location information
about your vehicle cannot work unless GPS
satellite signals are unobstructed and available
in that place as well.
Your vehicle must have a working electrical
system (including adequate battery power) for
the OnStar
®equipment to operate. There are
other problems OnStar®cannot control that may
prevent OnStar®from providing OnStar®service
to you at any particular time or place. Some
examples are damage to important parts of your
vehicle in an accident, hills, tall buildings, tunnels,
weather or wireless phone network congestion.
Your Responsibility
You may need to increase the volume of your
radio to hear the OnStar®advisor. If the light next
to the OnStar®buttons is red, this means that
your system is not functioning properly and should
be checked by a dealer. If the light appears
clear (no light is appearing), your OnStar
®
subscription has expired. You can always press
the OnStar®button to con�rm that your OnStar®
equipment is active.
Universal Home Remote
System
Universal Home Remote System
(With Three Round LED)
The Universal Home Remote System provides
a way to replace up to three hand-held
Radio-Frequency (RF) transmitters used to
activate devices such as garage door openers,
security systems, and home lighting.
This device complies with Part 15 of the
FCC Rules. Operation is subject to the
following two conditions:
1. This device may not cause harmful
interference.
2. This device must accept any interference
received, including interference that may
cause undesired operation.
The FCC Grant of Equipment Authorization
Certi�cate number is KOBGTE05A.
159
Page 287 of 618
While your vehicle is parked, set up your audio
system by presetting your favorite radio stations,
setting the tone and adjusting the speakers. Then,
when driving conditions permit, you can tune to
your favorite stations using the presets and
steering wheel controls if the vehicle has them.
{CAUTION:
This system provides you with a far greater
access to audio stations and song listings.
Giving extended attention to entertainment
tasks while driving can cause a crash and
you or others can be injured or killed.
Always keep your eyes on the road and
your mind on the drive — avoid engaging
in extended searching while driving.
Keeping your mind on the drive is important for
safe driving. Here are some ways in which you can
help avoid distraction while driving.
While your vehicle is parked:
Familiarize yourself with all of its controls.
Familiarize yourself with its operation.
Set up your audio system by presetting your
favorite radio stations, setting the tone, and
adjusting the speakers. Then, when driving
conditions permit, you can tune to your favorite
radio stations using the presets and steering
wheel controls if the vehicle has them.
Notice:Before adding any sound equipment
to your vehicle, such as an audio system, CD
player, CB radio, mobile telephone, or two-way
radio, make sure that it can be added by
checking with your dealer. Also, check federal
rules covering mobile radio and telephone
units. If sound equipment can be added, it is
very important to do it properly. Added sound
equipment can interfere with the operation of
your vehicle’s engine, radio, or other systems,
and even damage them. Your vehicle’s systems
can interfere with the operation of sound
equipment that has been added.
Your vehicle has a feature called Retained
Accessory Power (RAP). With RAP, the audio
system can be played even after the ignition
is turned off. SeeRetained Accessory Power
(RAP) on page 124for more information.
287
Page 300 of 618
CD Messages
CHECK DISC:If this message displays and/or
the CD comes out, it could be for one of the
following reasons:
It is very hot. When the temperature returns
to normal, the CD should play.
You are driving on a very rough road.
When the road becomes smoother,
the CD should play.
The CD is dirty, scratched, wet, or
upside down.
The air is very humid. If so, wait about
an hour and try again.
There could have been a problem while
burning the CD.
The label could be caught in the CD player.
If the CD is not playing correctly, for any
other reason, try a known good CD.
If any error occurs repeatedly or if an error
cannot be corrected, contact your dealer.
If the radio displays an error message, write
it down and provide it to your dealer when
reporting the problem.
Using the Auxiliary Input Jack
The radio system has an auxiliary input jack
located on the lower right side of the faceplate.
This is not an audio output; do not plug the
headphone set into the front auxiliary input jack.
However, an external audio device such as
an iPod, laptop computer, MP3 player, CD player,
or cassette tape player, etc. can be connected
to the auxiliary input jack for use as another source
for audio listening.
Drivers are encouraged to set up any auxiliary
device while the vehicle is in PARK (P). See
Defensive Driving on page 352for more
information on driver distraction.
To use a portable audio player, connect a
3.5 mm (1/8 inch) cable to the radio’s front
auxiliary input jack. When a device is connected,
press the radio CD/AUX button to begin playing
audio from the device over the vehicle speakers.
300
Page 318 of 618
Using the Auxiliary Input Jack(s)
The radio system has an auxiliary input jack
located on the lower right side of the faceplate.
This is not an audio output; do not plug the
headphone set into the front auxiliary input jack.
However, an external audio device such as
an iPod, laptop computer, MP3 player, CD player,
or cassette tape player, etc. can be connected
to the auxiliary input jack for use as another
source for audio listening.
Drivers are encouraged to set up any auxiliary
device while the vehicle is in PARK (P). See
Defensive Driving on page 352for more
information on driver distraction.
To use a portable audio player, connect a
1/8 inch (3.5 mm) cable to the radio’s front
auxiliary input jack. While a device is connected,
the radio automatically begins playing audio
from the device over the vehicle speakers.
To listen to a device through the rear auxiliary
input over the speakers, cycle the DVD/CD Aux
button on the radio faceplate until “Rear Aux Input”
displays on the radio. The RSA or DVD Screen
must be on in order for the radio to source to
rear auxiliary.
O(Power/Volume):Turn this knob clockwise or
counterclockwise to increase or decrease the
volume of the portable player. Additional volume
adjustments might be needed from the portable
device if the volume is not loud or soft enough.
BAND:Press this button to listen to the radio when
a portable audio device is playing. The portable
audio device continues playing, so you might want
to stop it or power it off.
DVD/CD AUX (CD/Auxiliary):Press this button
to cycle through DVD, CD, or Auxiliary when
listening to the radio. The DVD/CD text label and
a message showing track or chapter number
displays when a disc is in either slot. Press
this button again and the system automatically
searches for an auxiliary input device, such as a
portable audio player. If a portable audio player
is not connected, “No Aux Input Device” displays.
If a disc is in both the DVD slot and the CD
slot the DVD/CD AUX button cycles between
the two sources and not indicate “No Aux Input
Device”. If a front auxiliary device is connected,
the DVD/CD AUX button cycles through all
available options, such as: DVD slot, CD slot,
Front Auxiliary, and Rear Auxiliary (if available).
318
Page 334 of 618
Navigation/Radio System
Your vehicle could have a navigation radio system.
The navigation system has built-in features
intended to minimize driver distraction. Technology
alone, no matter how advanced, can never
replace your own judgment. See the Navigation
System manual for some tips to help you
reduce distractions while driving.
Rear Seat Entertainment System
Your vehicle may have a DVD Rear Seat
Entertainment (RSE) system. The RSE system
works with the vehicle’s audio system. The
DVD player is part of the front radio. The RSE
system includes a radio with a DVD player,
a video display screen, audio/video jacks,
two wireless headphones, and a remote
control. SeeRadio with CD and DVD (MP3)
on page 301for more information on the
vehicle’s audio/DVD system.
Before You Drive
The RSE is designed for rear seat passengers
only. The driver cannot safely view the video
screen while driving and should not try to do so.
In severe or extreme weather conditions the
RSE system may or may not work until the
temperature is within the operating range.
The operating range for the RSE system is
above−4°F (−20°C) or below 140°F (60°C).
If the temperature of your vehicle is outside
of this range, heat or cool the vehicle until the
temperature is within the operating range of
the RSE system.
Parental Control
The RSE system may have a Parental Control
feature, depending on which radio you have.
The Parental Control feature turns off the video
screen and Rear Seat Audio (RSA). This feature
also disables all button operations from the
remote control and all audio button operations
from the RSA. This feature can be used to gain
the attention of the rear passengers that are
using headphones.
334
Page 335 of 618
To enable Parental Control, press and hold the
radio power button for more than two seconds.
If on, the radio, video screen, and RSA turns off.
If a DVD and/or CD is playing, it stops. While
Parental Control is on, either a padlock icon or
a text message comes on, depending on the
radio. When the radio is turned back on, the
RSE system remains in Parental Control.
To turn off Parental Control, press and hold the
radio power button for more than two seconds.
The video screen and RSA returns to the
state they were in before Parental Control was
turned on and if the padlock icon is on the
display, it disappears.
Parental Control is also turned off by inserting
or ejecting a disc, by pressing the play icon
on the radio DVD display menu, or when the
ignition is turned off.Headphones
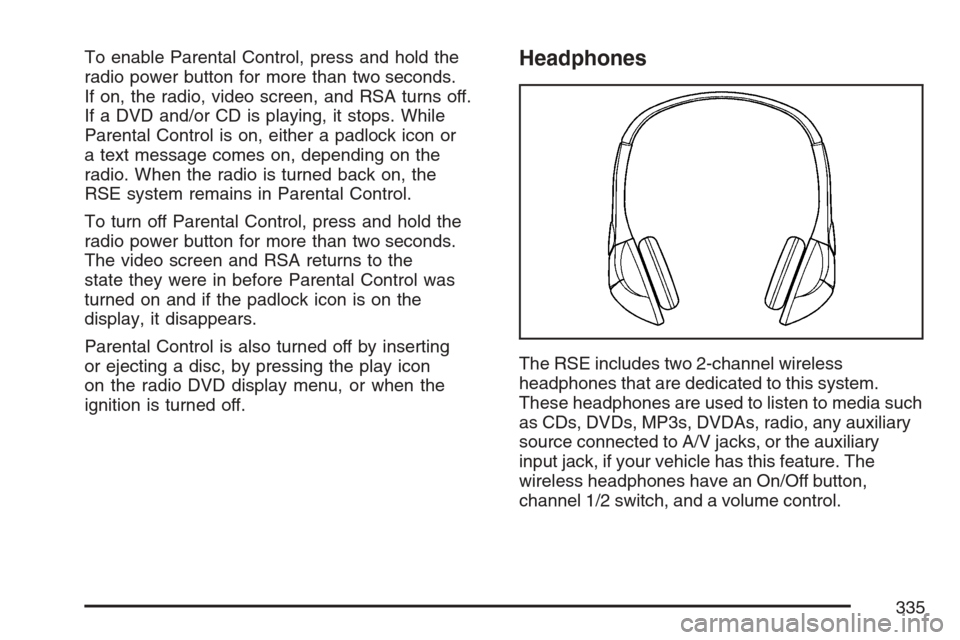
The RSE includes two 2-channel wireless
headphones that are dedicated to this system.
These headphones are used to listen to media such
as CDs, DVDs, MP3s, DVDAs, radio, any auxiliary
source connected to A/V jacks, or the auxiliary
input jack, if your vehicle has this feature. The
wireless headphones have an On/Off button,
channel 1/2 switch, and a volume control.
335
Page 336 of 618
If your vehicle has a third row video screen
display, it has two additional headphones.
Push the power button to turn on the headphones.
An indicator light located on the headphones comes
on. If the light does not come on, the batteries may
need to be replaced. See “Battery Replacement”
later in this section for more information. Switch
the headphones to Off when not in use. Channel 1
is dedicated to the video screen, while Channel 2
is dedicated to RSA selections.
Infrared transmitters are located at the rear of
the RSE overhead console. The headphones
shut off automatically to save the battery power if
the RSE system and RSA are shut off or if the
headphones are out of range of the transmitters
for more than three minutes. If you move too
far forward or step out of the vehicle, the
headphones lose the audio signal.
The headphones automatically turns off after
four hours of continuous use.
To adjust the volume on the headphones, use
the volume control located on the right side.For optimal audio performance, the headphones
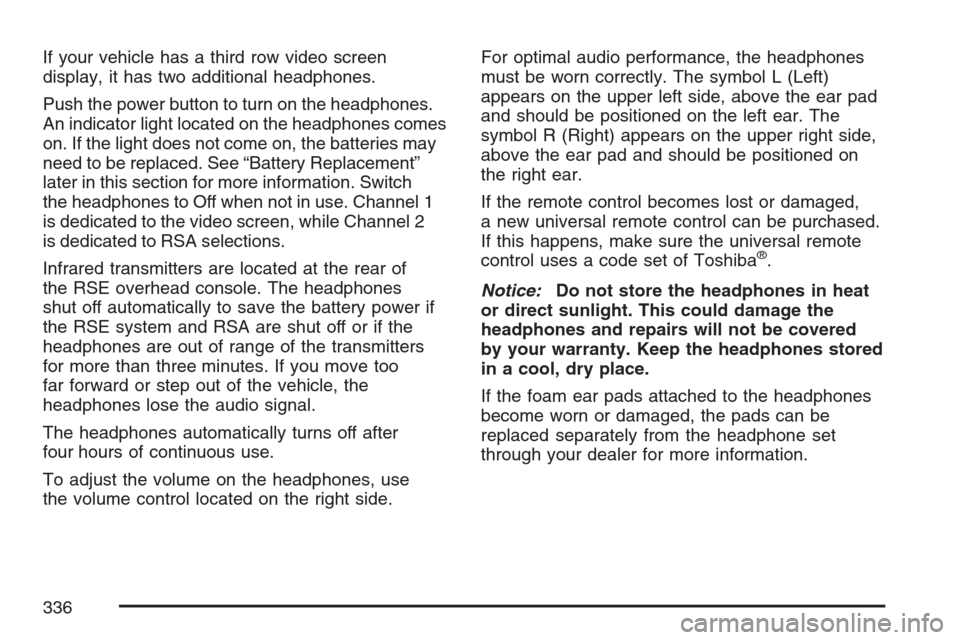
must be worn correctly. The symbol L (Left)
appears on the upper left side, above the ear pad
and should be positioned on the left ear. The
symbol R (Right) appears on the upper right side,
above the ear pad and should be positioned on
the right ear.
If the remote control becomes lost or damaged,
a new universal remote control can be purchased.
If this happens, make sure the universal remote
control uses a code set of Toshiba
®.
Notice:Do not store the headphones in heat
or direct sunlight. This could damage the
headphones and repairs will not be covered
by your warranty. Keep the headphones stored
in a cool, dry place.
If the foam ear pads attached to the headphones
become worn or damaged, the pads can be
replaced separately from the headphone set
through your dealer for more information.
336
Page 337 of 618
Battery Replacement
To change the batteries on the headphones,
do the following:
1. Turn the screw with a coin or screw driver
to loosen the battery door located on the
left side of the headphones. Slide the
battery door open.
2. Replace the two batteries in the compartment.
Make sure that they are installed correctly,
using the diagram on the inside of the
battery compartment.
3. Replace the battery door and tighten the
door screw.
If the headphones are to be stored for a long
period of time, remove the batteries and keep
them in a cool, dry place.
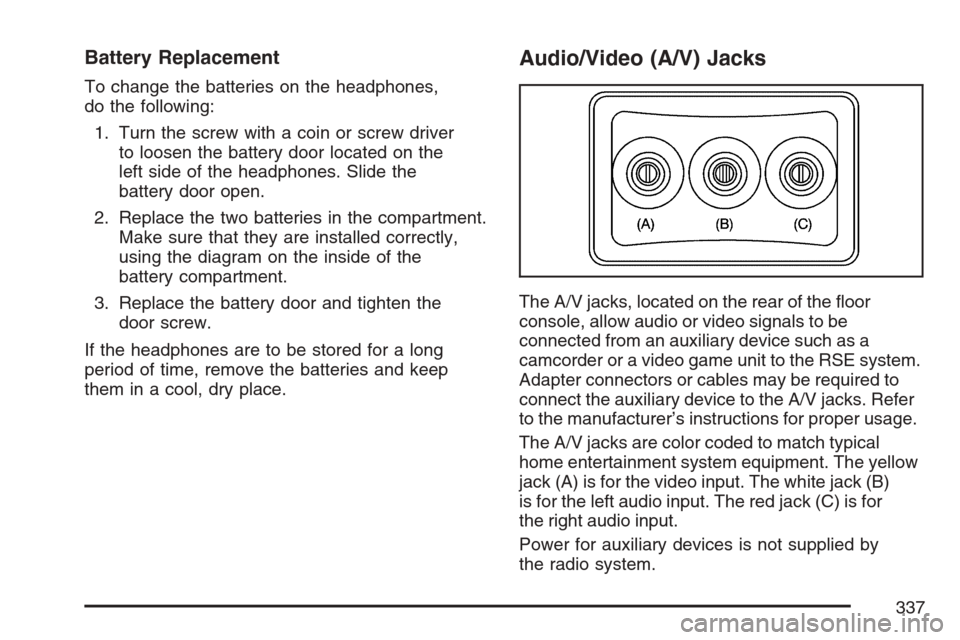
Audio/Video (A/V) Jacks
The A/V jacks, located on the rear of the �oor
console, allow audio or video signals to be
connected from an auxiliary device such as a
camcorder or a video game unit to the RSE system.
Adapter connectors or cables may be required to
connect the auxiliary device to the A/V jacks. Refer
to the manufacturer’s instructions for proper usage.
The A/V jacks are color coded to match typical
home entertainment system equipment. The yellow
jack (A) is for the video input. The white jack (B)
is for the left audio input. The red jack (C) is for
the right audio input.
Power for auxiliary devices is not supplied by
the radio system.
337