brake light CHEVROLET AVALANCHE 2009 2.G Owner's Manual
[x] Cancel search | Manufacturer: CHEVROLET, Model Year: 2009, Model line: AVALANCHE, Model: CHEVROLET AVALANCHE 2009 2.GPages: 550, PDF Size: 3.06 MB
Page 323 of 550
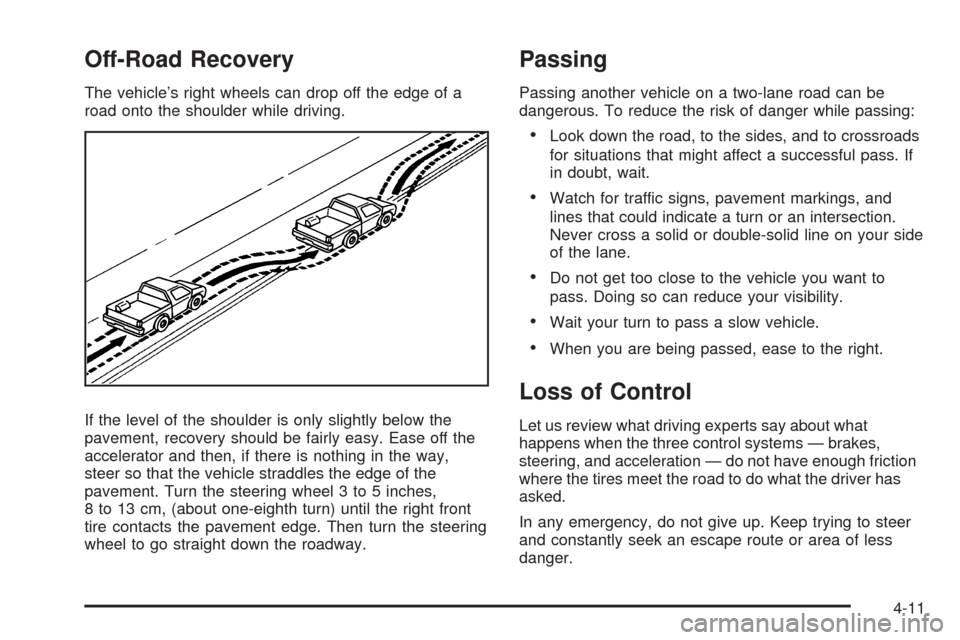
Off-Road Recovery
The vehicle’s right wheels can drop off the edge of a
road onto the shoulder while driving.
If the level of the shoulder is only slightly below the
pavement, recovery should be fairly easy. Ease off the
accelerator and then, if there is nothing in the way,
steer so that the vehicle straddles the edge of the
pavement. Turn the steering wheel 3 to 5 inches,
8 to 13 cm, (about one-eighth turn) until the right front
tire contacts the pavement edge. Then turn the steering
wheel to go straight down the roadway.
Passing
Passing another vehicle on a two-lane road can be
dangerous. To reduce the risk of danger while passing:
Look down the road, to the sides, and to crossroads
for situations that might affect a successful pass. If
in doubt, wait.
Watch for traffic signs, pavement markings, and
lines that could indicate a turn or an intersection.
Never cross a solid or double-solid line on your side
of the lane.
Do not get too close to the vehicle you want to
pass. Doing so can reduce your visibility.
Wait your turn to pass a slow vehicle.
When you are being passed, ease to the right.
Loss of Control
Let us review what driving experts say about what
happens when the three control systems — brakes,
steering, and acceleration — do not have enough friction
where the tires meet the road to do what the driver has
asked.
In any emergency, do not give up. Keep trying to steer
and constantly seek an escape route or area of less
danger.
4-11
Page 333 of 550
Driving Downhill
When off-roading takes you downhill, consider:
How steep is the downhill? Will I be able to maintain
vehicle control?
What is the surface like? Smooth? Rough?
Slippery? Hard-packed dirt? Gravel?
Are there hidden surface obstacles? Ruts? Logs?
Boulders?
What is at the bottom of the hill? Is there a
hidden creek bank or even a river bottom with
large rocks?
If you decide you can go down a hill safely, try to keep
the vehicle headed straight down. Use a low gear
so engine drag can help the brakes so they do not have
to do all the work. Descend slowly, keeping the
vehicle under control at all times.
{CAUTION:
Heavy braking when going down a hill can cause
your brakes to overheat and fade. This could
cause loss of control and a serious accident.
Apply the brakes lightly when descending a hill
and use a low gear to keep vehicle speed under
control.
Things not to do when driving down a hill:
When driving downhill, avoid turns that take you
across the incline of the hill. A hill that is not too
steep to drive down might be too steep to drive
across. The vehicle could roll over.
Never go downhill with the transmission in
N (Neutral), called free-wheeling. The brakes will
have to do all the work and could overheat
and fade.
4-21
Page 339 of 550
Driving in Rain and on Wet Roads
Rain and wet roads can reduce vehicle traction
and affect your ability to stop and accelerate. Always
drive slower in these types of driving conditions
and avoid driving through large puddles and
deep-standing or owing water.
{CAUTION:
Wet brakes can cause crashes. They might not
work as well in a quick stop and could cause
pulling to one side. You could lose control of the
vehicle.
After driving through a large puddle of water or a
car/vehicle wash, lightly apply the brake pedal until
the brakes work normally.
Flowing or rushing water creates strong forces.
Driving through owing water could cause your
vehicle to be carried away. If this happens, you
and other vehicle occupants could drown. Do not
ignore police warnings and be very cautious about
trying to drive through owing water.
Hydroplaning
Hydroplaning is dangerous. Water can build up under
your vehicle’s tires so they actually ride on the water. This
can happen if the road is wet enough and you are going
fast enough. When your vehicle is hydroplaning, it has
little or no contact with the road.
There is no hard and fast rule about hydroplaning. The
best advice is to slow down when the road is wet.
Other Rainy Weather Tips
Besides slowing down, other wet weather driving tips
include:
Allow extra following distance.
Pass with caution.
Keep windshield wiping equipment in good shape.
Keep the windshield washer uid reservoir lled.
Have good tires with proper tread depth. SeeTires
on page 5-55.
Turn off cruise control.
4-27
Page 358 of 550
6. Use an adequate clamping device designed for
towing to ensure that the front wheels are locked
into the straight position.
{CAUTION:
Shifting a four-wheel-drive vehicle’s transfer case
into N (Neutral) can cause the vehicle to roll even
if the transmission is in P (Park). The driver or
others could be injured. Make sure the parking
brake is rmly set before the transfer case is
shifted to N (Neutral).
7. Shift the transfer case to N (Neutral). See “Shifting
into Neutral” underFour-Wheel Drive on page 2-43
for the proper procedure to select the neutral
position for the vehicle.
8. Turn the ignition to LOCK/OFF.
After towing, see “Shifting Out of Neutral” under
Four-Wheel Drive on page 2-43.
Level Control
Automatic Level Control
The automatic level control rear suspension is available
on light-duty vehicles and comes as a part of the
Autoride
®suspension, if equipped.
This type of level control is fully automatic and will
provide a better leveled riding position as well as better
handling under a variety of passenger and loading
conditions. An air compressor connected to the rear
shocks will raise or lower the rear of the vehicle
to maintain proper vehicle height. The system is
activated when the ignition key is turned to ON/RUN
and will automatically adjust vehicle height thereafter.
The system may exhaust (lower vehicle height) for up to
ten minutes after the ignition key has been turned off.
You may hear the air compressor operating when
the height is being adjusted.
If a weight-distributing hitch is being used, it is
recommended to allow the shocks to inate, thereby
leveling the vehicle prior to adjusting the hitch.
4-46
Page 378 of 550
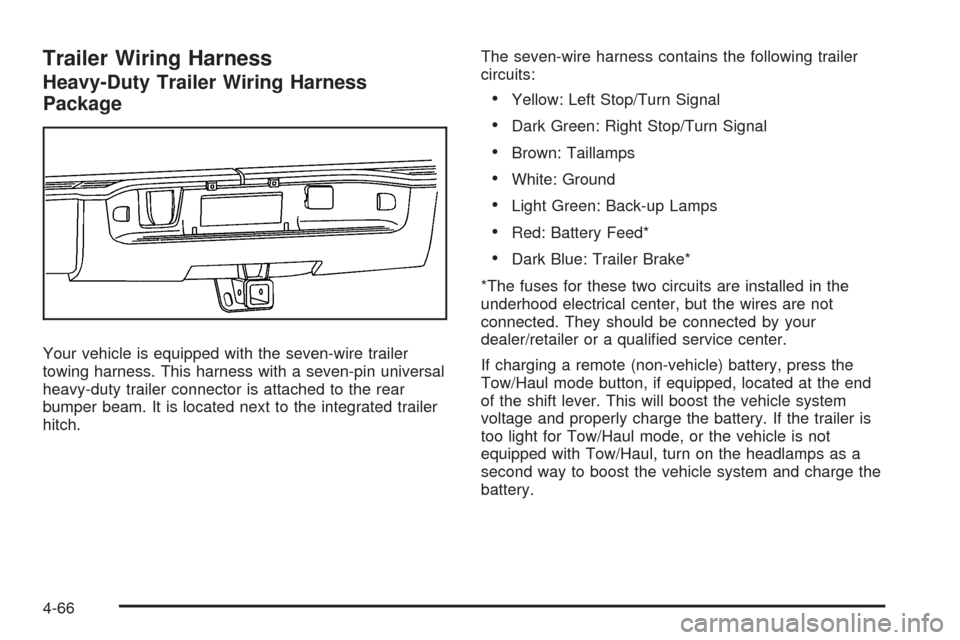
Trailer Wiring Harness
Heavy-Duty Trailer Wiring Harness
Package
Your vehicle is equipped with the seven-wire trailer
towing harness. This harness with a seven-pin universal
heavy-duty trailer connector is attached to the rear
bumper beam. It is located next to the integrated trailer
hitch.The seven-wire harness contains the following trailer
circuits:
Yellow: Left Stop/Turn Signal
Dark Green: Right Stop/Turn Signal
Brown: Taillamps
White: Ground
Light Green: Back-up Lamps
Red: Battery Feed*
Dark Blue: Trailer Brake*
*The fuses for these two circuits are installed in the
underhood electrical center, but the wires are not
connected. They should be connected by your
dealer/retailer or a qualied service center.
If charging a remote (non-vehicle) battery, press the
Tow/Haul mode button, if equipped, located at the end
of the shift lever. This will boost the vehicle system
voltage and properly charge the battery. If the trailer is
too light for Tow/Haul mode, or the vehicle is not
equipped with Tow/Haul, turn on the headlamps as a
second way to boost the vehicle system and charge the
battery.
4-66
Page 379 of 550
Electric Brake Control Wiring
Provisions
These wiring provisions are included with the vehicle as
part of the trailer wiring package. These provisions
are for an electric brake controller. The instrument panel
contains blunt cut wires near the data link connector
for the trailer brake controller. The harness contains the
following wires:
Dark Blue: Brake Signal to Trailer Connector
Red/Black: Battery
Light Blue/White: Brake Switch
White: Ground
It should be installed by your dealer/retailer or a
qualied service center.
If the vehicle is equipped with an ITBC, the blunt cuts
exist, but are not connected further in the harness. If an
aftermarket trailer brake controller is installed, the
ITBC must be disconnected. Do not power both ITBC
and aftermarket controllers to control the trailer brakes at
the same time.
Trailer Recommendations
Subtract the hitch loads from the Cargo Weight Rating
(CWR). CWR is the maximum weight of the load
the vehicle can carry. It does not include the weight of
the people inside, but you can gure about 150 lbs.
(68 kg) for each passenger. The total cargo load must
not be more than the vehicles CWR.
Weigh the vehicle with the trailer attached, so the
GVWR or GAWR are not exceeded. If using a
weight-distributing hitch, weigh the vehicle without the
spring bars in place.
The best performance is obtained by correctly spreading
out the weight of the load and choosing the correct
hitch and trailer brakes.
For more information seeTowing a Trailer on page 4-47.
4-67
Page 416 of 550
Brakes
Brake Fluid
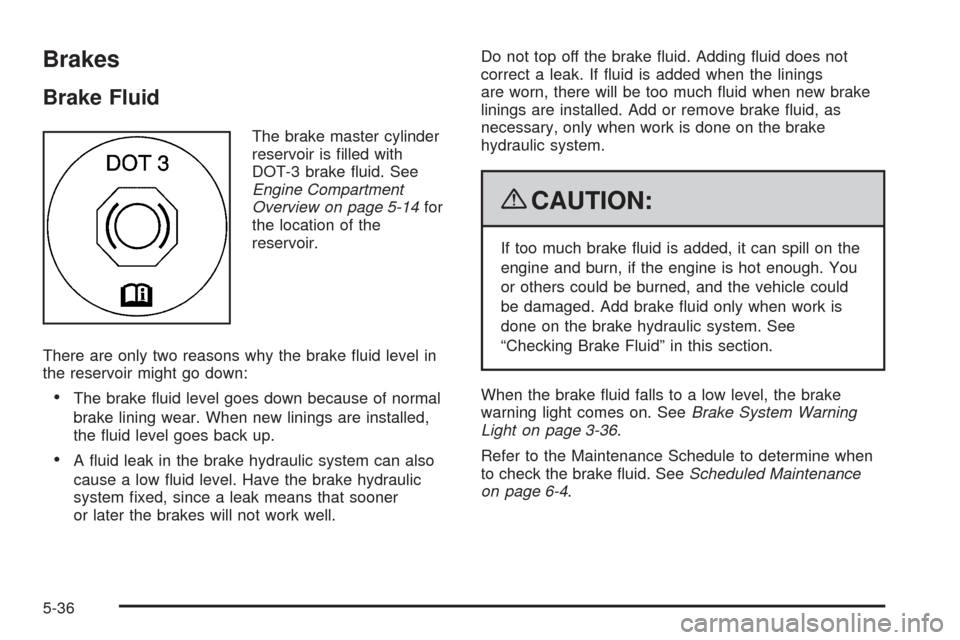
The brake master cylinder
reservoir is lled with
DOT-3 brake uid. See
Engine Compartment
Overview on page 5-14for
the location of the
reservoir.
There are only two reasons why the brake uid level in
the reservoir might go down:
The brake uid level goes down because of normal
brake lining wear. When new linings are installed,
the uid level goes back up.
A uid leak in the brake hydraulic system can also
cause a low uid level. Have the brake hydraulic
system xed, since a leak means that sooner
or later the brakes will not work well.Do not top off the brake uid. Adding uid does not
correct a leak. If uid is added when the linings
are worn, there will be too much uid when new brake
linings are installed. Add or remove brake uid, as
necessary, only when work is done on the brake
hydraulic system.
{CAUTION:
If too much brake uid is added, it can spill on the
engine and burn, if the engine is hot enough. You
or others could be burned, and the vehicle could
be damaged. Add brake uid only when work is
done on the brake hydraulic system. See
“Checking Brake Fluid” in this section.
When the brake uid falls to a low level, the brake
warning light comes on. SeeBrake System Warning
Light on page 3-36.
Refer to the Maintenance Schedule to determine when
to check the brake uid. SeeScheduled Maintenance
on page 6-4.
5-36
Page 418 of 550
Brake Wear
This vehicle has disc brakes. Disc brake pads have
built-in wear indicators that make a high-pitched warning
sound when the brake pads are worn and new pads
are needed. The sound can come and go or be heard all
the time the vehicle is moving, except when applying
the brake pedal rmly.
{CAUTION:
The brake wear warning sound means that soon
the brakes will not work well. That could lead to an
accident. When the brake wear warning sound is
heard, have the vehicle serviced.
Notice:Continuing to drive with worn-out brake
pads could result in costly brake repair.
Some driving conditions or climates can cause a brake
squeal when the brakes are rst applied or lightly
applied. This does not mean something is wrong with
the brakes.Properly torqued wheel nuts are necessary to help
prevent brake pulsation. When tires are rotated, inspect
brake pads for wear and evenly tighten wheel nuts in
the proper sequence to torque specications in
Capacities and Specications on page 5-116.
Brake linings should always be replaced as complete
axle sets.
Brake Pedal Travel
See your dealer/retailer if the brake pedal does not
return to normal height, or if there is a rapid increase in
pedal travel. This could be a sign that brake service
might be required.
Brake Adjustment
Every brake stop, the disc brakes adjust for wear.
5-38
Page 506 of 550
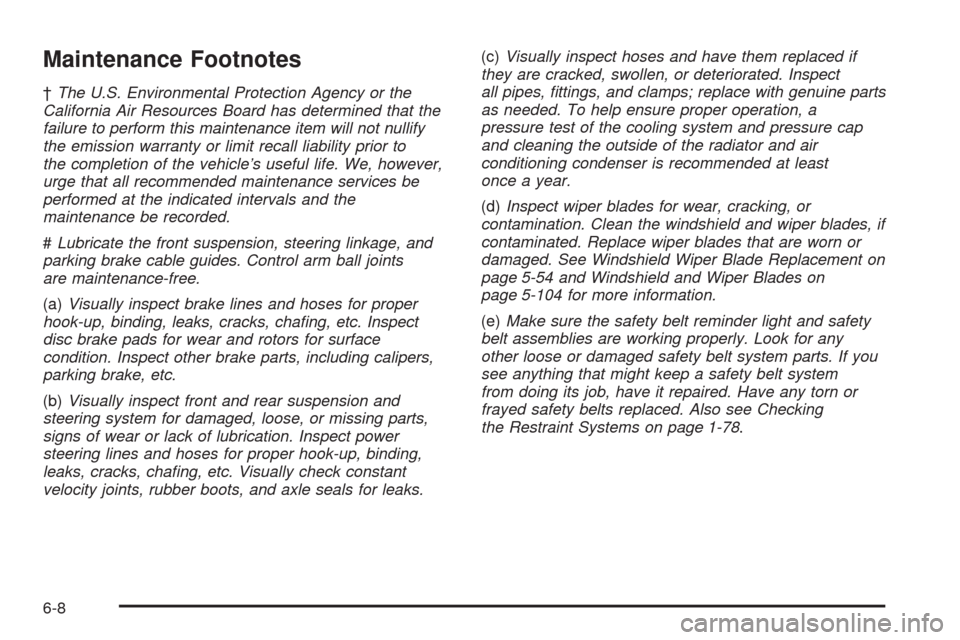
Maintenance Footnotes
†The U.S. Environmental Protection Agency or the
California Air Resources Board has determined that the
failure to perform this maintenance item will not nullify
the emission warranty or limit recall liability prior to
the completion of the vehicle’s useful life. We, however,
urge that all recommended maintenance services be
performed at the indicated intervals and the
maintenance be recorded.
#Lubricate the front suspension, steering linkage, and
parking brake cable guides. Control arm ball joints
are maintenance-free.
(a)Visually inspect brake lines and hoses for proper
hook-up, binding, leaks, cracks, chang, etc. Inspect
disc brake pads for wear and rotors for surface
condition. Inspect other brake parts, including calipers,
parking brake, etc.
(b)Visually inspect front and rear suspension and
steering system for damaged, loose, or missing parts,
signs of wear or lack of lubrication. Inspect power
steering lines and hoses for proper hook-up, binding,
leaks, cracks, chang, etc. Visually check constant
velocity joints, rubber boots, and axle seals for leaks.(c)Visually inspect hoses and have them replaced if
they are cracked, swollen, or deteriorated. Inspect
all pipes, ttings, and clamps; replace with genuine parts
as needed. To help ensure proper operation, a
pressure test of the cooling system and pressure cap
and cleaning the outside of the radiator and air
conditioning condenser is recommended at least
once a year.
(d)Inspect wiper blades for wear, cracking, or
contamination. Clean the windshield and wiper blades, if
contaminated. Replace wiper blades that are worn or
damaged. See Windshield Wiper Blade Replacement on
page 5-54 and Windshield and Wiper Blades on
page 5-104 for more information.
(e)Make sure the safety belt reminder light and safety
belt assemblies are working properly. Look for any
other loose or damaged safety belt system parts. If you
see anything that might keep a safety belt system
from doing its job, have it repaired. Have any torn or
frayed safety belts replaced. Also see Checking
the Restraint Systems on page 1-78.
6-8
Page 537 of 550
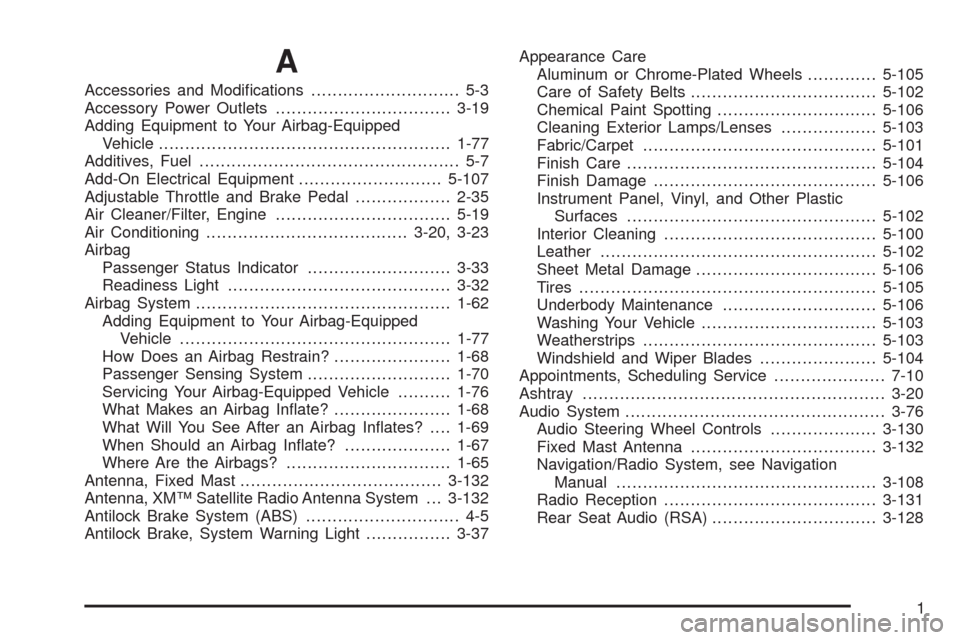
A
Accessories and Modications............................ 5-3
Accessory Power Outlets.................................3-19
Adding Equipment to Your Airbag-Equipped
Vehicle.......................................................1-77
Additives, Fuel................................................. 5-7
Add-On Electrical Equipment...........................5-107
Adjustable Throttle and Brake Pedal..................2-35
Air Cleaner/Filter, Engine.................................5-19
Air Conditioning......................................3-20, 3-23
Airbag
Passenger Status Indicator...........................3-33
Readiness Light..........................................3-32
Airbag System................................................1-62
Adding Equipment to Your Airbag-Equipped
Vehicle...................................................1-77
How Does an Airbag Restrain?......................1-68
Passenger Sensing System...........................1-70
Servicing Your Airbag-Equipped Vehicle..........1-76
What Makes an Airbag Inate?......................1-68
What Will You See After an Airbag Inates?....1-69
When Should an Airbag Inate?....................1-67
Where Are the Airbags?...............................1-65
Antenna, Fixed Mast......................................3-132
Antenna, XM™ Satellite Radio Antenna System . . . 3-132
Antilock Brake System (ABS)............................. 4-5
Antilock Brake, System Warning Light................3-37Appearance Care
Aluminum or Chrome-Plated Wheels.............5-105
Care of Safety Belts...................................5-102
Chemical Paint Spotting..............................5-106
Cleaning Exterior Lamps/Lenses..................5-103
Fabric/Carpet............................................5-101
Finish Care...............................................5-104
Finish Damage..........................................5-106
Instrument Panel, Vinyl, and Other Plastic
Surfaces...............................................5-102
Interior Cleaning........................................5-100
Leather....................................................5-102
Sheet Metal Damage..................................5-106
Tires........................................................5-105
Underbody Maintenance.............................5-106
Washing Your Vehicle.................................5-103
Weatherstrips............................................5-103
Windshield and Wiper Blades......................5-104
Appointments, Scheduling Service.....................7-10
Ashtray.........................................................3-20
Audio System.................................................3-76
Audio Steering Wheel Controls....................3-130
Fixed Mast Antenna...................................3-132
Navigation/Radio System, see Navigation
Manual.................................................3-108
Radio Reception........................................3-131
Rear Seat Audio (RSA)...............................3-128
1