radiator CHEVROLET AVEO 2004 1.G Owners Manual
[x] Cancel search | Manufacturer: CHEVROLET, Model Year: 2004, Model line: AVEO, Model: CHEVROLET AVEO 2004 1.GPages: 334, PDF Size: 2.35 MB
Page 209 of 334
Engine Coolant
The following explains your cooling system and how to
add coolant when it is low. If you have a problem
with engine overheating, seeEngine Overheating on
page 5-25.
A 50/50 mixture of clean, drinkable water and proper
coolant will:
•Give freezing protection down to−22°F (−30°C).
•Give boiling protection up to 268°F (131°C)
•Protect against rust and corrosion.
•Help keep the proper engine temperature.
•Let the warning lights and gages work as they
should.
What to Use
Use a 50/50 mixture ofclean, drinkable waterand coolant
that meets GM Specification 1825M, which will not
damage aluminum parts. You can also use a recycled
coolant conforming to GM Specification 1825M with a
complete coolant flush and refill. If you use this coolant
mixture, you do not need to add anything else.
For protection in extremely cold weather conditions,
use a 40/60 mixture of clean, drinkable water and proper
coolant.
{CAUTION:
Adding only plain water to your cooling
system can be dangerous. Plain water, or
some other liquid such as alcohol, can boil
before the proper coolant mixture will. Your
vehicle’s coolant warning system is set for the
proper coolant mixture. With plain water or the
wrong mixture, your engine could get too hot
but you would not get the overheat warning.
Your engine could catch �re and you or others
could be burned. Use a 50/50 mixture of clean,
drinkable water and the proper coolant.
Notice:If you use an improper coolant mixture,
your engine could overheat and be badly damaged.
The repair cost would not be covered by your
warranty. Too much water in the mixture can freeze
and crack the engine, radiator, heater core and
other parts.
If you have to add coolant more than four times a year,
have your dealer check your cooling system.
Notice:If you use the proper coolant, you do not
have to add extra inhibitors or additives which claim
to improve the system. These can be harmful.
5-23
Page 210 of 334
Checking Coolant
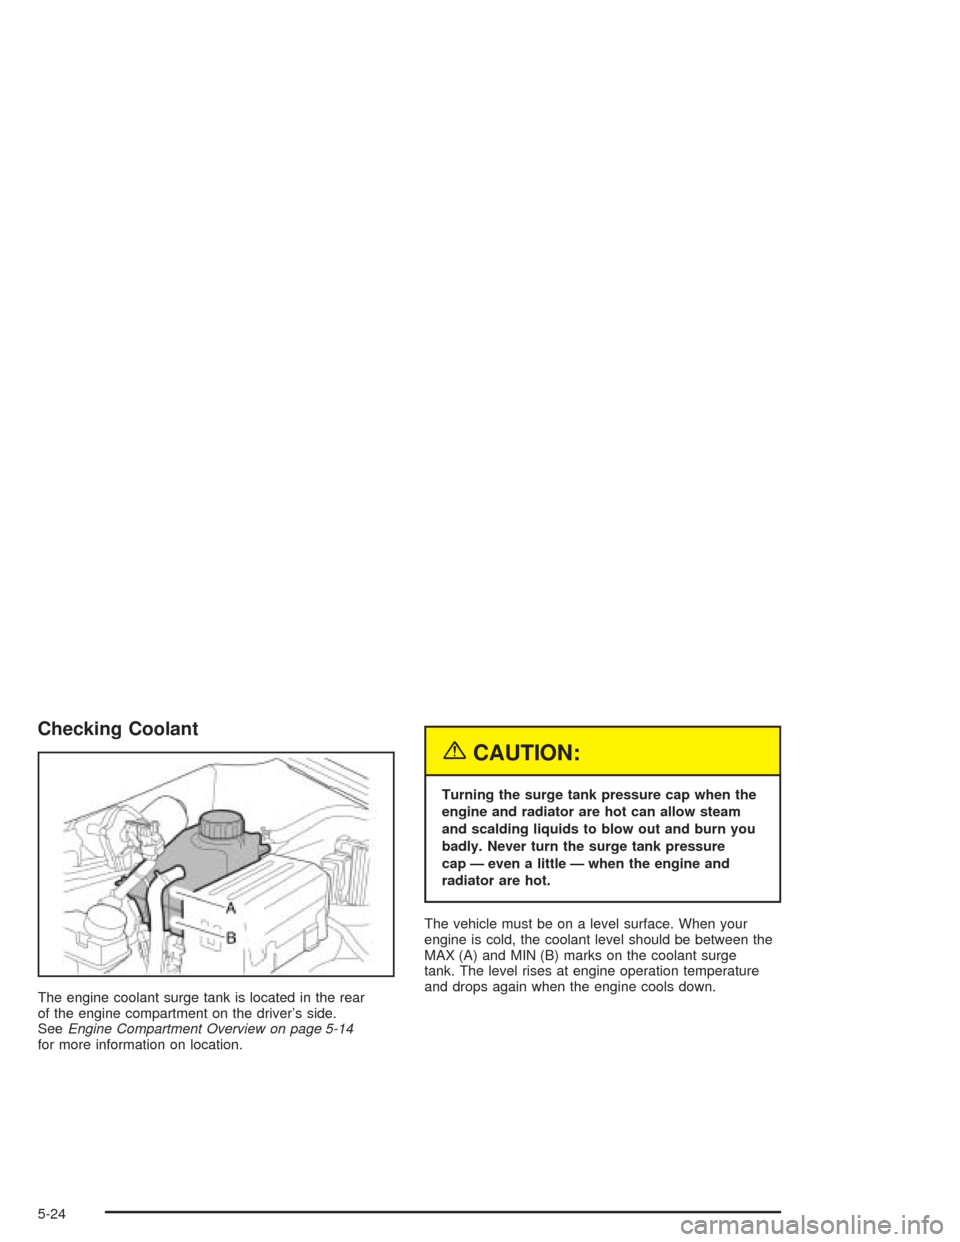
The engine coolant surge tank is located in the rear
of the engine compartment on the driver’s side.
SeeEngine Compartment Overview on page 5-14
for more information on location.
{CAUTION:
Turning the surge tank pressure cap when the
engine and radiator are hot can allow steam
and scalding liquids to blow out and burn you
badly. Never turn the surge tank pressure
cap — even a little — when the engine and
radiator are hot.
The vehicle must be on a level surface. When your
engine is cold, the coolant level should be between the
MAX (A) and MIN (B) marks on the coolant surge
tank. The level rises at engine operation temperature
and drops again when the engine cools down.
5-24
Page 215 of 334
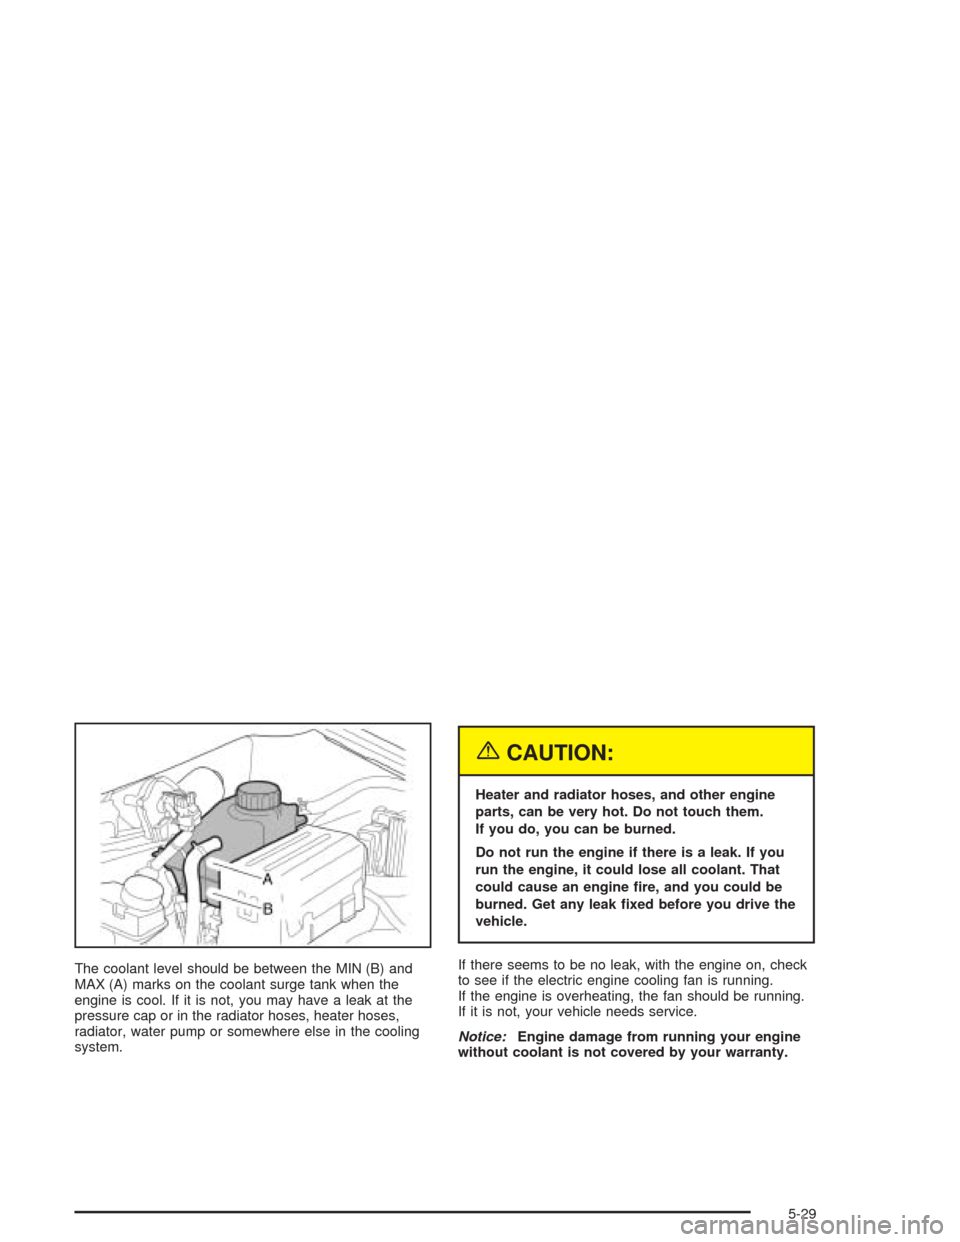
The coolant level should be between the MIN (B) and
MAX (A) marks on the coolant surge tank when the
engine is cool. If it is not, you may have a leak at the
pressure cap or in the radiator hoses, heater hoses,
radiator, water pump or somewhere else in the cooling
system.
{CAUTION:
Heater and radiator hoses, and other engine
parts, can be very hot. Do not touch them.
If you do, you can be burned.
Do not run the engine if there is a leak. If you
run the engine, it could lose all coolant. That
could cause an engine �re, and you could be
burned. Get any leak �xed before you drive the
vehicle.
If there seems to be no leak, with the engine on, check
to see if the electric engine cooling fan is running.
If the engine is overheating, the fan should be running.
If it is not, your vehicle needs service.
Notice:Engine damage from running your engine
without coolant is not covered by your warranty.
5-29
Page 217 of 334
{CAUTION:
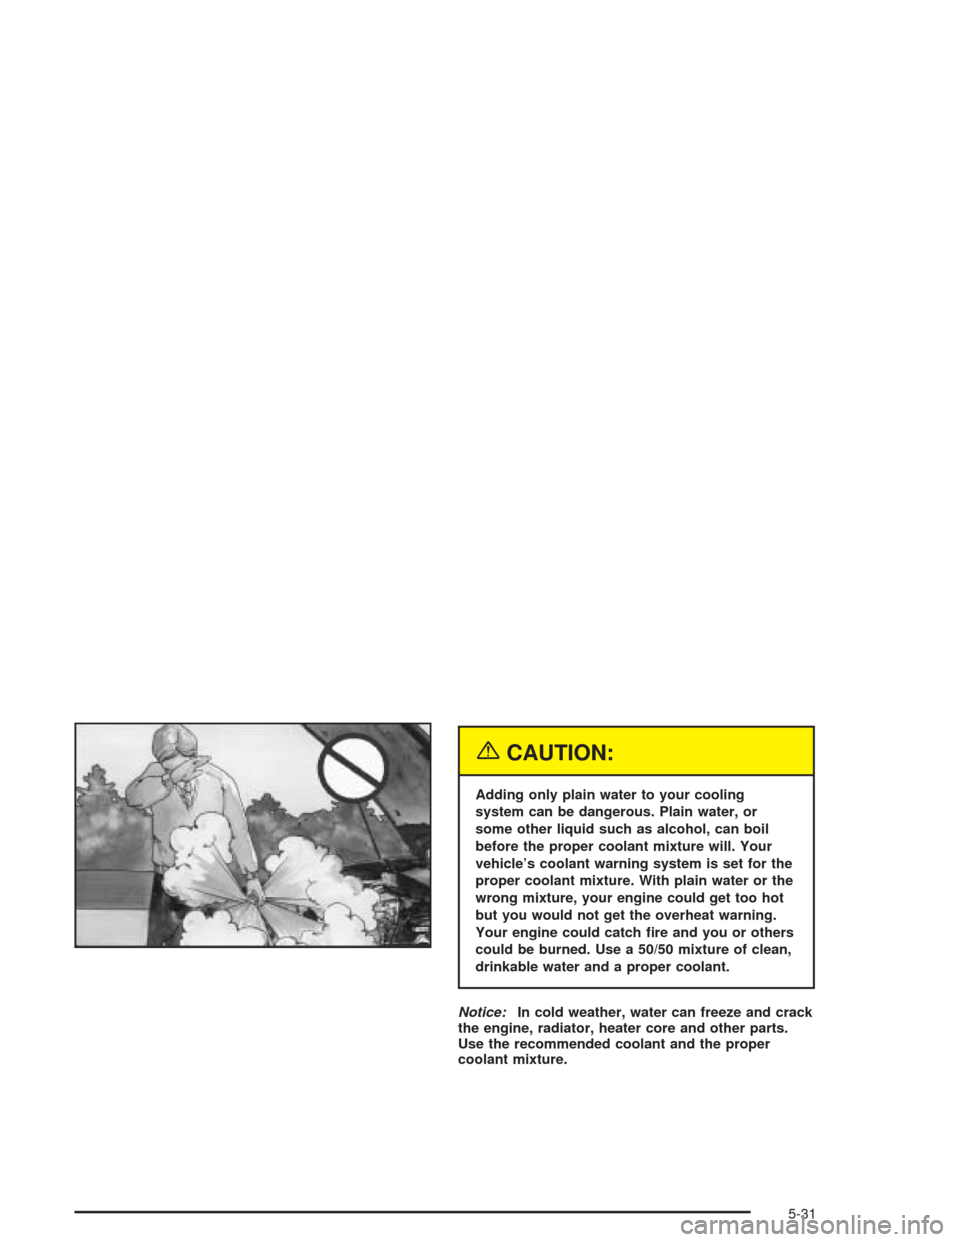
Adding only plain water to your cooling
system can be dangerous. Plain water, or
some other liquid such as alcohol, can boil
before the proper coolant mixture will. Your
vehicle’s coolant warning system is set for the
proper coolant mixture. With plain water or the
wrong mixture, your engine could get too hot
but you would not get the overheat warning.
Your engine could catch �re and you or others
could be burned. Use a 50/50 mixture of clean,
drinkable water and a proper coolant.
Notice:In cold weather, water can freeze and crack
the engine, radiator, heater core and other parts.
Use the recommended coolant and the proper
coolant mixture.
5-31
Page 218 of 334
{CAUTION:
You can be burned if you spill coolant on hot
engine parts. Coolant contains ethylene glycol
and it will burn if the engine parts are hot
enough. Do not spill coolant on a hot engine.
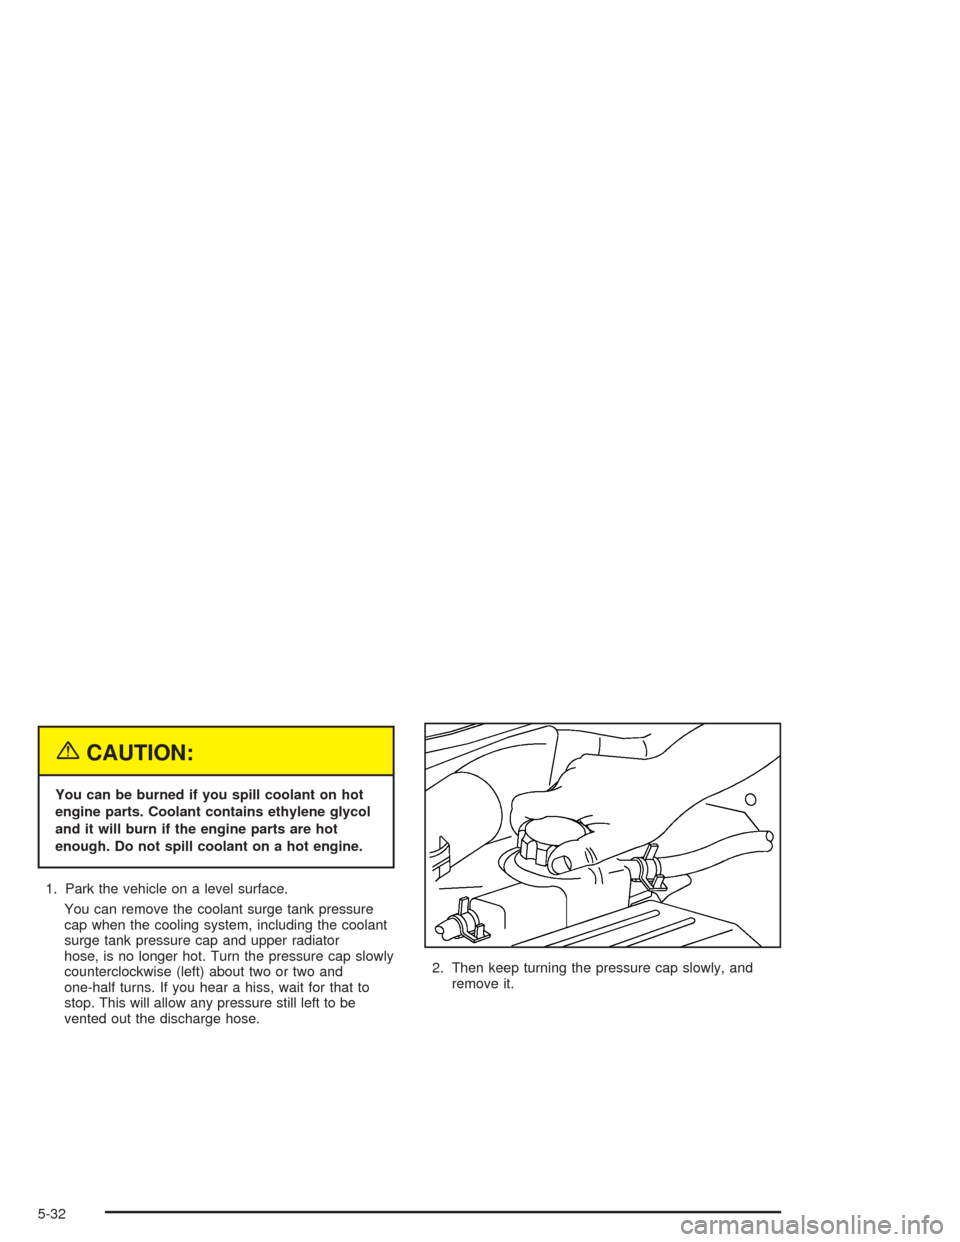
1. Park the vehicle on a level surface.
You can remove the coolant surge tank pressure
cap when the cooling system, including the coolant
surge tank pressure cap and upper radiator
hose, is no longer hot. Turn the pressure cap slowly
counterclockwise (left) about two or two and
one-half turns. If you hear a hiss, wait for that to
stop. This will allow any pressure still left to be
vented out the discharge hose.2. Then keep turning the pressure cap slowly, and
remove it.
5-32
Page 219 of 334
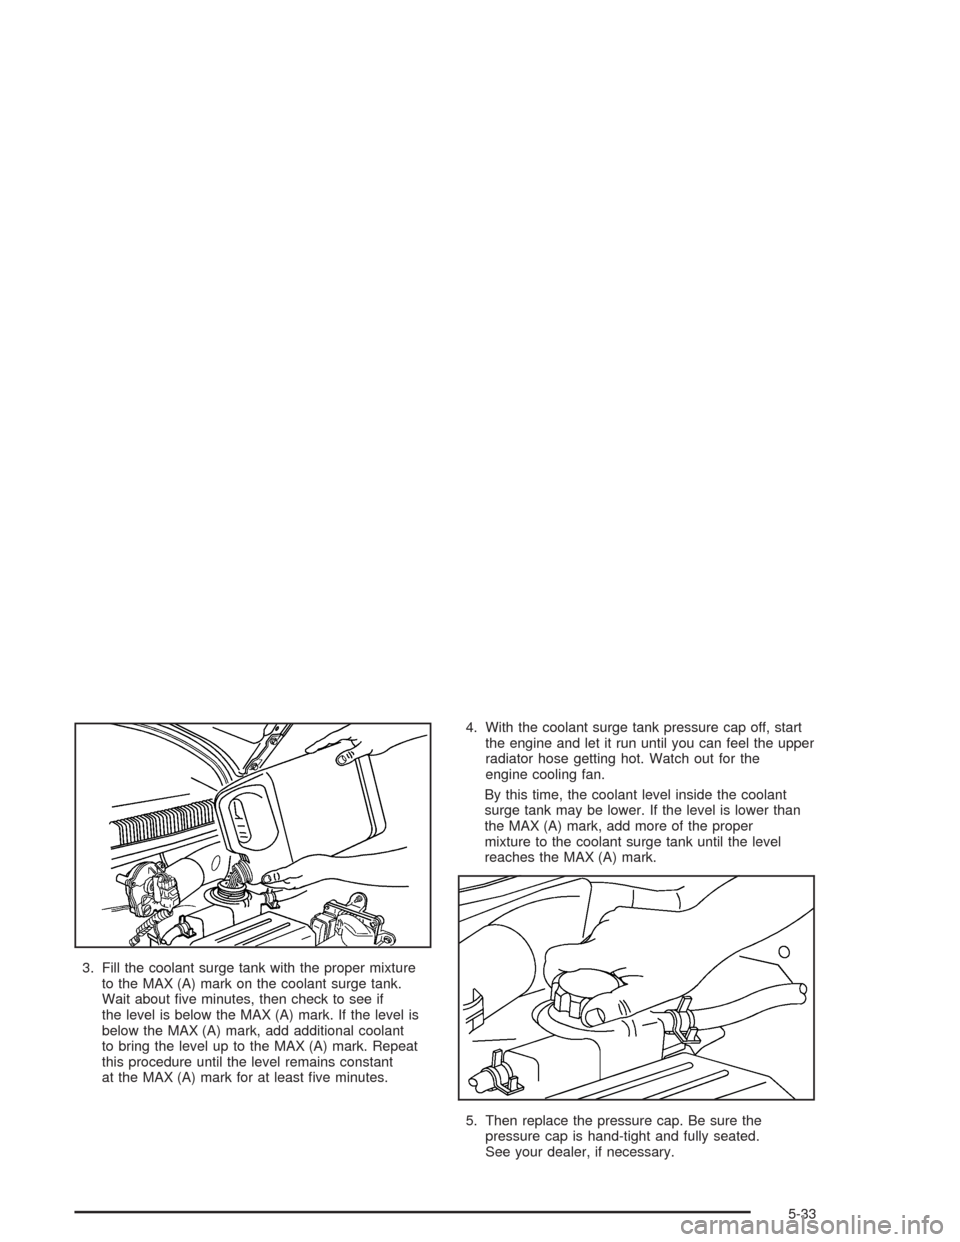
3. Fill the coolant surge tank with the proper mixture
to the MAX (A) mark on the coolant surge tank.
Wait about five minutes, then check to see if
the level is below the MAX (A) mark. If the level is
below the MAX (A) mark, add additional coolant
to bring the level up to the MAX (A) mark. Repeat
this procedure until the level remains constant
at the MAX (A) mark for at least five minutes.4. With the coolant surge tank pressure cap off, start
the engine and let it run until you can feel the upper
radiator hose getting hot. Watch out for the
engine cooling fan.
By this time, the coolant level inside the coolant
surge tank may be lower. If the level is lower than
the MAX (A) mark, add more of the proper
mixture to the coolant surge tank until the level
reaches the MAX (A) mark.
5. Then replace the pressure cap. Be sure the
pressure cap is hand-tight and fully seated.
See your dealer, if necessary.
5-33
Page 232 of 334
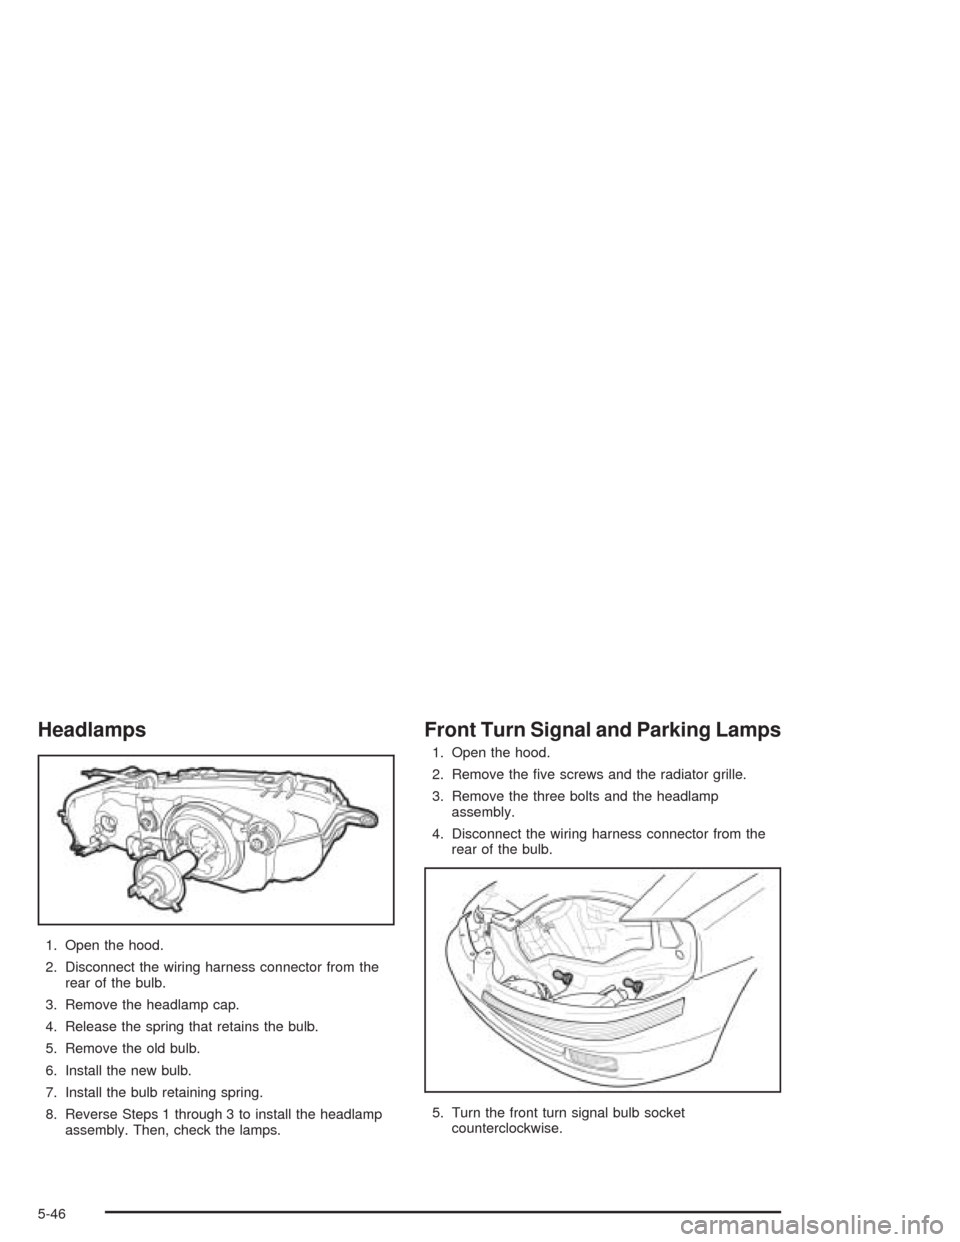
Headlamps
1. Open the hood.
2. Disconnect the wiring harness connector from the
rear of the bulb.
3. Remove the headlamp cap.
4. Release the spring that retains the bulb.
5. Remove the old bulb.
6. Install the new bulb.
7. Install the bulb retaining spring.
8. Reverse Steps 1 through 3 to install the headlamp
assembly. Then, check the lamps.
Front Turn Signal and Parking Lamps
1. Open the hood.
2. Remove the five screws and the radiator grille.
3. Remove the three bolts and the headlamp
assembly.
4. Disconnect the wiring harness connector from the
rear of the bulb.
5. Turn the front turn signal bulb socket
counterclockwise.
5-46
Page 234 of 334
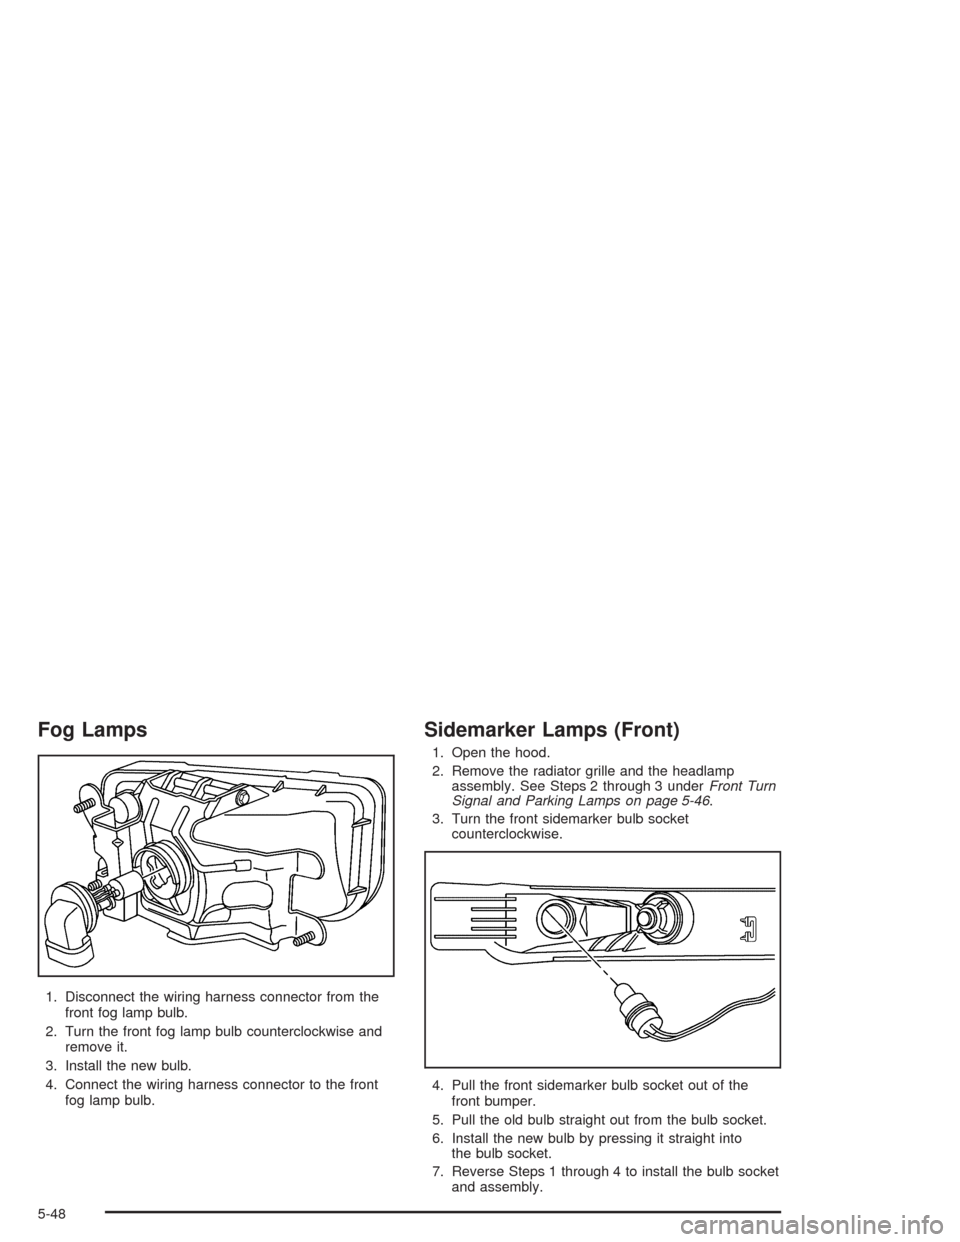
Fog Lamps
1. Disconnect the wiring harness connector from the
front fog lamp bulb.
2. Turn the front fog lamp bulb counterclockwise and
remove it.
3. Install the new bulb.
4. Connect the wiring harness connector to the front
fog lamp bulb.
Sidemarker Lamps (Front)
1. Open the hood.
2. Remove the radiator grille and the headlamp
assembly. See Steps 2 through 3 underFront Turn
Signal and Parking Lamps on page 5-46.
3. Turn the front sidemarker bulb socket
counterclockwise.
4. Pull the front sidemarker bulb socket out of the
front bumper.
5. Pull the old bulb straight out from the bulb socket.
6. Install the new bulb by pressing it straight into
the bulb socket.
7. Reverse Steps 1 through 4 to install the bulb socket
and assembly.
5-48
Page 275 of 334
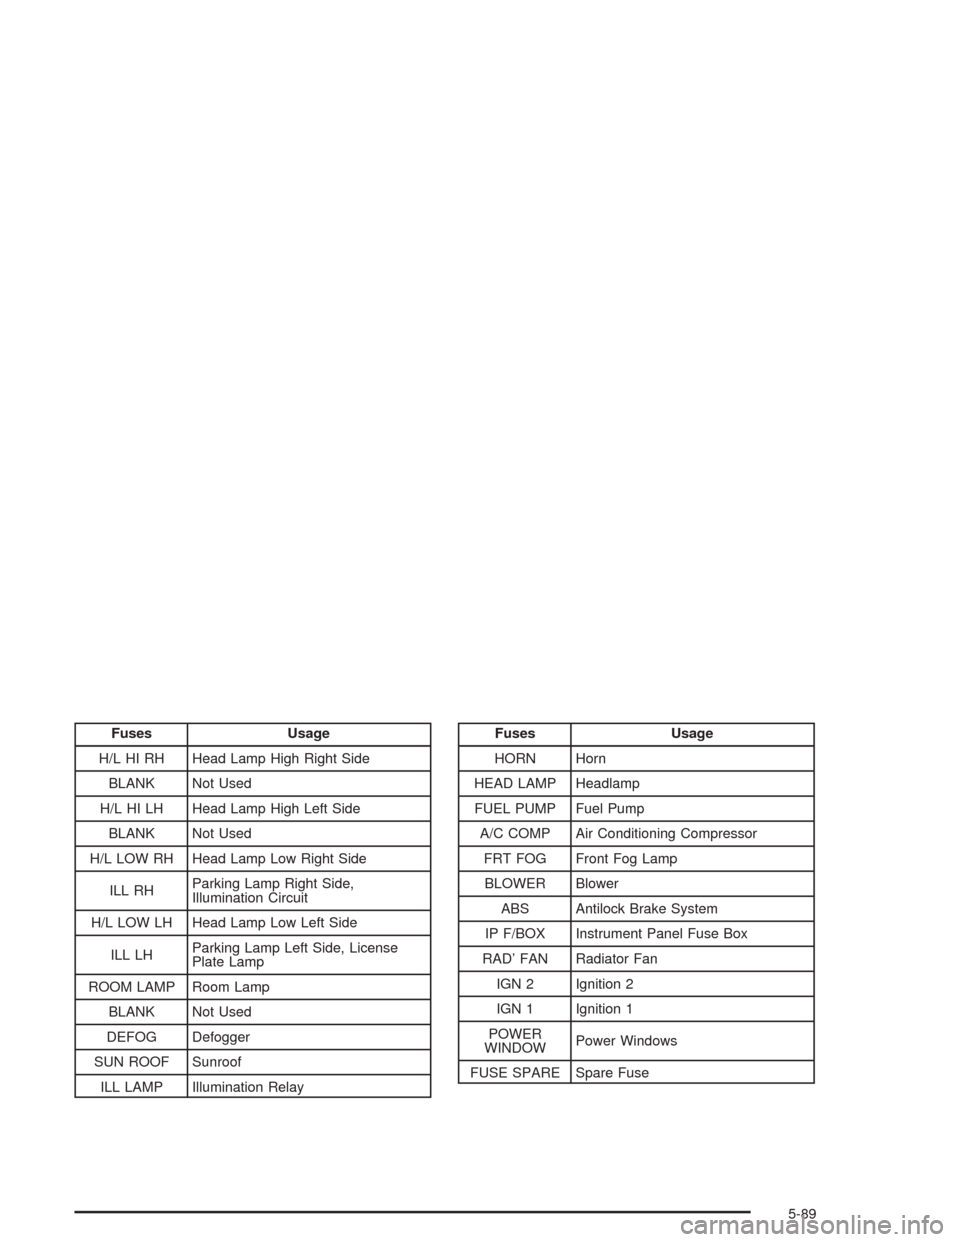
Fuses Usage
H/L HI RH Head Lamp High Right Side
BLANK Not Used
H/L HI LH Head Lamp High Left Side
BLANK Not Used
H/L LOW RH Head Lamp Low Right Side
ILL RHParking Lamp Right Side,
Illumination Circuit
H/L LOW LH Head Lamp Low Left Side
ILL LHParking Lamp Left Side, License
Plate Lamp
ROOM LAMP Room Lamp
BLANK Not Used
DEFOG Defogger
SUN ROOF Sunroof
ILL LAMP Illumination RelayFuses Usage
HORN Horn
HEAD LAMP Headlamp
FUEL PUMP Fuel Pump
A/C COMP Air Conditioning Compressor
FRT FOG Front Fog Lamp
BLOWER Blower
ABS Antilock Brake System
IP F/BOX Instrument Panel Fuse Box
RAD’ FAN Radiator Fan
IGN 2 Ignition 2
IGN 1 Ignition 1
POWER
WINDOWPower Windows
FUSE SPARE Spare Fuse
5-89
Page 276 of 334
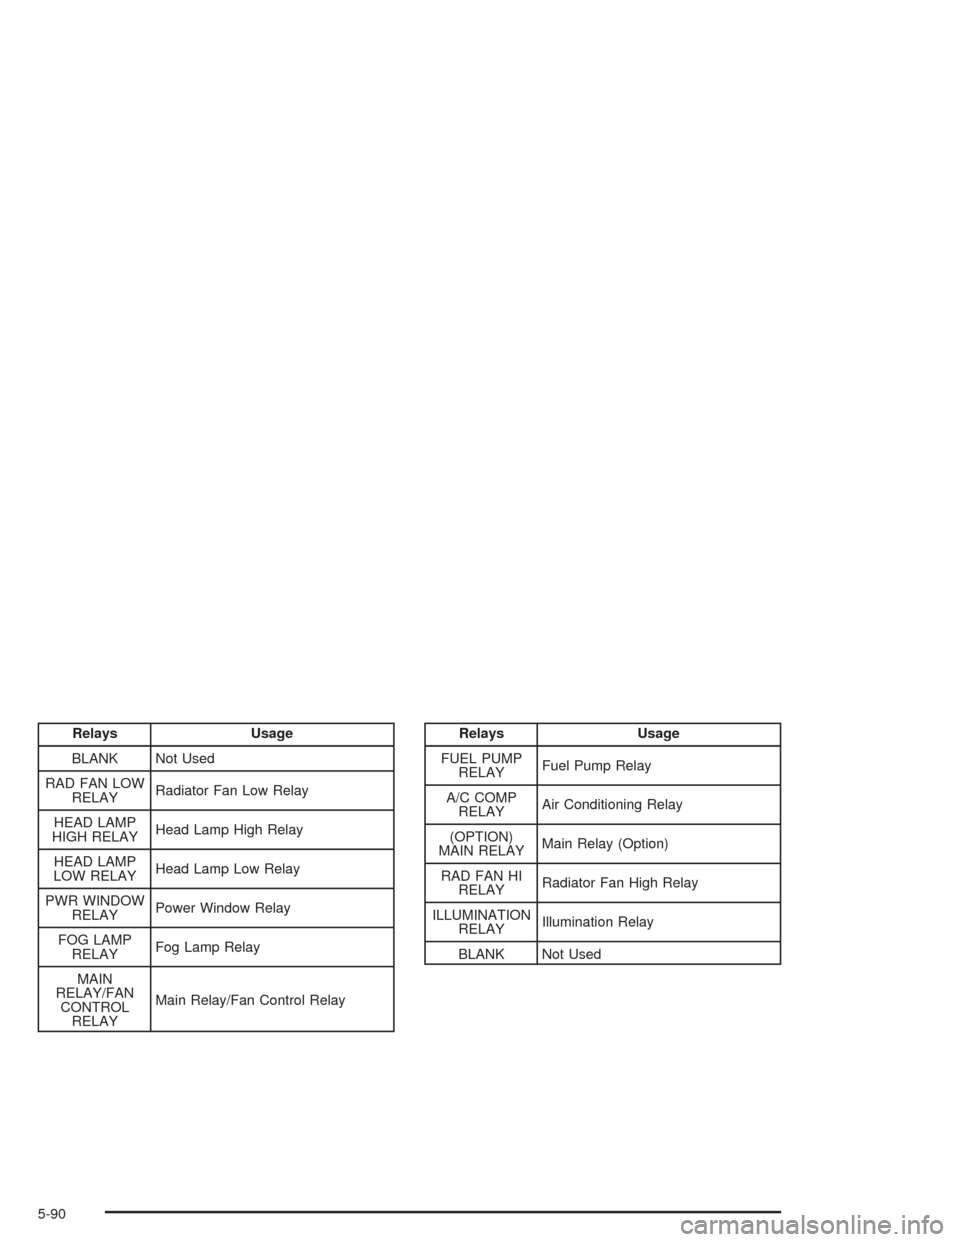
Relays Usage
BLANK Not Used
RAD FAN LOW
RELAYRadiator Fan Low Relay
HEAD LAMP
HIGH RELAYHead Lamp High Relay
HEAD LAMP
LOW RELAYHead Lamp Low Relay
PWR WINDOW
RELAYPower Window Relay
FOG LAMP
RELAYFog Lamp Relay
MAIN
RELAY/FAN
CONTROL
RELAYMain Relay/Fan Control RelayRelays Usage
FUEL PUMP
RELAYFuel Pump Relay
A/C COMP
RELAYAir Conditioning Relay
(OPTION)
MAIN RELAYMain Relay (Option)
RAD FAN HI
RELAYRadiator Fan High Relay
ILLUMINATION
RELAYIllumination Relay
BLANK Not Used
5-90