brake CHEVROLET AVEO 2006 1.G Service Manual
[x] Cancel search | Manufacturer: CHEVROLET, Model Year: 2006, Model line: AVEO, Model: CHEVROLET AVEO 2006 1.GPages: 362, PDF Size: 2.24 MB
Page 241 of 362
Automatic Transaxle Fluid
When to Check Automatic Transaxle
Fluid
Check your automatic transaxle fluid level at least twice
a year. Add fluid if needed. SeeAt Least Twice a
Year on page 6-19.
How to Check Automatic Transaxle
Fluid
Because this operation can be a little difficult, you may
choose to have this done at the dealership service
department.
If you do it yourself, be sure to follow all the instructions
here, or you could get a false reading on the dipstick.
Notice:Too much or too little uid can damage the
transaxle. Too much can mean that some of the uid
could come out and fall on hot engine or exhaust
system parts, starting a re. Too little uid could
cause the transaxle to overheat. Be sure to get an
accurate reading if you check the transaxle uid.Wait at least 30 minutes before checking the transaxle
fluid level if you have been driving:
•When outside temperatures are above 90°F (32°C).
•At high speed for quite a while.
•In heavy traffic — especially in hot weather.
To get the right reading, the fluid should be at normal
operating temperature, which is 158°F to 176°F
(70°C to 80°C).
Get the vehicle warmed up by driving about
15 miles (24 km) when outside temperatures are
above 50°F (10°C). If it is colder than 50°F (10°C),
you may have to drive longer.
Checking the Fluid Level
Prepare your vehicle as follows:
1. Park your vehicle on a level place. Keep the engine
running.
2. With the parking brake applied, place the shift lever
in PARK (P).
3. With your foot on the brake pedal, move the shift
lever through each gear range, pausing for about
three seconds in each range. Then, position
the shift lever in PARK (P).
4. Let the engine run at idle for three to five minutes.
5-19
Page 243 of 362
Manual Transaxle Fluid
It is not necessary to check the transaxle fluid level.
A transaxle fluid leak is the only reason for fluid loss.
If a leak occurs, take the vehicle to the dealership
service department and have it repaired as soon as
possible. SeePart D: Recommended Fluids and
Lubricants on page 6-25for the proper fluid to use.
Hydraulic Clutch
There is one reservoir for both the brake and the
hydraulic clutch fluid. SeeBrakes on page 5-32for more
information.
The hydraulic clutch linkage in your vehicle is
self-adjusting. The master cylinder reservoir is filled with
hydraulic fluid.
A fluid loss in this system could indicate a problem.
Have the system inspected and repaired.
When to Check and What to Use
Refer to the Maintenance Schedule to determine how
often you should check the fluid level in your master
cylinder reservoir and for the proper fluid. SeePart B:
Owner Checks and Services on page 6-18andPart D:
Recommended Fluids and Lubricants on page 6-25.
How to Check and Add Fluid
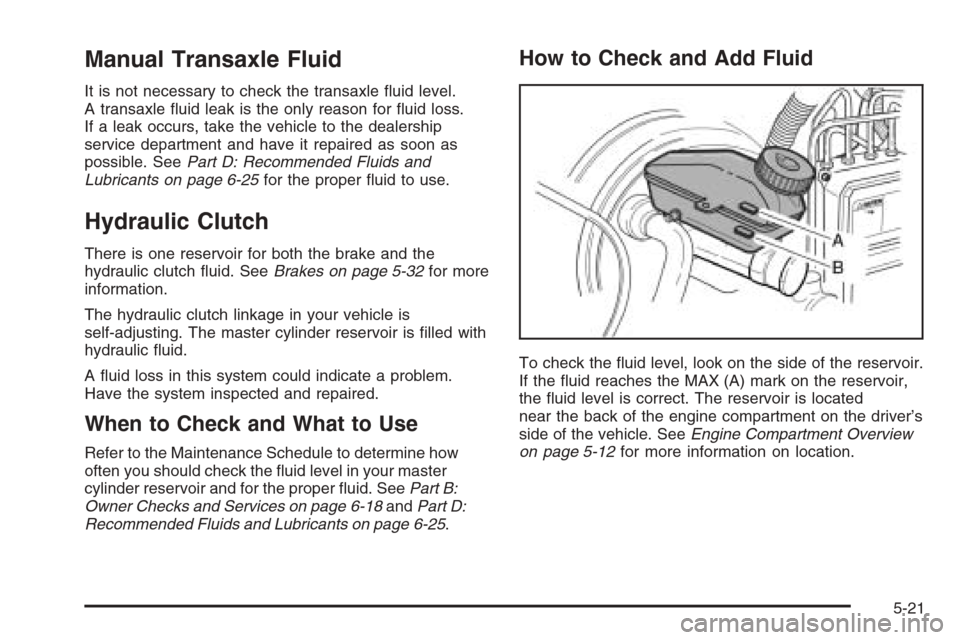
To check the fluid level, look on the side of the reservoir.
If the fluid reaches the MAX (A) mark on the reservoir,
the fluid level is correct. The reservoir is located
near the back of the engine compartment on the driver’s
side of the vehicle. SeeEngine Compartment Overview
on page 5-12for more information on location.
5-21
Page 254 of 362
Adding Washer Fluid
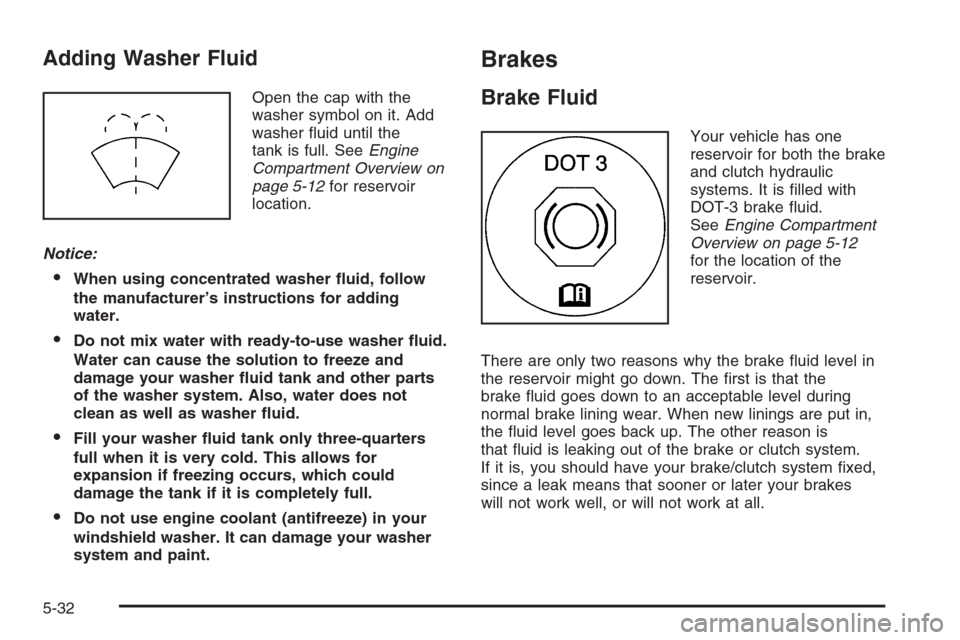
Open the cap with the
washer symbol on it. Add
washer fluid until the
tank is full. SeeEngine
Compartment Overview on
page 5-12for reservoir
location.
Notice:
When using concentrated washer uid, follow
the manufacturer’s instructions for adding
water.
Do not mix water with ready-to-use washer uid.
Water can cause the solution to freeze and
damage your washer uid tank and other parts
of the washer system. Also, water does not
clean as well as washer uid.
Fill your washer uid tank only three-quarters
full when it is very cold. This allows for
expansion if freezing occurs, which could
damage the tank if it is completely full.
Do not use engine coolant (antifreeze) in your
windshield washer. It can damage your washer
system and paint.
Brakes
Brake Fluid
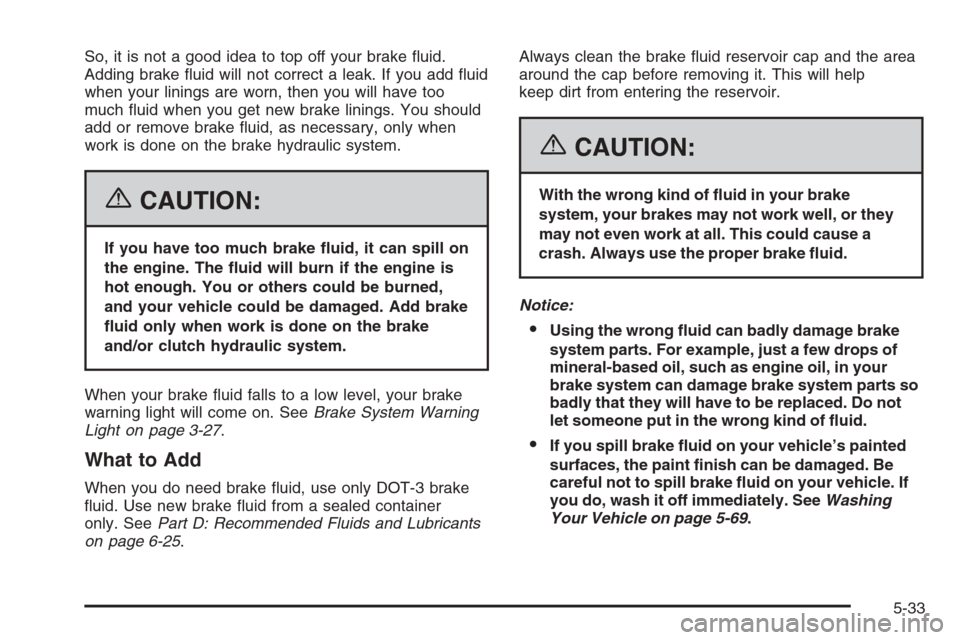
Your vehicle has one
reservoir for both the brake
and clutch hydraulic
systems. It is filled with
DOT-3 brake fluid.
SeeEngine Compartment
Overview on page 5-12
for the location of the
reservoir.
There are only two reasons why the brake fluid level in
the reservoir might go down. The first is that the
brake fluid goes down to an acceptable level during
normal brake lining wear. When new linings are put in,
the fluid level goes back up. The other reason is
that fluid is leaking out of the brake or clutch system.
If it is, you should have your brake/clutch system fixed,
since a leak means that sooner or later your brakes
will not work well, or will not work at all.
5-32
Page 255 of 362
So, it is not a good idea to top off your brake fluid.
Adding brake fluid will not correct a leak. If you add fluid
when your linings are worn, then you will have too
much fluid when you get new brake linings. You should
add or remove brake fluid, as necessary, only when
work is done on the brake hydraulic system.
{CAUTION:
If you have too much brake uid, it can spill on
the engine. The uid will burn if the engine is
hot enough. You or others could be burned,
and your vehicle could be damaged. Add brake
uid only when work is done on the brake
and/or clutch hydraulic system.
When your brake fluid falls to a low level, your brake
warning light will come on. SeeBrake System Warning
Light on page 3-27.
What to Add
When you do need brake fluid, use only DOT-3 brake
fluid. Use new brake fluid from a sealed container
only. SeePart D: Recommended Fluids and Lubricants
on page 6-25.Always clean the brake fluid reservoir cap and the area
around the cap before removing it. This will help
keep dirt from entering the reservoir.
{CAUTION:
With the wrong kind of uid in your brake
system, your brakes may not work well, or they
may not even work at all. This could cause a
crash. Always use the proper brake uid.
Notice:
Using the wrong uid can badly damage brake
system parts. For example, just a few drops of
mineral-based oil, such as engine oil, in your
brake system can damage brake system parts so
badly that they will have to be replaced. Do not
let someone put in the wrong kind of uid.
If you spill brake uid on your vehicle’s painted
surfaces, the paint nish can be damaged. Be
careful not to spill brake uid on your vehicle. If
you do, wash it off immediately. SeeWashing
Your Vehicle on page 5-69.
5-33
Page 256 of 362
Brake Wear
Your vehicle has front disc brakes and may have rear
drum brakes or rear disc brakes.
Disc brake pads have built-in wear indicators that make a
high-pitched warning sound when the brake pads are
worn and new pads are needed. The sound may come
and go or be heard all the time your vehicle is moving,
except when you are pushing on the brake pedal firmly.
{CAUTION:
The brake wear warning sound means that soon
your brakes will not work well. That could lead
to an accident. When you hear the brake wear
warning sound, have your vehicle serviced.
Notice:Continuing to drive with worn-out brake
pads could result in costly brake repair.
Some driving conditions or climates may cause a brake
squeal when the brakes are first applied or lightly applied.
This does not mean something is wrong with your brakes.
Properly torqued wheel nuts are necessary to help
prevent brake pulsation. When tires are rotated, inspect
brake pads for wear and evenly tighten wheel nuts in
the proper sequence to GM torque specifications.If you have rear drum brakes, they do not have wear
indicators, but if you ever hear a rear brake rubbing
noise, have the rear brake linings inspected immediately.
Also, the rear brake drums should be removed and
inspected each time the tires are removed for rotation or
changing. When you have the front brake pads
replaced, have the rear brakes inspected, too.
Brake linings should always be replaced as complete
axle sets.
SeeBrake System Inspection on page 6-24.
Brake Pedal Travel
See your dealer if the brake pedal does not return to
normal height, or if there is a rapid increase in
pedal travel. This could be a sign of brake trouble.
Brake Adjustment
Every time you make a moderate brake stop, your disc
brakes adjust for wear. If you rarely make a moderate or
heavier stop, then your brakes might not adjust correctly.
If you drive in that way, then — very carefully — make a
few moderate brake stops about every 1,000 miles
(1 600 km), so your brakes will adjust properly.
If your brake pedal goes down farther than normal, your
rear drum brakes may need adjustment. Adjust them by
backing up and firmly applying the brakes a few times.
5-34
Page 257 of 362
Replacing Brake System Parts
The braking system on a vehicle is complex. Its many
parts have to be of top quality and work well together if
the vehicle is to have really good braking. Your
vehicle was designed and tested with top-quality GM
brake parts. When you replace parts of your braking
system — for example, when your brake linings
wear down and you need new ones put in — be sure
you get new approved GM replacement parts. If you do
not, your brakes may no longer work properly. For
example, if someone puts in brake linings that are wrong
for your vehicle, the balance between your front and
rear brakes can change — for the worse. The braking
performance you have come to expect can change
in many other ways if someone puts in the wrong
replacement brake parts.
Battery
Your vehicle has a maintenance free battery. When it is
time for a new battery, get one that has the replacement
number shown on the original battery’s label. SeeEngine
Compartment Overview on page 5-12for battery location.
Warning:Battery posts, terminals, and related
accessories contain lead and lead compounds,
chemicals known to the State of California to cause
cancer and reproductive harm. Wash hands after
handling.
Vehicle Storage
If you are not going to drive your vehicle for 25 days
or more, remove the black, negative (−) cable from
the battery. This will help keep your battery from
running down.
{CAUTION:
Batteries have acid that can burn you and gas
that can explode. You can be badly hurt if you
are not careful. SeeJump Starting on
page 5-36for tips on working around a battery
without getting hurt.
5-35
Page 258 of 362
Jump Starting
If your battery has run down, you may want to use
another vehicle and some jumper cables to start your
vehicle. Be sure to use the following steps to do it safely.
{CAUTION:
Batteries can hurt you. They can be dangerous
because:
They contain acid that can burn you.
They contain gas that can explode or
ignite.
They contain enough electricity to
burn you.
If you do not follow these steps exactly, some
or all of these things can hurt you.
Notice:Ignoring these steps could result in costly
damage to your vehicle that would not be covered
by your warranty.
Trying to start your vehicle by pushing or pulling it
will not work, and it could damage your vehicle.
1. Check the other vehicle. It must have a 12-volt
battery with a negative ground system.Notice:If the other vehicle’s system is not a 12-volt
system with a negative ground, both vehicles can
be damaged. Only use vehicles with 12-volt systems
with negative grounds to jump start your vehicle.
2. Get the vehicles close enough so the jumper cables
can reach, but be sure the vehicles are not touching
each other. If they are, it could cause a ground
connection you do not want. You would not be able
to start your vehicle, and the bad grounding
could damage the electrical systems.
To avoid the possibility of the vehicles rolling, set
the parking brake firmly on both vehicles involved in
the jump start procedure. Put an automatic
transaxle in PARK (P) or a manual transaxle in
NEUTRAL before setting the parking brake.
Notice:If you leave your radio or other accessories
on during the jump starting procedure, they could
be damaged. The repairs would not be covered
by your warranty. Always turn off your radio and
other accessories when jump starting your vehicle.
3. Turn off the ignition on both vehicles. Unplug
unnecessary accessories plugged into the cigarette
lighter or the accessory power outlet. Turn off
the radio and all lamps that are not needed. This
will avoid sparks and help save both batteries. And
it could save the radio!
5-36
Page 270 of 362
Tire Size
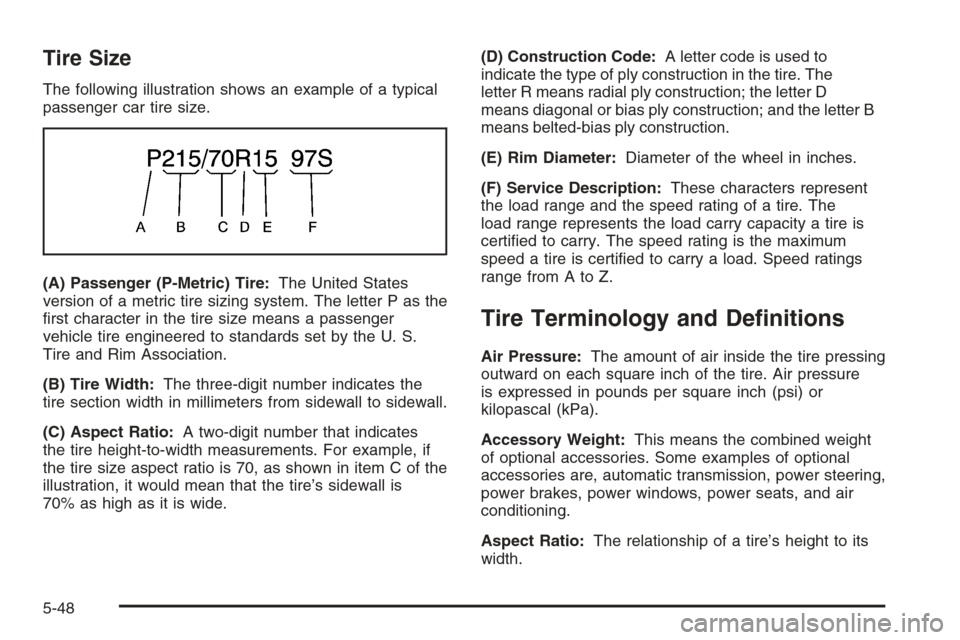
The following illustration shows an example of a typical
passenger car tire size.
(A) Passenger (P-Metric) Tire:The United States
version of a metric tire sizing system. The letter P as the
first character in the tire size means a passenger
vehicle tire engineered to standards set by the U. S.
Tire and Rim Association.
(B) Tire Width:The three-digit number indicates the
tire section width in millimeters from sidewall to sidewall.
(C) Aspect Ratio:A two-digit number that indicates
the tire height-to-width measurements. For example, if
the tire size aspect ratio is 70, as shown in item C of the
illustration, it would mean that the tire’s sidewall is
70% as high as it is wide.(D) Construction Code:A letter code is used to
indicate the type of ply construction in the tire. The
letter R means radial ply construction; the letter D
means diagonal or bias ply construction; and the letter B
means belted-bias ply construction.
(E) Rim Diameter:Diameter of the wheel in inches.
(F) Service Description:These characters represent
the load range and the speed rating of a tire. The
load range represents the load carry capacity a tire is
certified to carry. The speed rating is the maximum
speed a tire is certified to carry a load. Speed ratings
range from A to Z.
Tire Terminology and Denitions
Air Pressure:The amount of air inside the tire pressing
outward on each square inch of the tire. Air pressure
is expressed in pounds per square inch (psi) or
kilopascal (kPa).
Accessory Weight:This means the combined weight
of optional accessories. Some examples of optional
accessories are, automatic transmission, power steering,
power brakes, power windows, power seats, and air
conditioning.
Aspect Ratio:The relationship of a tire’s height to its
width.
5-48
Page 276 of 362
Buying New Tires
GM has developed and matched specific tires for your
vehicle. If you need replacement tires, GM strongly
recommends that you get tires that are the same size,
brand, load range, speed rating, and construction
type (radial and bias-belted tires) as your vehicle’s
original tires. This way, your vehicle will continue to have
tires that are designed to give the same performance
and vehicle safety, during normal use, as the original
tires. SeeTire Sidewall Labeling on page 5-46for
additional information.
{CAUTION:
Mixing tires could cause you to lose control
while driving. If you mix tires of different sizes,
brands, or types (radial and bias-belted tires),
the vehicle may not handle properly, and you
could have a crash. Using tires of different
sizes, brands, or types may also cause
damage to your vehicle. Be sure to use the
correct size, brand, and type of tires on all
wheels. It is all right to drive with your
compact spare temporarily, as it was
developed for use on your vehicle. See
Compact Spare Tire on page 5-66.
{CAUTION:
If you use bias-ply tires on your vehicle, the
wheel rim anges could develop cracks after
many miles of driving. A tire and/or wheel
could fail suddenly, causing a crash. Use only
radial-ply tires with the wheels on your vehicle.
Your vehicle’s original equipment tires are listed on the
Tire and Loading Information Label. This label is
attached to the vehicle’s center pillar (B-pillar). See
Loading Your Vehicle on page 4-27, for more information
about the Tire and Loading Information Label.
Different Size Tires and Wheels
If you add wheels or tires that are a different size than
your original equipment wheels and tires, this may
affect the way your vehicle performs, including its
braking, ride and handling characteristics, stability, and
resistance to rollover. Additionally, if your vehicle
has electronic systems such as, anti-lock brakes,
traction control, and electronic stability control, the
performance of these systems can be affected.
5-54
Page 279 of 362
Each new wheel should have the same load-carrying
capacity, diameter, width, offset and be mounted
the same way as the one it replaces.
If you need to replace any of your wheels, wheel bolts, or
wheel nuts, replace them only with new GM original
equipment parts. This way, you will be sure to have the
right wheel, wheel bolts, and wheel nuts for your vehicle.
{CAUTION:
Using the wrong replacement wheels, wheel
bolts, or wheel nuts on your vehicle can be
dangerous. It could affect the braking and
handling of your vehicle, make your tires lose
air and make you lose control. You could have
a collision in which you or others could be
injured. Always use the correct wheel, wheel
bolts, and wheel nuts for replacement.
Notice:The wrong wheel can also cause problems
with bearing life, brake cooling, speedometer or
odometer calibration, headlamp aim, bumper height,
vehicle ground clearance, and tire or tire chain
clearance to the body and chassis.
SeeChanging a Flat Tire on page 5-58for more
information.
Used Replacement Wheels
{CAUTION:
Putting a used wheel on your vehicle is
dangerous. You cannot know how it has been
used or how far it has been driven. It could fail
suddenly and cause a crash. If you have to
replace a wheel, use a new GM original
equipment wheel.
Tire Chains
Notice:Use tire chains only where legal and only
when you must. Use only SAE Class “S” type chains
that are the proper size for your tires. Install them
on the front tires and tighten them as tightly as
possible with the ends securely fastened. Drive
slowly and follow the chain manufacturer’s
instructions. If you can hear the chains contacting
your vehicle, stop and retighten them. If the contact
continues, slow down until it stops. Driving too
fast or spinning the wheels with chains on will
damage your vehicle.
5-57