oil CHEVROLET AVEO 2008 1.G Owners Manual
[x] Cancel search | Manufacturer: CHEVROLET, Model Year: 2008, Model line: AVEO, Model: CHEVROLET AVEO 2008 1.GPages: 384, PDF Size: 6.67 MB
Page 99 of 384
How long should you keep the coolant heater plugged in?
The answer depends on the outside temperature, the
kind of oil you have, and some other things. Instead of
trying to list everything here, we ask that you contact your
dealer/retailer in the area where you will be parking your
vehicle. The dealer/retailer can give you the best advice
for that particular area.
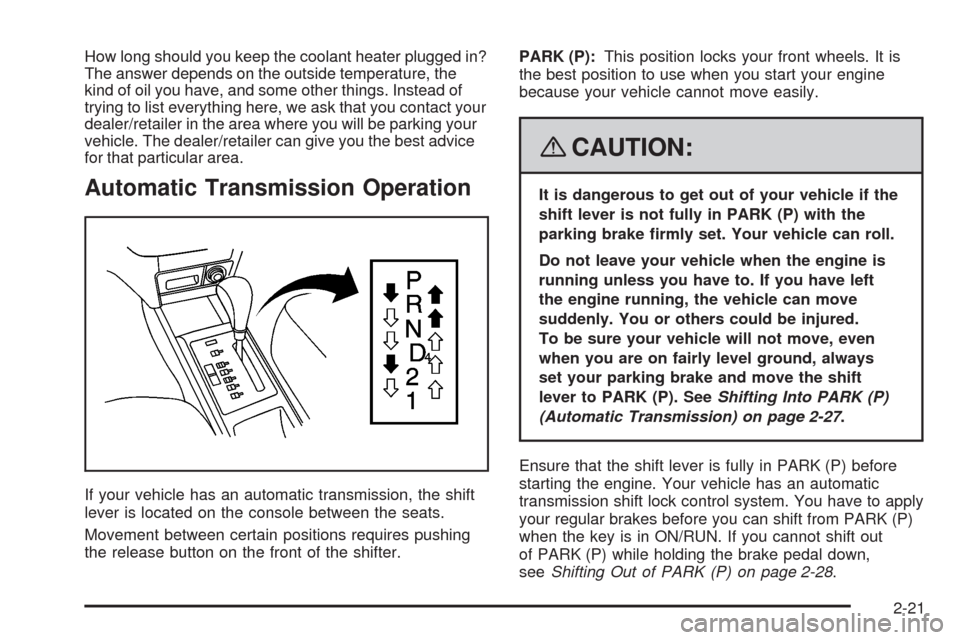
Automatic Transmission Operation
If your vehicle has an automatic transmission, the shift
lever is located on the console between the seats.
Movement between certain positions requires pushing
the release button on the front of the shifter.PARK (P):This position locks your front wheels. It is
the best position to use when you start your engine
because your vehicle cannot move easily.
{CAUTION:
It is dangerous to get out of your vehicle if the
shift lever is not fully in PARK (P) with the
parking brake �rmly set. Your vehicle can roll.
Do not leave your vehicle when the engine is
running unless you have to. If you have left
the engine running, the vehicle can move
suddenly. You or others could be injured.
To be sure your vehicle will not move, even
when you are on fairly level ground, always
set your parking brake and move the shift
lever to PARK (P). SeeShifting Into PARK (P)
(Automatic Transmission) on page 2-27.
Ensure that the shift lever is fully in PARK (P) before
starting the engine. Your vehicle has an automatic
transmission shift lock control system. You have to apply
your regular brakes before you can shift from PARK (P)
when the key is in ON/RUN. If you cannot shift out
of PARK (P) while holding the brake pedal down,
seeShifting Out of PARK (P) on page 2-28.
2-21
Page 115 of 384
Instrument Panel Overview...............................3-4
Hazard Warning Flashers................................3-8
Other Warning Devices...................................3-8
Horn.............................................................3-8
Tilt Wheel.....................................................3-9
Turn Signal/Multifunction Lever.........................3-9
Turn and Lane-Change Signals.......................3-10
Headlamp High/Low-Beam Changer.................3-10
Flash-to-Pass...............................................3-10
Windshield Wipers........................................3-11
Windshield Washer.......................................3-12
Rear Window Wiper/Washer (Hatchback).........3-12
Cruise Control..............................................3-13
Exterior Lamps.............................................3-15
Headlamps on Reminder................................3-16
Daytime Running Lamps (DRL).......................3-16
Fog Lamps..................................................3-17
Instrument Panel Brightness...........................3-17
Dome Lamp.................................................3-18
Inadvertent Power Battery Saver.....................3-18
Accessory Power Outlet(s).............................3-18
Ashtray(s) and Cigarette Lighter......................3-19
Clock..........................................................3-20Climate Controls............................................3-20
Climate Control System.................................3-20
Outlet Adjustment.........................................3-24
Passenger Compartment Air Filter...................3-24
Warning Lights, Gages, and Indicators............3-26
Instrument Panel Cluster................................3-27
Speedometer and Odometer...........................3-29
Trip Odometer..............................................3-29
Tachometer.................................................3-29
Safety Belt Reminders...................................3-30
Airbag Readiness Light.................................
.3-30
Passenger Airbag Status Indicator (Sedan).......3-31
Charging System Light..................................3-33
Brake System Warning Light..........................3-33
Antilock Brake System Warning Light...............3-34
Hold Mode Light...........................................3-35
Engine Coolant Temperature Gage..................3-35
Tire Pressure Light.......................................3-36
Malfunction Indicator Lamp.............................3-36
Oil Pressure Light.........................................3-39
Fog Lamp Light............................................3-40
Cruise Control Light......................................3-40
Section 3 Instrument Panel
3-1
Page 116 of 384
Highbeam On Light.......................................3-40
Daytime Running Lamps (DRL) Indicator Light.....3-40
Door Ajar Light.............................................3-41
Fuel Gage...................................................3-41
Low Fuel Warning Light.................................3-42
Secondary Information Center (SIC).................3-43
Secondary Information Center (SIC)
(Hatchback Only).......................................3-43
Clock (Hatchback Only).................................3-44
Safety Belt Reminders...................................3-44
Airbag Readiness Light..................................3-45
Passenger Airbag Status Indicator
(Hatchback)..............................................3-46
Charging System Light..................................3-47
Antilock Brake System Warning Light...............3-48
Hold Mode Light...........................................3-48
Malfunction Indicator Lamp.............................3-49Oil Pressure Light.........................................3-52
Fog Lamp Light............................................3-53
Cruise Control Light......................................3-53
Door Ajar Light.............................................3-53
Audio System(s).............................................3-54
AM-FM Radio (Single Display, Base Level).......3-55
AM-FM Radio (Double Display, Base Level).....3-56
Radio with CD (MP3/WMA)............................3-60
Radio with Six-Disc CD (MP3/WMA)................3-66
Using an MP3 (Radio with CD Player).............3-72
Using an MP3 (Radio with Six-Disc Player)......3-75
Audio Steering Wheel Controls.......................3-78
Radio Reception...........................................3-79
Care of Your CDs.........................................3-79
Care of the CD Player...................................3-79
Fixed Mast Antenna (Hatchback).....................3-80
Backglass Antenna (Sedan)...........................3-80
Section 3 Instrument Panel
3-2
Page 153 of 384
This can happen if you have recently replaced the battery
or if the battery has run down. The diagnostic system is
designed to evaluate critical emission control systems
during normal driving. This can take several days of
routine driving. If you have done this and your vehicle
still does not pass the inspection for lack of OBD system
readiness, your dealer/retailer can prepare the vehicle for
inspection.
Oil Pressure Light
If your vehicle has low
engine oil pressure, this
light will stay on after
you start your engine,
or come on when you
are driving.
This indicates that your engine is not receiving enough
oil. The engine could be low on oil, or could have
some other oil problem. Have it fixed immediately
by your dealer/retailer.The oil light could also come on in three other situations:
•When the ignition is on but the engine is not running,
the light will come on as a test to show you it is
working. The light will go out when you turn the
ignition on. If it does not come on with the ignition
on, you may have a problem with the fuse or bulb.
Have it fixed right away.
•If you make a hard stop, the light may come on for a
moment. This is normal.
{CAUTION:
Do not keep driving if the oil pressure is low.
If you do, your engine can become so hot that
it catches �re. You or others could be burned.
Check your oil as soon as possible and have
your vehicle serviced.
Notice:Lack of proper engine oil maintenance
may damage the engine. The repairs would not
be covered by your warranty. Always follow
the maintenance schedule in this manual for
changing engine oil.
3-39
Page 166 of 384
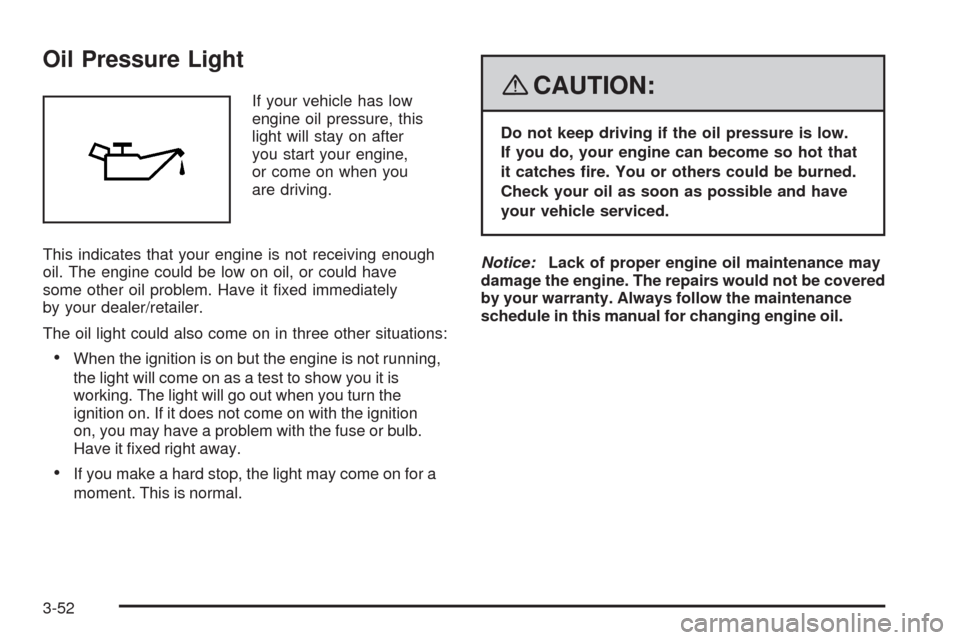
Oil Pressure Light
If your vehicle has low
engine oil pressure, this
light will stay on after
you start your engine,
or come on when you
are driving.
This indicates that your engine is not receiving enough
oil. The engine could be low on oil, or could have
some other oil problem. Have it fixed immediately
by your dealer/retailer.
The oil light could also come on in three other situations:
•When the ignition is on but the engine is not running,
the light will come on as a test to show you it is
working. The light will go out when you turn the
ignition on. If it does not come on with the ignition
on, you may have a problem with the fuse or bulb.
Have it fixed right away.
•If you make a hard stop, the light may come on for a
moment. This is normal.
{CAUTION:
Do not keep driving if the oil pressure is low.
If you do, your engine can become so hot that
it catches �re. You or others could be burned.
Check your oil as soon as possible and have
your vehicle serviced.
Notice:Lack of proper engine oil maintenance may
damage the engine. The repairs would not be covered
by your warranty. Always follow the maintenance
schedule in this manual for changing engine oil.
3-52
Page 176 of 384
Adjusting the Speakers (Balance/Fade)
SOUND (Balance/Fade):To adjust the balance
between the right and the left speakers, press this
button until BAL (balance) displays. Turn the
Oknob
to increase or to decrease. The display shows the
balance level. After making the selection, press
this button to set the balance level.
To adjust the fade between the front and the rear
speakers, press this button until FAD (fade) displays.
Turn the
Oknob to increase or to decrease the
fade between the front and the rear speakers. The
display shows the fade level. After making the selection,
press this button to set the fade level.
Setting the Equalization
The order for displayed customized equalization settings
are EQ OFF, CLASSIC, DANCE, ROCK, JAZZ, POP,
VOICE, TECHNO, EQ OFF.
SOUND (Equalization):Press this button until EQ OFF
(equalization) displays to select customized equalization
settings designed for classic, dance, rock, jazz, pop,
voice and techno. Turn the
Oknob until the desired
equalization setting displays. After making the selection,
press the SOUND button to set the equalization setting.
To cancel an equalization setting, press the SOUND
button until EQ OFF displays, turn the
Oknob until OFF
displays, then press the SOUND button again to set the
equalization setting.
Playing a CD
Insert a CD partway into the slot, label side up.
The player pulls it in and the CD should begin playing.
When a CD is inserted, CDP displays. As the CD is
loading, Filecheck displays. As each new track starts
to play, Track and the track number displays.
If the ignition or radio is turned off with a CD in the
player, it stays in the player. When a CD is in the player
and the ignition is turned on, the radio must be turned
on before the CD starts playback. When the ignition
and radio are turned on, the CD starts playing where
it stopped, if it was the last selected audio source.
The CD player can play the smaller 3 inch (8 cm)
single CDs with an adapter ring. Full-size CDs and
the smaller CDs are loaded in the same manner.
If playing a CD-R, the sound quality can be reduced due
to CD-R quality, the method of recording, the quality of
the music that has been recorded, and the way the CD-R
has been handled. There can be an increase in skipping,
difficulty in finding tracks, and/or difficulty in loading and
ejecting. If these problems occur, check the bottom
surface of the CD. If the surface of the CD is damaged,
such as cracked, broken, or scratched, the CD will not
play properly. If the surface of the CD is soiled, seeCare
of Your CDs on page 3-79for more information.
If there is no apparent damage, try a known good CD.
3-62
Page 183 of 384
Once playback begins, the track and track number
displays.
If the ignition or radio is turned off with a CD in the
player, it stays in the player. While a CD is in the player
and the ignition is turned on, the radio must be turned on
before the current CD starts playback. When the ignition
and radio are turned on, the CD starts playing where it
stopped, if it was the last selected audio source.
The CD player can play the smaller 3 inch (8 cm)
single CDs with an adapter ring. Full-size CDs and
the smaller CDs are loaded in the same manner.
If playing a CD-R, the sound quality can be reduced due
to CD-R quality, the method of recording, the quality of
the music that has been recorded, and the way the CD-R
has been handled. There can be an increase in skipping,
difficulty in finding tracks, and/or difficulty in loading and
ejecting. If these problems occur, check the bottom
surface of the CD. If the surface of the CD is damaged,
such as cracked, broken, or scratched, the CD does not
play properly. If the surface of the CD is soiled, seeCare
of Your CDs on page 3-79for more information.
If there is no apparent damage, try a known good CD.
Do not add any label to a CD, it could get caught in the
CD player. If a CD is recorded on a personal computer
and a description label is needed, try labeling the top
of the recorded CD with a marking pen.Notice:If a label is added to a CD, or more than
one CD is inserted into the slot at a time, or an
attempt is made to play scratched or damaged CDs,
the CD player could be damaged. While using the
CD player, use only CDs in good condition without
any label, load one CD at a time, and keep the
CD player and the loading slot free of foreign
materials, liquids, and debris.
If an error displays, see “CD Messages” later in this
section.
2 RPT (Repeat):Press this button to repeat the current
track. RPT displays. Press this button again to turn
off repeat play.
3 RDM (Random):Press this button to hear the tracks
in random, rather than sequential, order. RDM displays.
Press this button again to turn off random play.
4 INT (Scan):Press this button to listen to the first
few seconds of each track on each loaded CD. INTRO
displays. To stop scanning press this button again.
The current track begins to play.
5 DSC−(Previous CDC):Press this button to go back
to the start of the previous CDC.
6 DSC + (Next CDC):Press this button to go forward
to the start of the next CDC.
3-69
Page 188 of 384
If playing a CD-R, the sound quality can be reduced due
to CD-R quality, the method of recording, the quality of
the music that has been recorded, and the way the CD-R
has been handled. There can be an increase in skipping,
difficulty in finding tracks, and/or difficulty in loading and
ejecting. If these problems occur, check the bottom
surface of the CD. If the surface of the CD is damaged,
such as cracked, broken, or scratched, the CD does not
play properly. If the surface of the CD is soiled, seeCare
of Your CDs on page 3-79for more information.
If there is no apparent damage, try a known good CD.
Do not add any label to a CD, it could get caught in the
CD player. If a CD is recorded on a personal computer
and a description label is needed, try labeling the top
of the recorded CD with a marking pen.
Notice:If a label is added to a CD, or more than
one CD is inserted into the slot at a time, or an
attempt is made to play scratched or damaged CDs,
the CD player could be damaged. While using the
CD player, use only CDs in good condition without
any label, load one CD at a time, and keep the
CD player and the loading slot free of foreign
materials, liquids, and debris.
If an error displays, see “CD Messages” later in this
section.
All of the CD functions work the same while playing an
MP3/WMA, except for those listed here. See “Playing
a CD” earlier for more information.SCROLL (MP3/WMA Mode Only):Press the SOUND
button for longer than two seconds. The song title or
other available information of a song scrolls on/off.
The offset is scroll on. The scroll mode can be changed
only when the SOUND button is pressed for longer
than two seconds.
DIR (Directory):Press this button to repeat the tracks
in the current directory. DIR displays.
Press this button again to repeat the tracks in all of the
directories. ALL displays.
Press this button again to turn off repeat play.
¦¥SEEK (Previous/Next Folder) (in MP3/WMA
Mode):Press the SEEK arrows to change the folder.
If CD-R does not have any folder, “ROOT” flashes on the
display for a short time.
()TUNE (Previous/Next Track):Press the up
TUNE arrow to go to the next track. The track number
displays. Press the down TUNE arrow to go to the
start of the current track. The player continues moving
forward or backward through the CD with each press of
the TUNE arrows.
INFO/DISP (Information/Display):Press this button to
display additional text information related to the current
MP3/WMA song. A choice of additional information such
as: Song Title, Album Title, and Artist. Bit rate might also
display.
3-74
Page 191 of 384
If playing a CD-R, the sound quality can be reduced due
to CD-R quality, the method of recording, the quality of
the music that has been recorded, and the way the CD-R
has been handled. There can be an increase in skipping,
difficulty in finding tracks, and/or difficulty in loading and
ejecting. If these problems occur, check the bottom
surface of the CD. If the surface of the CD is damaged,
such as cracked, broken, or scratched, the CD will not
play properly. If the surface of the CD is soiled, seeCare
of Your CDs on page 3-79for more information.
If there is no apparent damage, try a known good CD.
Do not add any label to a CD, it could get caught in the
CD player. If a CD is recorded on a personal computer
and a description label is needed, try labeling the top of
the recorded CD with a marking pen.
Notice:If a label is added to a CD, or more than
one CD is inserted into the slot at a time, or an
attempt is made to play scratched or damaged CDs,
the CD player could be damaged. While using the
CD player, use only CDs in good condition without
any label, load one CD at a time, and keep the
CD player and the loading slot free of foreign
materials, liquids, and debris.
If an error displays, see “CD Messages” later in this
section.
All of the CD functions work the same while playing an
MP3/WMA, except for those listed here. See “Playing
a CD” earlier for more information.SCROLL (MP3/WMA Mode Only):Press the SOUND
button for longer than two seconds. The song title and
other available information of the song scrolls on/off.
The offset is scroll on. The scroll mode can be changed
only when the SOUND button is pressed for longer than
two seconds.
1 DIR (Directory):Press this button to repeat the
tracks in the current directory. DIR displays.
Press this button again to repeat the tracks in all of the
directories. ALL displays.
Press this button again to turn off repeat play.
¦¥SEEK (Previous/Next Folder) (in MP3/WMA
Mode):Press the SEEK arrows to change the folder.
If CD-R does not have any folder, “ROOT” flashes
on the display for a short time.
()TUNE (Previous/Next Track):Press the up
TUNE arrow to go to the next track. The track number
displays. Press the down TUNE arrow to go to the
start of the current track. The player continues moving
forward or backward through the CD with each press of
the up or down arrows.
INFO/DISP (Information/Display):Press this button to
display additional text information related to the current
MP3/WMA song. A choice of additional information such
as: Song Title, Album Title, and Artist. Bit rate might also
display.
3-77
Page 193 of 384
Radio Reception
Frequency interference and static can occur during
normal radio reception if items such as cell phone
chargers, vehicle convenience accessories, and external
electronic devices are plugged into the accessory
power outlet. If there is interference or static, unplug
the item from the accessory power outlet.
AM
The range for most AM stations is greater than for FM,
especially at night. The longer range can cause station
frequencies to interfere with each other. For better radio
reception, most AM radio stations boost the power levels
during the day, and then reduce these levels during the
night. Static can also occur when things like storms and
power lines interfere with radio reception. When this
happens, try reducing the treble on your radio.
FM Stereo
FM stereo gives the best sound, but FM signals reach
only about 10 to 40 miles (16 to 65 km). Tall buildings
or hills can interfere with FM signals, causing the sound
to fade in and out.
Care of Your CDs
Handle CDs carefully. Store them in their original cases
or other protective cases and away from direct sunlight
and dust. The CD player scans the bottom surface of the
disc. If the surface of a CD is damaged, such as cracked,
broken, or scratched, the CD does not play properly or
not at all. If the surface of a CD is soiled, take a soft, lint
free cloth or dampen a clean, soft cloth in a mild, neutral
detergent solution mixed with water, and clean it.
Make sure the wiping process starts from the center
to the edge.
Do not touch the bottom side of a CD while handling it;
this could damage the surface. Pick up CDs by grasping
the outer edges or the edge of the hole and the
outer edge.
Care of the CD Player
Do not use CD lens cleaners for CD players because
the lens of the CD optics can become contaminated by
lubricants.
3-79